
A couple of days ago, I released a blog post on how you can add a PowerShell remote session in the Windows Terminal menu. In my example, I created a menu item in Windows Terminal to use PowerShell remoting to connect to an Azure virtual machine (VM). In the meantime, I got a lot of questions on how you can add an SSH connection to an Azure VM in the Windows Terminal. That is why I am going to share here, how you can add an SSH connection to an Azure VM in the Windows Terminal menu.
Scott Hanselman wrote a great blog post on how you can add tabs to open an SSH connection, so I highly recommend that you read his blog for all the details.
Add an SSH Remote Session to an Azure VM in the Windows Terminal Menu
To get started, we need to open up the settings of the Windows Terminal. This will open up a settings.json file, which you can edit in your favorite editor, for example, Visual Studio Code. To add new “menu items,” you will need to add a profile to the profiles array in the JSON file. There are two options for how you can do that, you can use the SSH client in Windows 10, or you can use SSH from the Windows Subsystem for Linux (WSL) and even WSL 2.
First, you will need to install and configure SSH on your machine and your server. You can use password authentication or certificates. Both will work with this Windows Terminal shortcut.
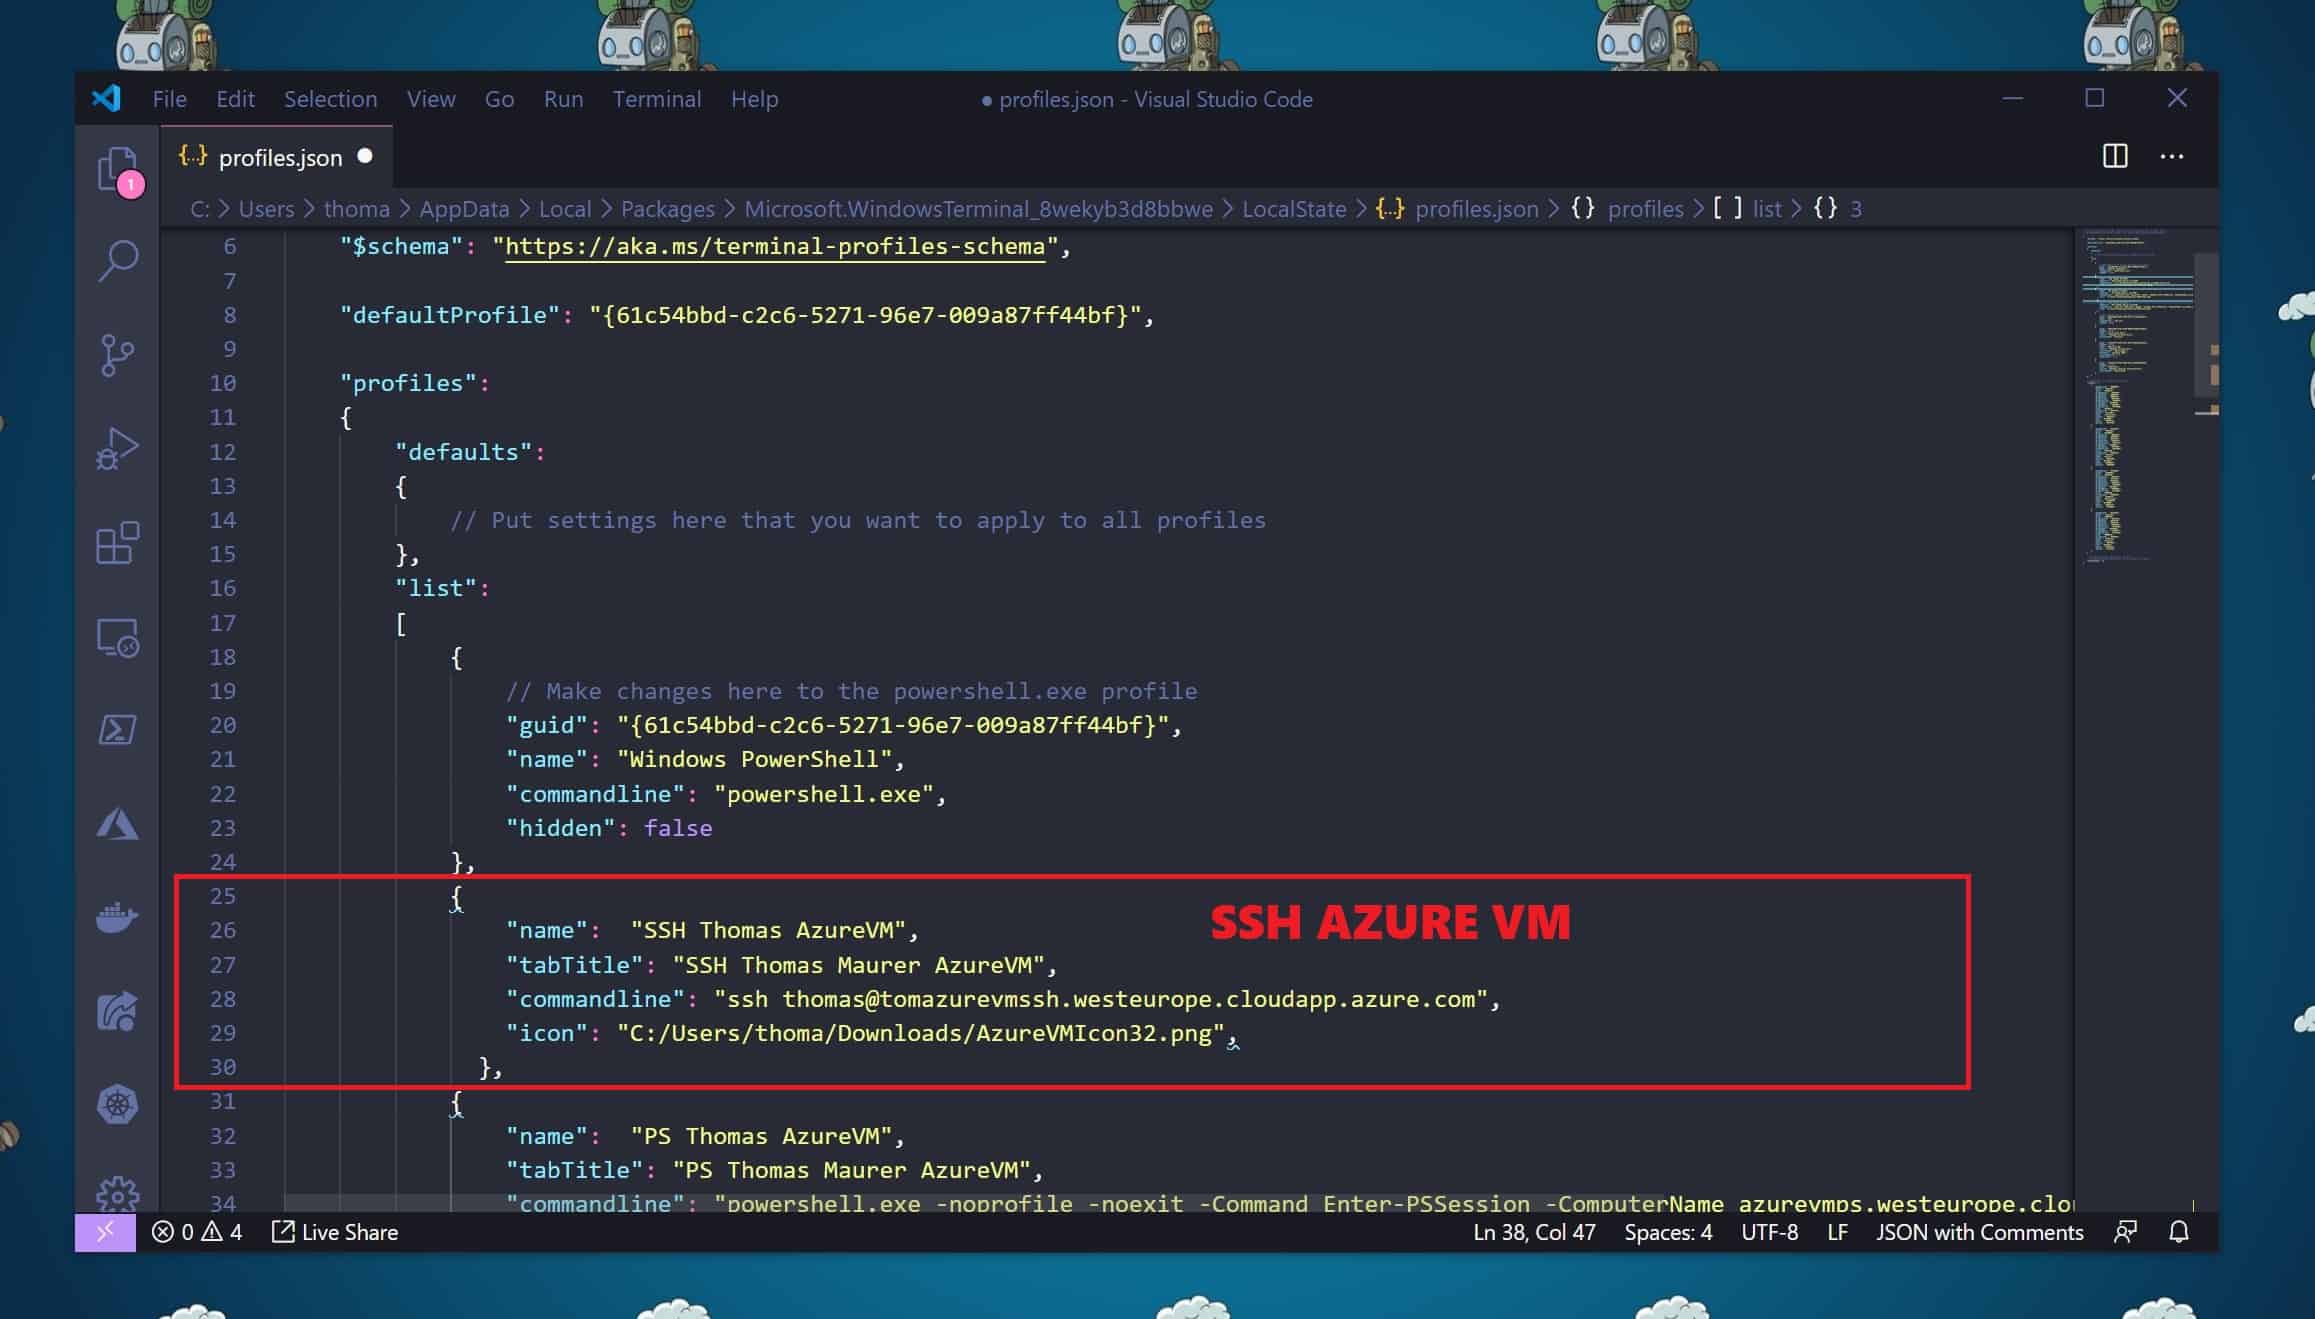
Windows Terminal Settings SSH Azure VM
You can see here the following to profile entries:
Remote session using SSH client in Windows 10
{
"name":  "SSH Thomas AzureVM",
"tabTitle": "SSH Thomas Maurer AzureVM",
"commandline": "ssh [email protected]",
"icon": "C:/Users/thoma/Downloads/AzureVMIcon32.png"
},
Remote session using SSH client in the Windows Subsystem for Linux
{
"name":  "WSL SSH Thomas AzureVM",
"tabTitle": "WSL SSH Thomas Maurer AzureVM",
"commandline": "wsl.exe ssh [email protected]",
"icon": "C:/Users/thoma/Downloads/AzureVMIcon32.png"
},
As you can see, we define the profile name and the tab title in for the Windows Terminal entry. We have the command line command here, which starts the SSH remoting session to the Azure VM. The command opens an SSH connection to the Azure VM. In my case, I am connecting to an Azure VM with the name azurevmssh.westeurope.cloudapp.azure.com (could also be an IP address) and the username thomas. The last thing I add is a small icon (32×32 pixel) since I am connecting to an Azure VM, I took the Azure VM icon.
And yes, to be compliant with the schema for the settings.json, you will need to add a GUID. You can generate GUIDs using PowerShell.
Now your Windows Terminal drop-down menu will look like this:

How to SSH into an Azure VM from Windows Terminal Menu
By selecting one of these profiles, you will automatically open an SSH remoting session to the Azure VM in Windows Terminal.
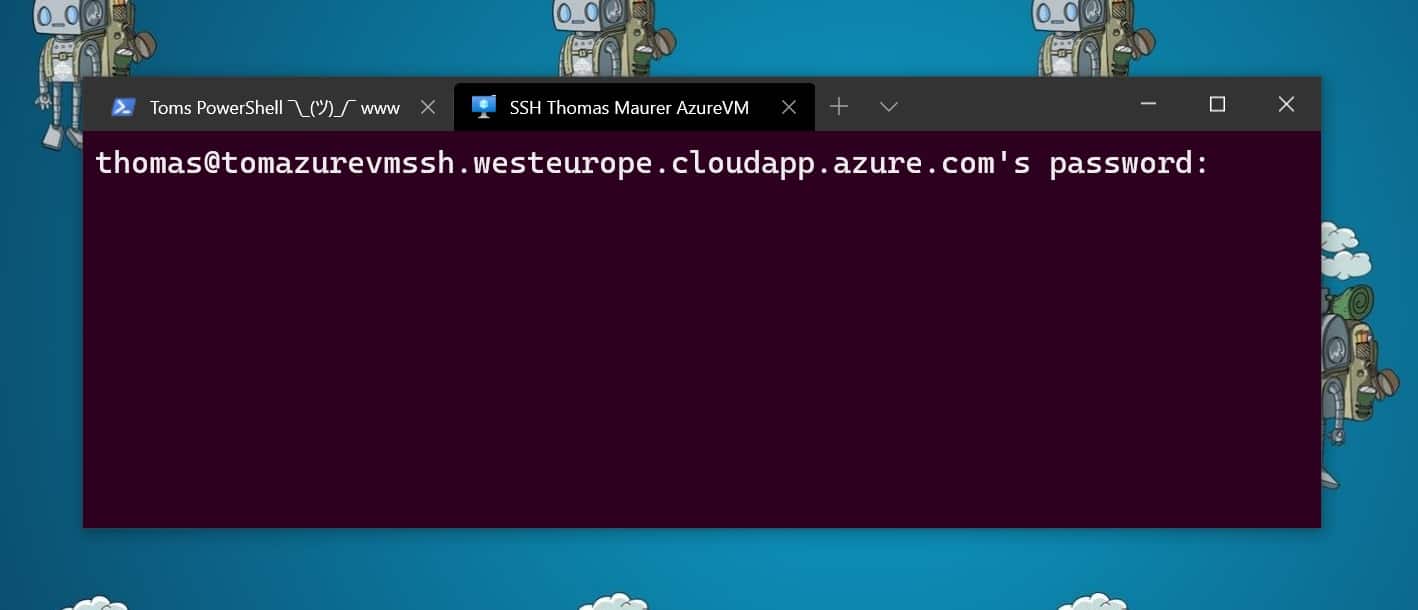
Windows Terminal Azure VM SSH remote session
You can see that in my case, it asks for a password. If you are setting up your SSH connection using certificates, this will also just work.
I hope this gives you an idea of how you can add an SSH remote session to an Azure VM in the Windows Terminal menu. If you want to know more about the Windows Terminal, check out the following blog, and if you have any questions, please feel free to leave a comment.
If you want to know how you can add a PowerShell remoting session to the Windows Terminal menu, check out the following blog.
Tags: Azure, Azure VM, Linux, Menu, Microsoft, Profile, remote, Remoting, SSH, Tab, Windows, Windows Terminal, WSL, WSL 2 Last modified: May 14, 2020


[…] How to SSH into an Azure VM from Windows Terminal Menu via Thomas Maurer […]
HI Thomas,
on the current version of Windows Terminal there is an issue on the icon path. You finde help about there:
https://github.com/microsoft/terminal/issues/1918#issuecomment-58709989
Hi Manuel
Good to know, thanks for sharing!