A couple of weeks ago Microsoft released the installation media, and you can download Hyper-V Server 2019 right now. In this blog post, I am going to show you how to install and configure Hyper-V Server 2019 step by step. This should especially help beginners with Hyper-V Server 2019. Hyper-V Server 2019 ships only a core option, so there won’t be desktop experience version of Hyper-V Server like you would have with Windows Server 2019.
Hyper-V Server 2019 Requirements
Hyper-V has specific hardware requirements to run virtualization in a secure and performant way.
- 64-bit processor with second-level address translation (SLAT)
- Minimum of 4GB of RAM. You will need more RAM for virtual machines on the Hyper-V Server.
- Virtualization features and support needs to be enabled in BIOS or UEFI
- Hardware-assisted virtualization – Intel Virtualization Technology (Intel VT) or AMD Virtualization (AMD-V) technology.
- Hardware-enforced Data Execution Prevention (DEP) Intel XD bit (execute disable bit) or AMD NX bit (no execute bit).
Specific features, like Discrete device assignment (DDA) or Shielded Virtual Machines, will also have other hardware requirements. You can find more about the Hyper-V Server 2019 requirements on Microsoft Docs.
Download ISO
You can download Hyper-V Server directly from the Microsoft evaluation center. This SKU does not require a license key, and it also doesn’t expire. It is a fully supported version of Hyper-V for free. However, if you run workloads like Windows Server, Windows 10, or other operating systems on top of it, they need to be correctly licensed.
Install Hyper-V Server 2019
After you have download the ISO file, you will need to install this on your machine. There are multiple options to do this:
- Burn a DVD drive and boot your server from DVD
- Attach the file using an out of bound management solutions like HPE ILO or others
- Create a USB drive to install Windows Server 2019
- Use Windows Deployment Services
- or other solutions
You can also follow this guide to add drivers to a Windows Server Image; this also works for Hyper-V Server.
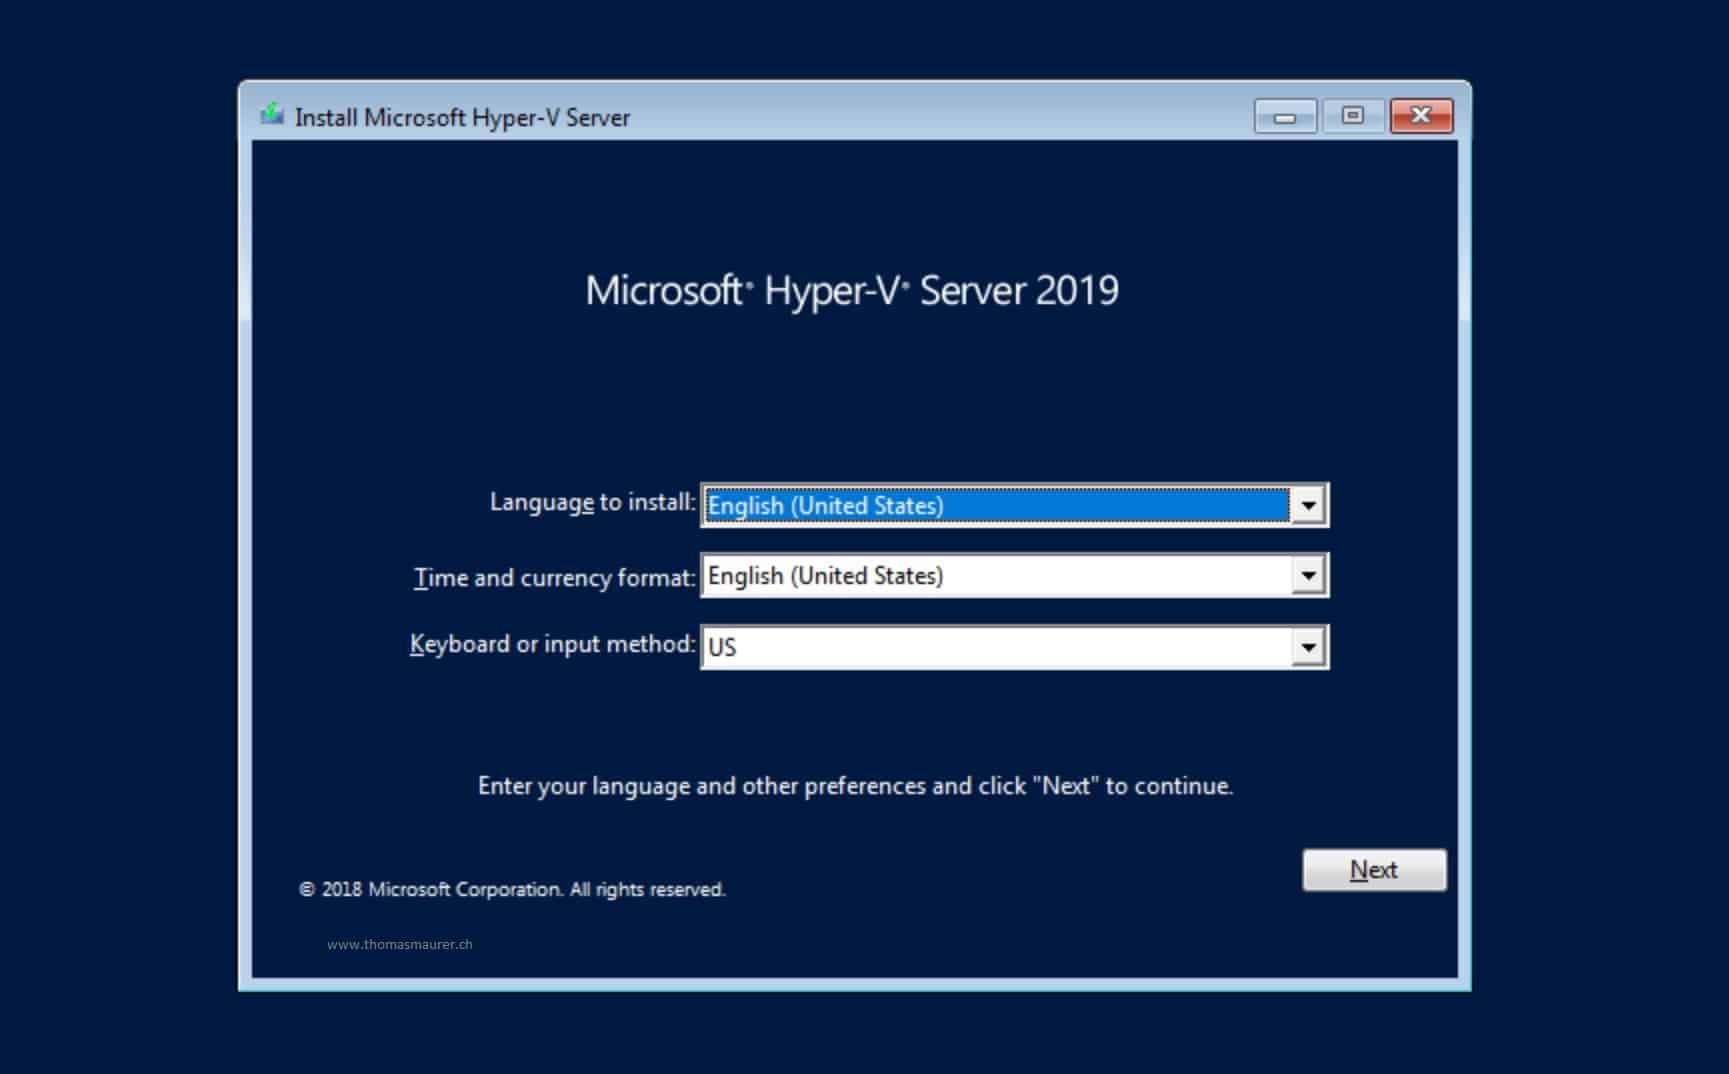
Now you can boot your server with the Hyper-V installation media. This will start the step by step installation. Select the language and region settings you want to use for your Hyper-V Server.
Install Hyper-V Server 2019
Press Install now
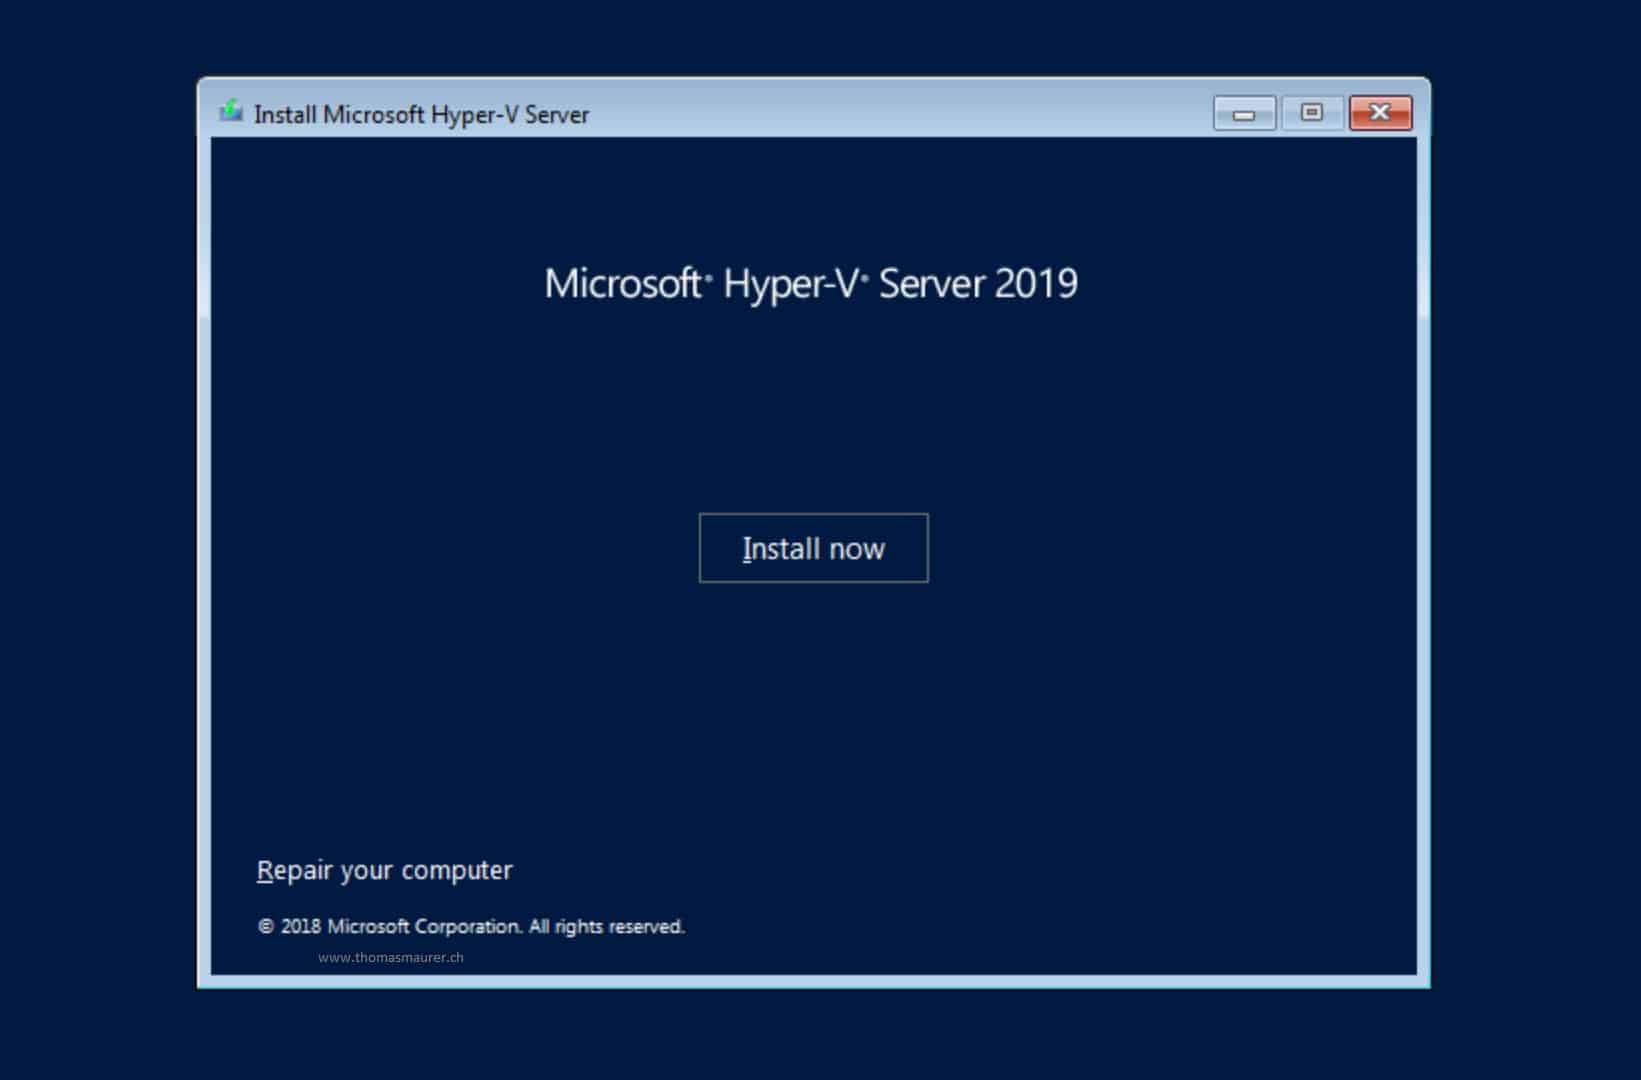
Hyper-V Server 2019 Install now
This will start up the setup process. Read the license terms and agree to them to start the installation. Click on I accept the license terms and click next.
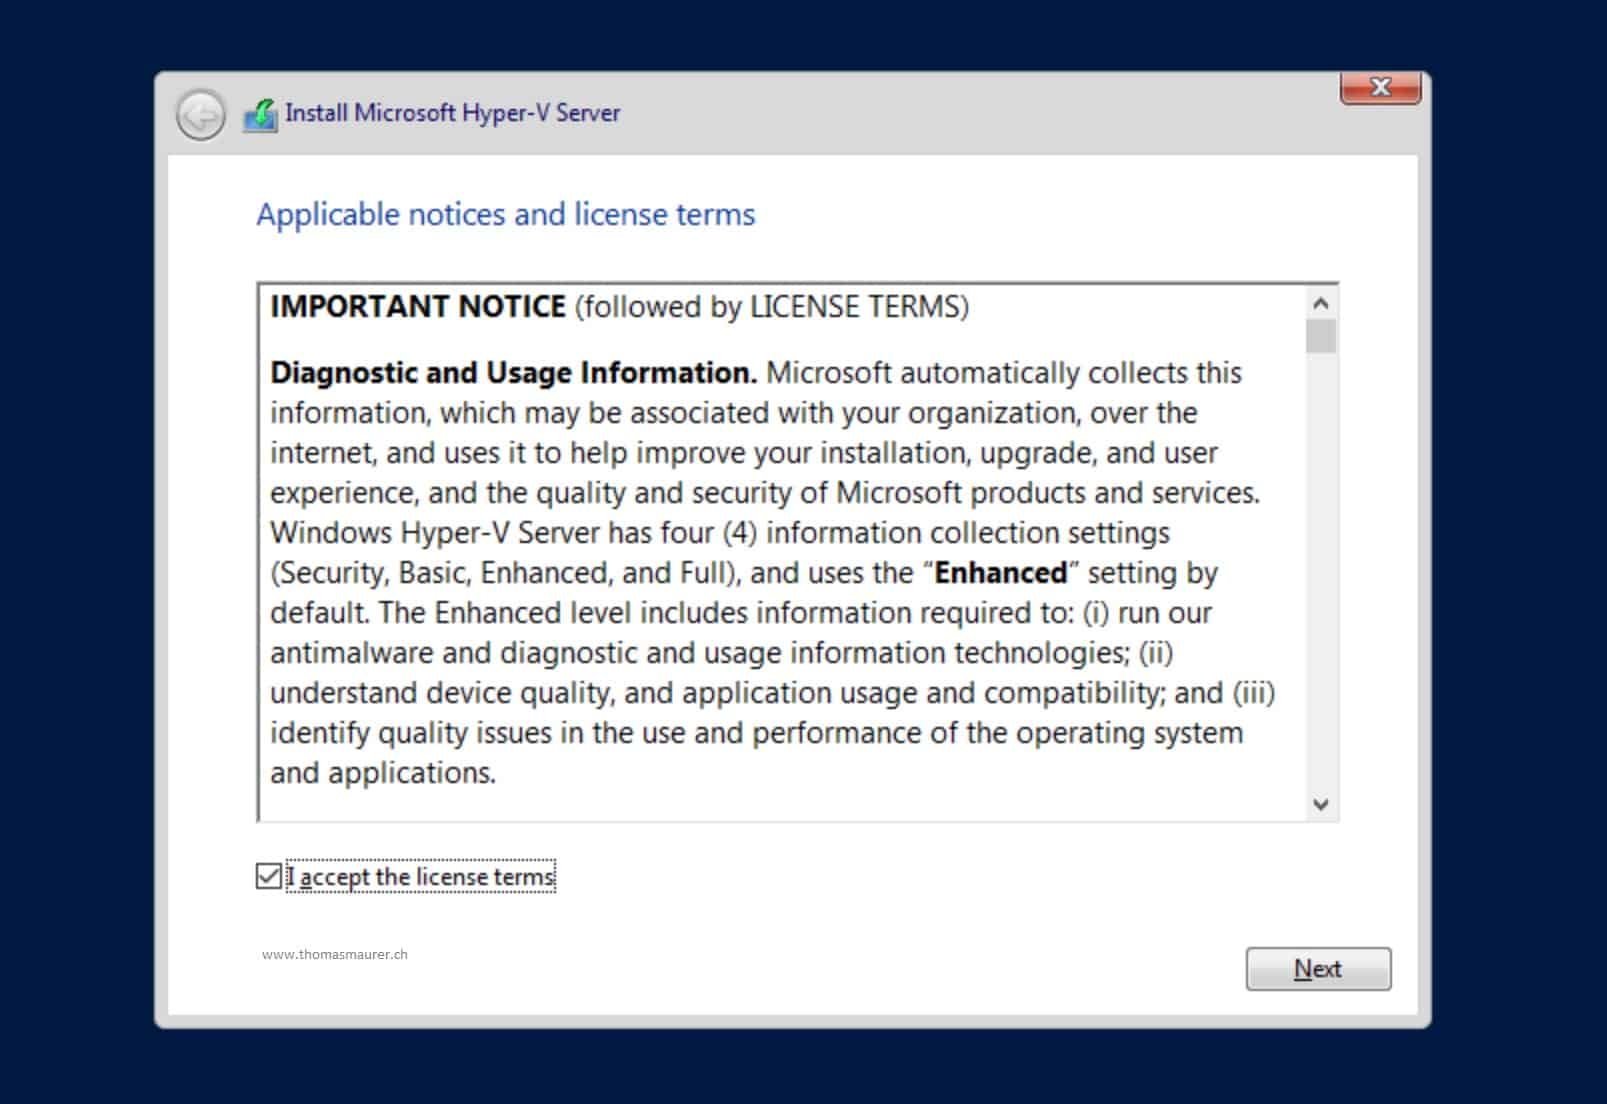
Hyper-V License terms
Select the drive you want to install Microsoft Hyper-V Server on and click next.
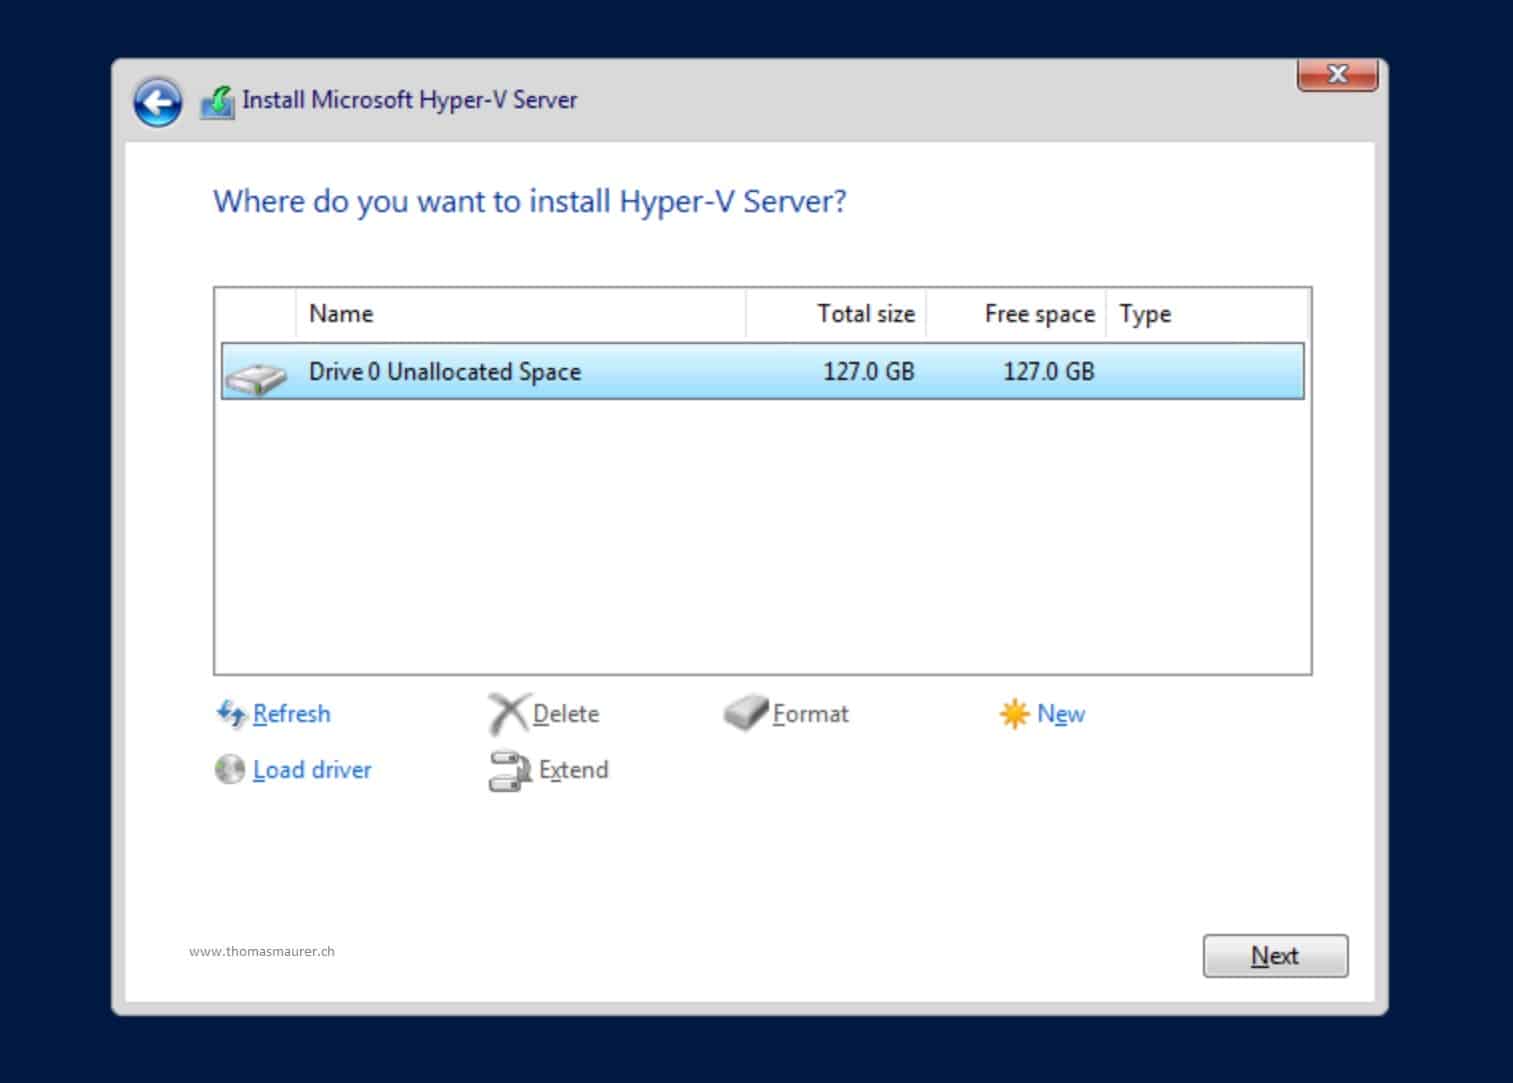
Select Drive to Install Hyper-V Server
This will now install the operating system.

Installation running
The server will automatically reboot multiple times. When the installation is finished, you will need to set the administrator password.
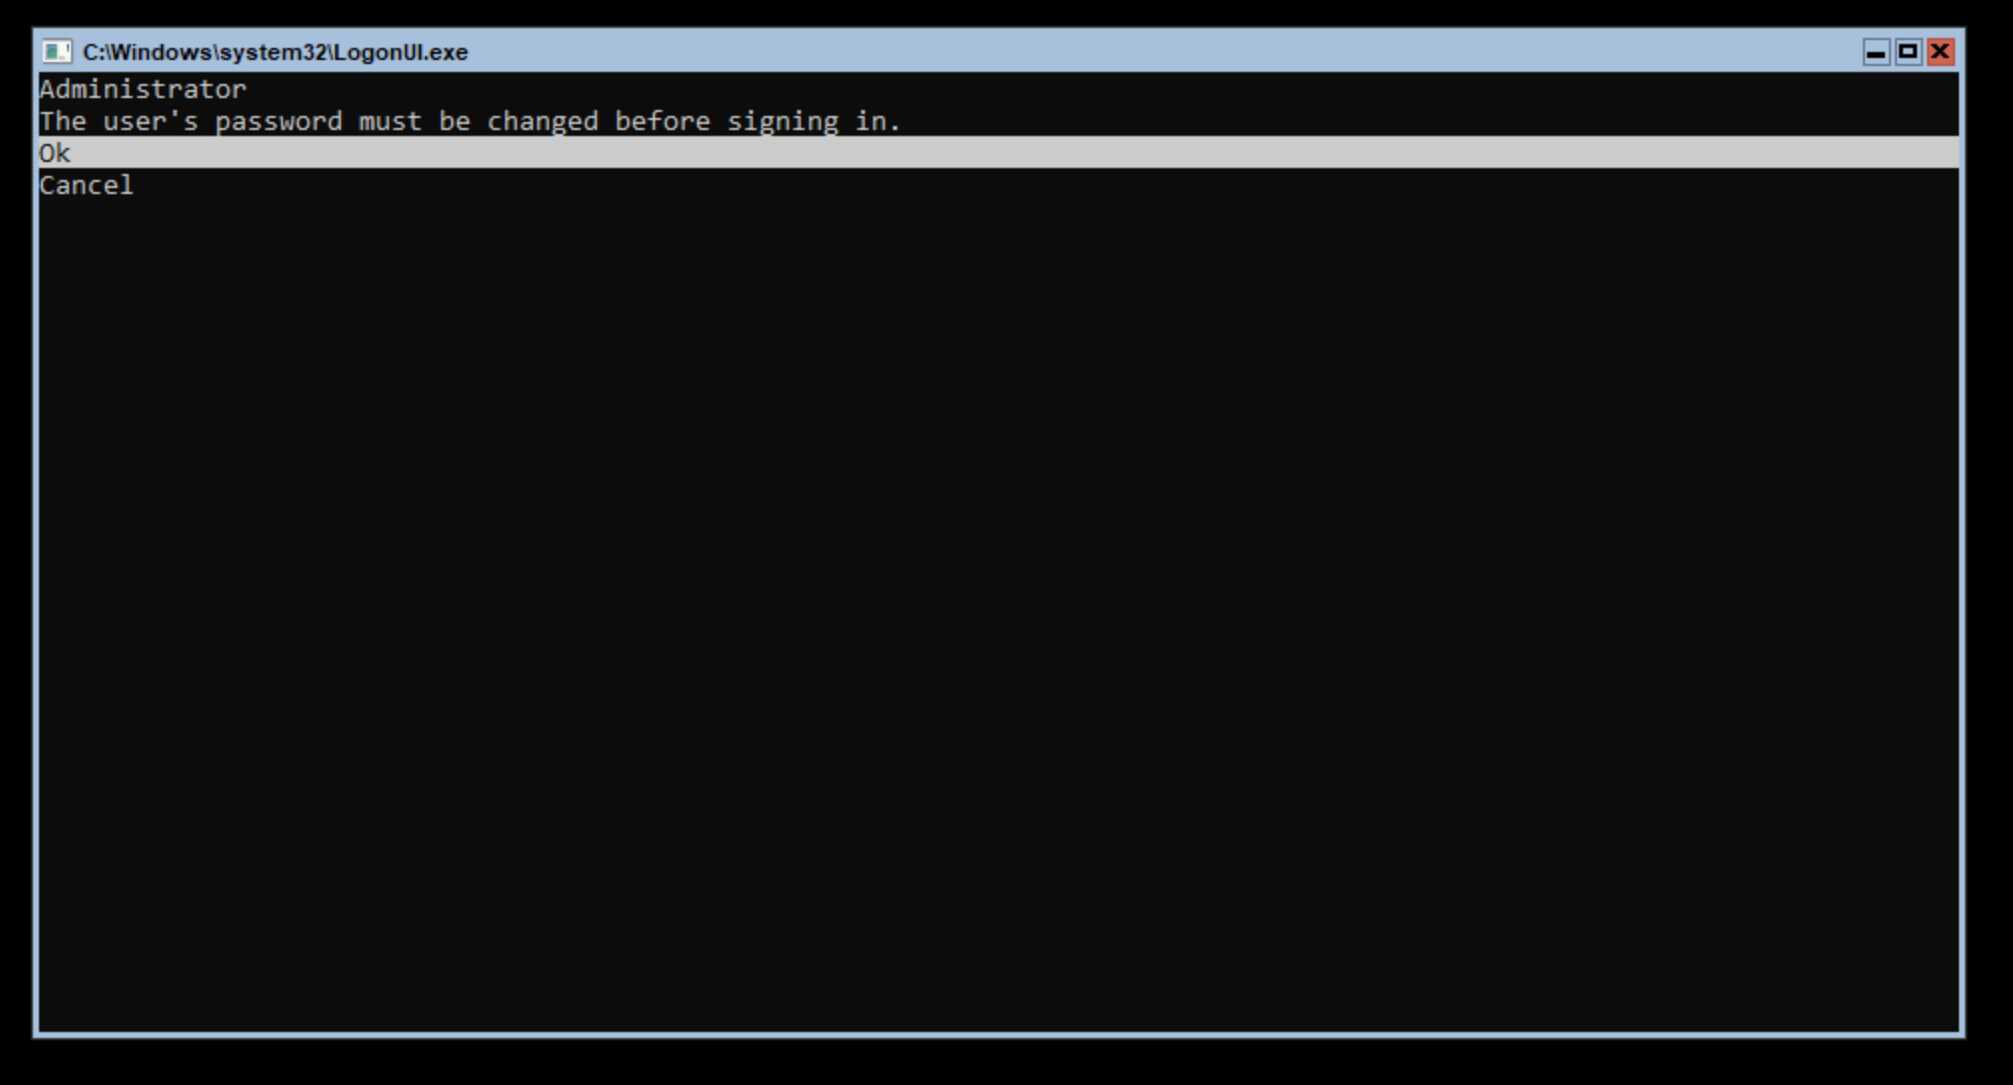
Set Administrator Password
After you have set the administrator password, it will automatically log you in. To configure the Hyper-V Server 2019 now, you can use the shell (command line or PowerShell), or you can start a utility using sconfig. Sconfig will allow you to do the basic setup tasks, like setting an IP address, hostname, configure remote management, install updates, and much more.
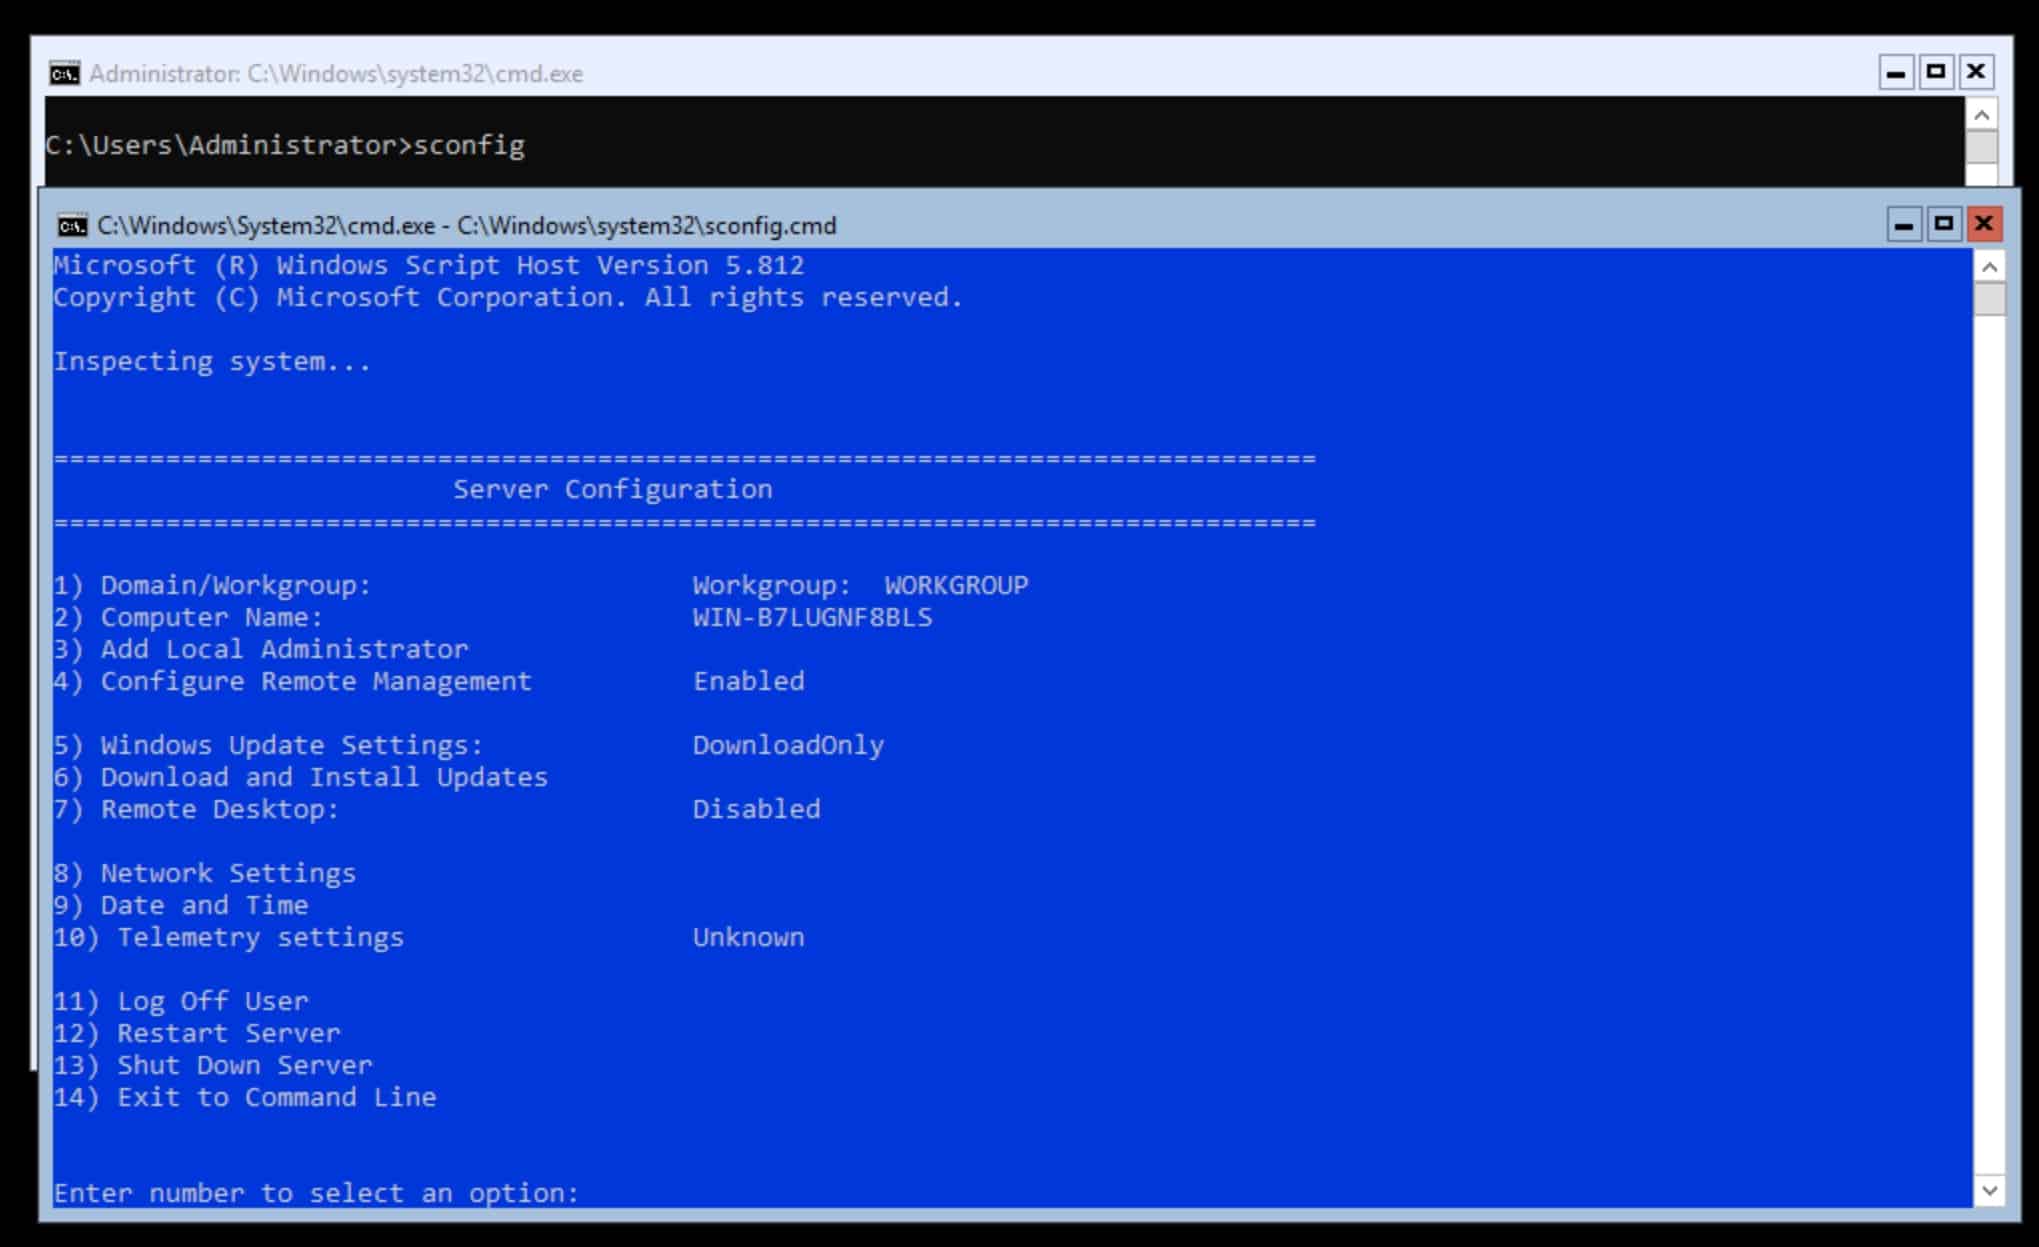
Hyper-V Server Sconfig
After you have done this, you can use the Hyper-V Manager MMC or Windows Admin Center to manage your server remotely. There is no need for you to install the Hyper-V role if you have used the Hyper-V Server 2019 SKU. If you have installed Windows Server 2019, you can use the following PowerShell command to install Hyper-V.
Install-WindowsFeature -Name Hyper-V -IncludeManagementTools -Restart
I hope this helps you to set up and install a new Hyper-V Server 2019. If you have any questions, let me know in the comments.
Tags: Configure Windows Server, download, how to, Hyper-V, Hyper-V Server, Hyper-V Server 2019, install, Install Hyper-V, Install Hyper-V Server, Installing, iso, Microsoft, requirements, Windows Server 2019 Last modified: July 17, 2019


Hi. So there remains only one edition of Hyper-V? Not just core or desktop but also no Windows Server 2019 with Hyper-V and Hyper-V server and Hyper-V datacenter etc? All those ediitons were very confusing.
Having just one, no mistakes anymore, would be a big progress.
Hi Garbie
It stays as before, you still have Hyper-V as a Server Role:
You get Hyper-V in:
Windows Server 2019 Standard
Windows Server 2019 Datacenter
Windows 10 Pro and Enterprise
all these options you need to pay licenses for (Most of the time you will need the Windows License anyway when you virtualize Windows Server. You can install Windows Server 2019 as Core (Default) or Desktop Experience (UI). https://www.thomasmaurer.ch/2019/03/which-windows-server-2019-installation-option-should-i-choose/
Hyper-V Server 2019 is a free option which comes with all the Hyper-V roles and features and is only available as a core installation option. Does this answer your question?
I was wondering if Hyper-V Server could be used as an alternative to the Win 10 Pro Hyper-V as a lightweight Type 1 hypervisor to switch between Win 10 Pro and a Linux client OS. I would like to use the laptop directly, not just remotely access it. If so, would you point me to someplace online or in a book showing how it can be done?
Hi John
I think this setup wouldn’t be ideal. I would recommend to use Windows 10 on your notebook and install Hyper-V on that https://www.thomasmaurer.ch/2017/08/install-hyper-v-on-windows-10-using-powershell/.
First, Hyper-V Server is designed to run on server hardware, I might be possible to install it on a laptop, however, the chances are very high that you run into driver issues. Secondly, Hyper-V Server is only available as Core installation option, so you won’t be able to manage the system with a UI.
I hope this helps you :)
Maybe this also helps you, https://www.thomasmaurer.ch/2019/06/install-wsl-2-on-windows-10/
Maybe you don’t need the full OS and you can just make use of the Windows Subsystem for Linux (WSL).
For the first time Hyper-v server 2019 does NOT support in place upgrade. Will a new install loose, or delete, any existing Hyper-v Server 2016 VMs? Or is it only replacing the Os and leaving everything else intact? Will it help or make any difference if the pre-existing VMs reside on a drive other than C:.
If you have stored the VM configuration files and the VHD/VHDX files on the C: Partition, and you remove that C: partition doing a clean install your VMs will be gone. You will need to put your VMs on another partition which you will not clean or delete, so you can import the virtual machines again.
Hi,
Thank you for this easy to use guide.
Excuse my ignorance, but what do I do after completing the installation, how do I get to the Windows GUI? I got to the sconfig page, all looks well. But after that I am lost.
Hi, Anders
After installing Hyper-V server there is no GUI available. You can manage it with Hyper-V Manager only from a remote computer.
Correct, or have a look at Windows Admin Center https://www.thomasmaurer.ch/2018/04/windows-admin-center/ which you might even install on the Hyper-V host: https://www.thomasmaurer.ch/2019/09/run-windows-admin-center-on-windows-server-core/
I am really a newbie at all this. My boss wants to upgrade our servers and we are already running several properly licensed VM’s. Can I get new hardware with no OS and add Hyper-V Server 2019 for no cost and continue to run my existing VM’s with no additional licensing required? Are there limitations on this Hyper-V Server 2019? I am looking at getting some used Dell servers with Quad XEONS where the Microsoft Server 2019 licensing costs would be more than the hardware. Also, does this version of Hyper-V Server 2019 include fail-over capabilities if one server in the pool dies the other will resume running the affected VM’s? Sorry I know these are amateur questions but I need some guidance. Thanks!
Hi Team,
I need the guideline of the hyper v server 2016 standard core model. if you have then send me on my gmail :- [email protected]
Thank You posting this. This has been something that has irritated me for a while and I’m very glad it now works!
You’re welcome :)
Hello Thomas,
We currently have a lab Hyper-V cluster with two Hyper-V Server 2016 hosts managed by SCVMM 2019 UR 1.
This week we have added a Hyper-V Server 2019 host to SCVMM but received the following error:
‘The Windows feature NetworkVirtualization could not be enabled on the computer X because of the following error: Unknown error (0x800f080c)’
After some research on the internet we found out everyone is experiencing this issue when adding a Hyper-V Server 2019 (Free edition) host to SCVMM 2019. By restarting the SCVMM service and refreshing the newly added host, the host comes back in a healthy and manageable state in SCVMM. After that we were able to add the Hyper-V Server 2019 host to the existing cluster in our lab.
So there is a lot of confusion between IT professionals if Hyper-V Server 2019 (Free edition) is officially supported by SCVMM 2019. The SCVMM documentation doesn’t explicitly state ‘Hyper-V Server’ but it also didn’t for SCVMM 1807 or lower.
https://social.technet.microsoft.com/Forums/en-US/4fc21484-5d0e-4f3d-9fae-81925997baf3/vmm-2019-adding-hyperv-server-2019-still-fails?forum=virtualmachingmgrhyperv
Do you know if Hyper-V Server 2019 (Free edition) is officially supported by SCVMM?
I would appreciate your feedback.
Kind Regards,
Jeroen
Is it possible to manage a Hyper-V Server 2019 (core) from a Windows 10 Pro 1909 machine with the Hy[er-V Management Console? I seem to be having issues… My client machine keeps telling me it cannot connect, to verify that Virtual Machine Managment service is running. But since this was the Hyper-V Server SKU, shouldn’t all that already be turned on by default? I have already used sconfig to set a server name and enable remote management….
Is it possible to manage a Hyper-V Server 2019 (core) from a Windows 10 Pro 1909 machine with the Hyper-V Management Console? I seem to be having issues… My client machine keeps telling me it cannot connect, to verify that Virtual Machine Management service is running. But since this was the Hyper-V Server SKU, shouldn’t all that already be turned on by default? I have already used sconfig to set a server name and enable remote management….
Yes, you can manage and i am already doing it. The error which you are mentioning could relate to something else.
Hello Thomas,
Thanks for such good content about Hyper-V Server and Windows Server… I striclty follow your howto guide to install Windows Server 2019 on a USB key for Hyper-V Server 2019 (Try to switch to bunch of usb key I have, other USB ports, GPT & MBR methods…). Unfortunately I was not able to make it, Windows Server 2019 in the other hand works like a charm.
Any clue about that?
Hi!
It is possible to use Windows Server Backup on Hyper-v Server 2019?
Hi Thomas,
Connecting to Hyper V Manager from a remote system is far from straightforward, do you have an addition to make that work in a setup with the Hyper V host not on a domain?
From Windows Admin Center you can also create and manage Hyper V but with much fewer options as it seems, therefore Hyper V Manager still seems very convenient.
Mark
Hi, I’ve been tasked with attempting to install Hyper-V Server 2019 on a physical server and then standup a VM from it running Windows 10 or 11. I have Hyper-V Server 2019 installed and configured following your guide now but cannot find info on how to create the VM and start the installation from say MDT or SCCM. Any guides or directions for this?