
Today, the Azure Migrate team launched an update to the Azure Migrate service, which can help you discover, assess, and migrate applications, infrastructure, and data from your on-prem environment to Microsoft Azure. This is excellent timing since we all know that Windows Server 2008 and Windows Server 2008 R2 are soon out of support and you get free extended security updates if you migrate your VMs to Azure. With Azure Migrate, you can now centrally track the progress of your migration journey across multiple thrid-party and Microsoft tools. In addition, Azure Migrate can now assess and migrate your Hyper-V virtual machines (VMs).
With the latest release of Azure Migrate you can now:
- Extensible approach with choice across Microsoft and popular ISV assessment and migration tools
- Integrated experience for discovery, assessment, and migration with end-to-end progress tracking for servers and databases
- Server Assessment and Server Migration for large-scale VMware, Hyper-V, and physical server migrations
- Database Assessment and Database Migration across various database targets including Azure SQL Database and Managed Instance
You can find more about the Azure Migrate capabilities on Microsoft Docs. For more information on Azure Migration, check out my blog post about Azure Migration on the Nigel Frank International blog. In this post, I am going to show you how you can step-by-step assess and migrate Hyper-V VMs to Azure using Azure Migrate.
Preparation
First, you need to prepare your Azure to set the right permissions and prepare the on-premises Hyper-V hosts and VMs for server assessment and migration. You can find more about the details for permissions and host preparations on Microsoft Docs.
Next, you will need to create a new Migration project for servers. Click on Asses and migrate servers.
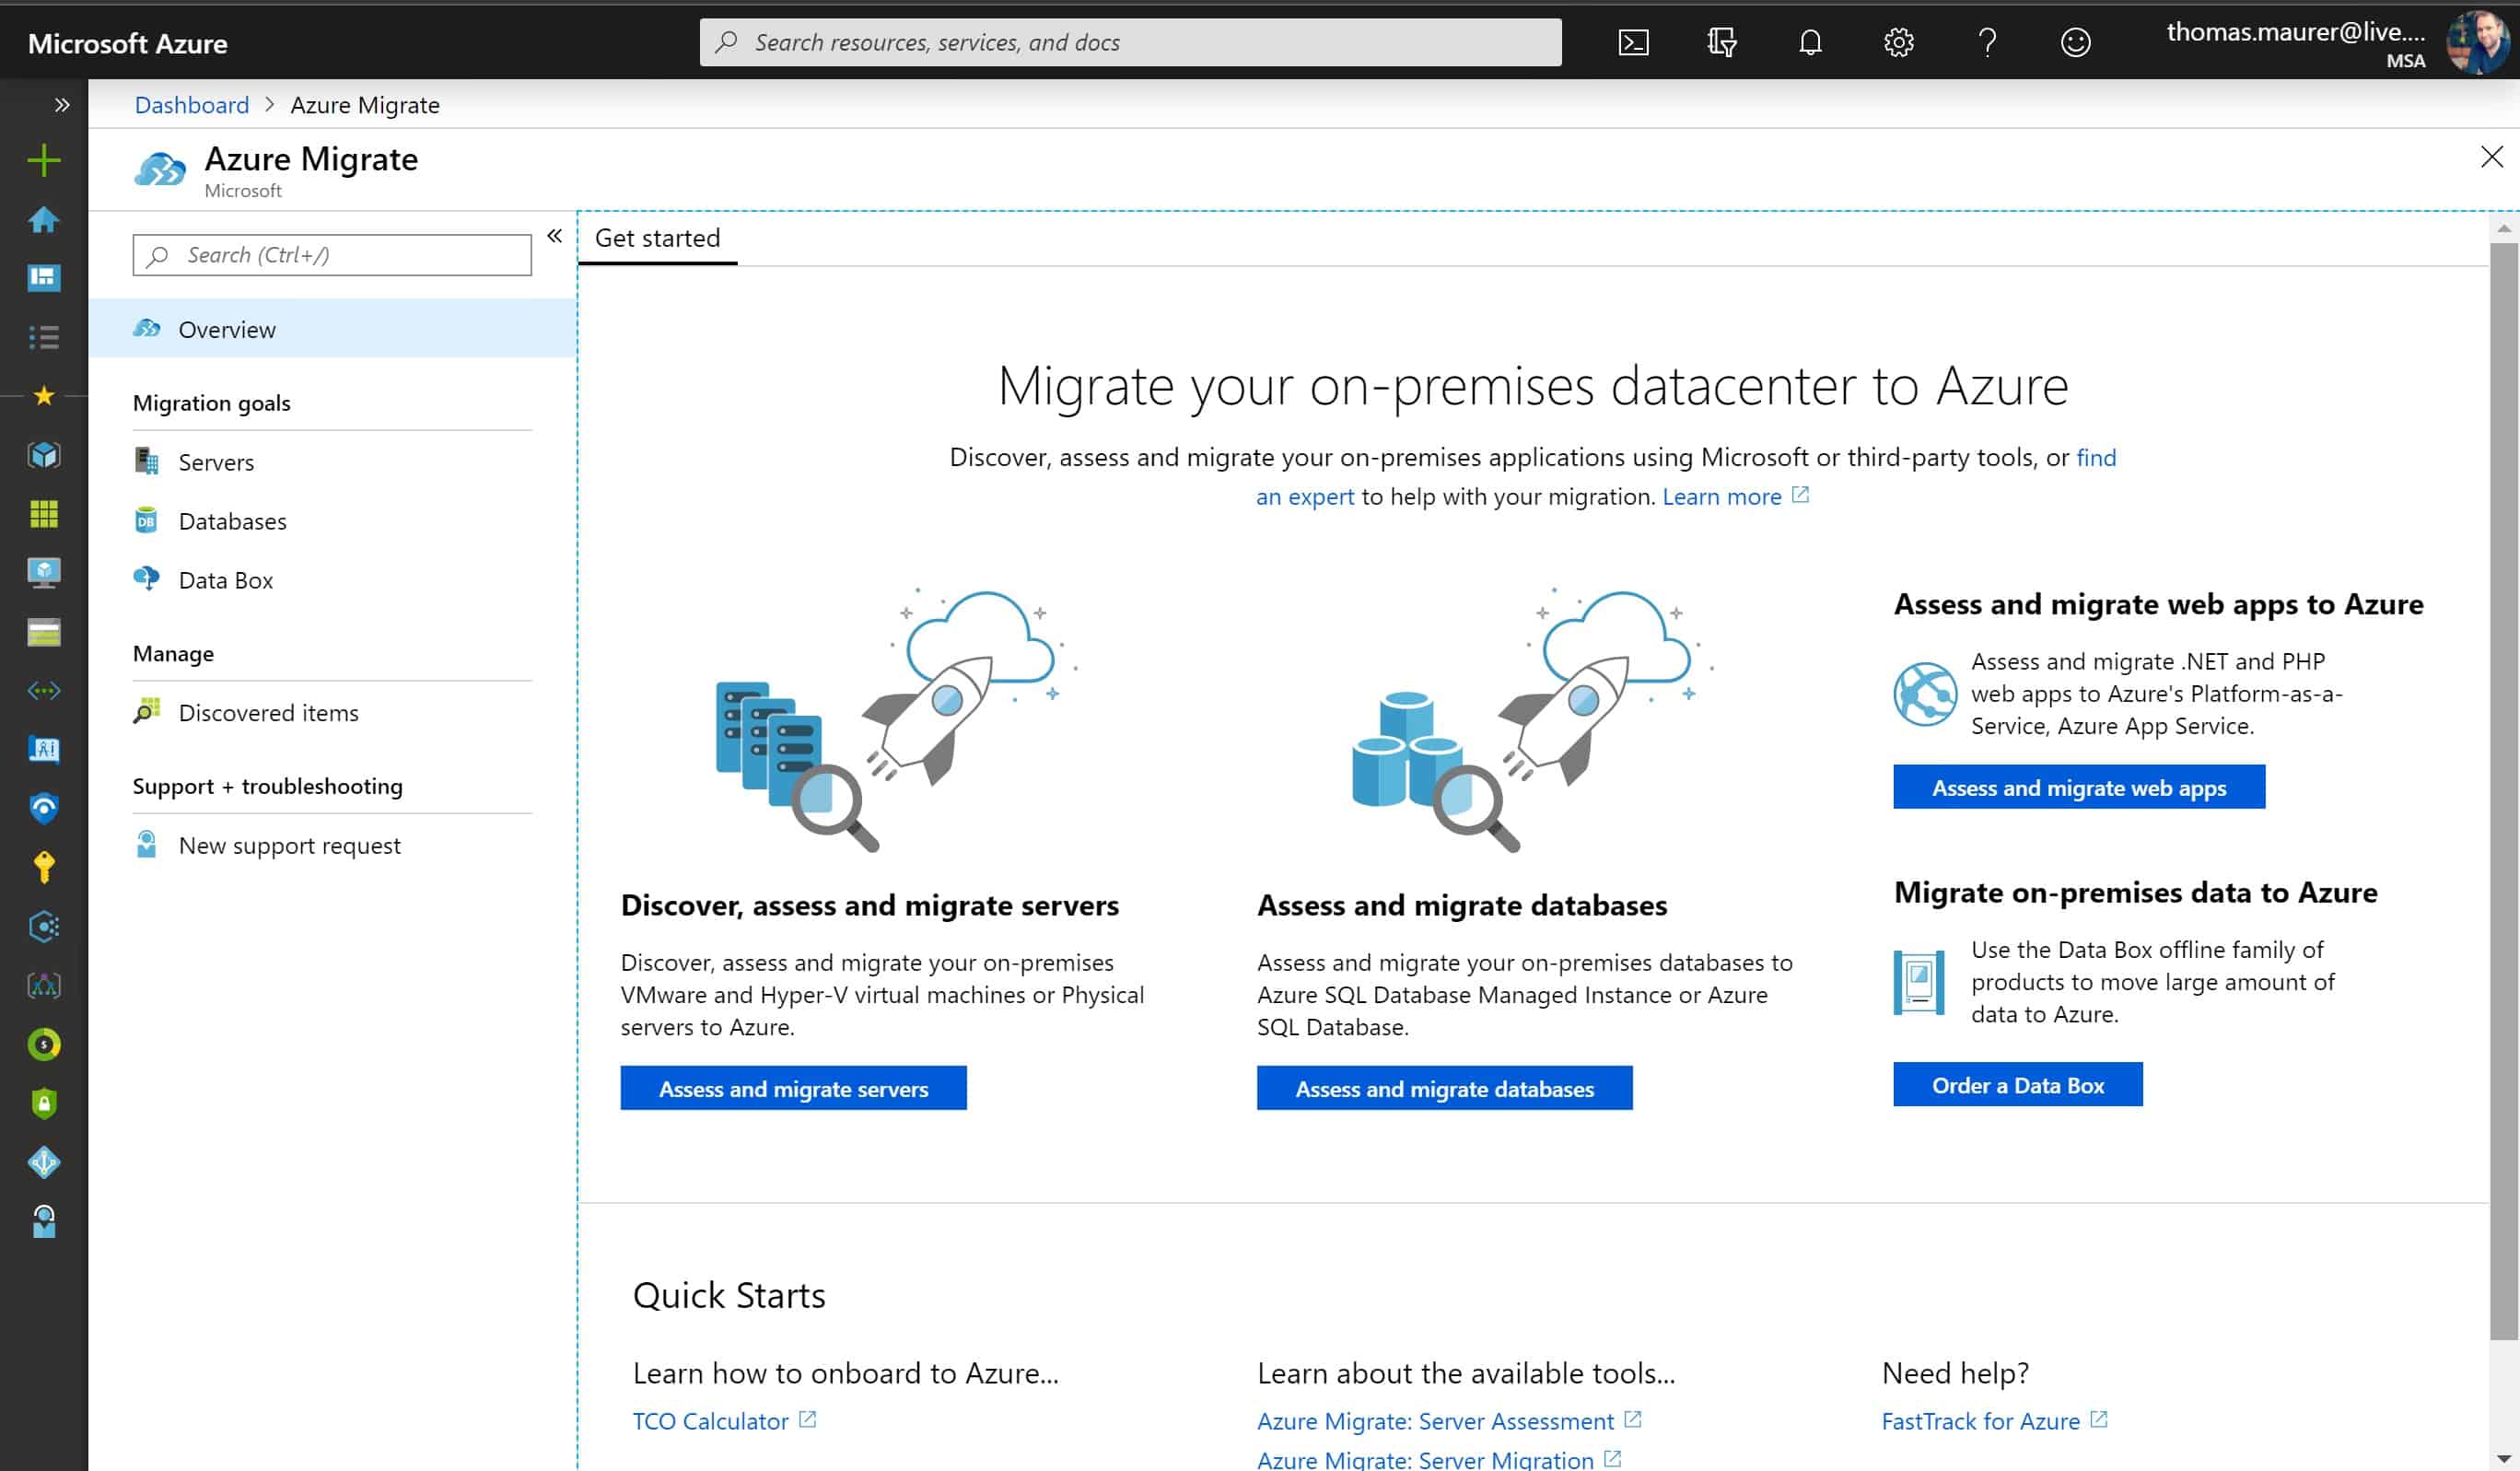
Azure Portal Azure Migrate
Now you will need to add the tools you want to use for the assessment as well as for the migration, click on “add tools”.
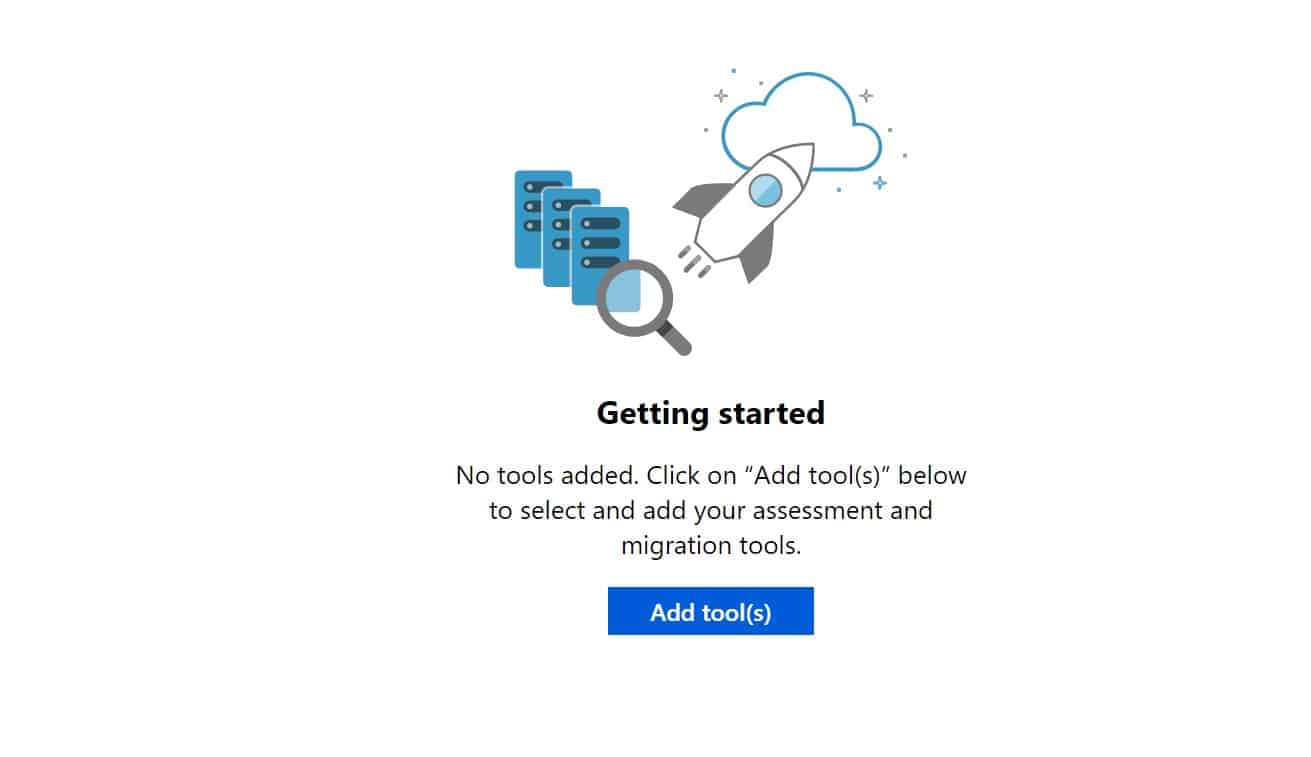
Getting started
You will need to create a new Azure Migrate project. Enter the details for your subscription, resource group, and a name for the project. You will also need to choose a region where your project is going to be deployed. No worries, this will only store the assessment data, you can still select another region for the migration.
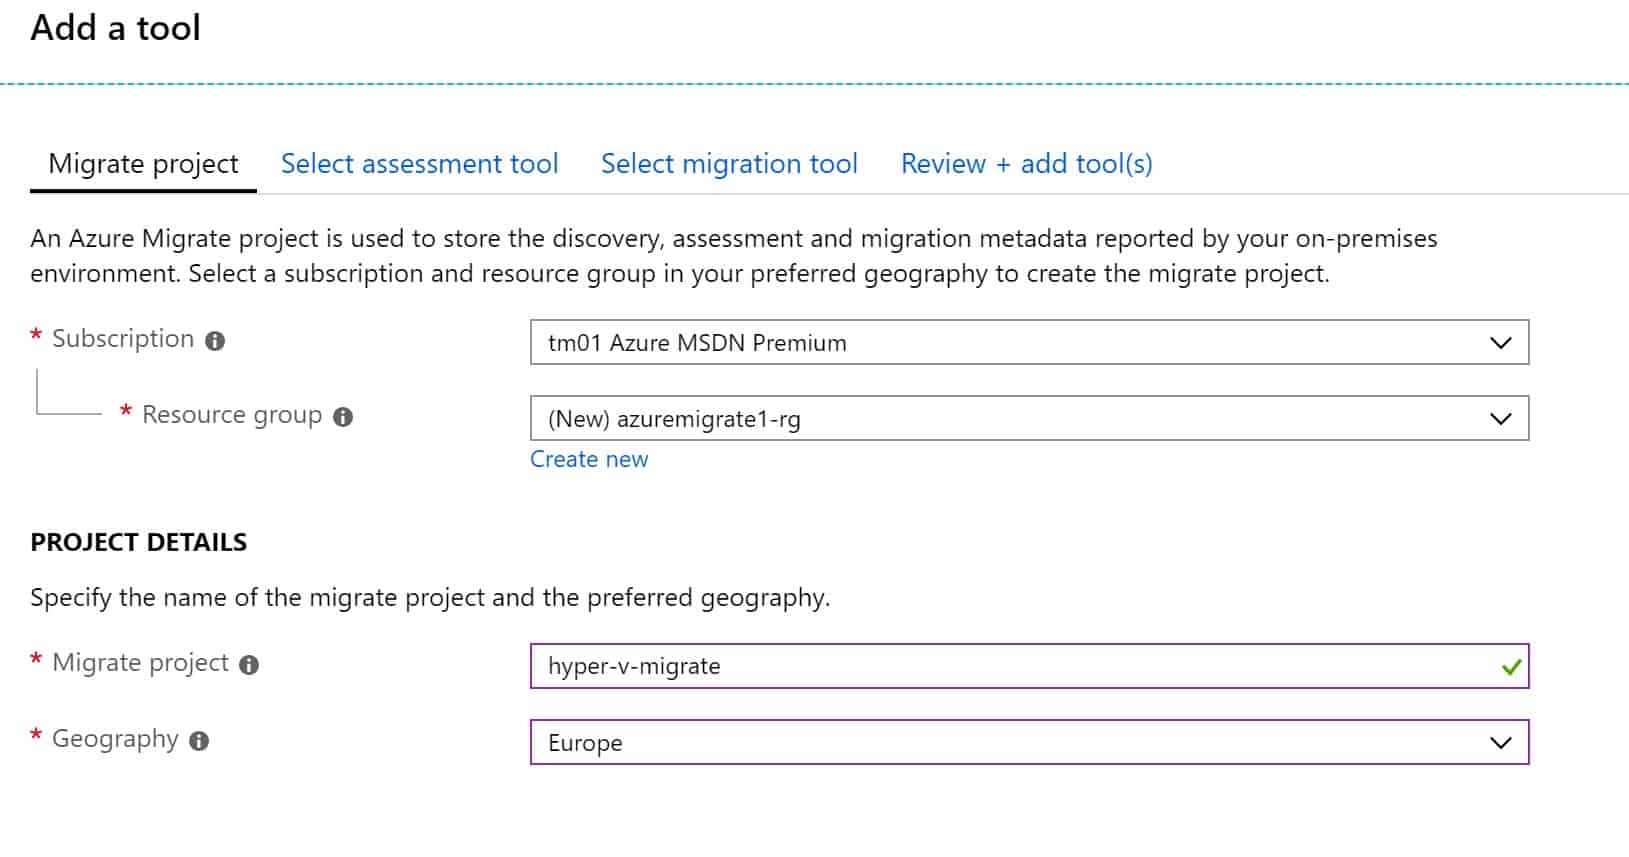
Create Azure Migrate project
On the next step, you will need to choose the assessment tool you want to use. This can be the Microsoft tool or a third-party provider. In my case, I choose the Microsoft assessment tool. If you only want to migrate, you can also skip this step.
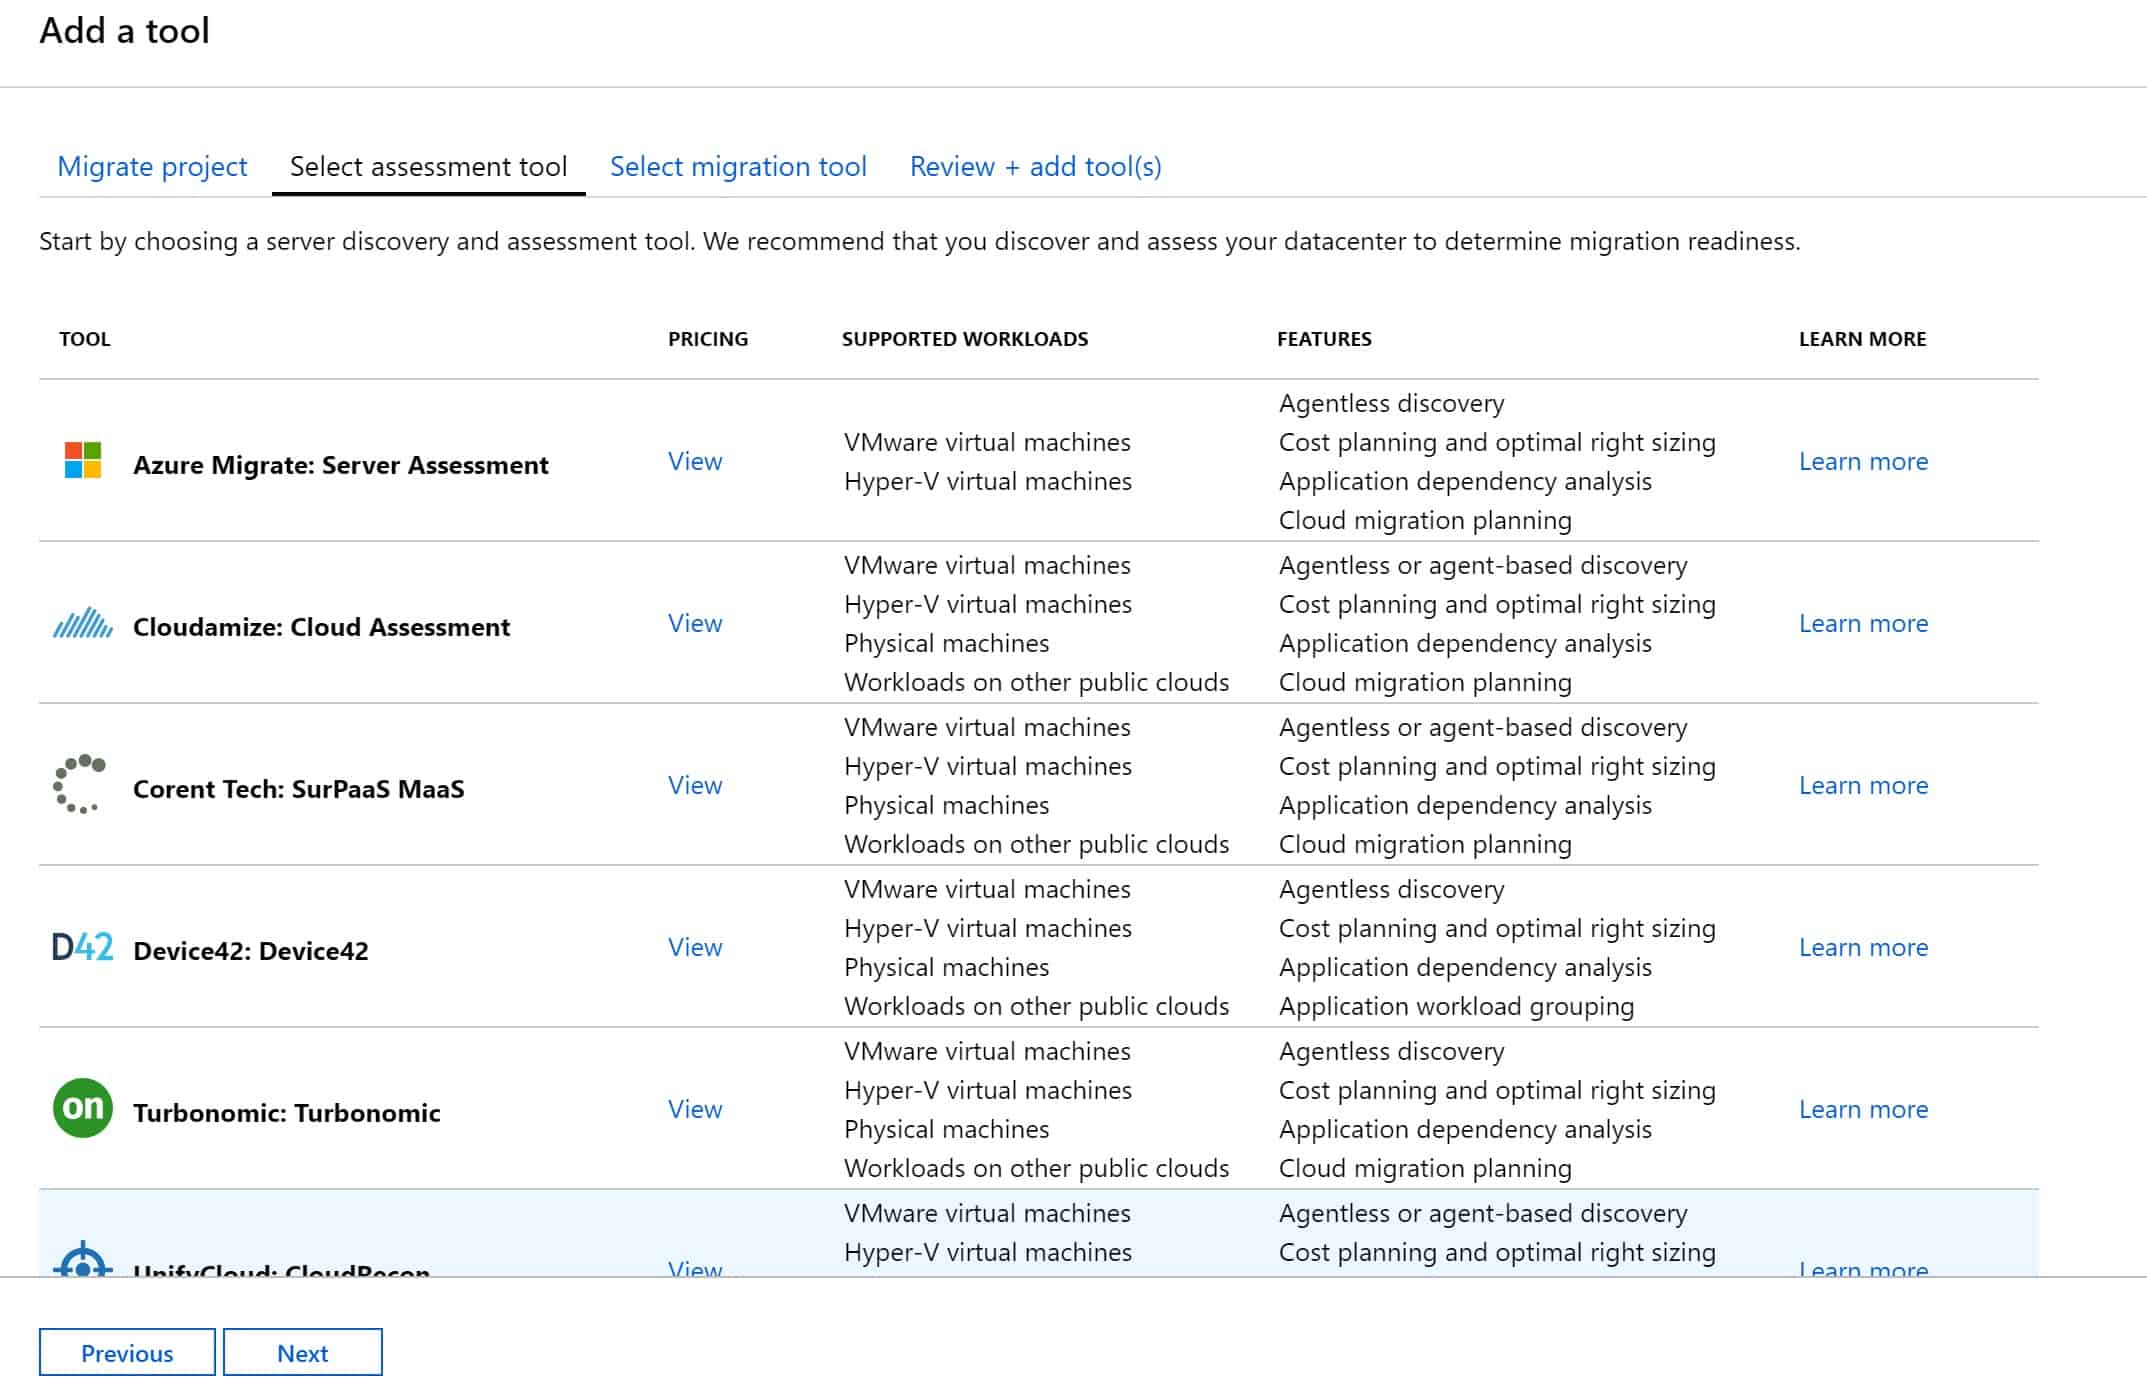
Select assessment tool
Next, you can choose the Migration tool you want to use; in my case, I again choose the Microsoft one. You can also skip this step and select a migration tool later after you have assessed your environment.
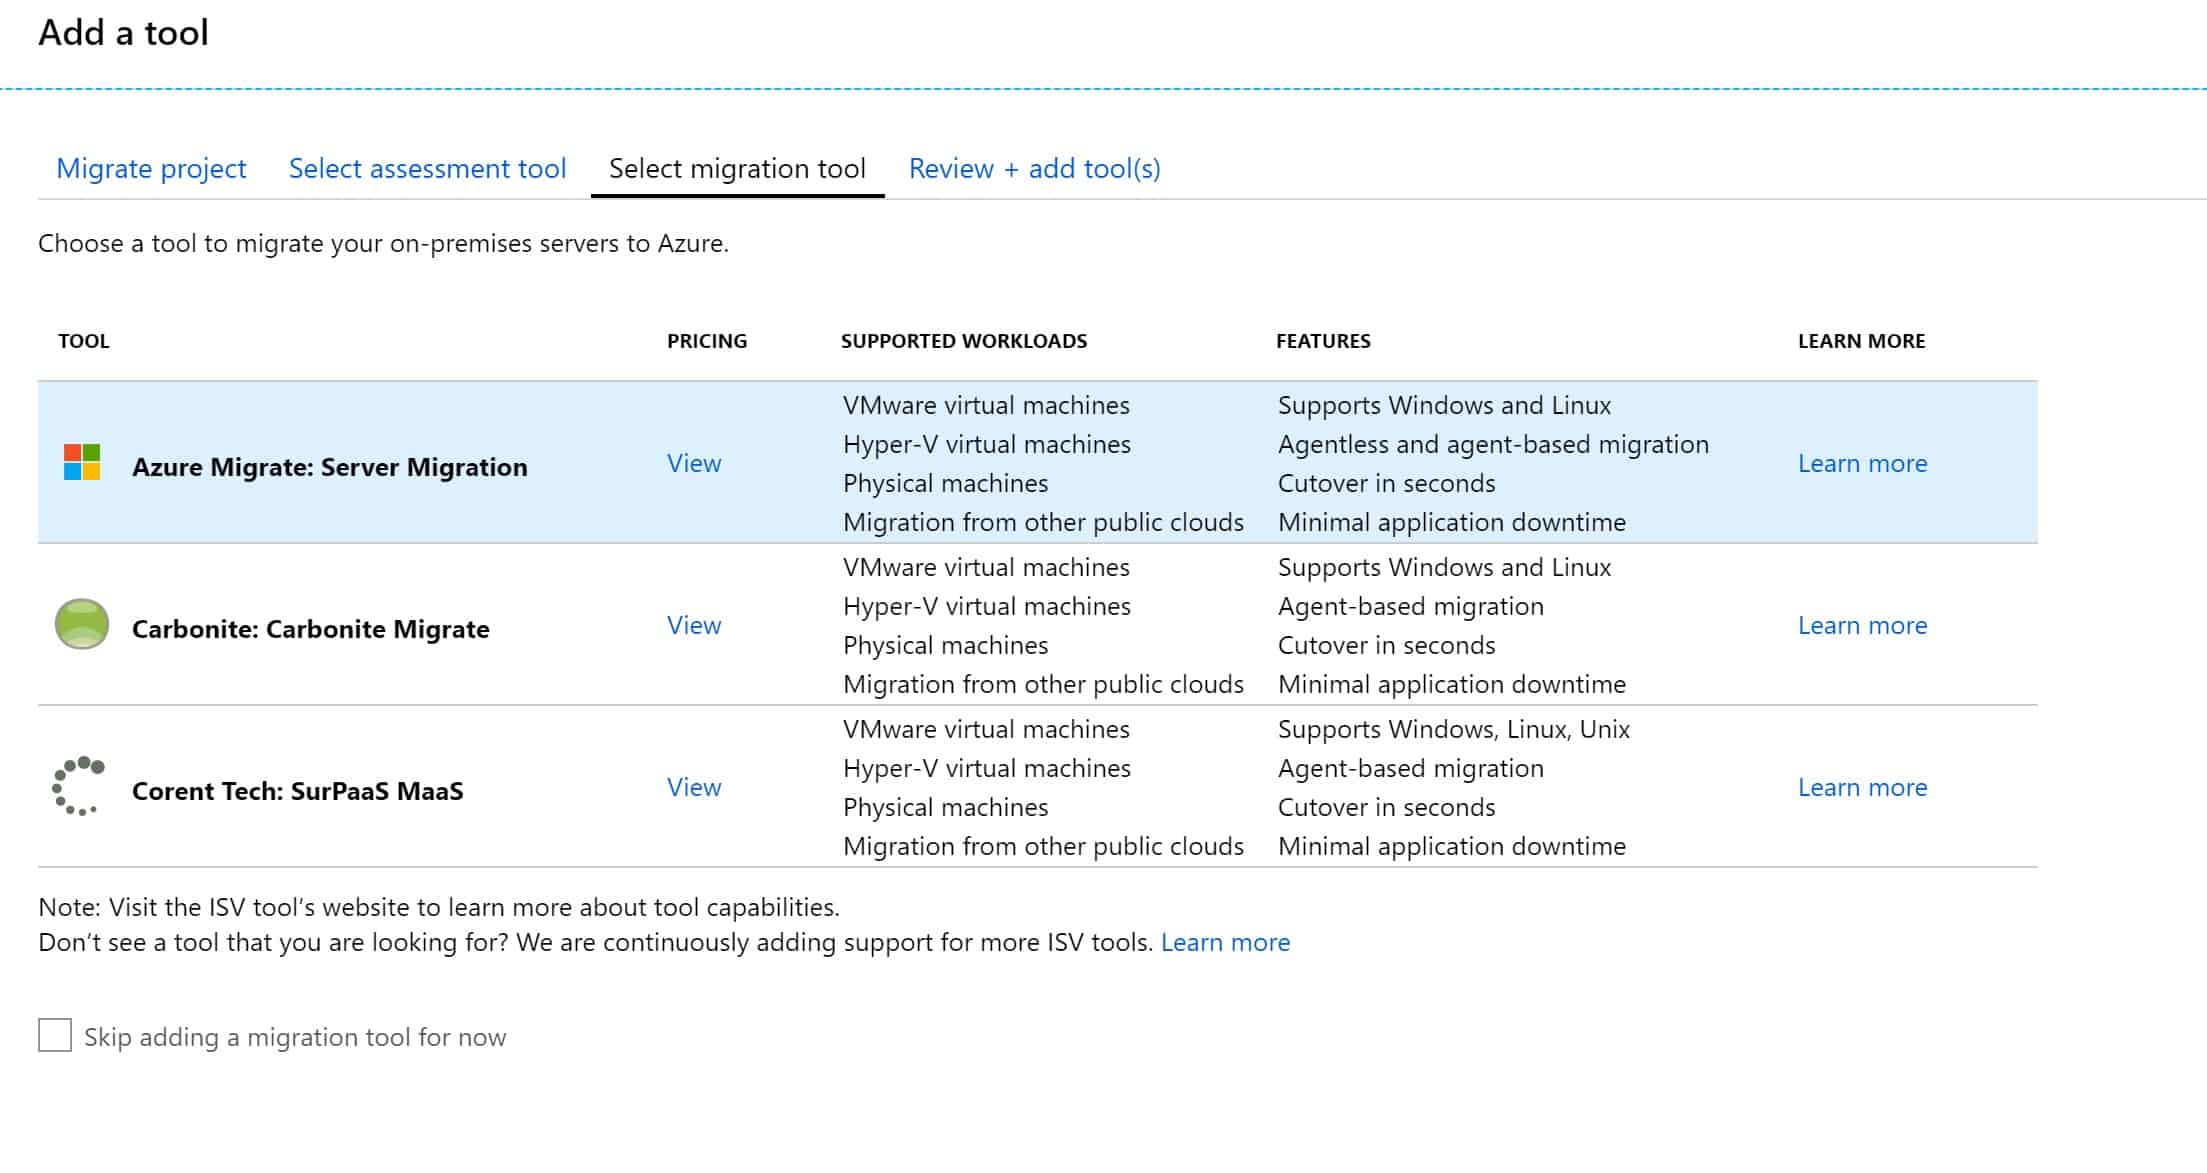
Select migration tool
On the last screen, click on “add tool”, this will create the Azure Migrate project with the selected tools. After a while, you will see the server assessment and server migration tools in the Azure portal.
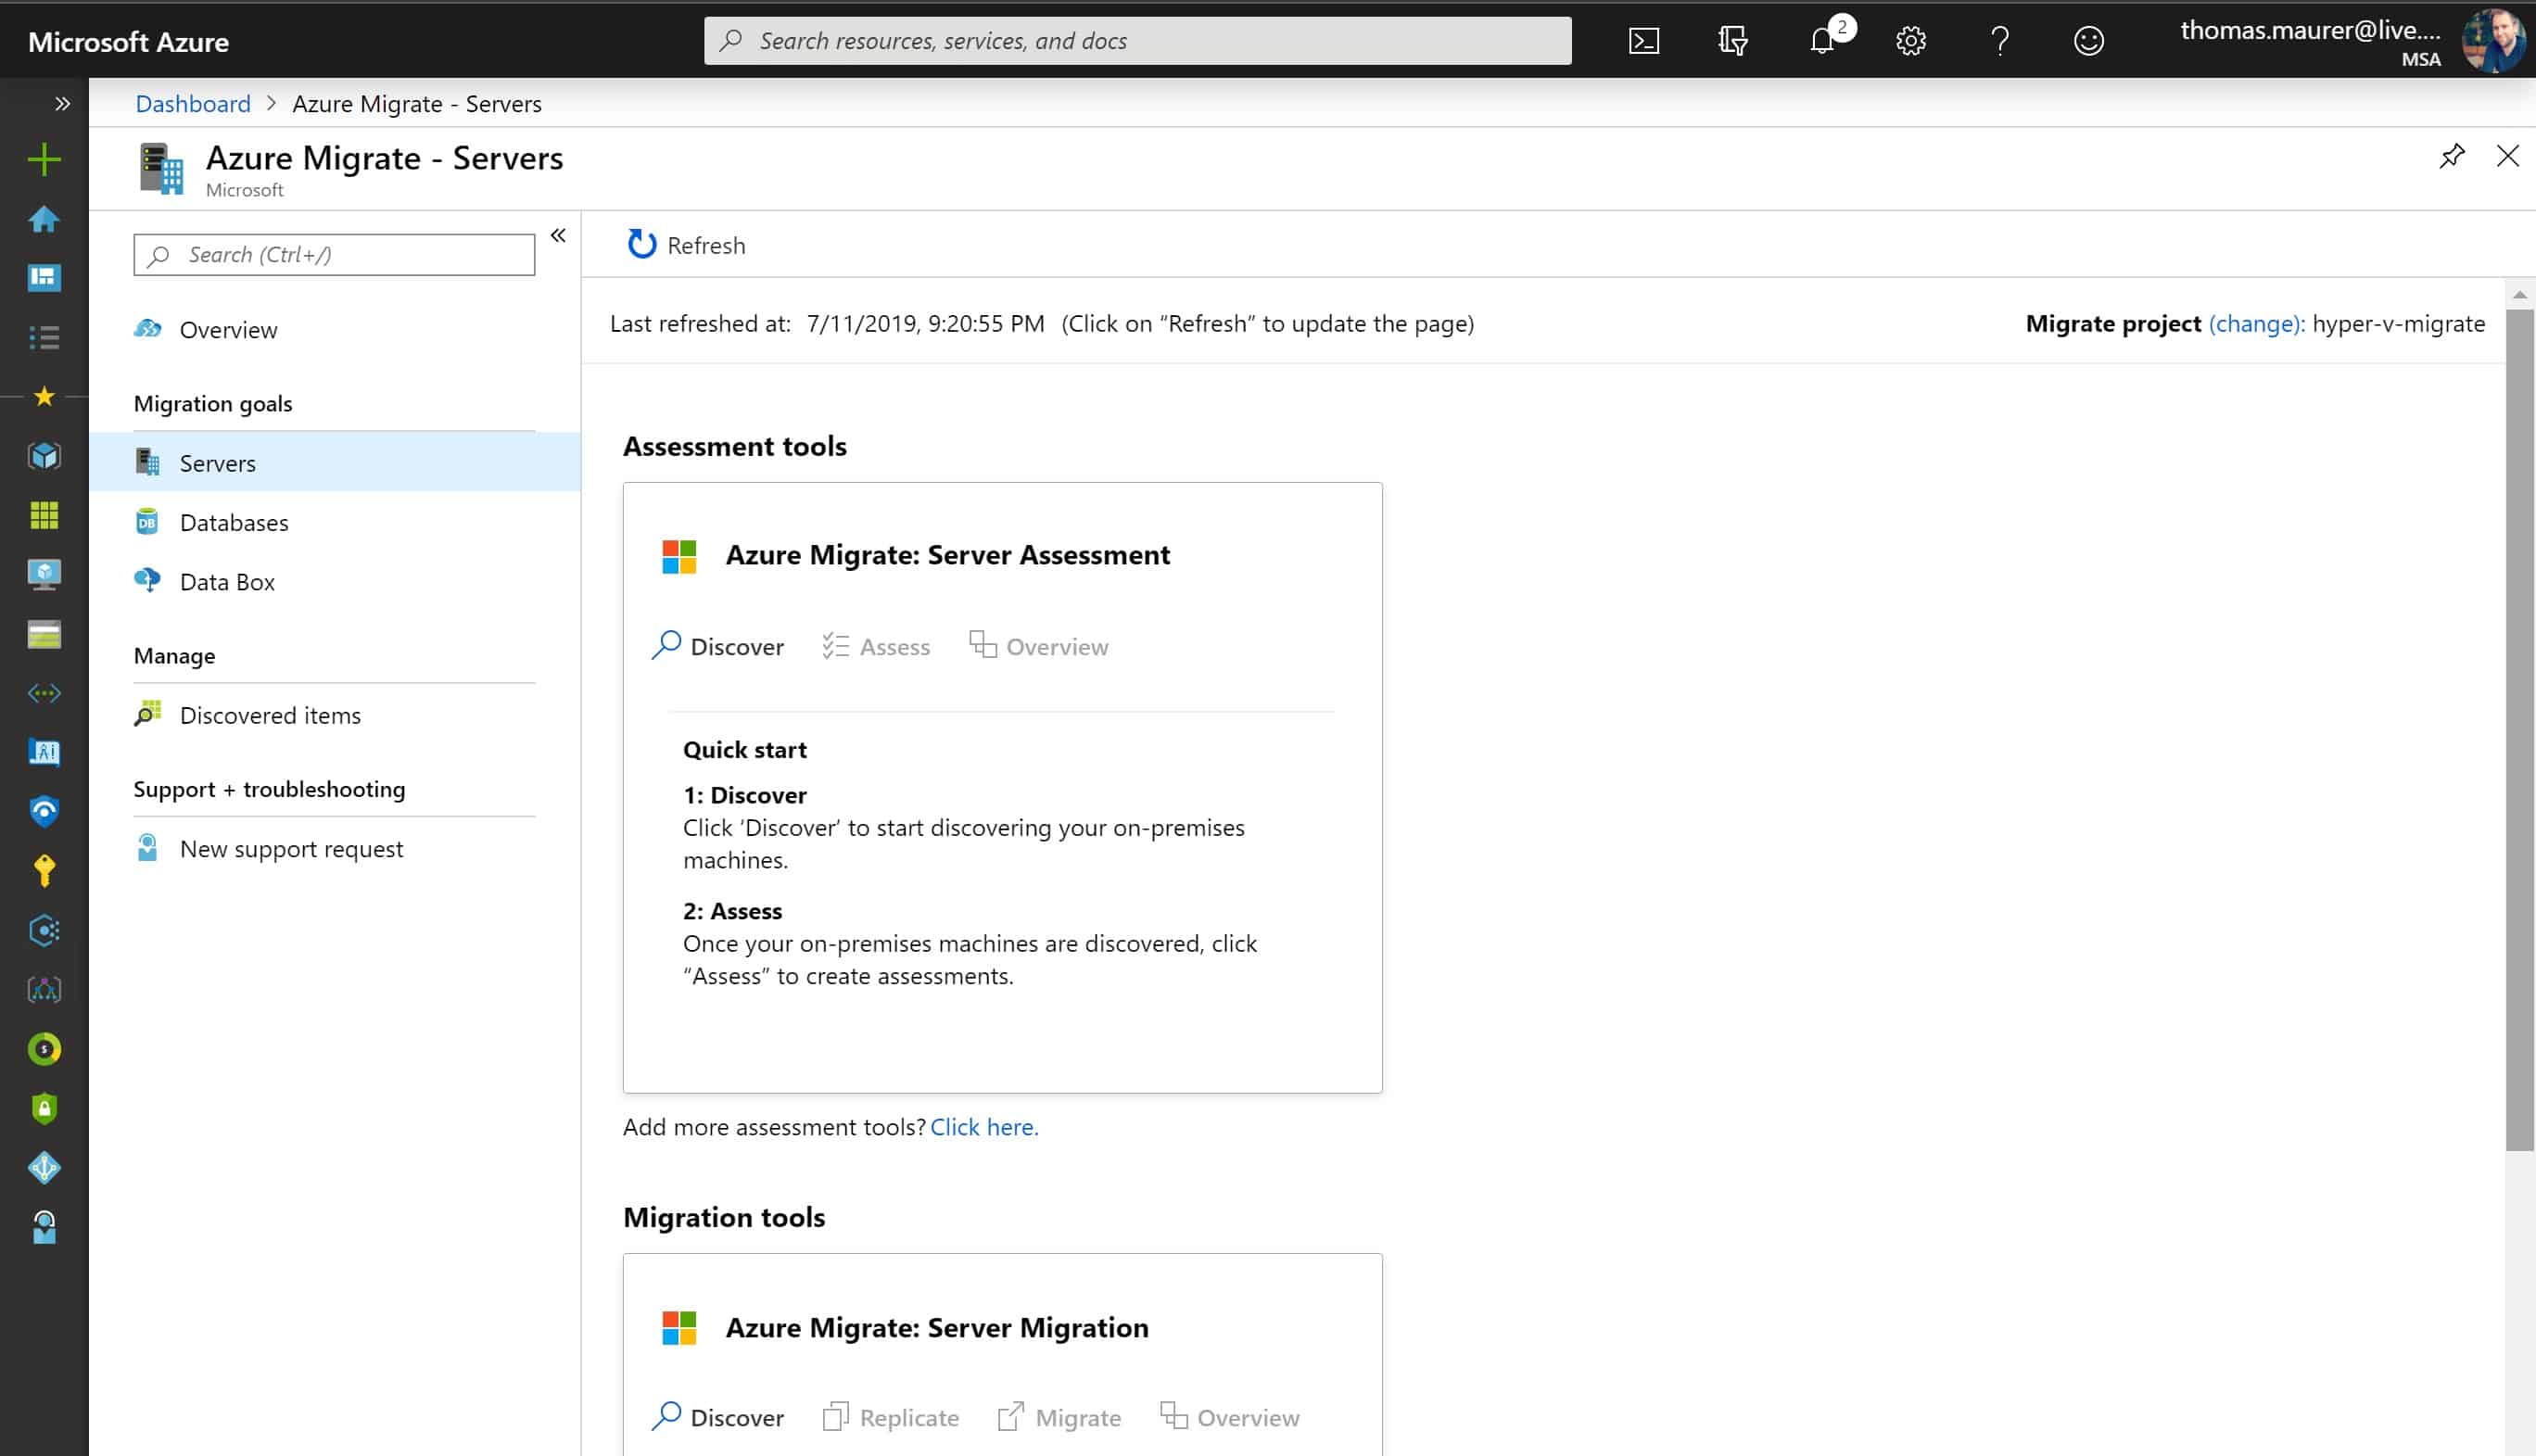
Azure Migrate Servers
Now you can start assessing your Hyper-V VMs.
Discover and assess Hyper-V VMs for migration
After we have set up the Azure Migrate project, we can now discover and assess the Hyper-V virtual machines for migration. First, you will need to download the Azure Migrate appliance form the Azure portal. Click on “Discover” and on the top with the question are your machines virtualized, select “Yes, with Hyper-V”. This will give you the download link to the VHD file with that you can create a new virtual machine on your Hyper-V server.
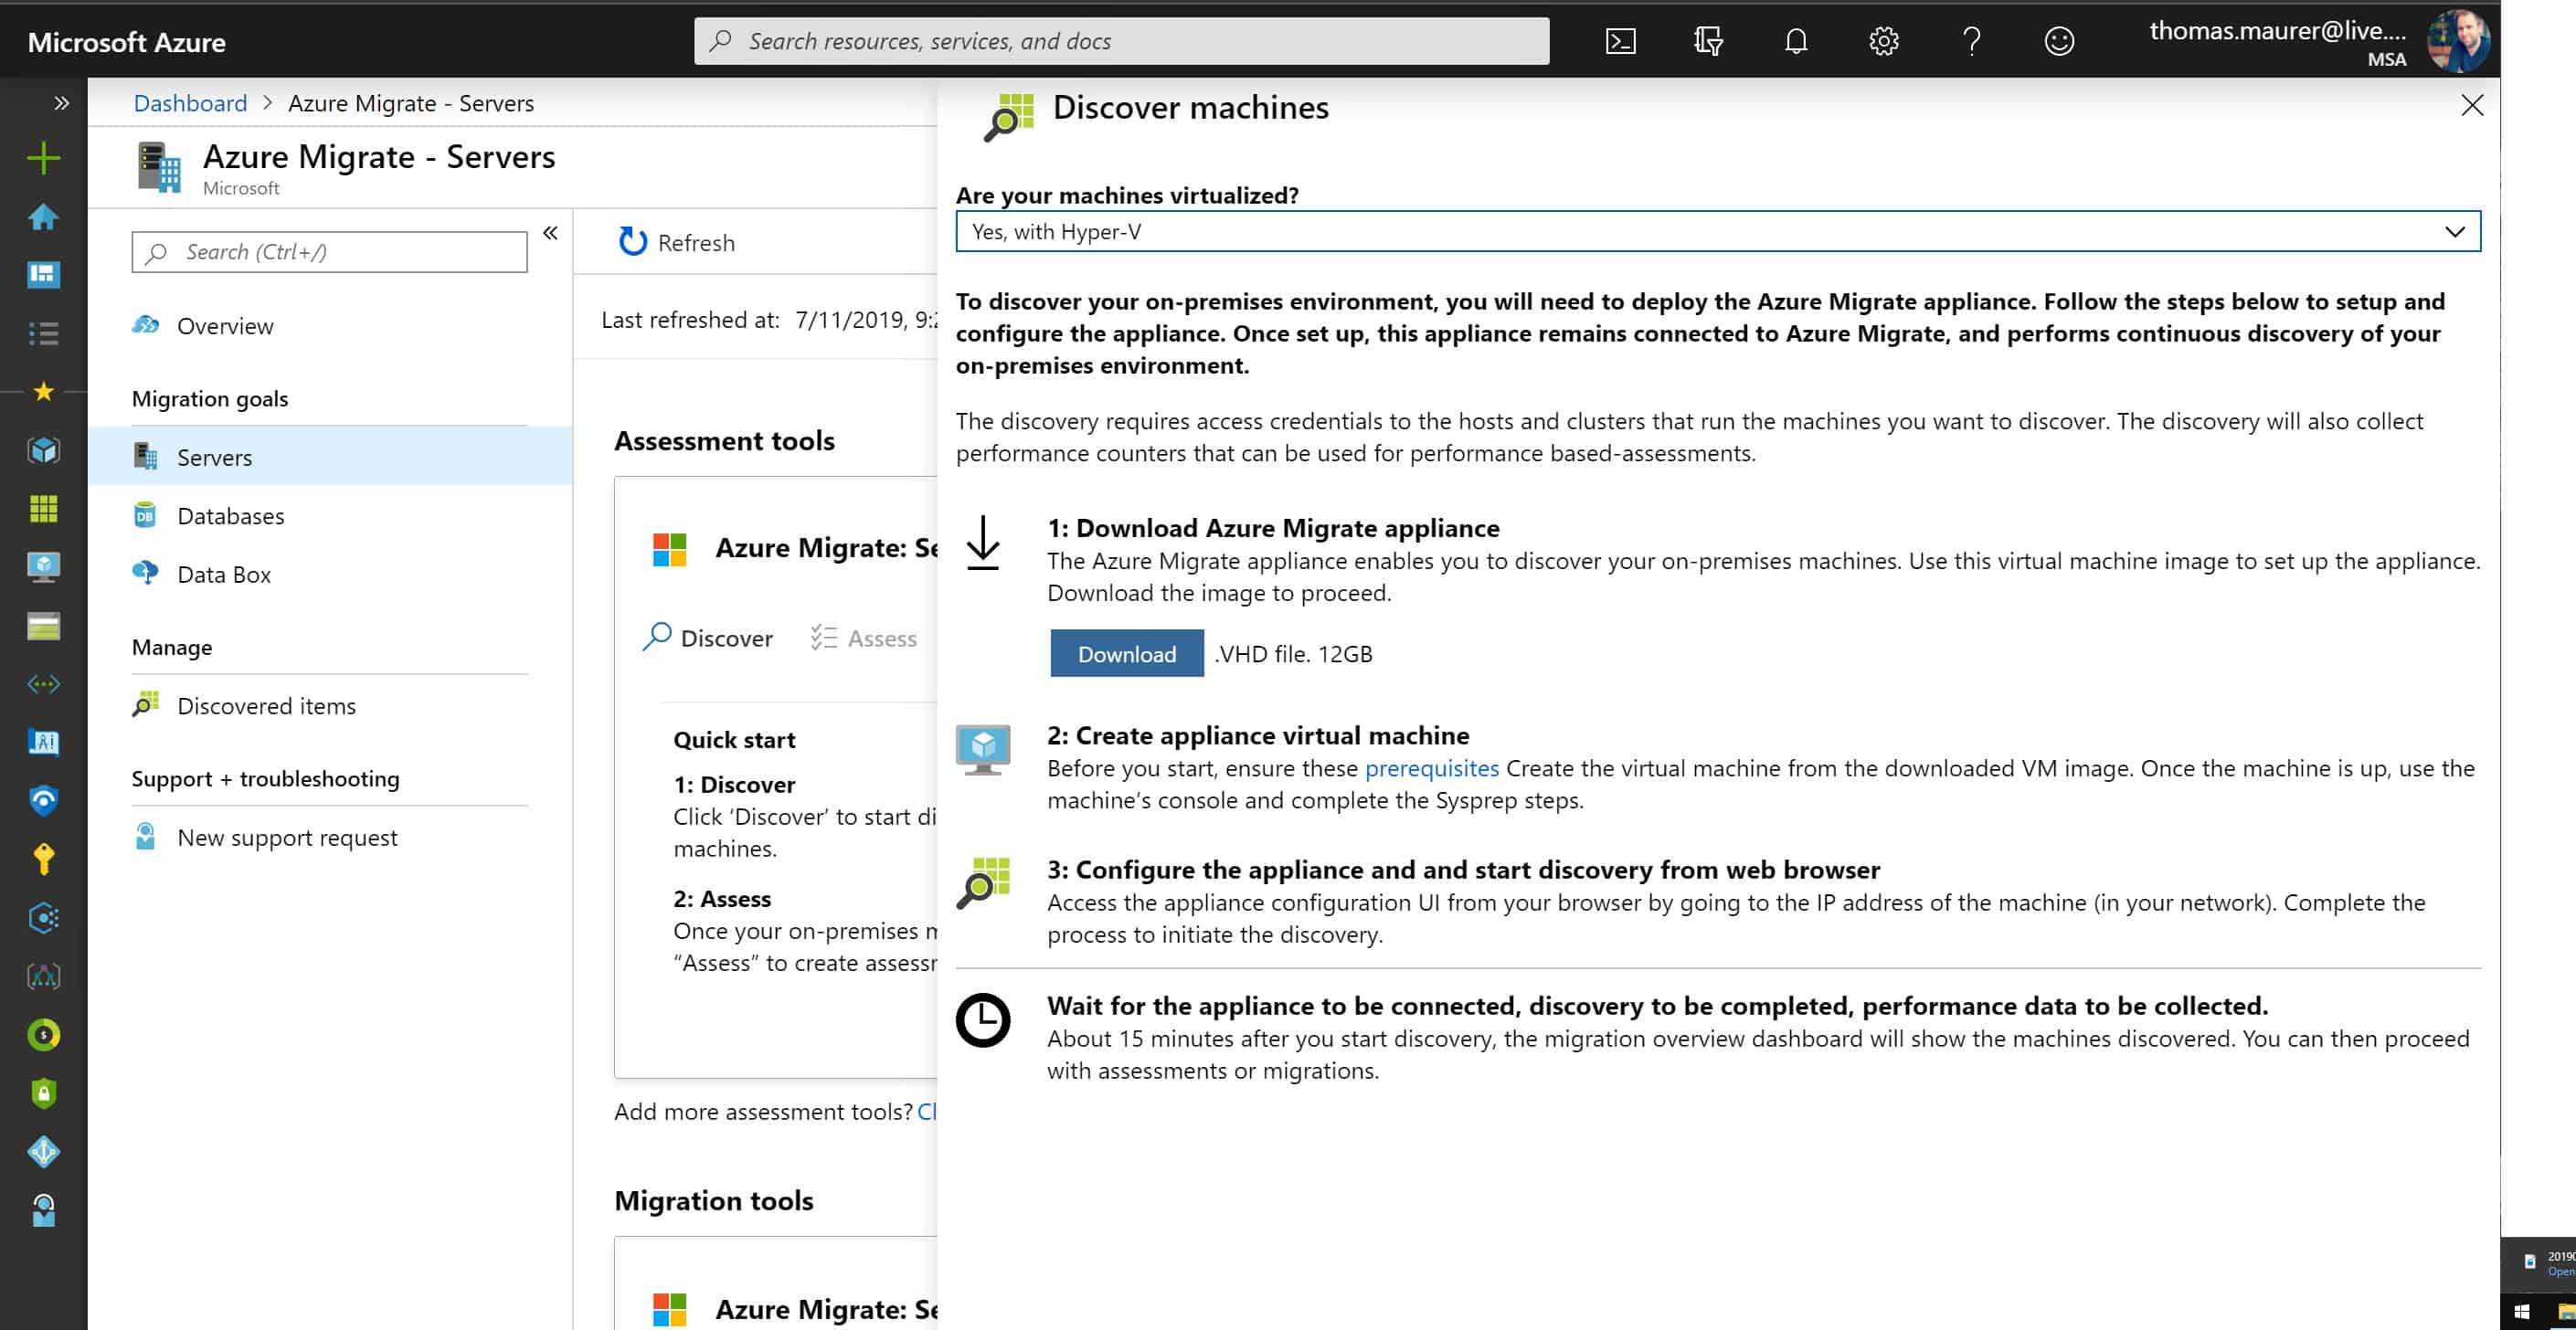
Download Azure Migrate appliance
After you have download the virtual machine, check the file hash, that it matches the original file. You can find the original file hash on Microsoft Docs, and you can check the file hash using PowerShell.
Get-FileHash -Path ./AzureMigrateAppliance_v1.19.06.27.zip -Algorithm SHA256
Set up and register the appliance
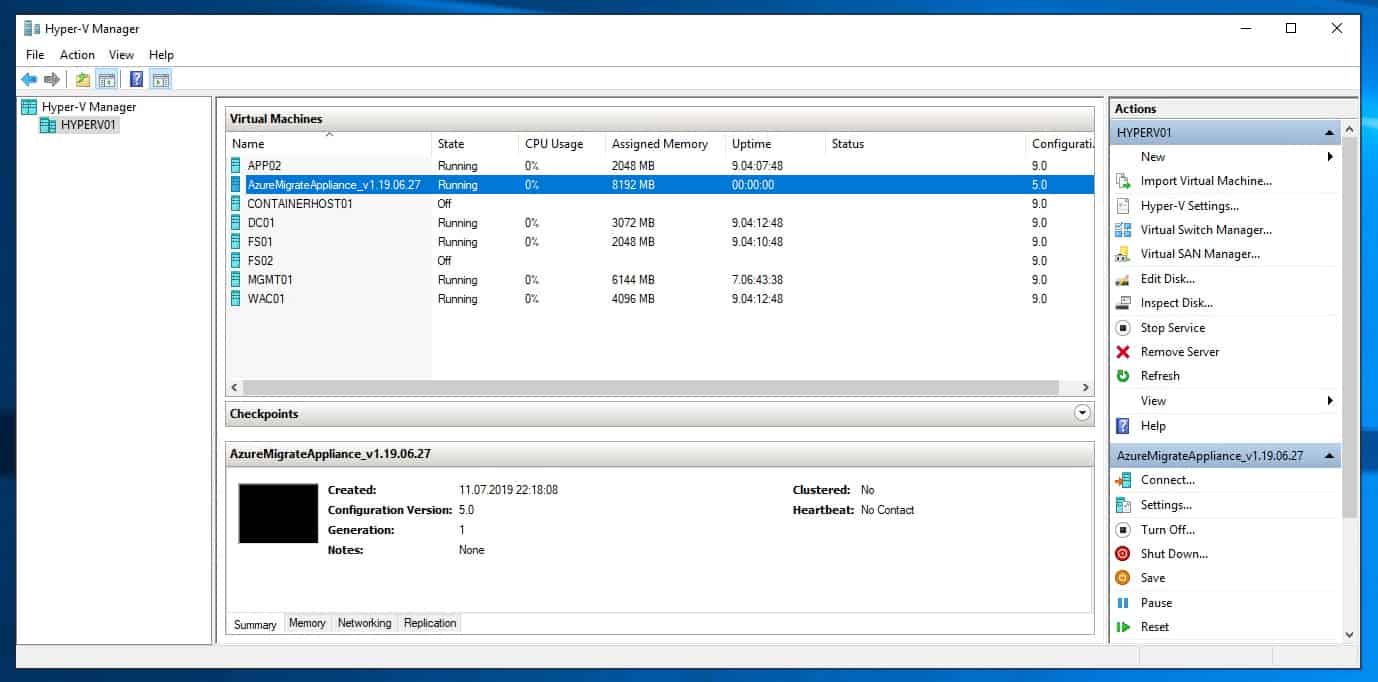
Hyper-V Azure Migrate Appliance
You will need to import a new Hyper-V using this existing VHD file and set the VM switch. You can follow the step-by-step guide here. After your appliance virtual machine is running, you can open a browser on a computer which can connect to the appliance VM, and open the URL of the appliance web app: https://appliancename-or-IPAddress:44368. Now you can configure the appliance, like setting connection details, time sync, and install updates.
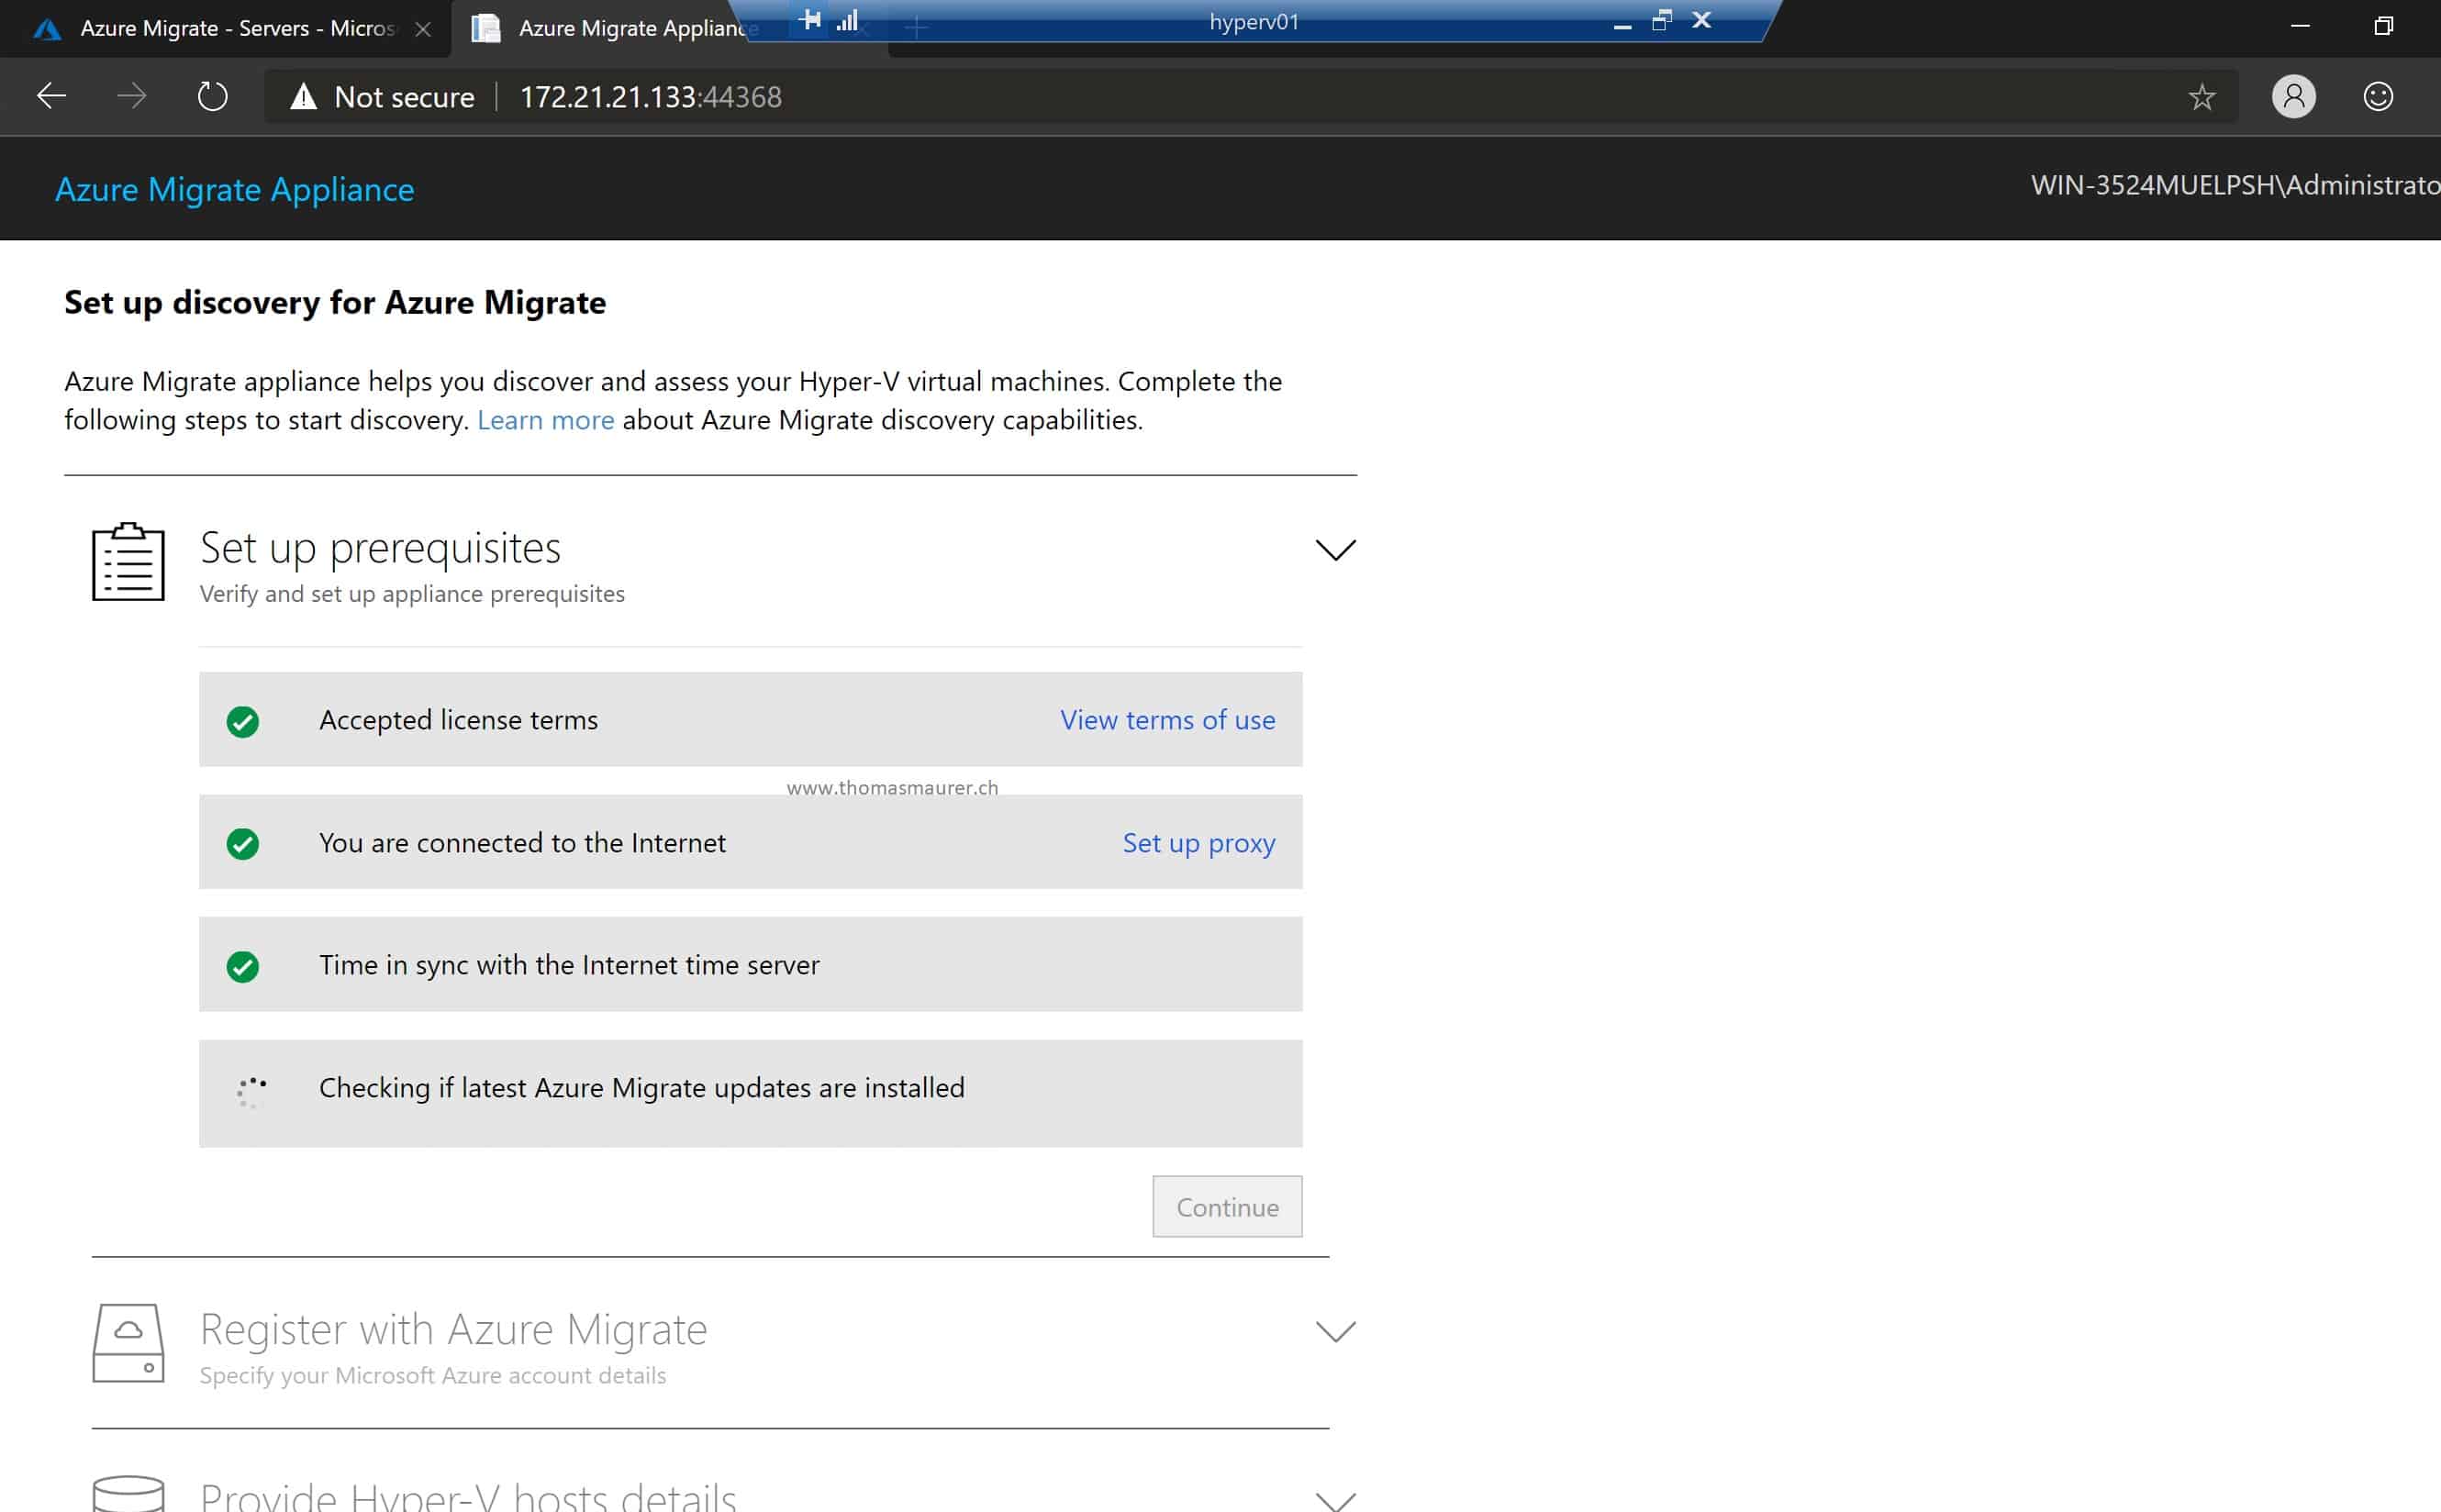
Setting up Azure Migrate Appliance
As a next step, you will need to register the appliance with Azure Migrate.
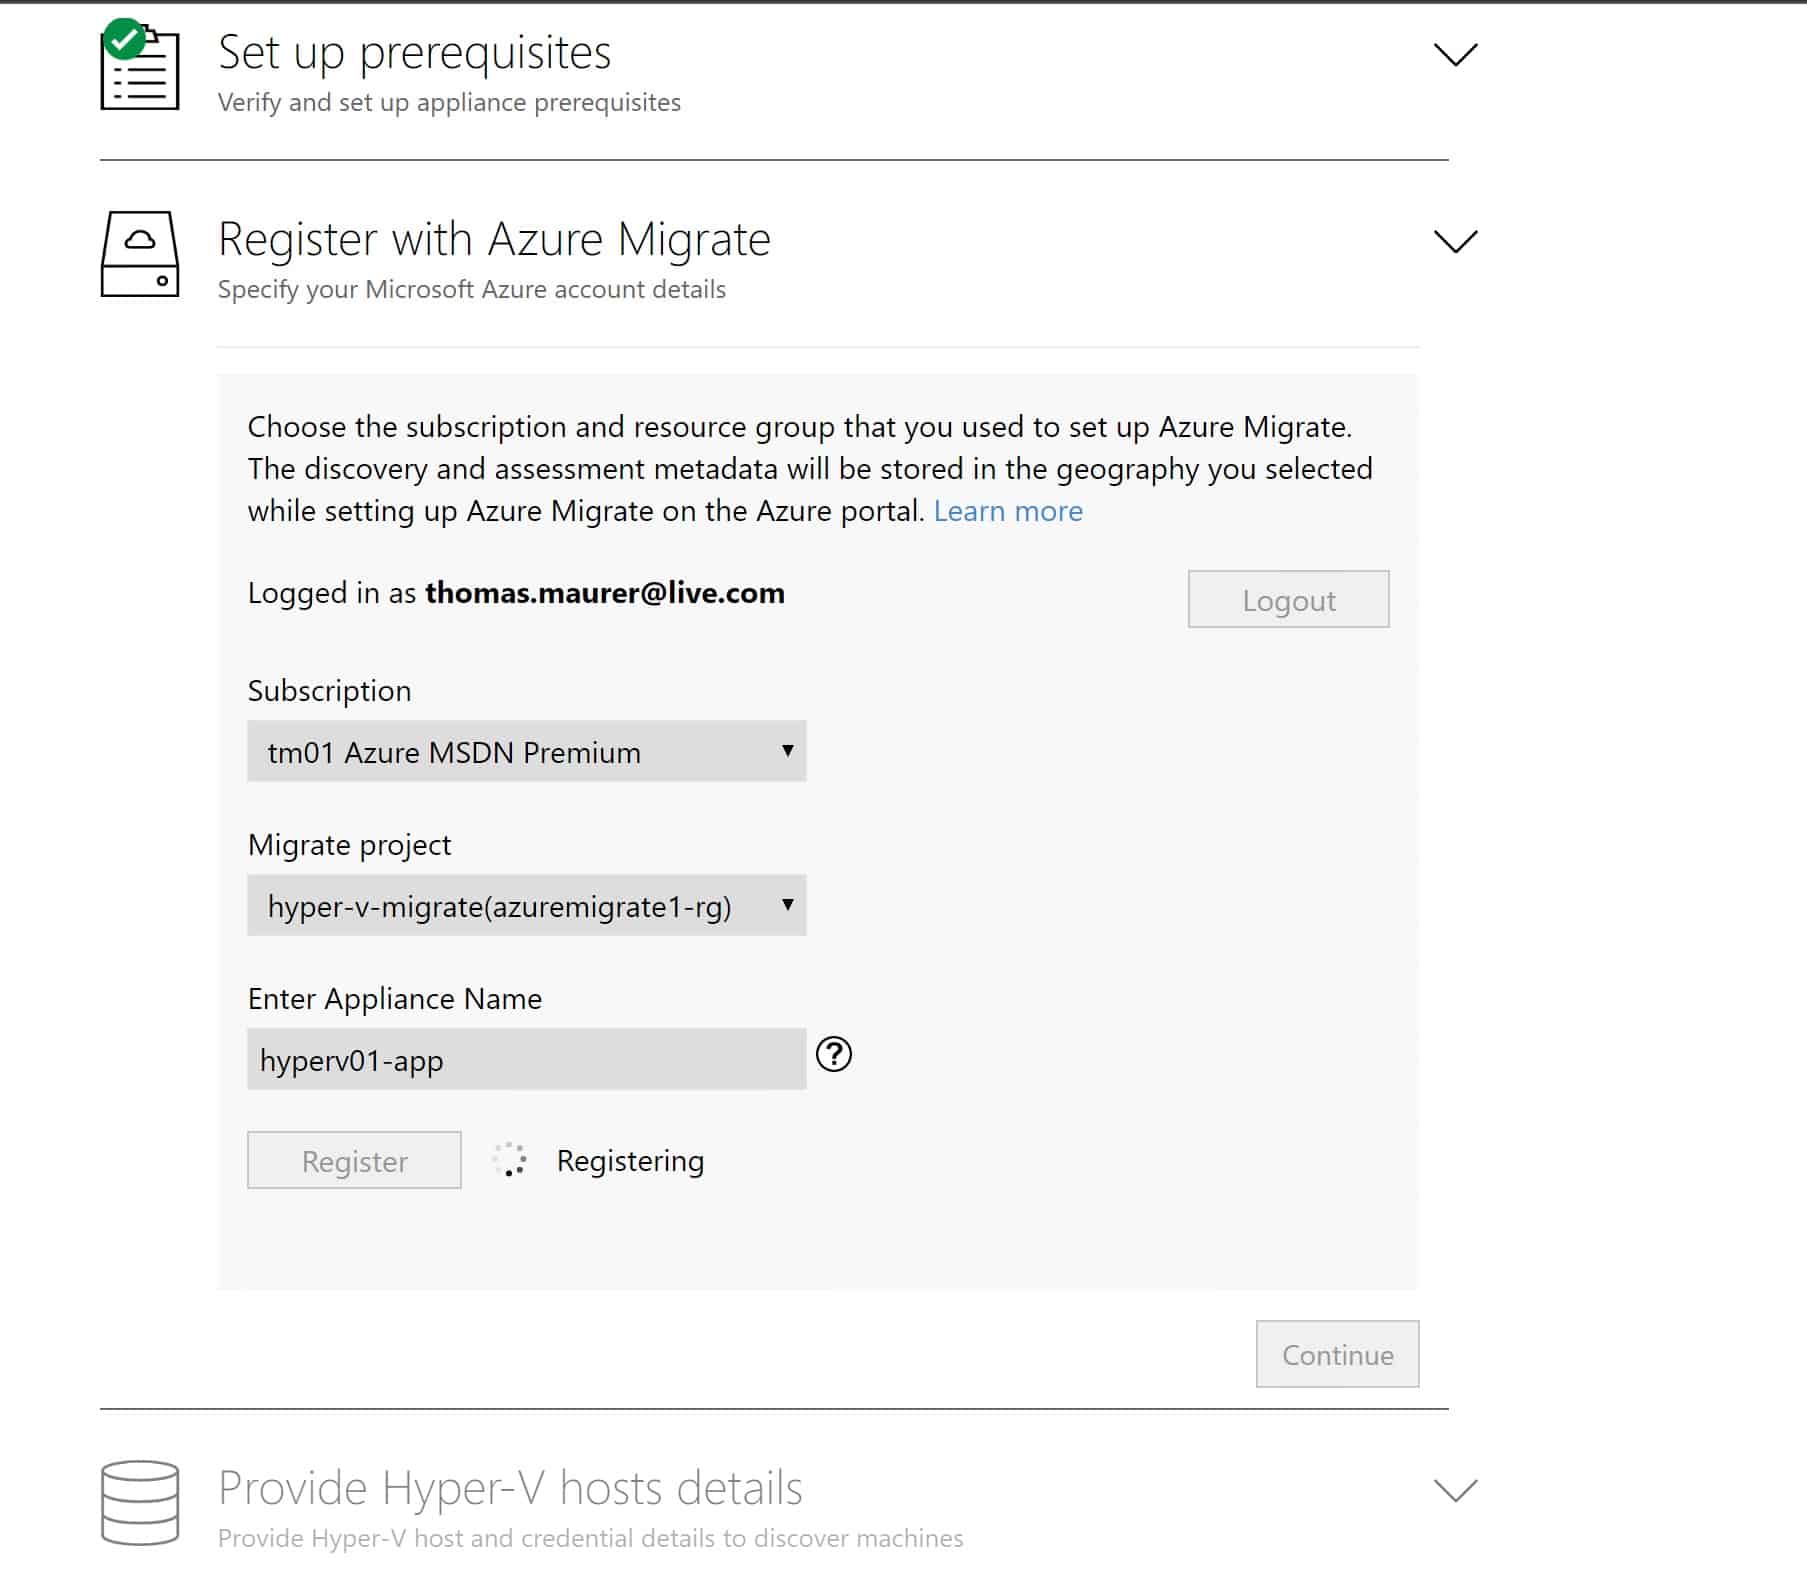
Register with Azure Migrate
Start continuous discovery
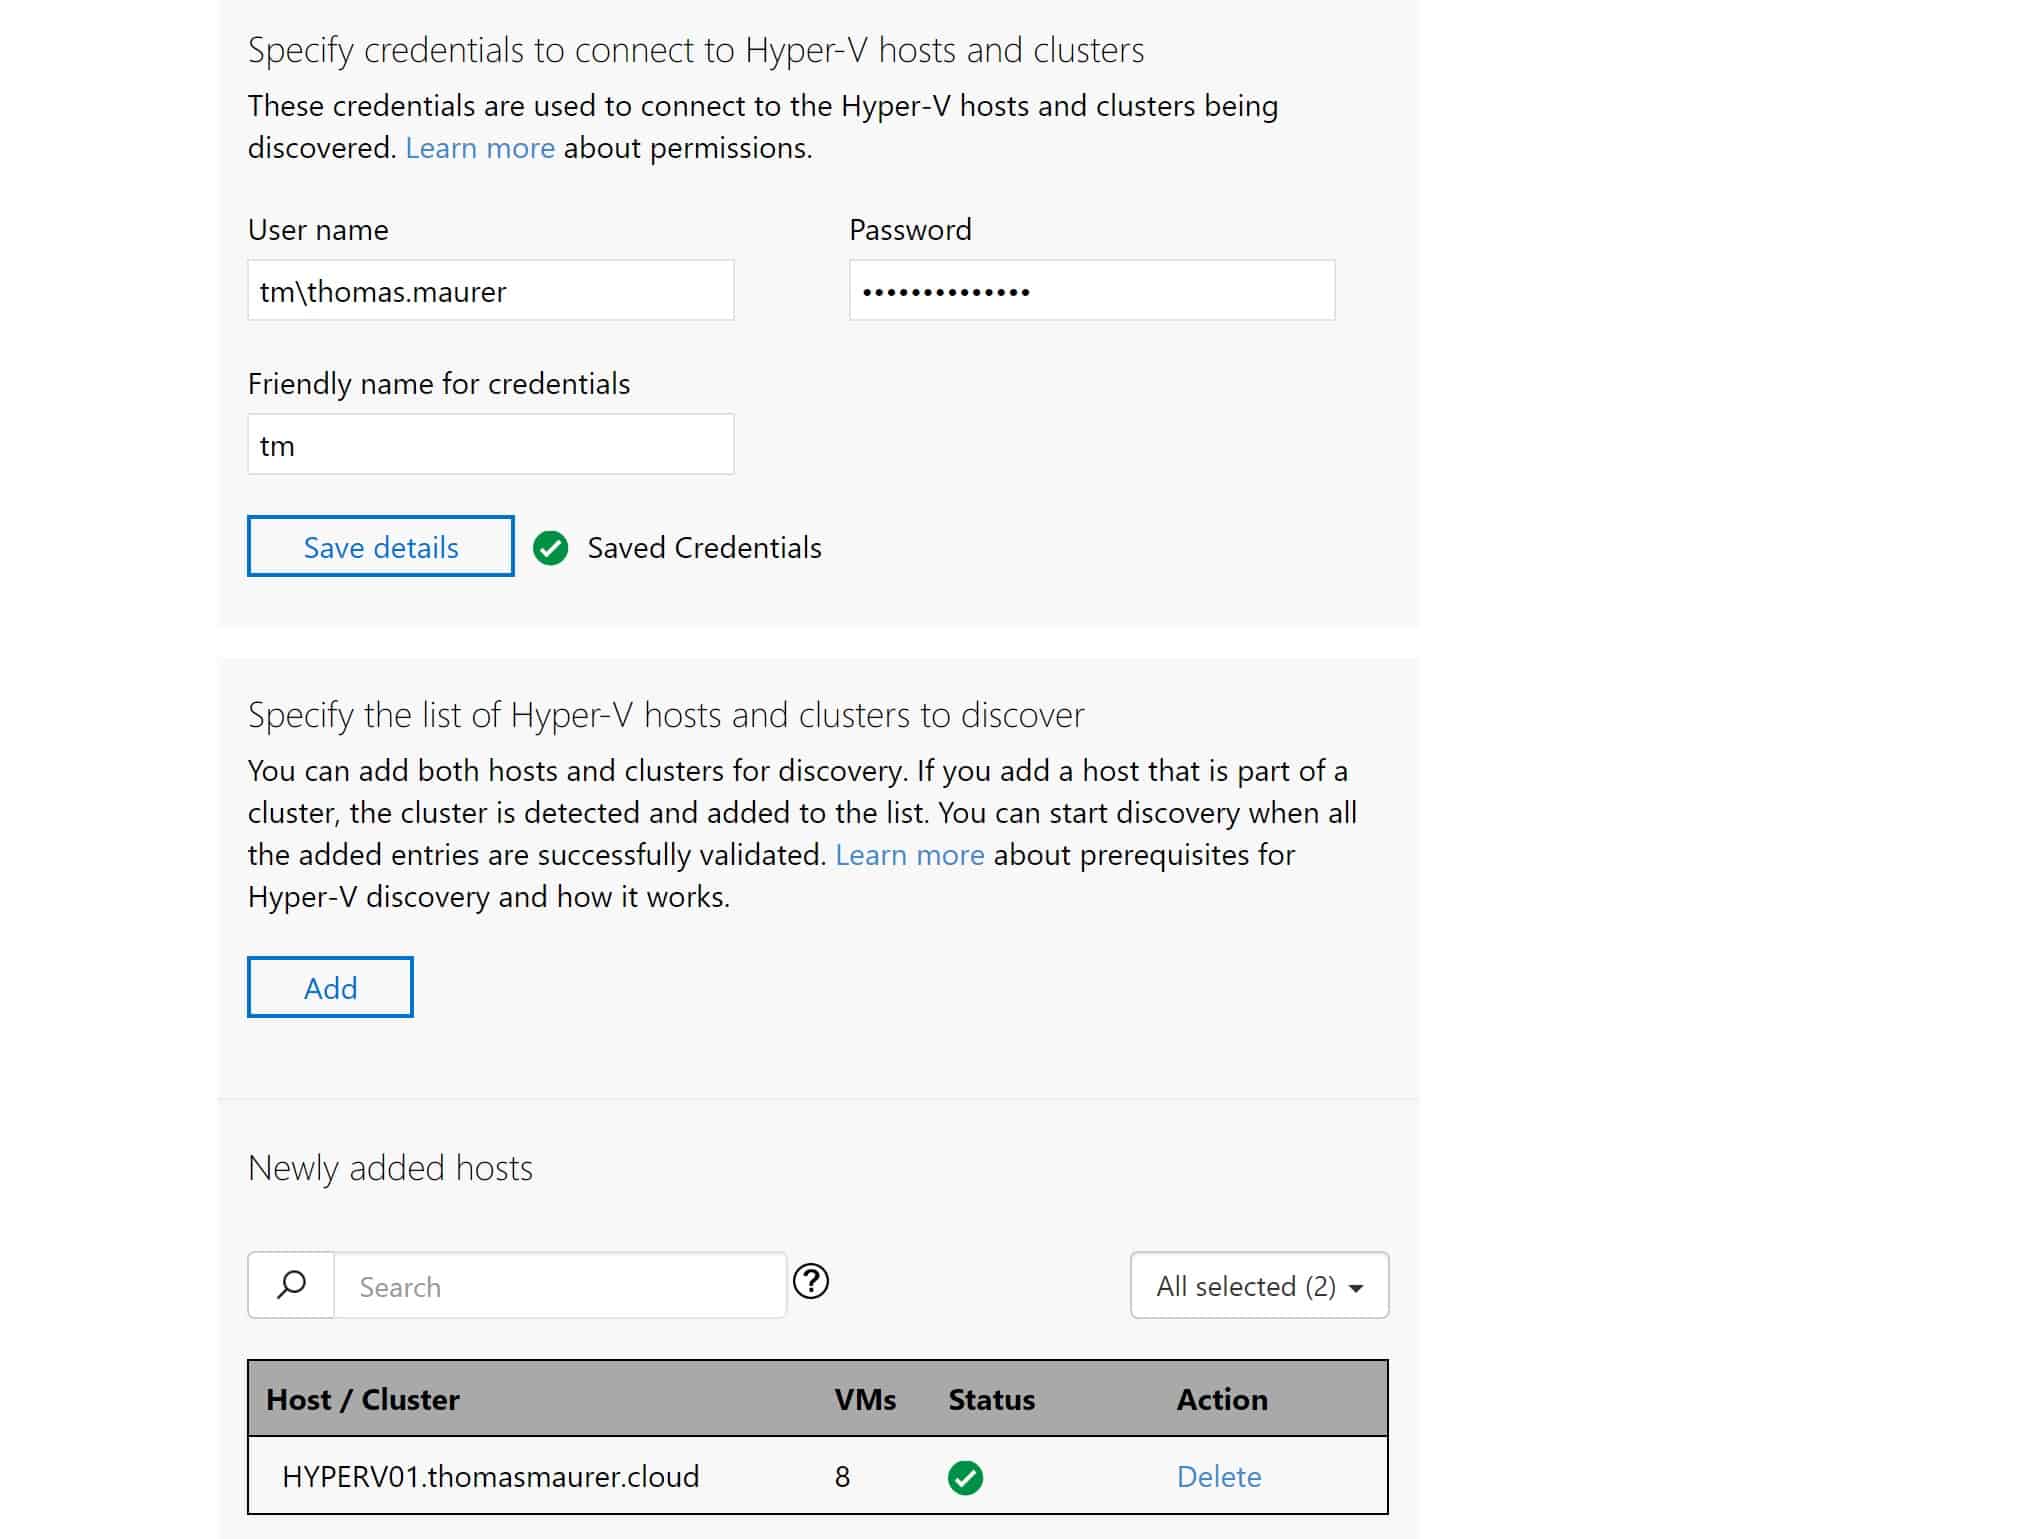
Assess Hyper-V Host
You can now set up and configure continuous discovery by connecting the appliance to Hyper-V hosts or clusters and start VM discovery. The appliance will begin collecting and discovering virtual machines. It can take up to 15 minutes until the discovered VMs show up in the Azure portal. If you want to use performance data in your assessment, we recommend that you create a performance-based assessment after 24-hours or more.
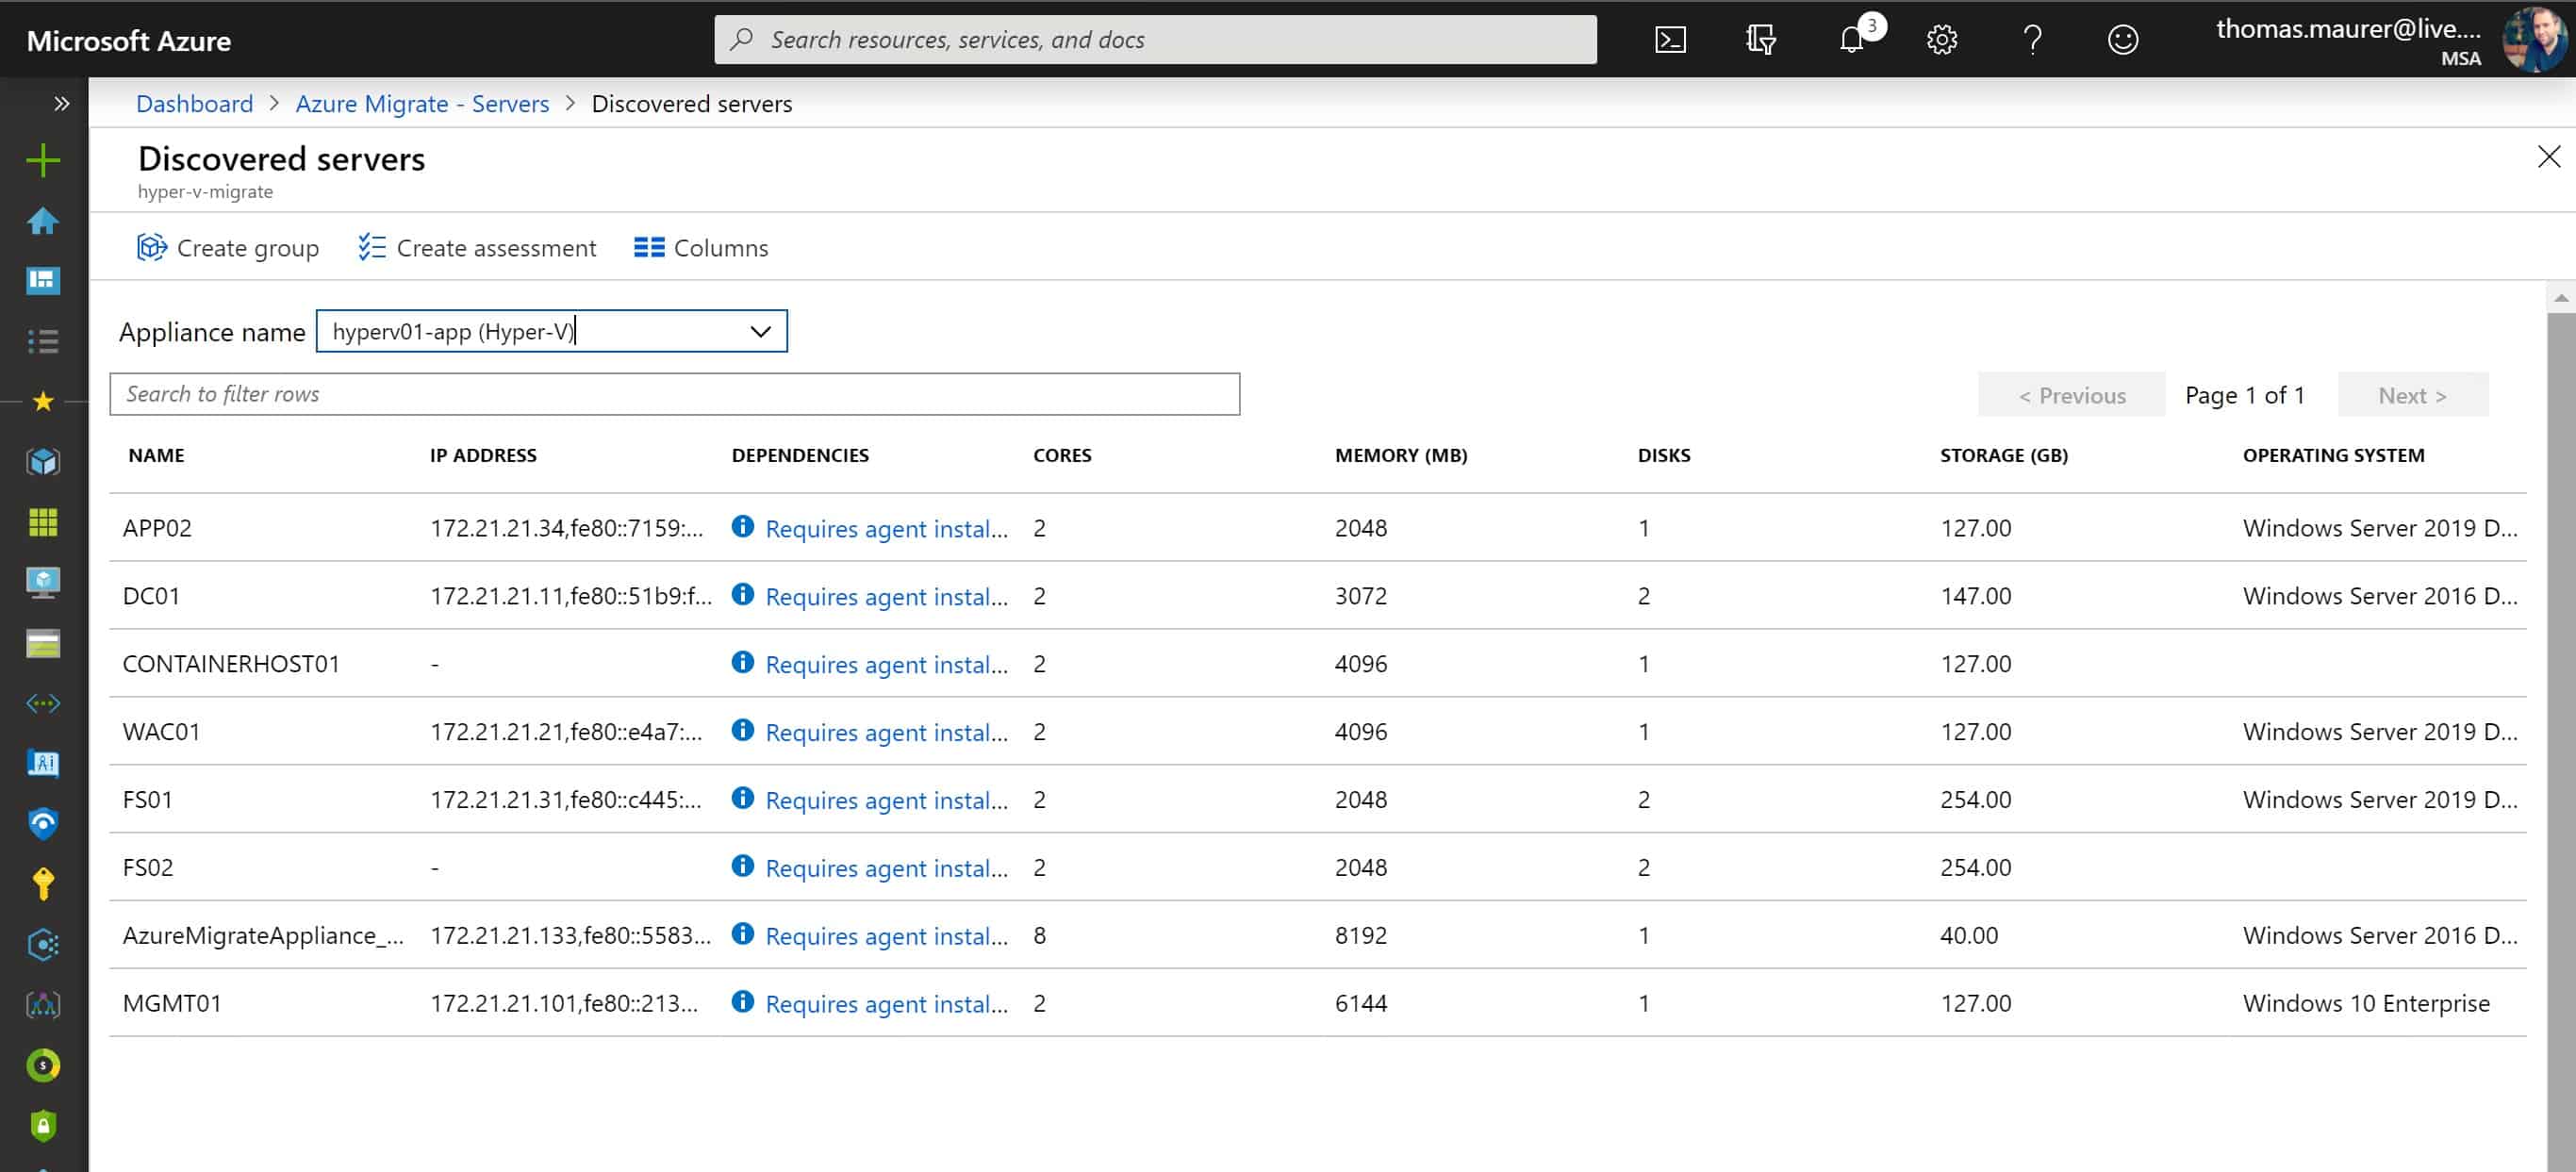
Discovered servers Azure Portal
Create and review an assessment
After the servers have been discovered, you can now create a new assessment for the specific virtual machines you want to assess.
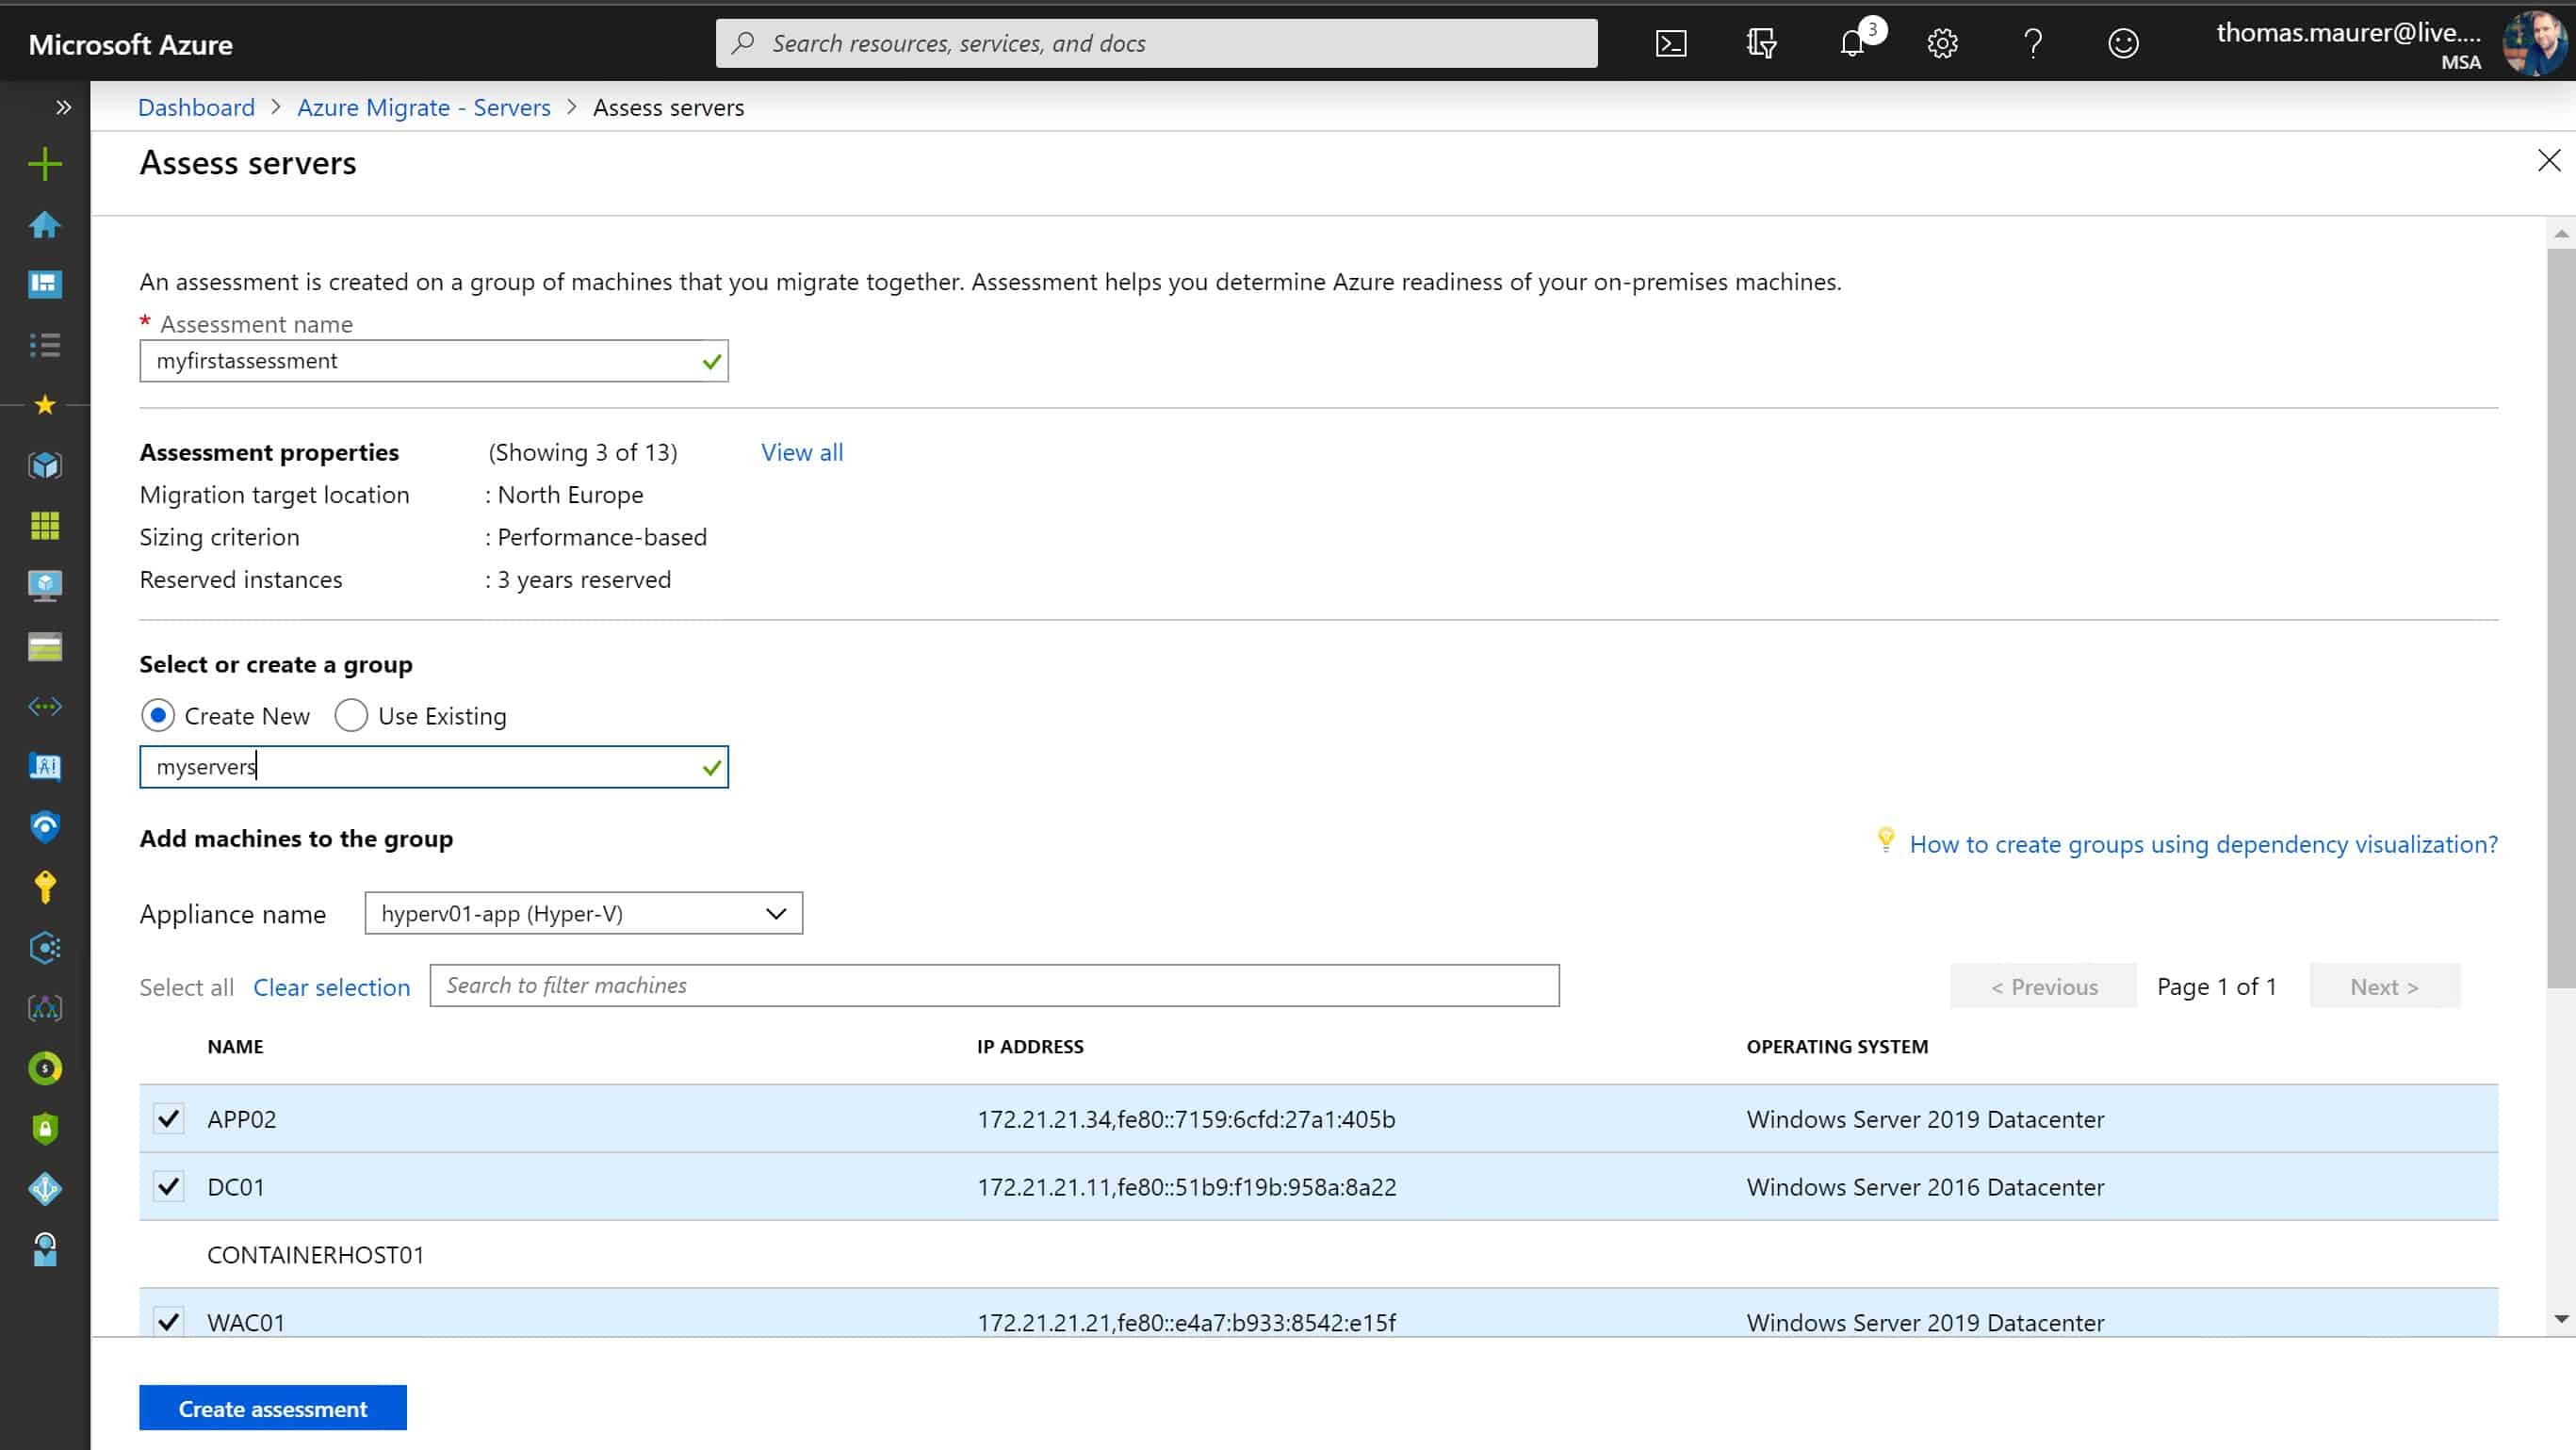
Assess Hyper-V VMs
After the assessment is done, you will see a report which will show you the Azure readiness, monthly cost estimation for compute and storage.
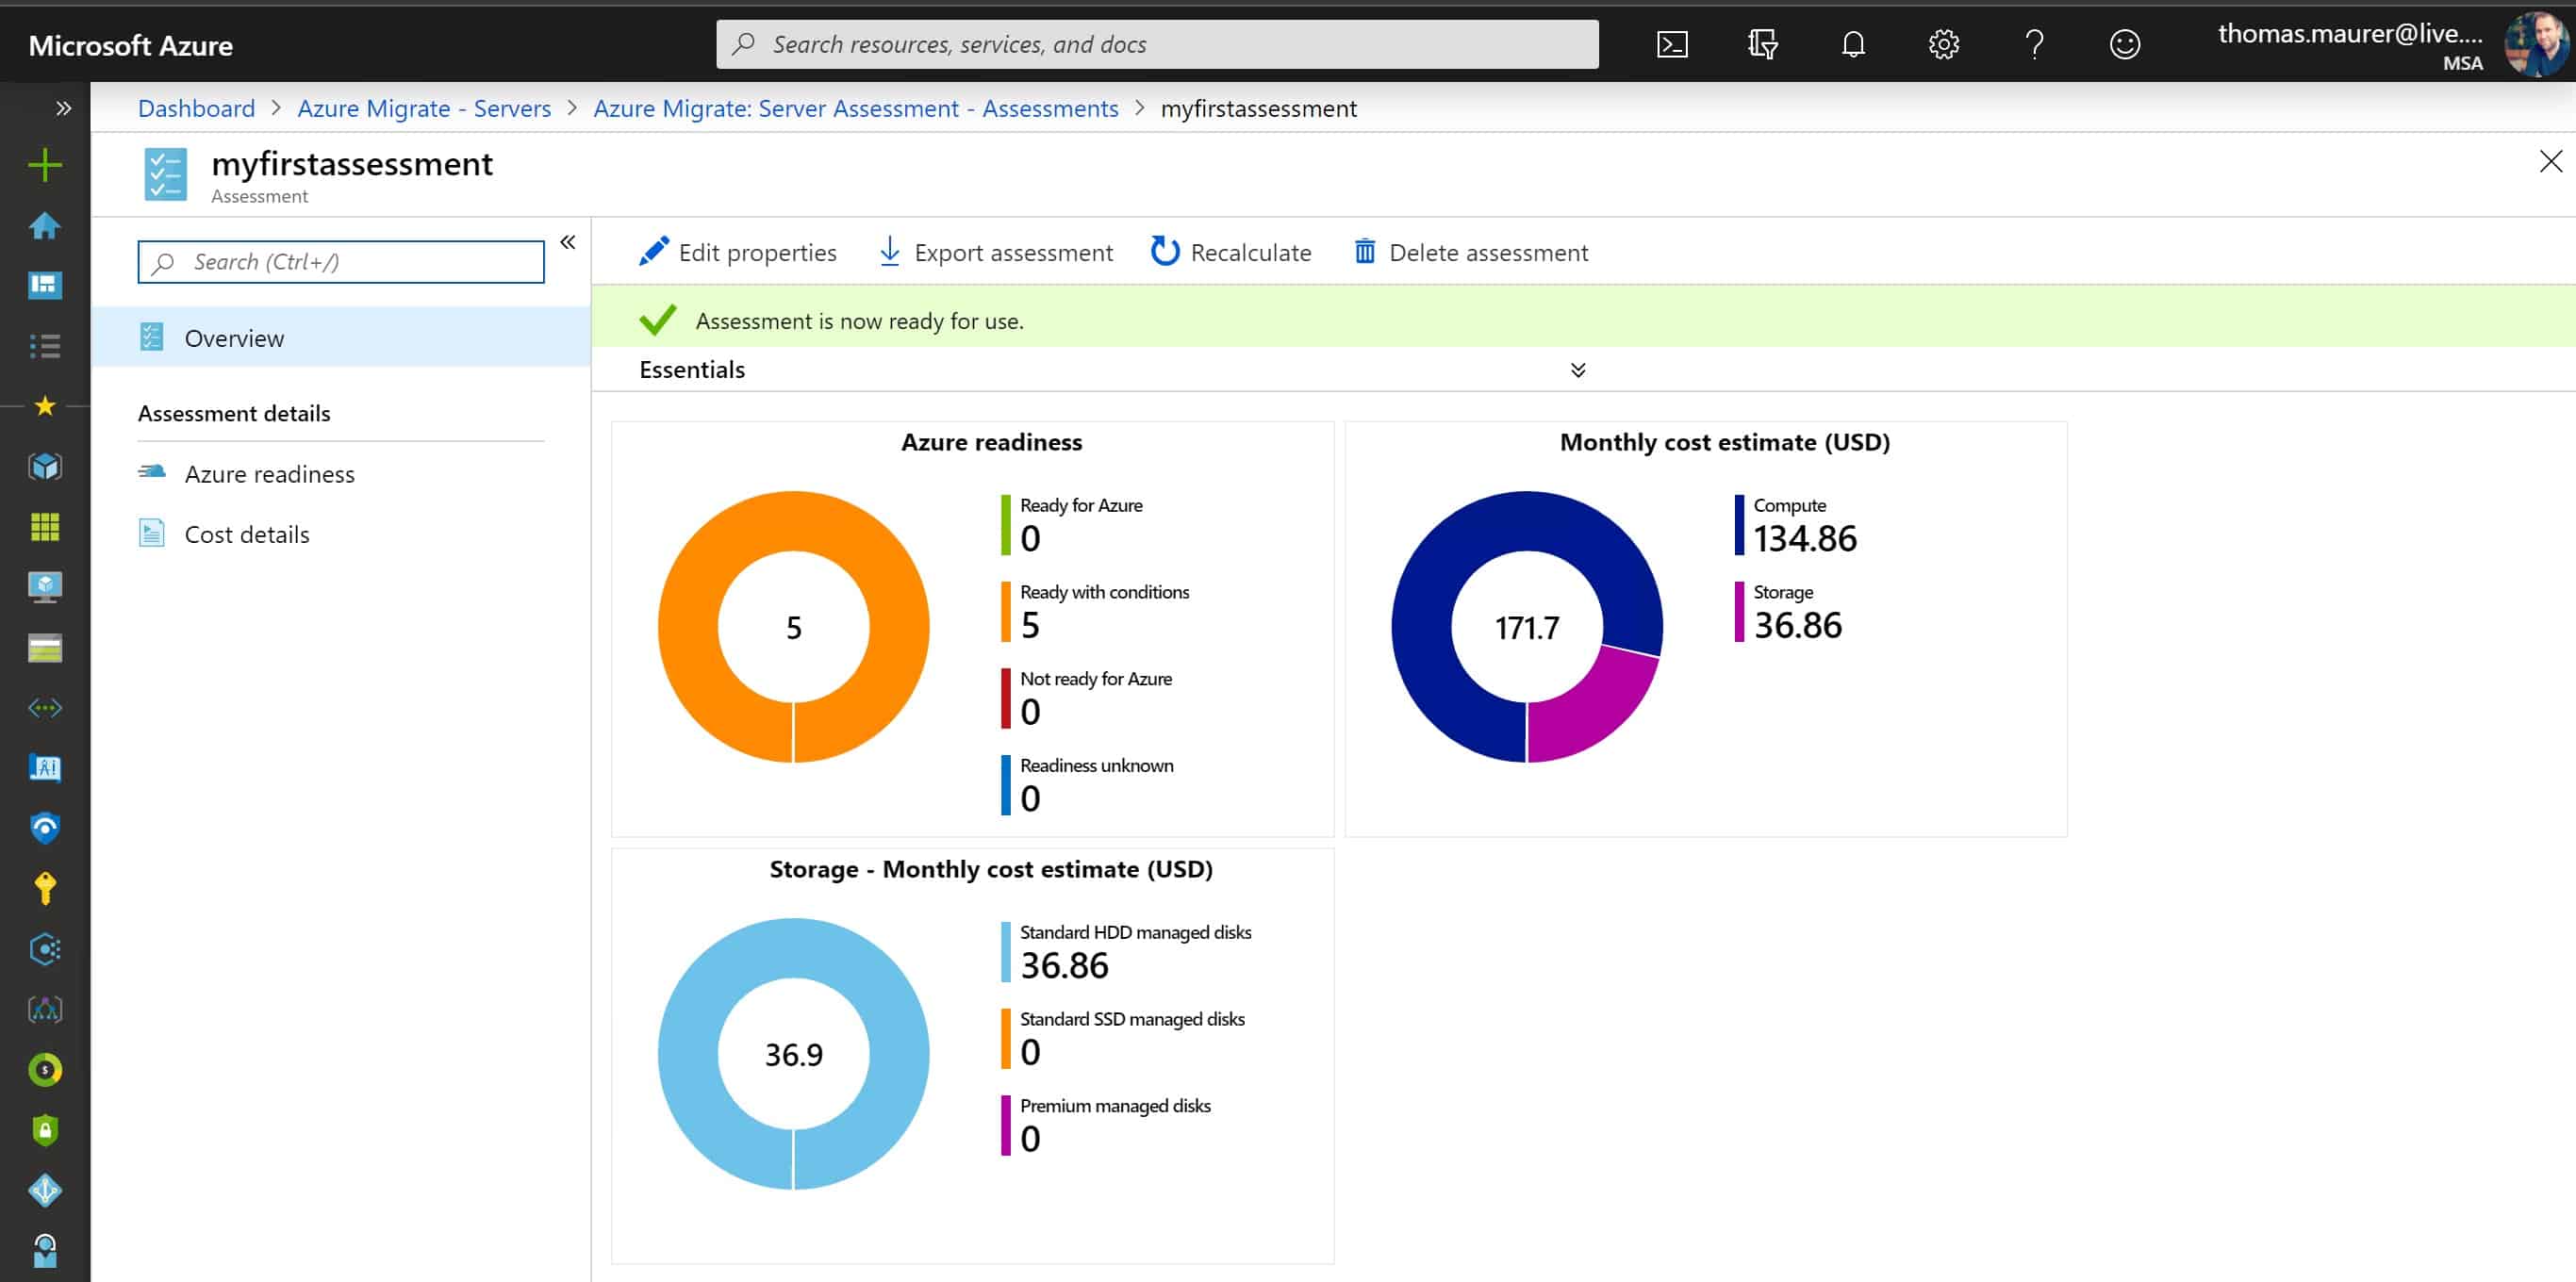
Azure Migrate Assessment
The report will provide you with details info about the readiness and will let you know about the VM status:
- Ready for Azure: Azure Migrate recommends a VM size and cost estimates for VMs in the assessment.
- Ready with conditions: Shows issues and suggested remediation.
- Not ready for Azure: Shows issues and suggested remediation.
- Readiness unknown: Used when Azure Migrate can’t assess readiness due to data availability issues.

Cost details
It will also give you more information on the cost of running VMs in Azure:
- Cost estimates are based on the size recommendations for a machine, and its disks and properties. If you want to have more accurate performance data, create the report after 24-hours or more.
- Estimated monthly costs for compute and storage are shown.
- The cost estimation is for running the on-premises VMs as IaaS VMs. Azure Migrate Server Assessment doesn’t consider PaaS or SaaS costs.
If you want to know more about the migration Assessment, check out the Microsoft Docs.
Migrate Hyper-V VMs using Azure Migrate
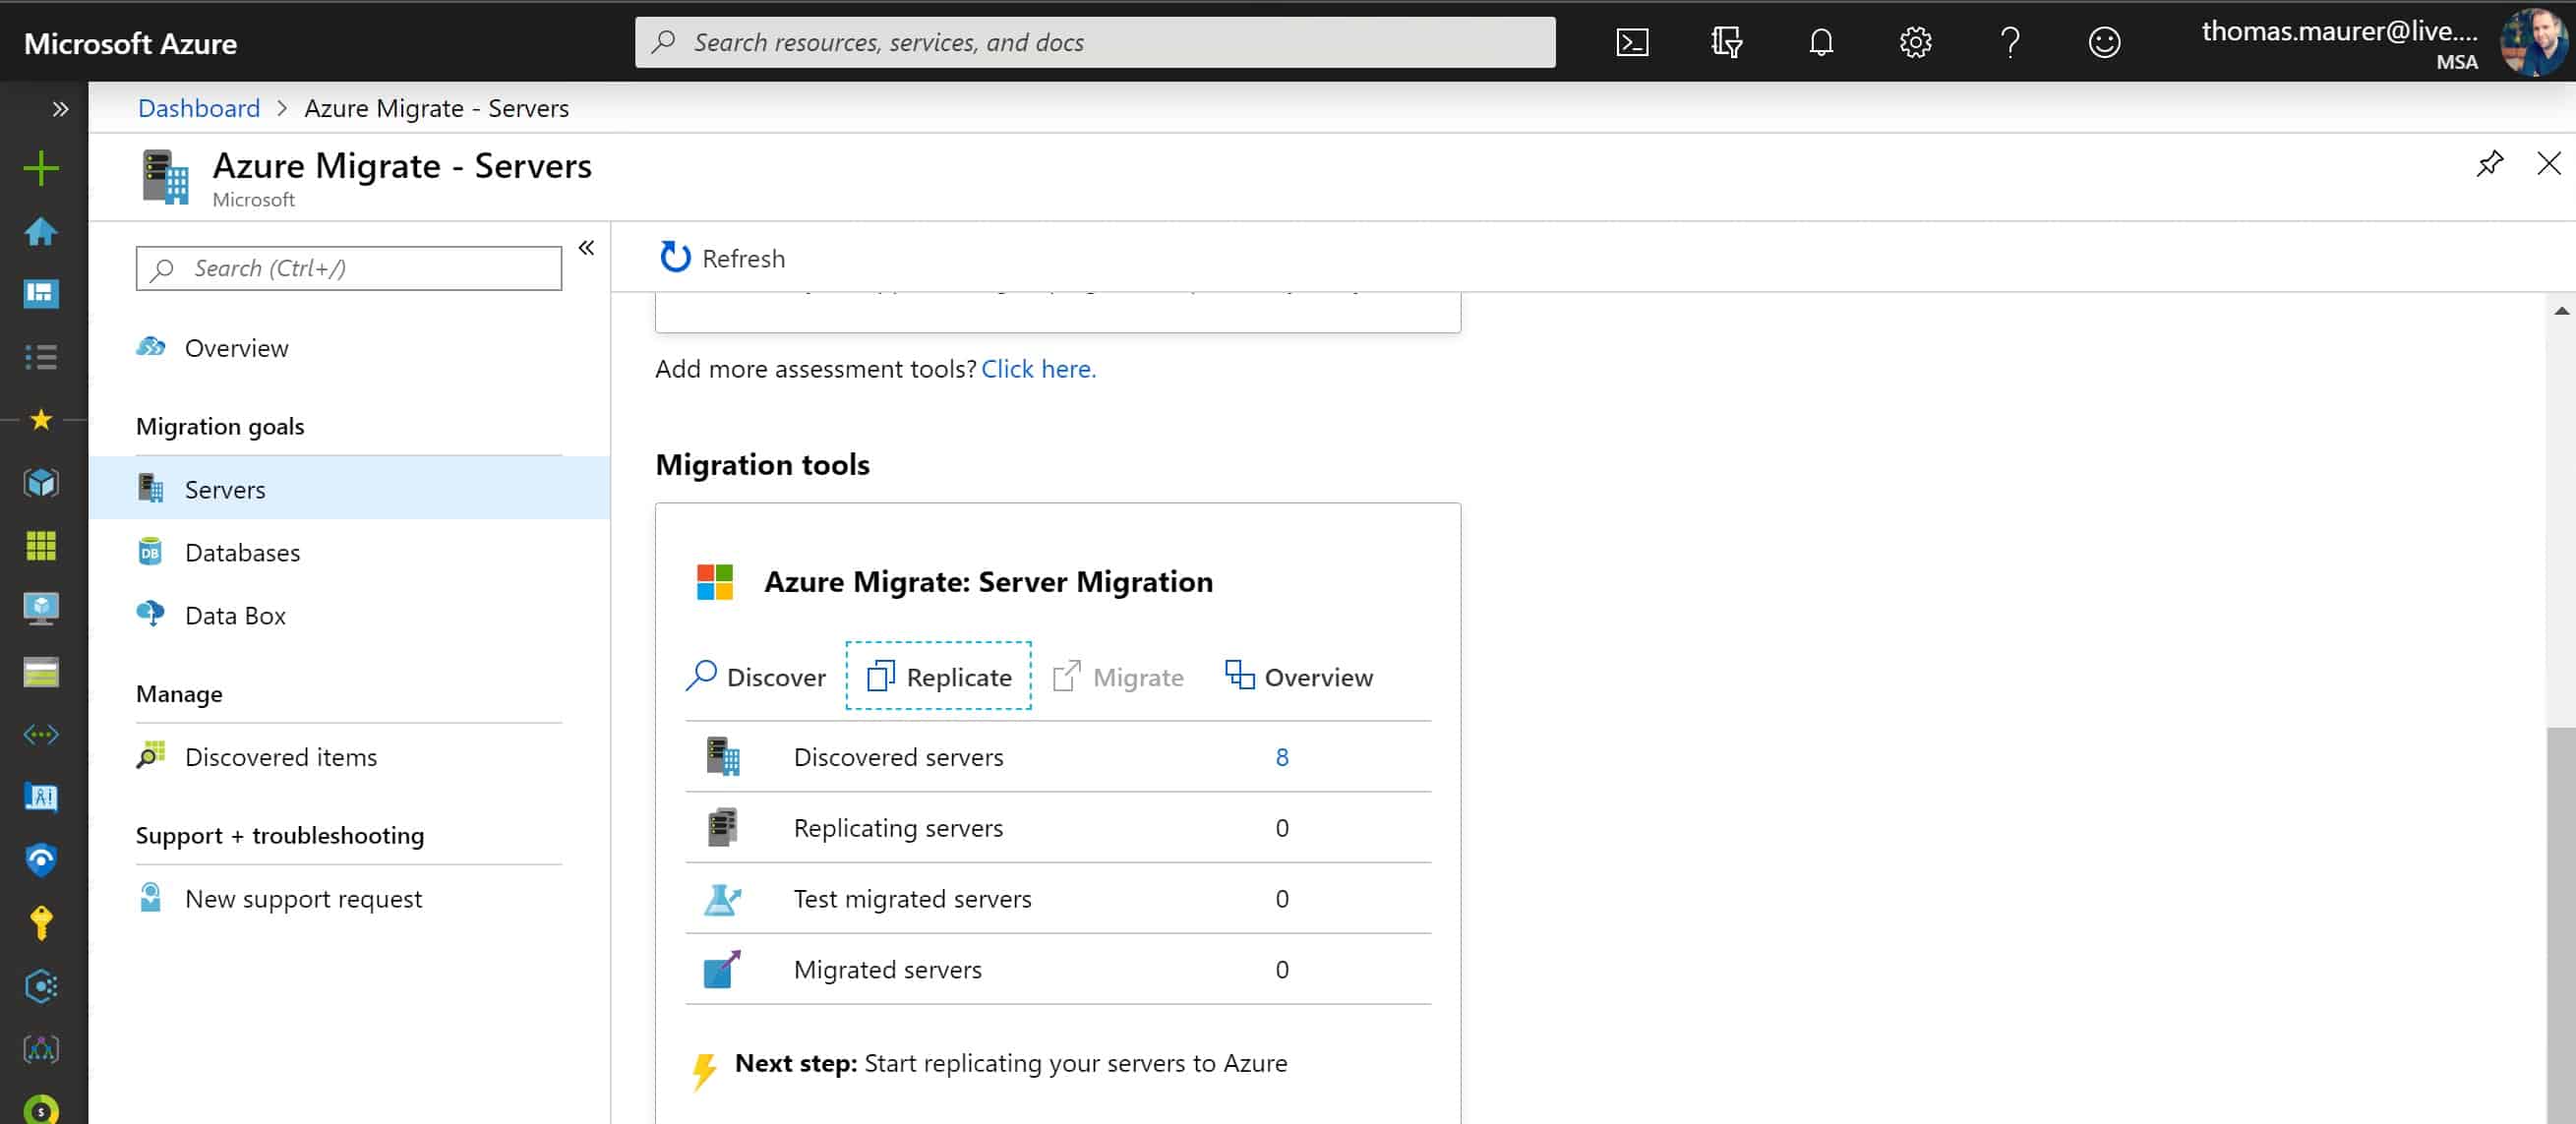
Azure Hyper-V Server Migration
After you have done your assessment and you know which Hyper-V virtual machines you want to migrate, you can now start with the migration process.
Set up the Azure Migrate appliance and Hyper-V Hosts
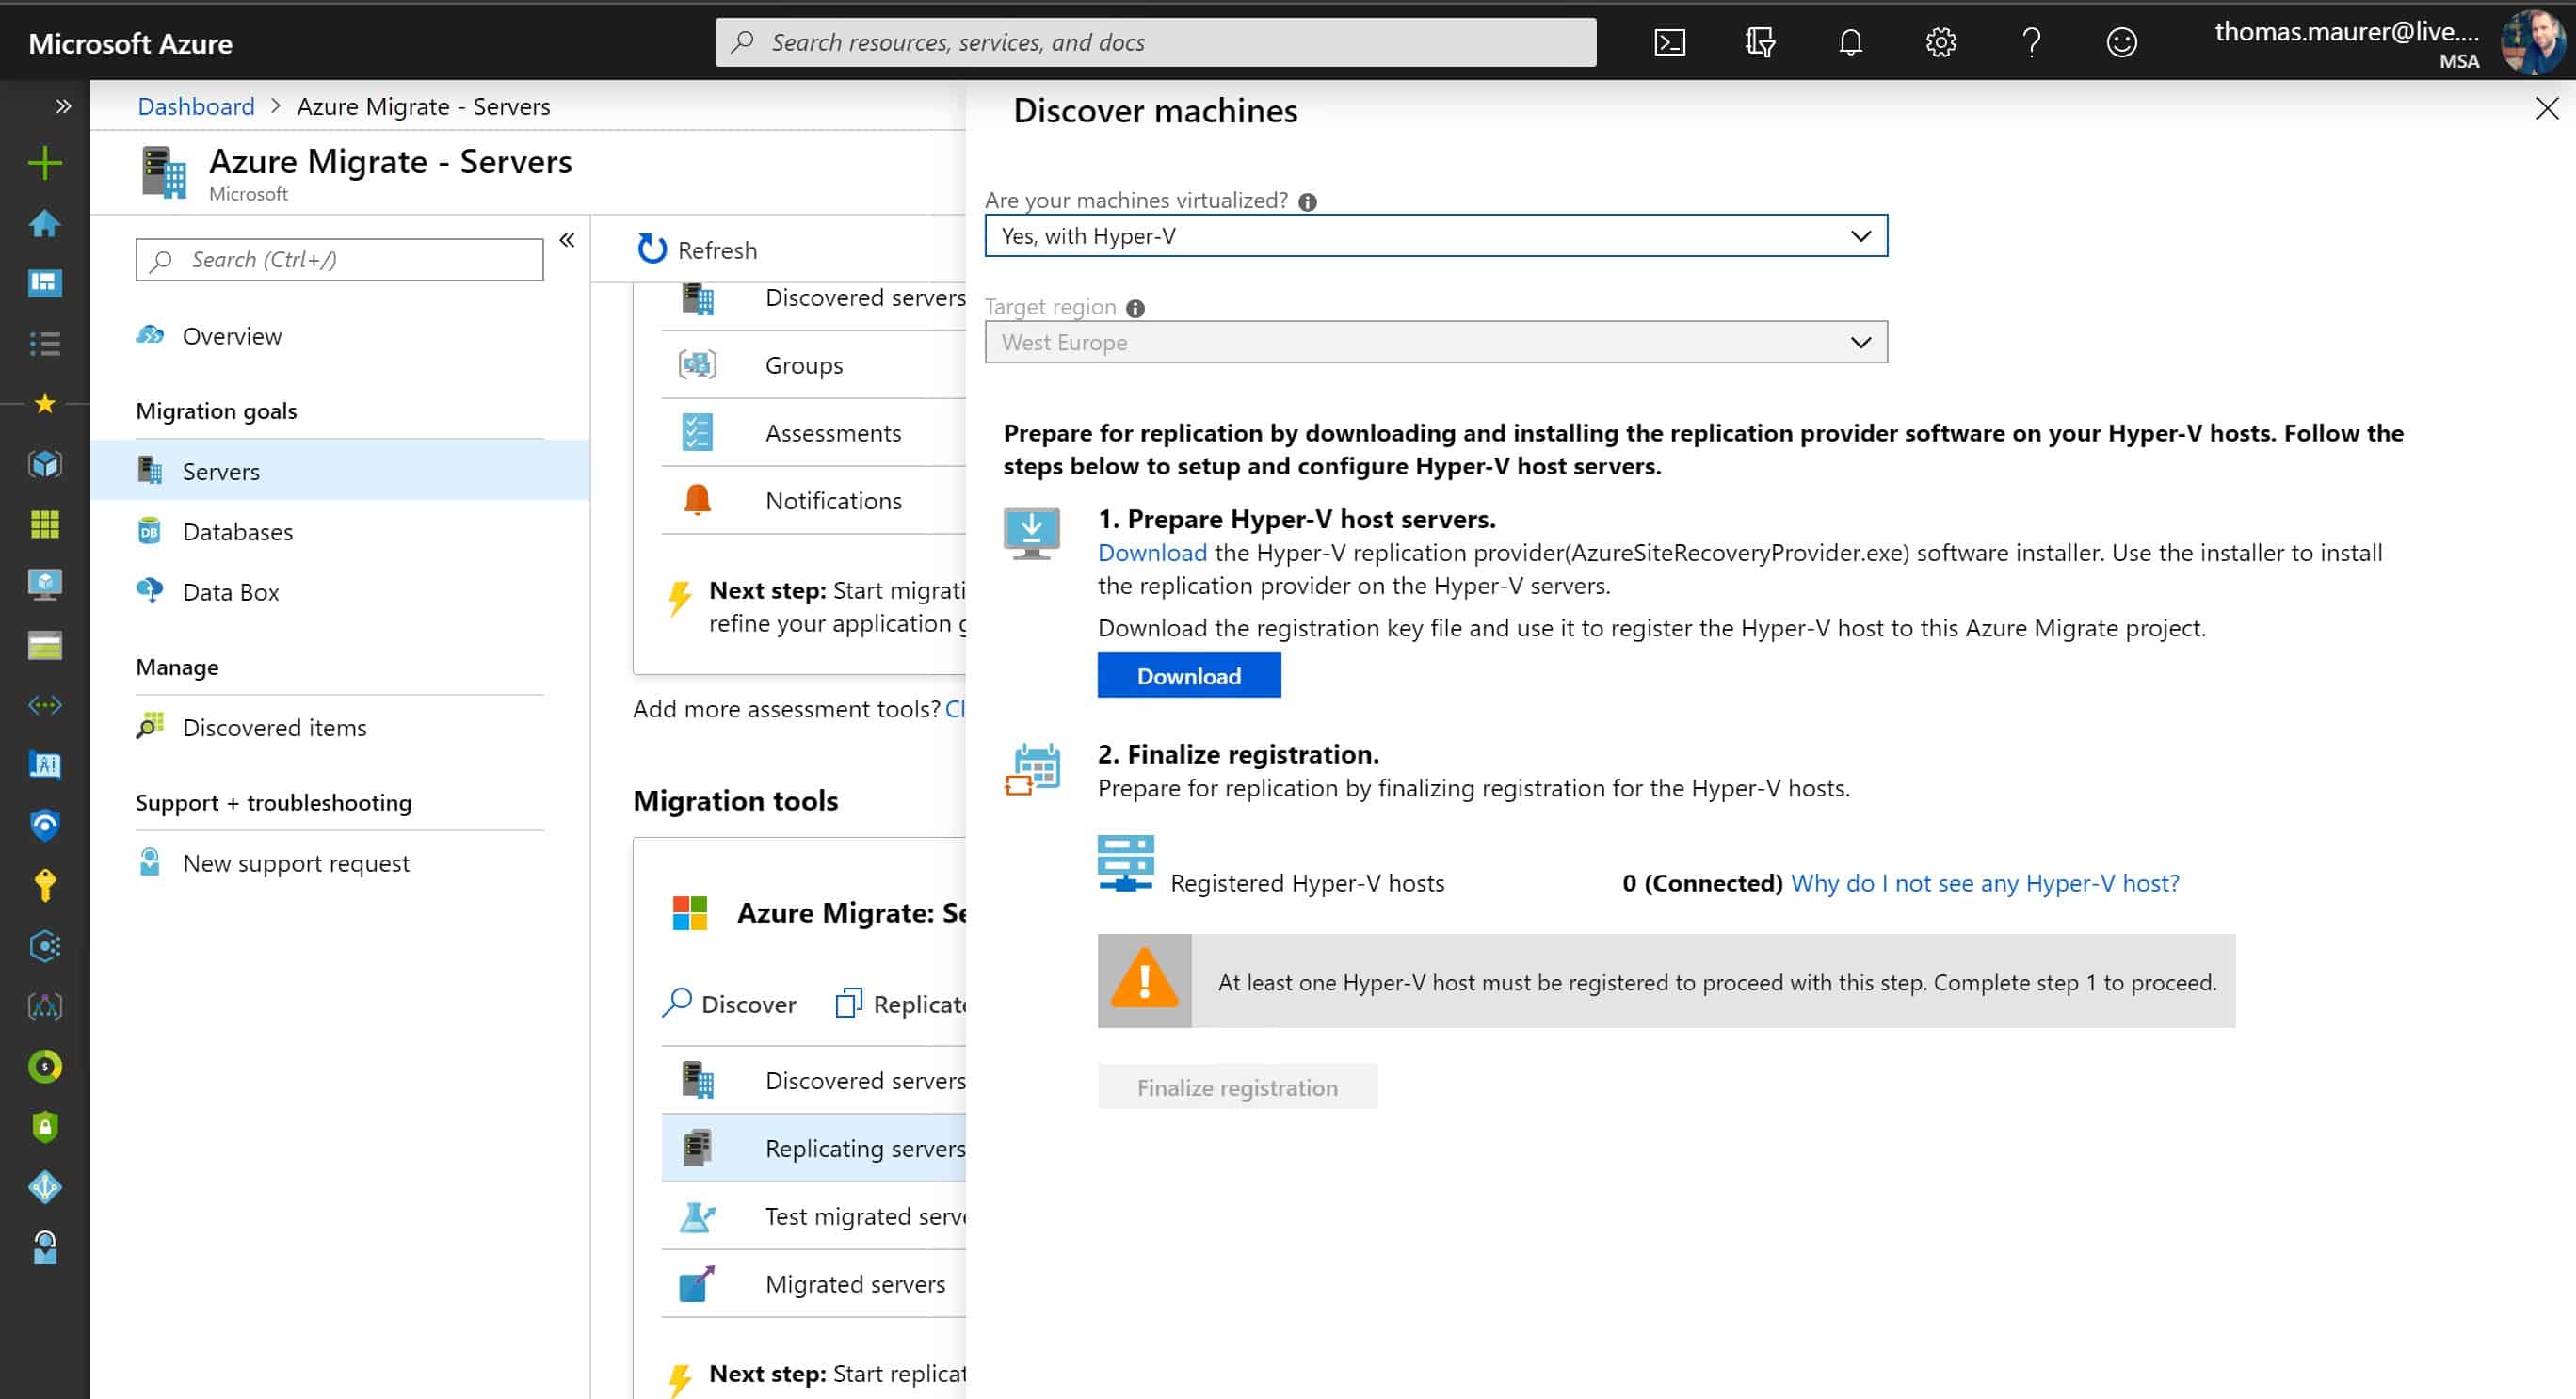
Register Hyper-V Host servers
The Azure Migrate Server Migration runs a lightweight Hyper-V VM appliance. This is the same VM which was used to assess the Hyper-V environment (Azure Migrate Server Assessment tool). If you didn’t use the assessment tool, and you went directly to migration, you will need to download and set up the appliance, like in the assessment process. If you already have that VM form the assessment, you can use the existing virtual machine.
The Hyper-V hosts will use Hyper-V replica to replicate the virtual machines to Azure. To configure the host, you will need to install the Hyper-V replication provider software installer and register it with the registration key file. You can read more about this process here.
Replicate Hyper-V VMs
To start the replication, you can now select the virtual machines you want to replicate to Azure. You can choose to apply them directly from the Azure Migrate assessment.
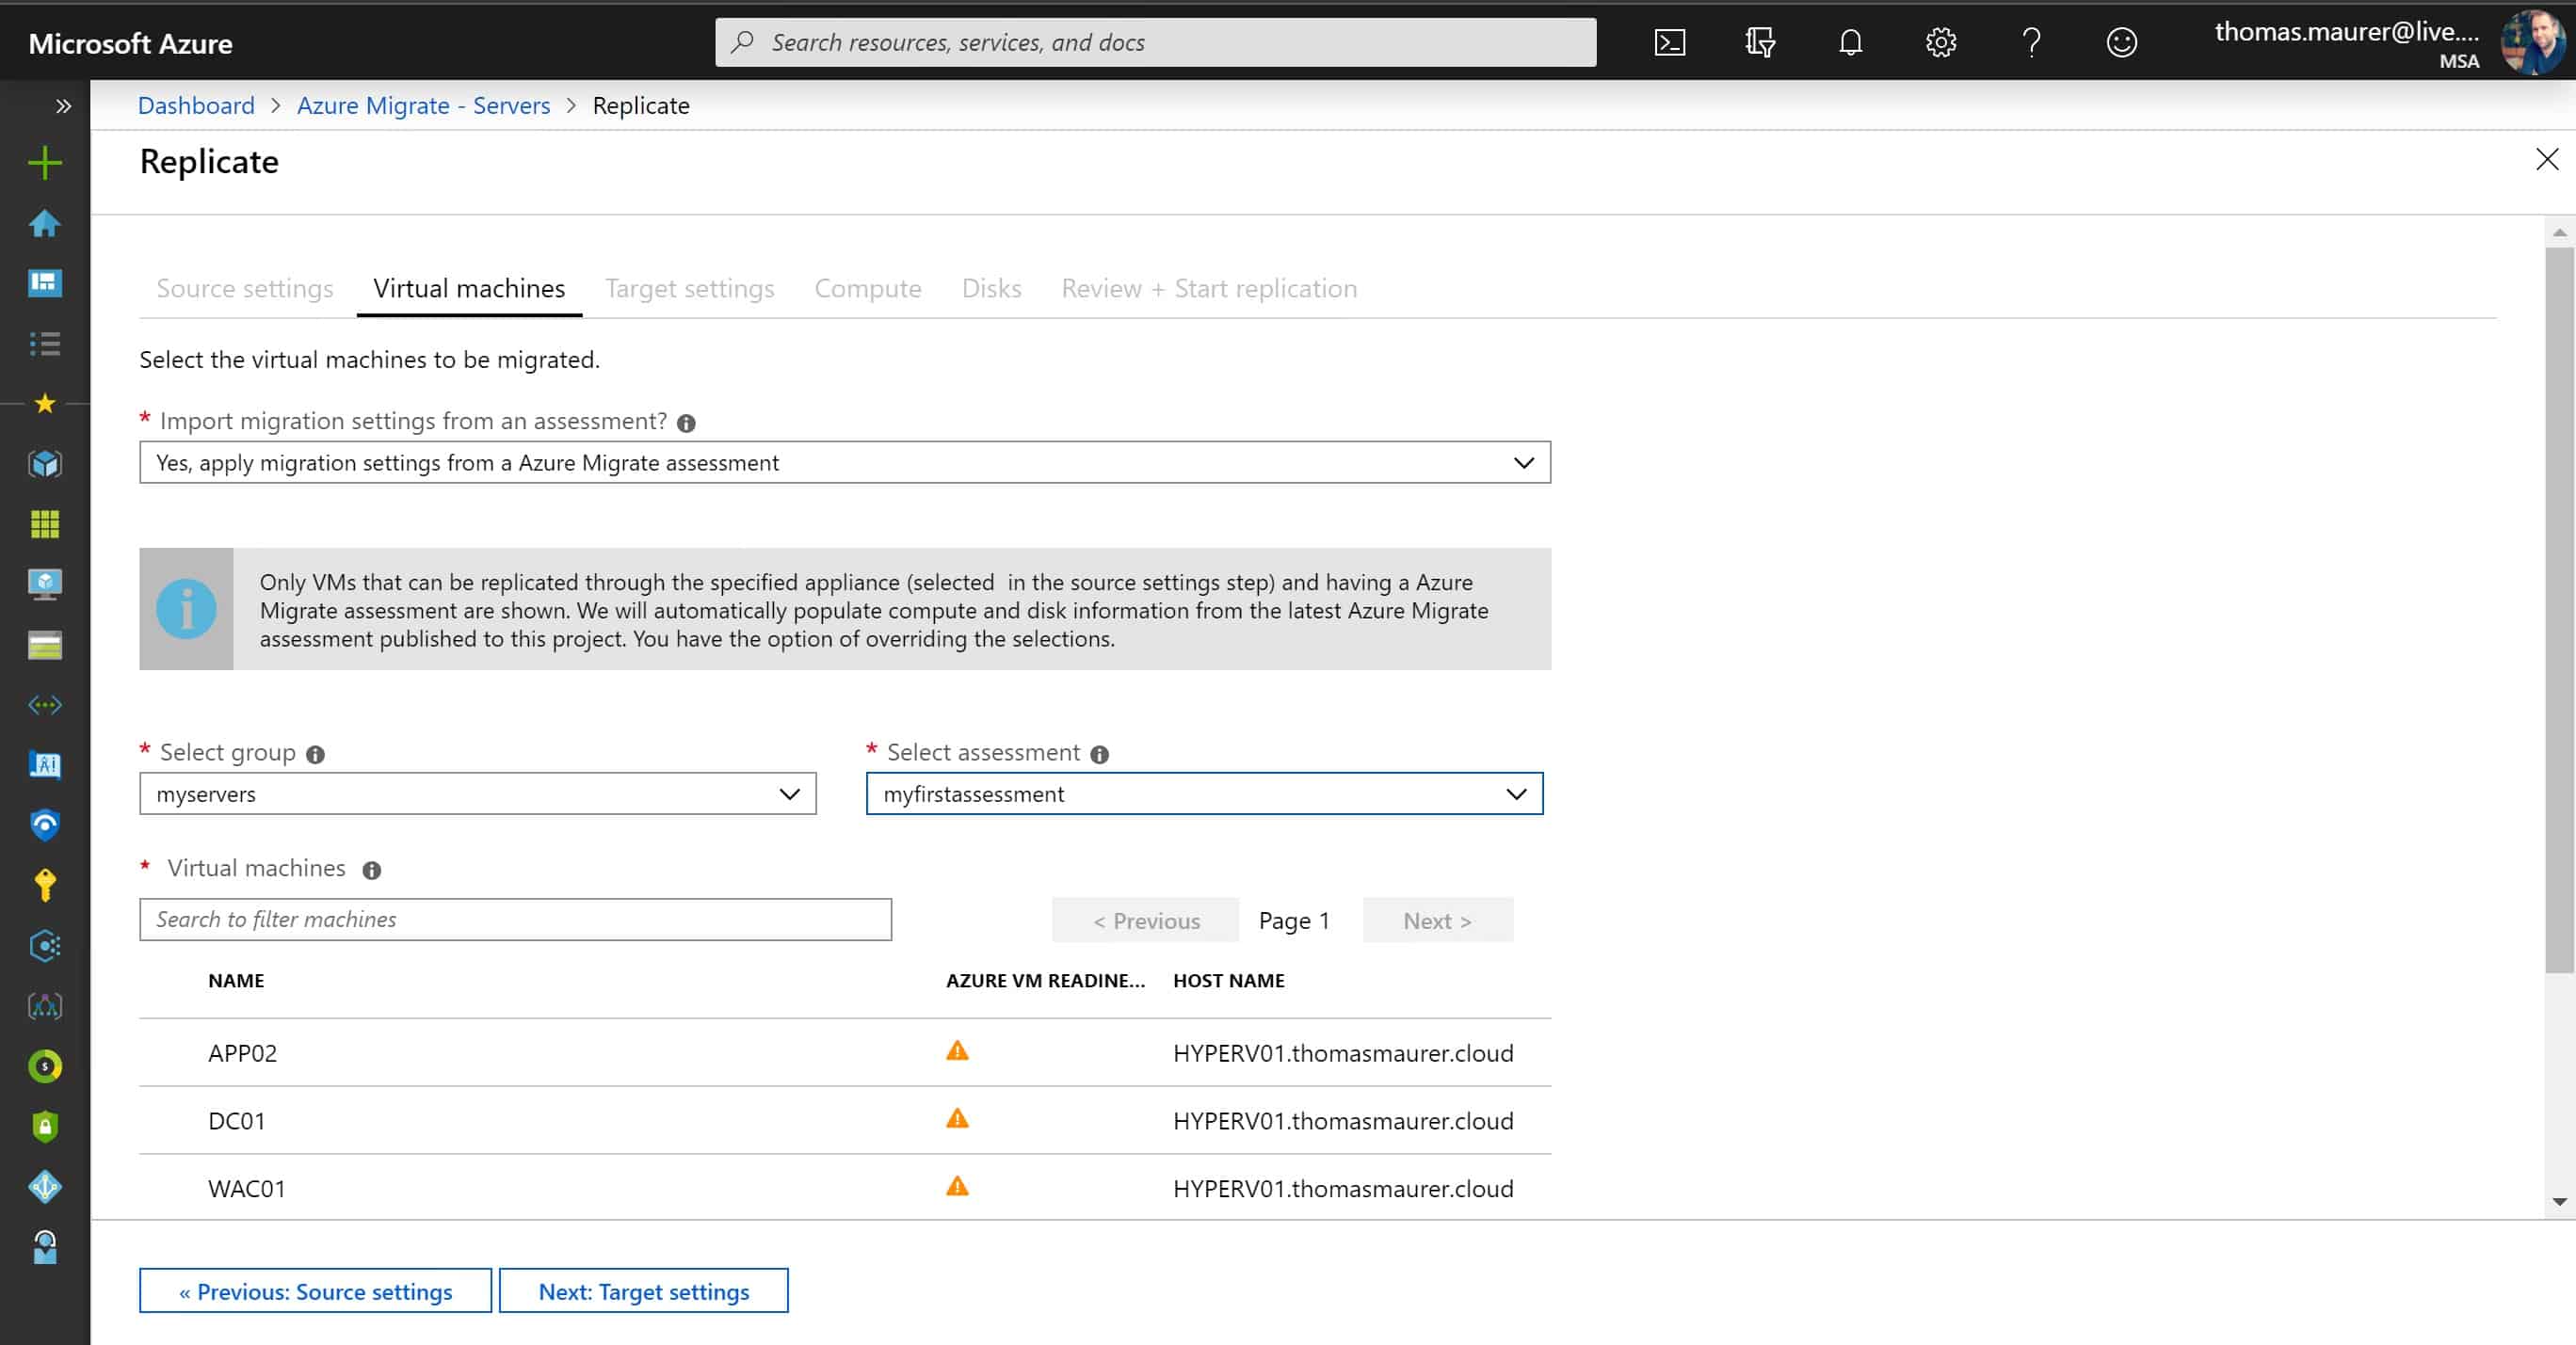
Azure Migrate Select Hyper-V VMs
You can configure the target settings like resource group, virtual network, and if you want/can use the Azure Hybrid Benefit.
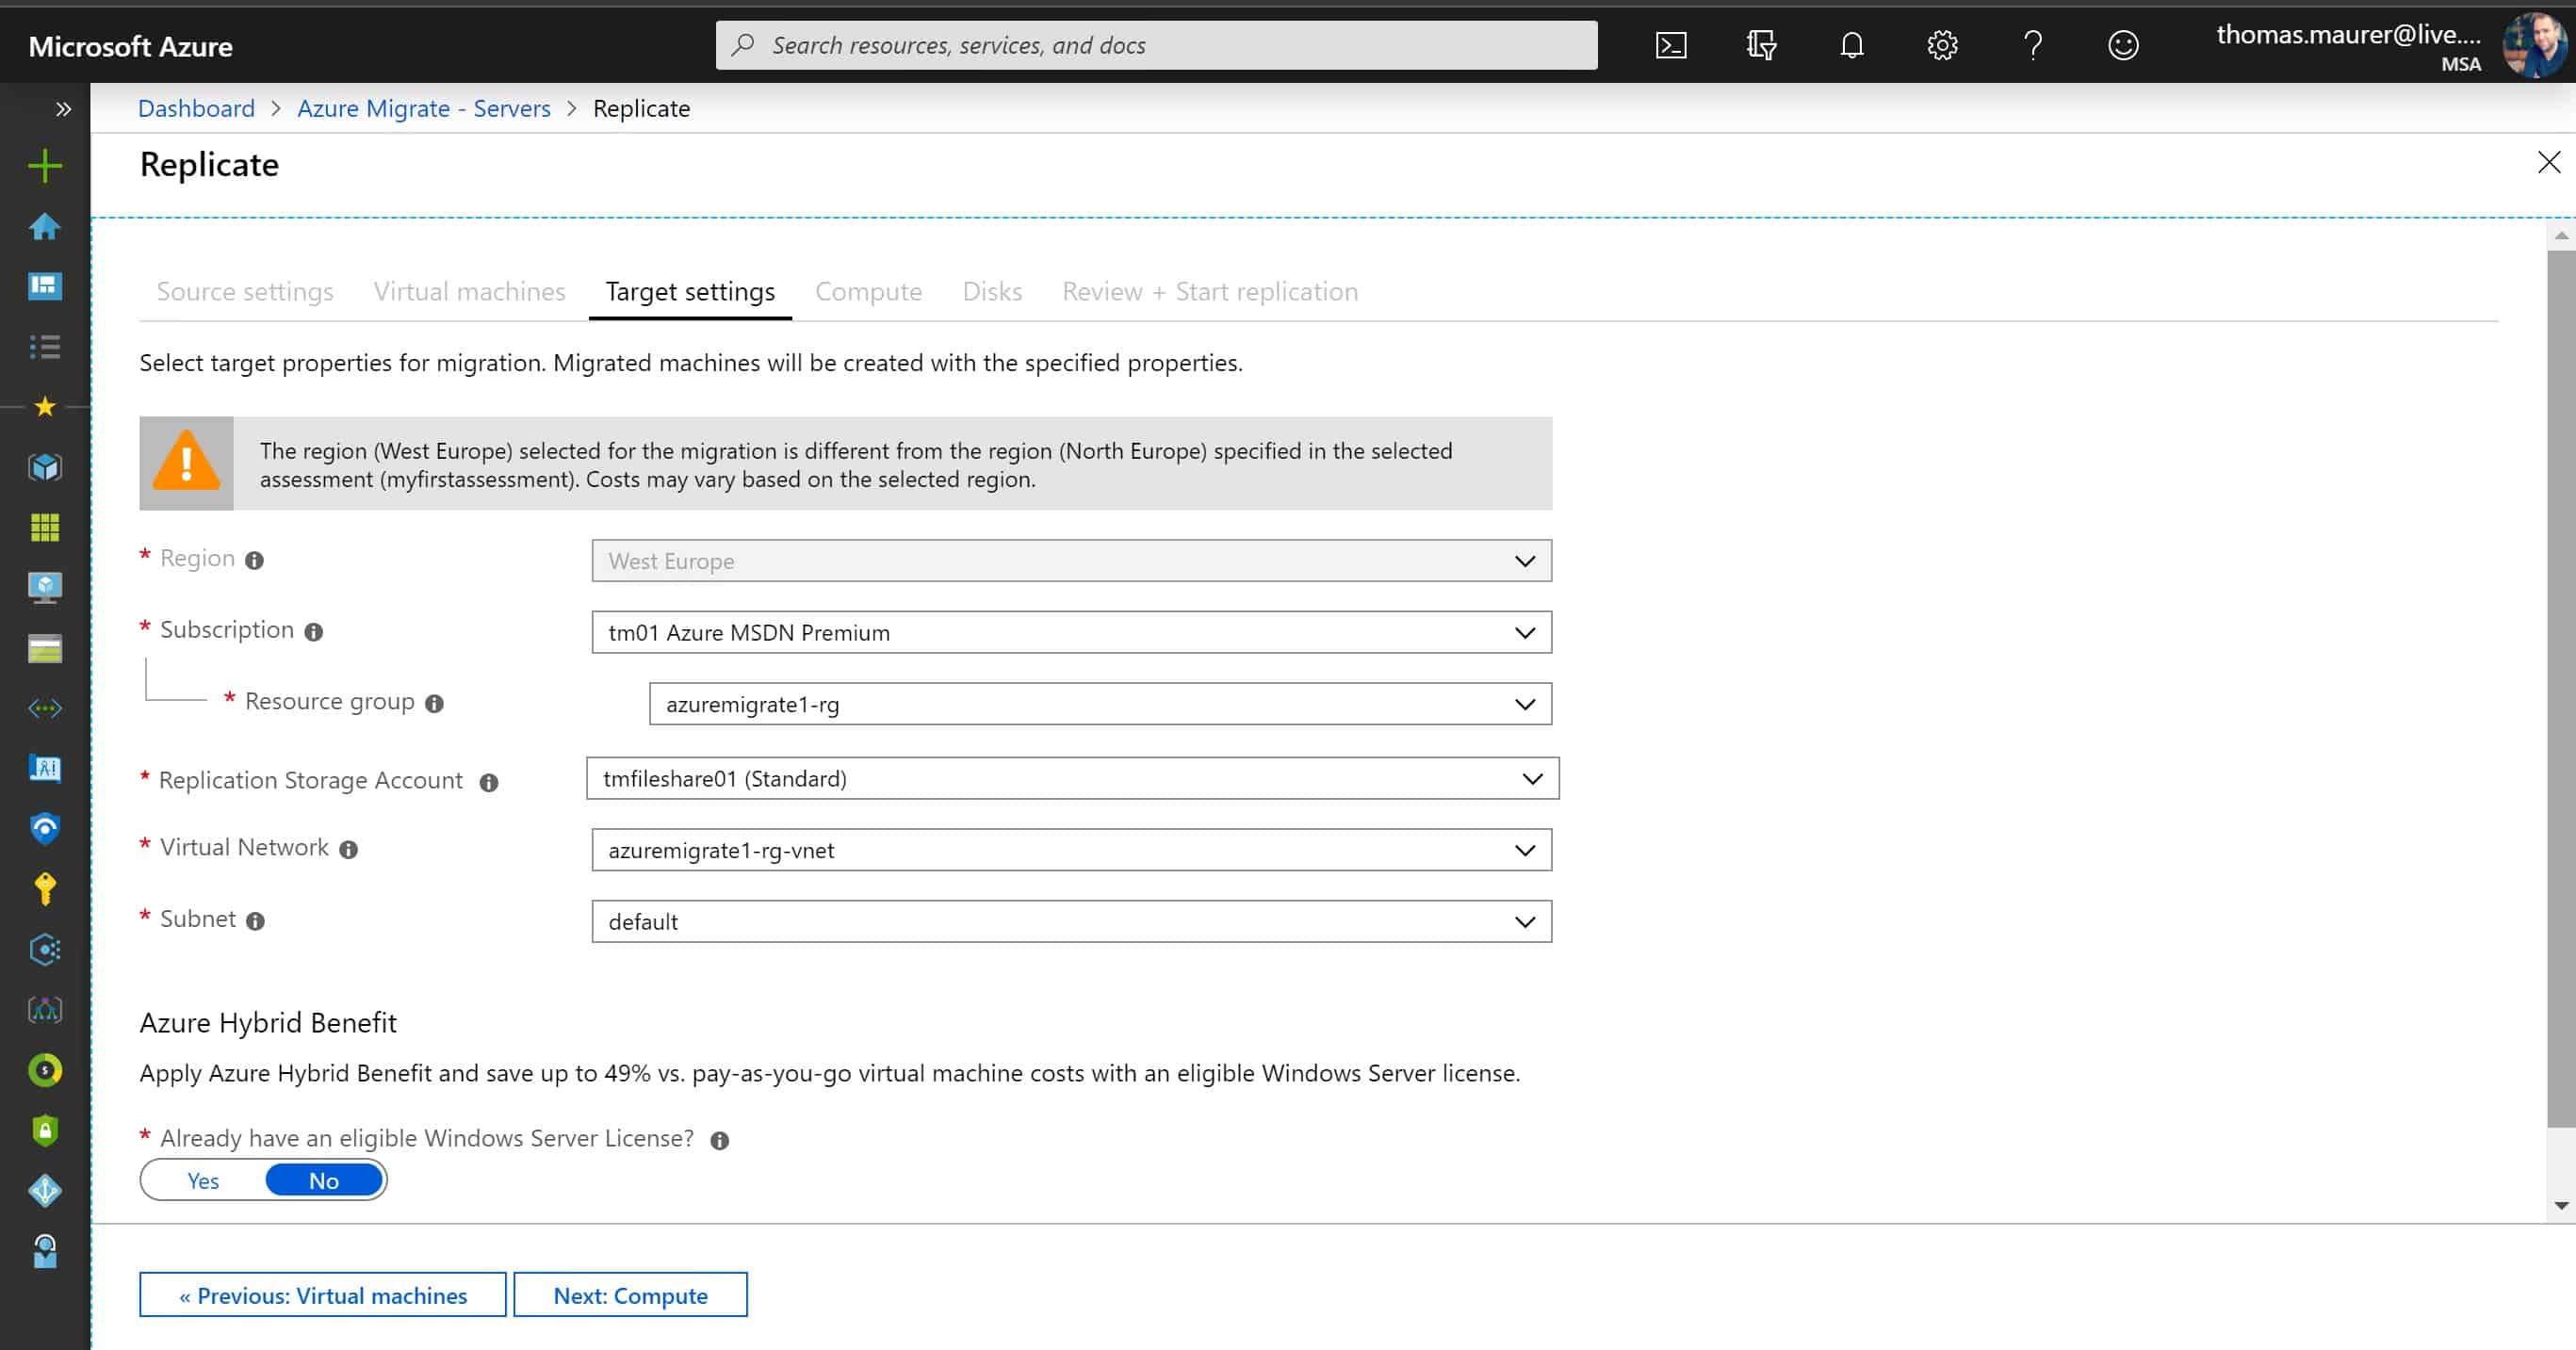
Azure Migrate Target settings
Under the compute tab, you can change the VM size, OS disk, availability set, disks, VM name.

Replication Compute settings
If all the configuration is done, you can now start replicating the virtual machines. Azure Migrate will automatically provision other Azure resources for the migration like Service bus, gateway storage account, log storage account, and key vault. The initial synchronization will take a while depending on the size of the virtual machines and the available internet bandwidth.
Test and migrate Hyper-V VMs
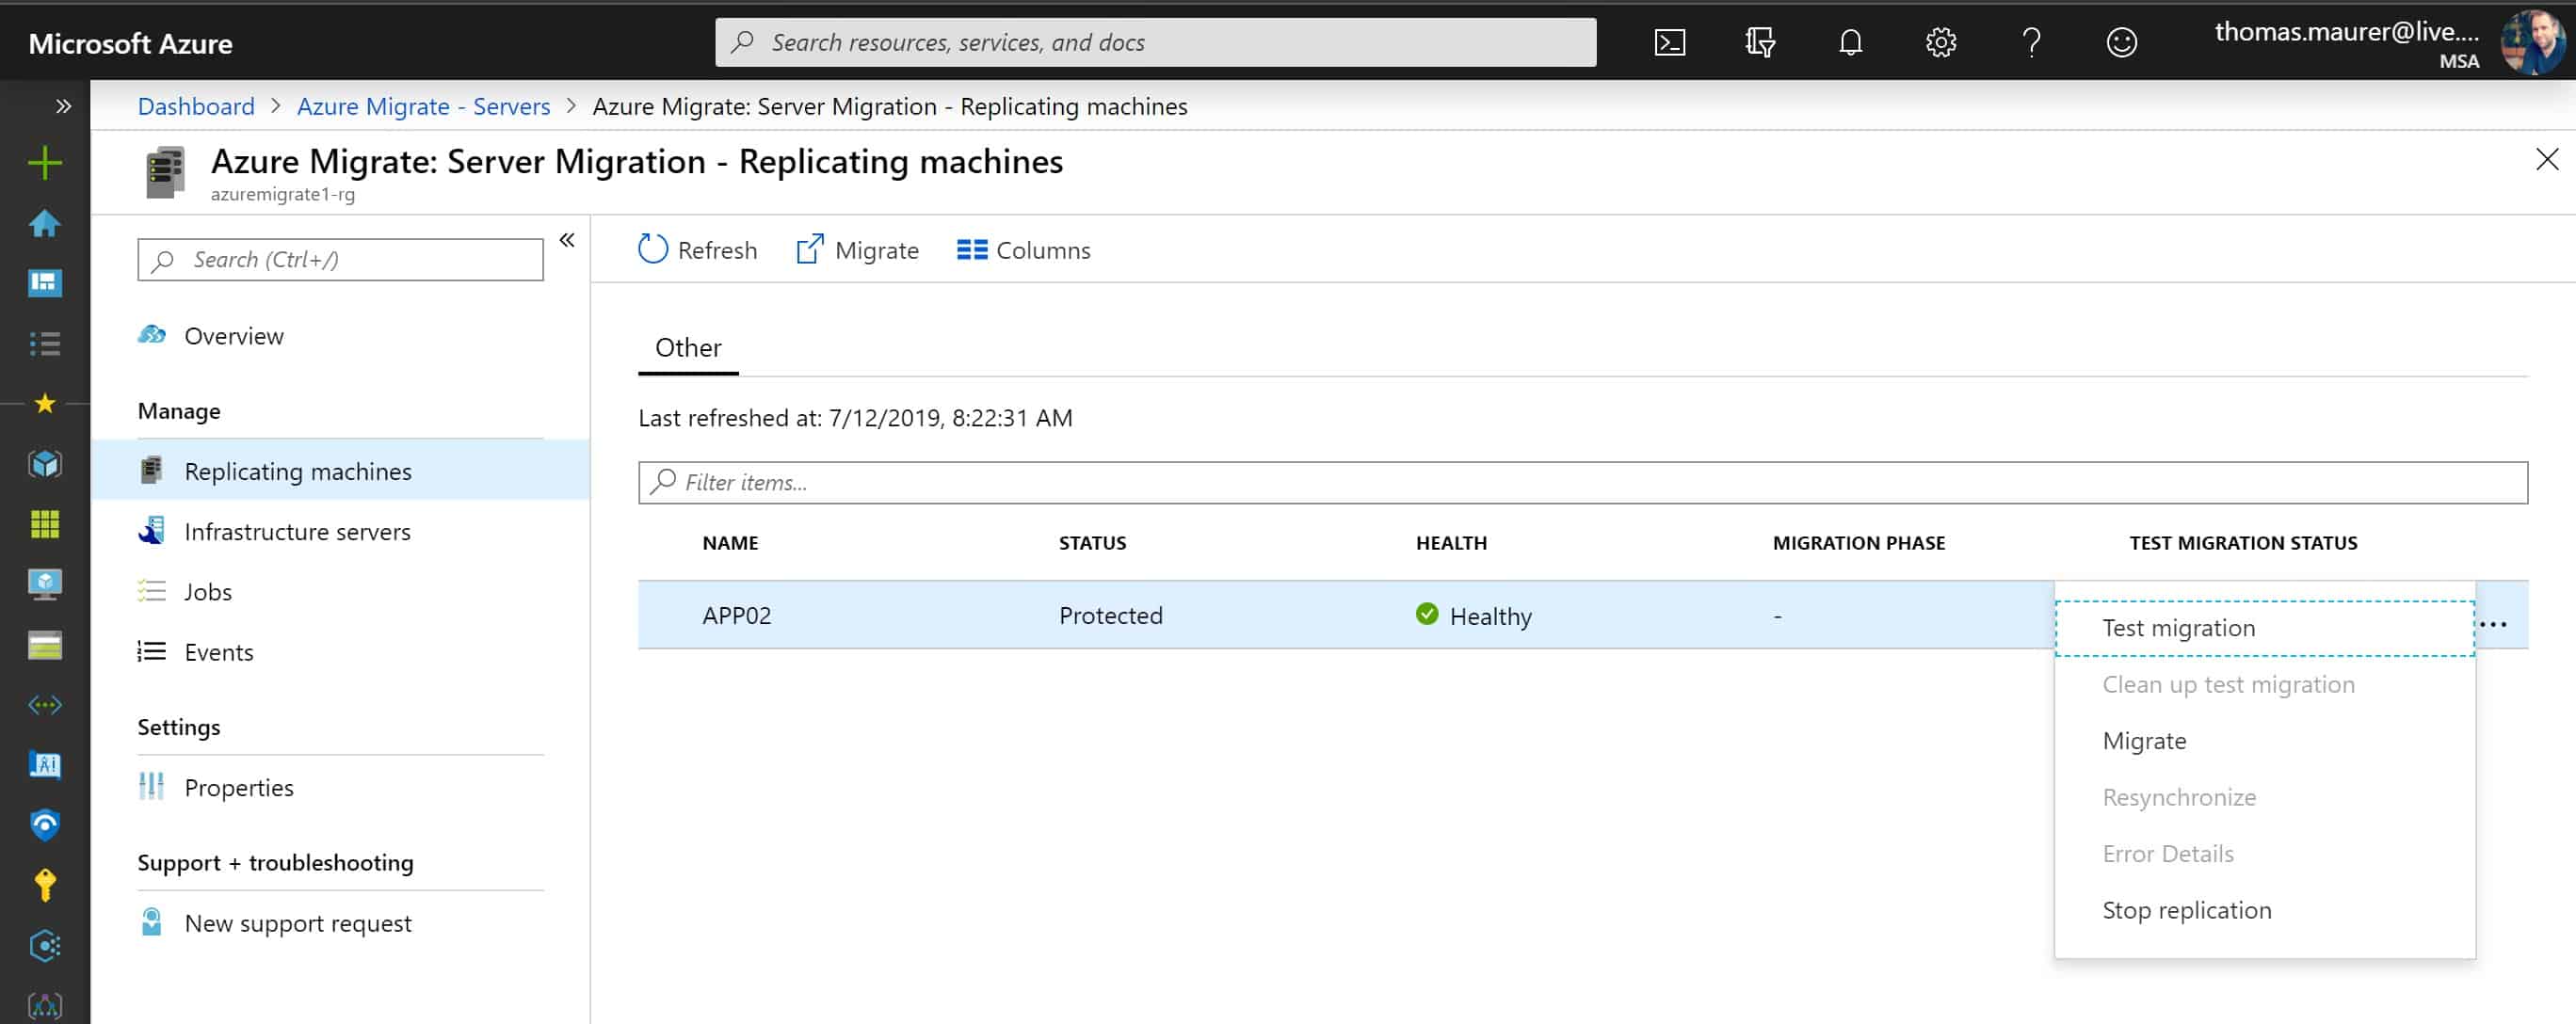
Azure Migrate Test Migration
When the virtual machine is replicated, you can now start to migrate it. However, in most cases, you first want to test the virtual machines before you completely migrate them. With Azure Migrate, you can first initiate a test migration to test the VM. You can find more on testing the migration here.
If you click on the virtual machine, you are replicating, and you get some more information about the server details, migration status, and the replication settings.
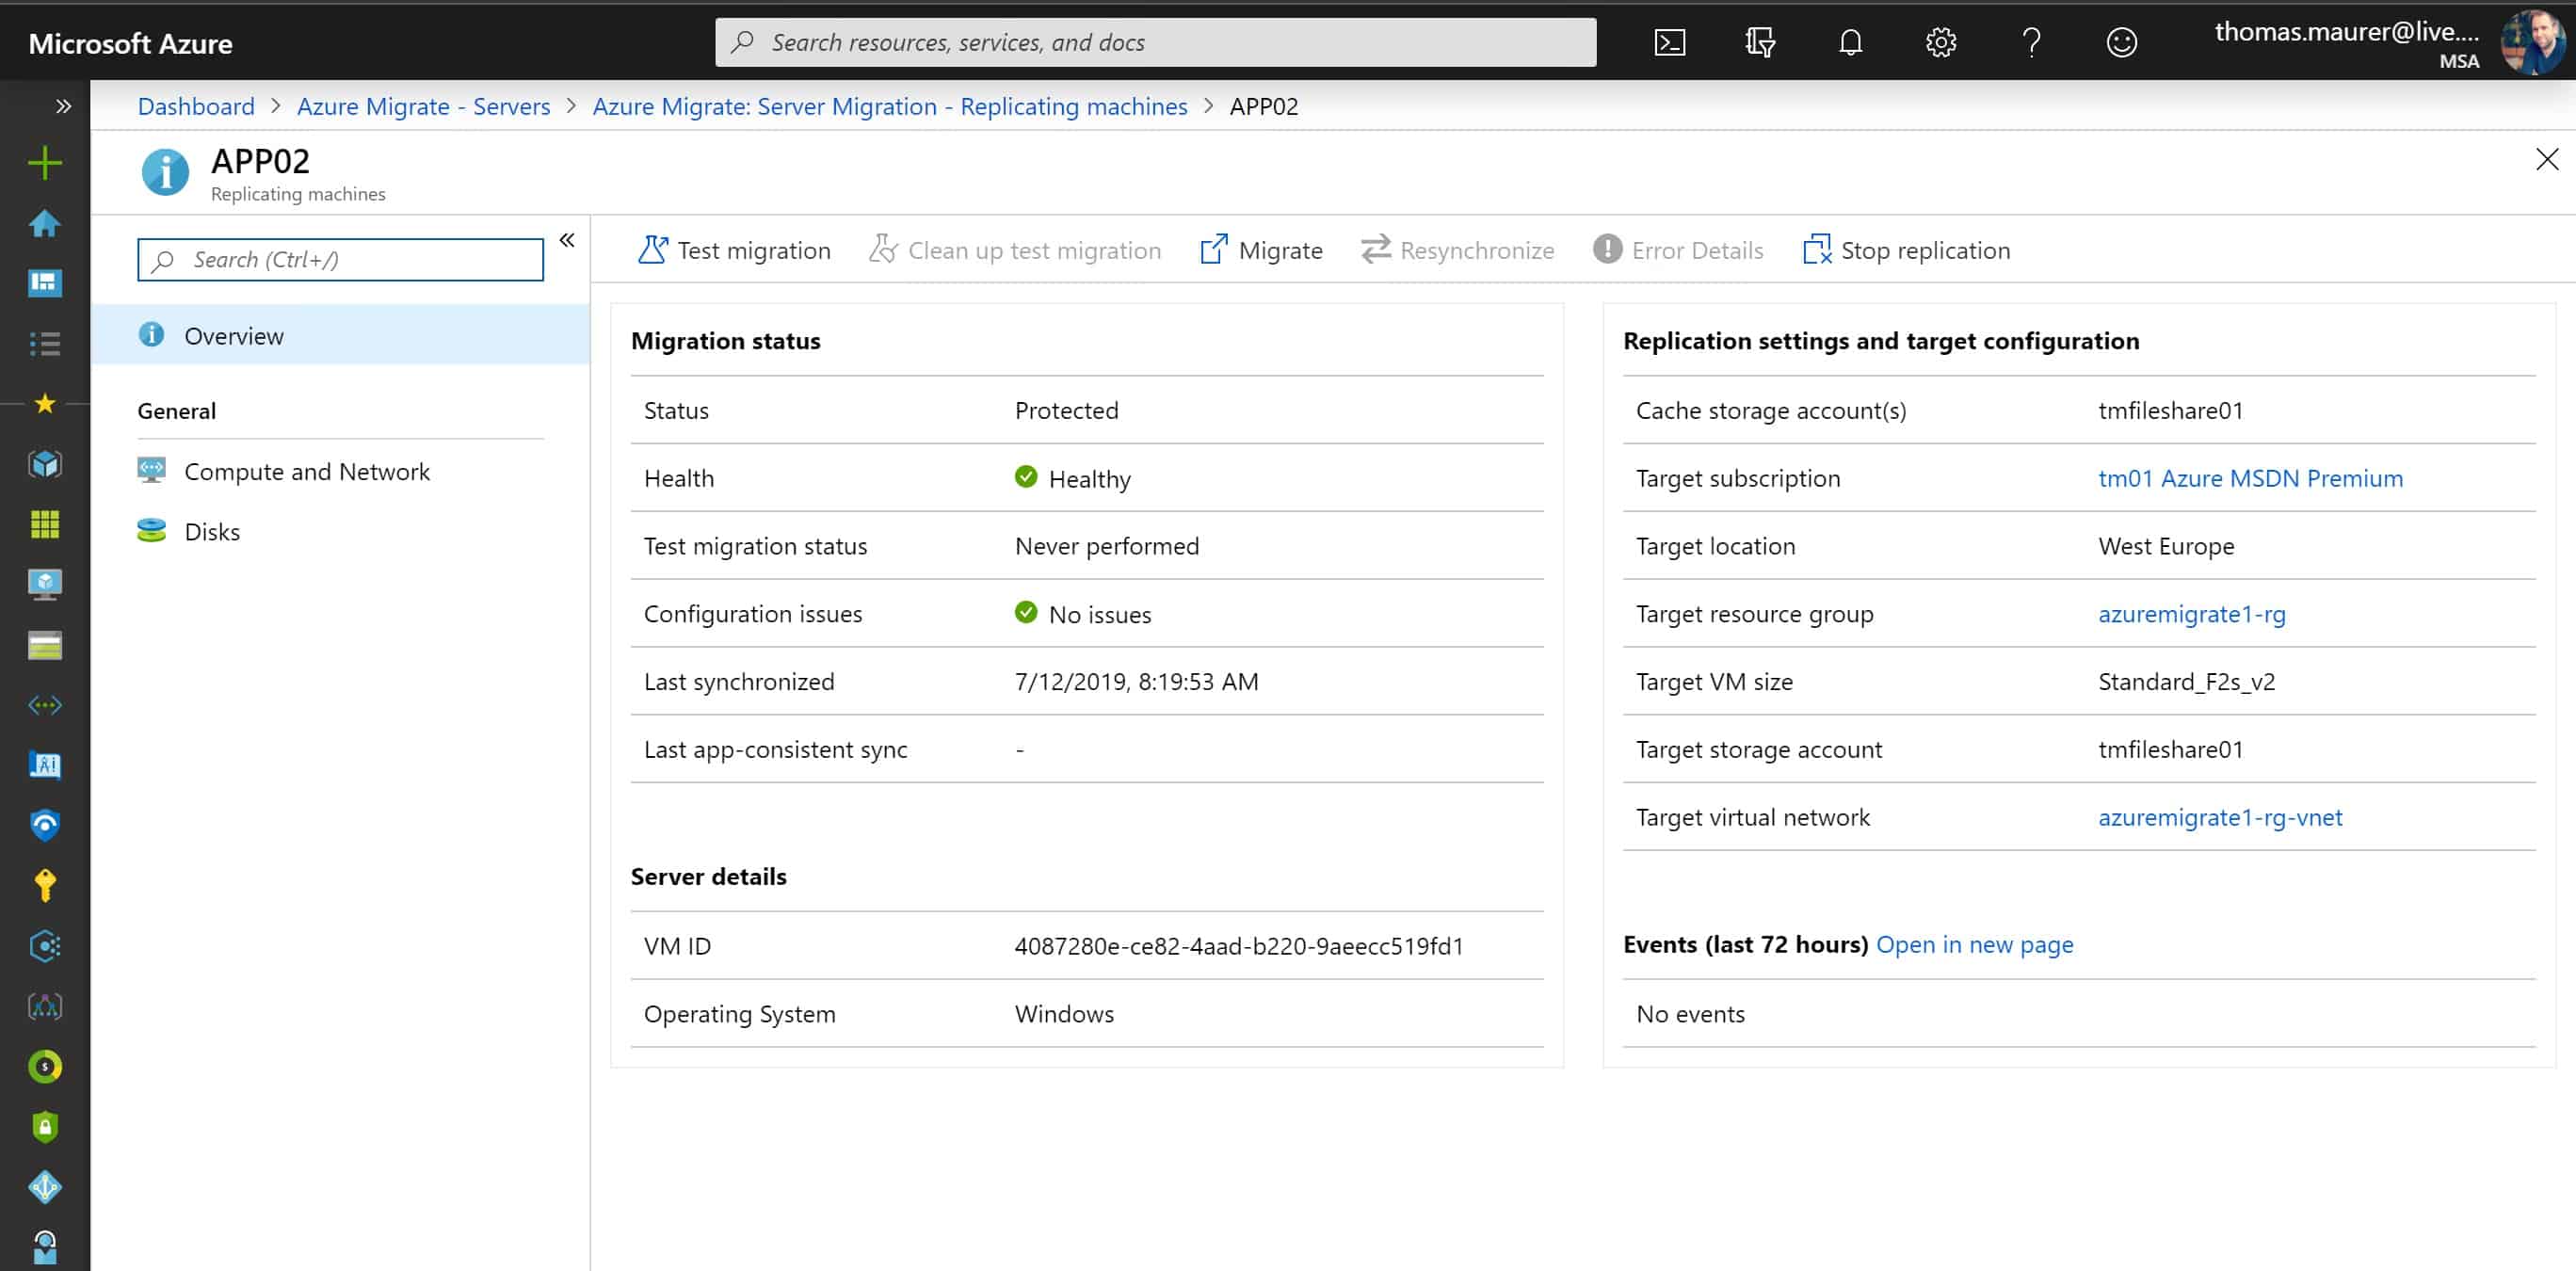
Azure Migrate VM Migration Status and Replication Settings
If you are sure you want to migrate the Hyper-V virtual machine to Azure, you can click on “Replicating servers” right-click on the machine you want to migrate and click on “Migrate” or click on “Migrate” on the server overview page. Azure Migrate will not remove or delete the on-prem Hyper-V virtual machine. But by default, Azure Migrate shuts down the on-premises VM and runs an on-demand replication to synchronize any VM changes that occurred since the last replication occurred. This ensures no data loss. If you want to keep the on-premise machine in running state, you can set that during the migration wizard.

Monitor Migration Failover
When the job is finished, you can view and manage the VM like any other Azure virtual machine.
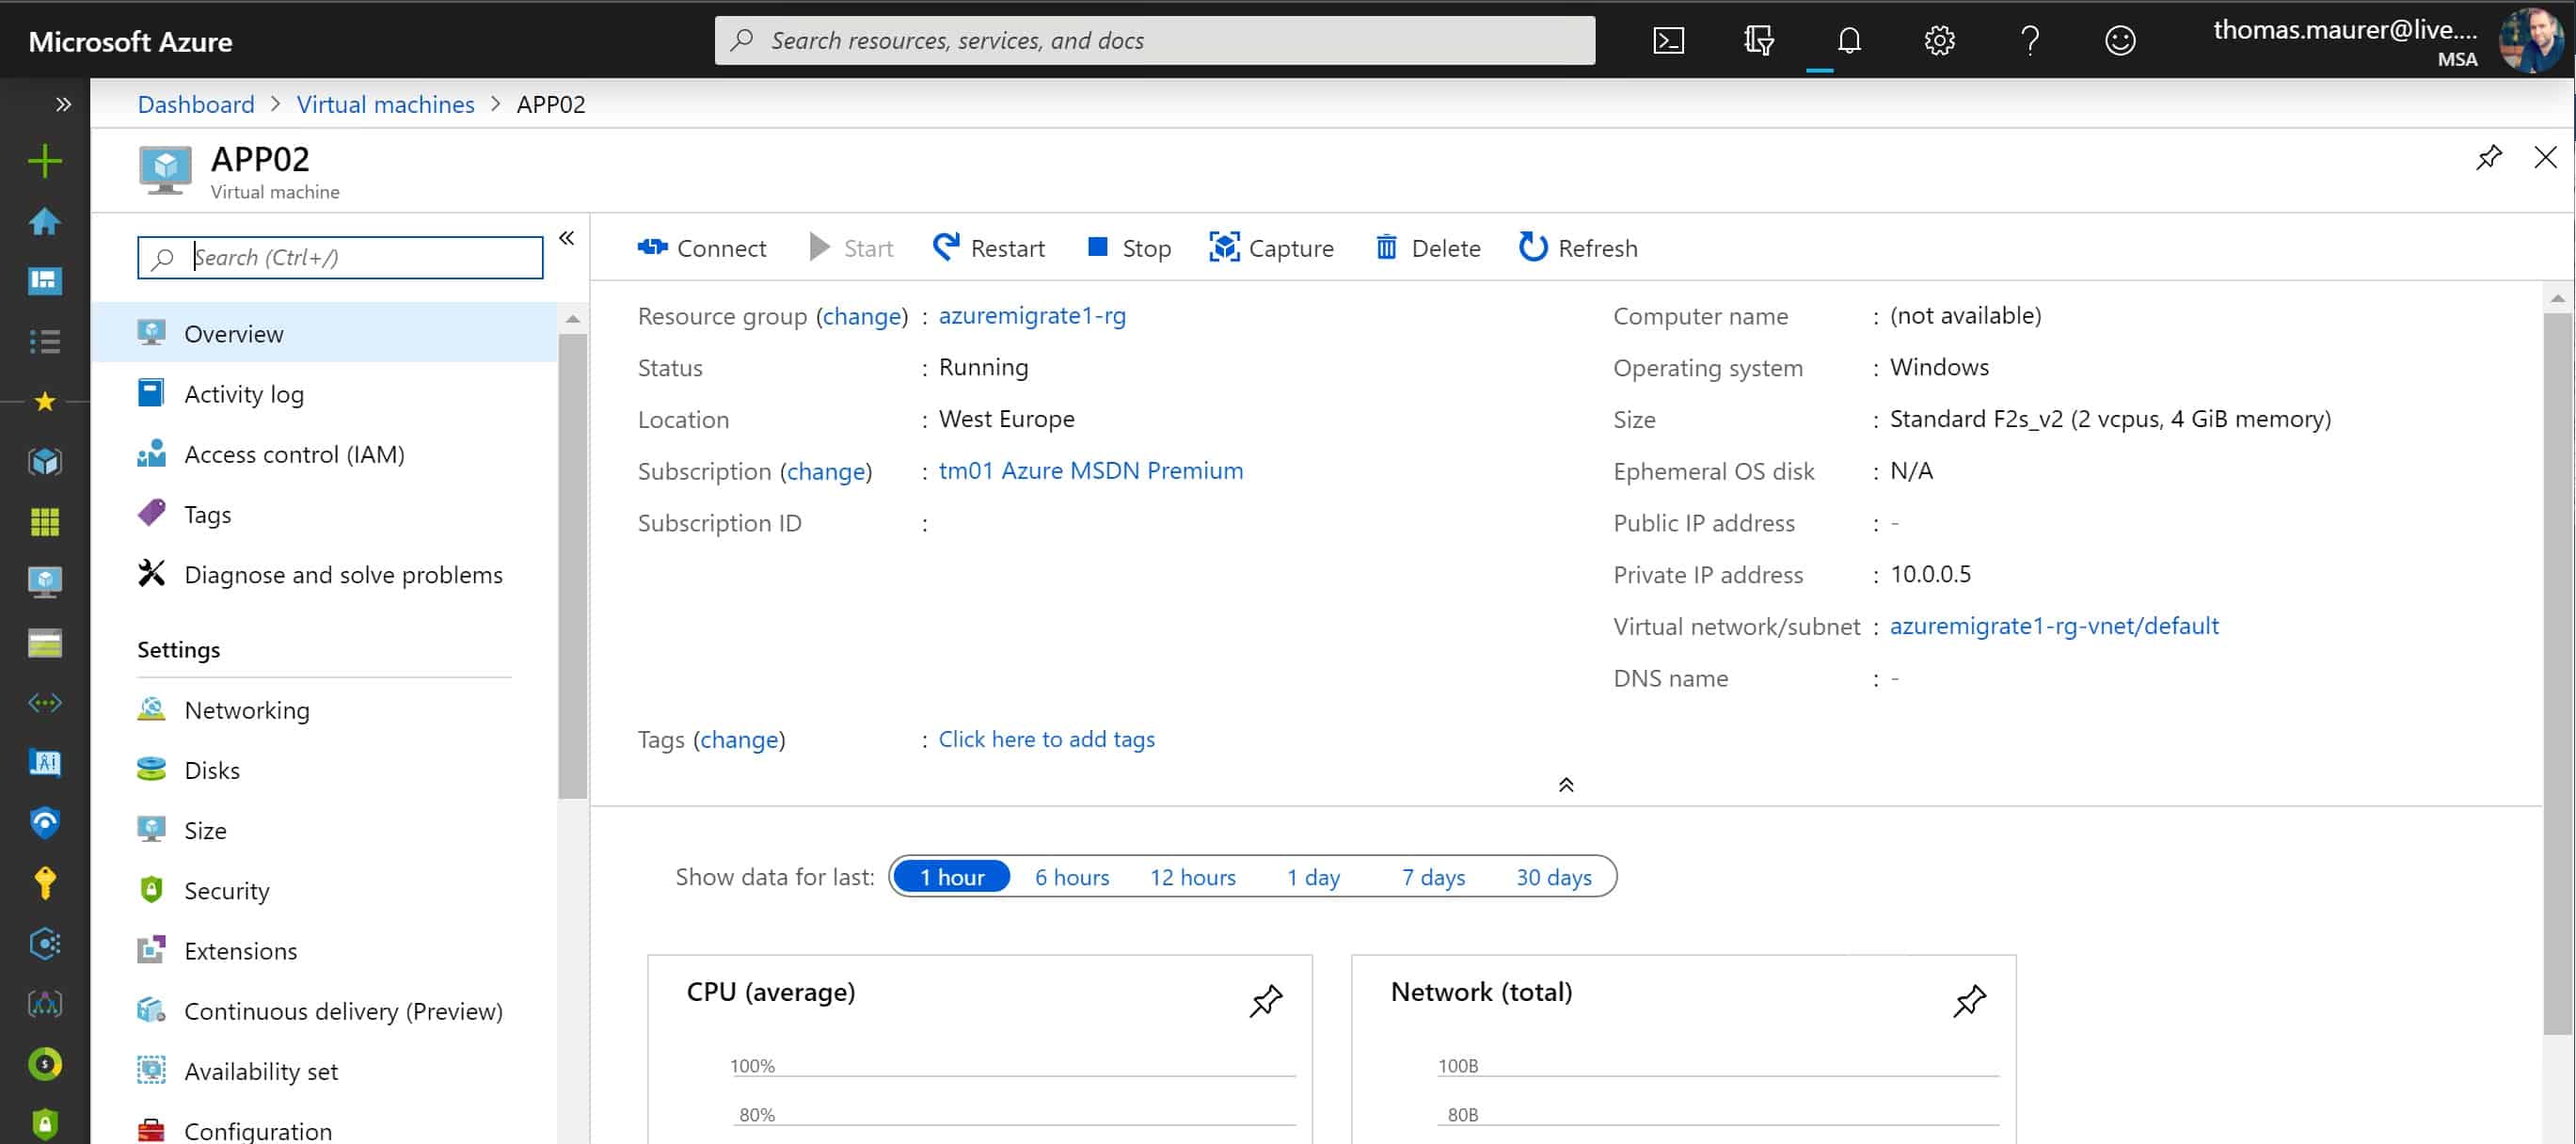
Hyper-V VM in Azure
Azure Migrate Post-Migration and cleanup
The Azure Migrate team has put together a list of post-migration steps to complete the migration and some post-migration best practices you should think about. You can find more information about the post-migration tasks here.
Complete the migration
- After the migration is done, right-click the VM > Stop migration. This stops replication for the on-premises machine and cleans up replication state information for the VM.
- Install the Azure VM Windows or Linux agent on the migrated machines.
- Perform any post-migration app tweaks, such as updating database connection strings, and web server configurations.
- Perform final application and migration acceptance testing on the migrated application now running in Azure.
- Cut over traffic to the migrated Azure VM instance.
- Remove the on-premises VMs from your local VM inventory.
- Remove the on-premises VMs from local backups.
- Update any internal documentation to show the new location and IP address of the Azure VMs.
Post-migration best practices
- For increased resilience:
- Keep data secure by backing up Azure VMs using the Azure Backup service.
- Keep workloads running and continuously available by replicating Azure VMs to a secondary region with Site Recovery.
- For increased security:
- Lock down and limit inbound traffic access with Azure Security Center – Just in time VM access.
- Restrict network traffic to management endpoints with Network Security Groups.
- Deploy Azure Disk Encryption to help secure disks, and keep data safe from theft and unauthorized access.
- Read more about securing IaaS resources, and visit the Azure Security Center.
- For monitoring and management:
- Consider deploying Azure Cost Management to monitor resource usage and spending.
Conclusion
I hope this post gives you a short overview about how you can migrate Hyper-V VMs to Azure using Azure Migrate. However, Azure Migrate also allows you to migrate VMware VMs as well as physical hosts and servers running at other cloud providers. If you have any questions, please let me know in the comments. Happy Migration!
Tags: Assessment, Azure, Azure Migrate, Azure Migration, how to, Hyper-V, Hyper-V Migration, Hyper-V to Azure, Microsoft, Microsoft Azure, Migrate, Migrate Hyper-V, Migration, Replication, Step-by-step, VMware Last modified: November 15, 2023


Great news! We have waited this for a long time!
Great news! Everyone was waiting for this for a quite long time.
Yes, it is great news! :)
Hello,
Do you know how much it will cost me to migrate on-prem server to Azure?
Thank you.
Hi Reema
Azure Migrate is a free service. However, there may incur charges depending on the tools you decide to use for the assessment and migration. You can find more details here: https://azure.microsoft.com/pricing/details/azure-migrate?WT.mc_id=thomasmaurer-blog-thmaure