
If you want to install Ubuntu or any other Linux inside a Hyper-V Generation 2 Virtual Machine you need to do a simple change to the VM so you can install it from ISO. If you create a Hyper-V Generation 2 Virtual Machine and try to start the Virtual Machine, the Virtual Machine will not boot from ISO. This is because of the Secure Boot feature, which is included in Hyper-V Generation 2 Virtual Machines and applies to all Linux operating systems running on Hyper-V.
If you don’t want to install the Ubuntu manually, you can simply use the Ubuntu images from the Hyper-V Quick Create gallery. This has all the necessary tools already installed.
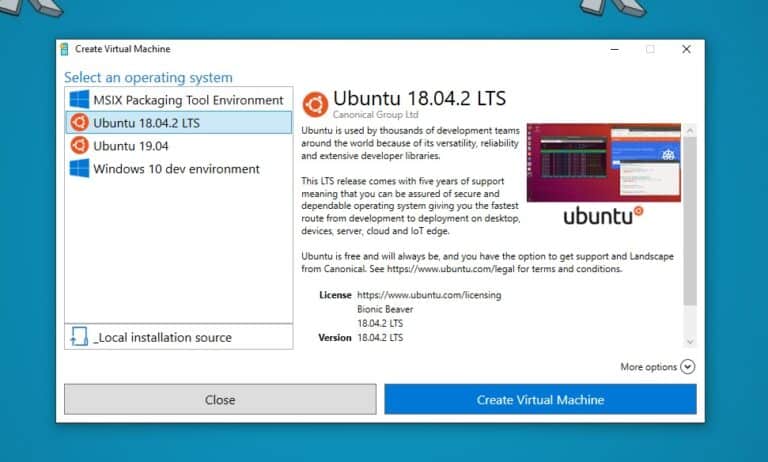
Ubuntu Hyper-V VM Images
How to Install Linux in a Hyper-V Generation 2 VM
Create a new Virtual Machine in the Hyper-V Manager
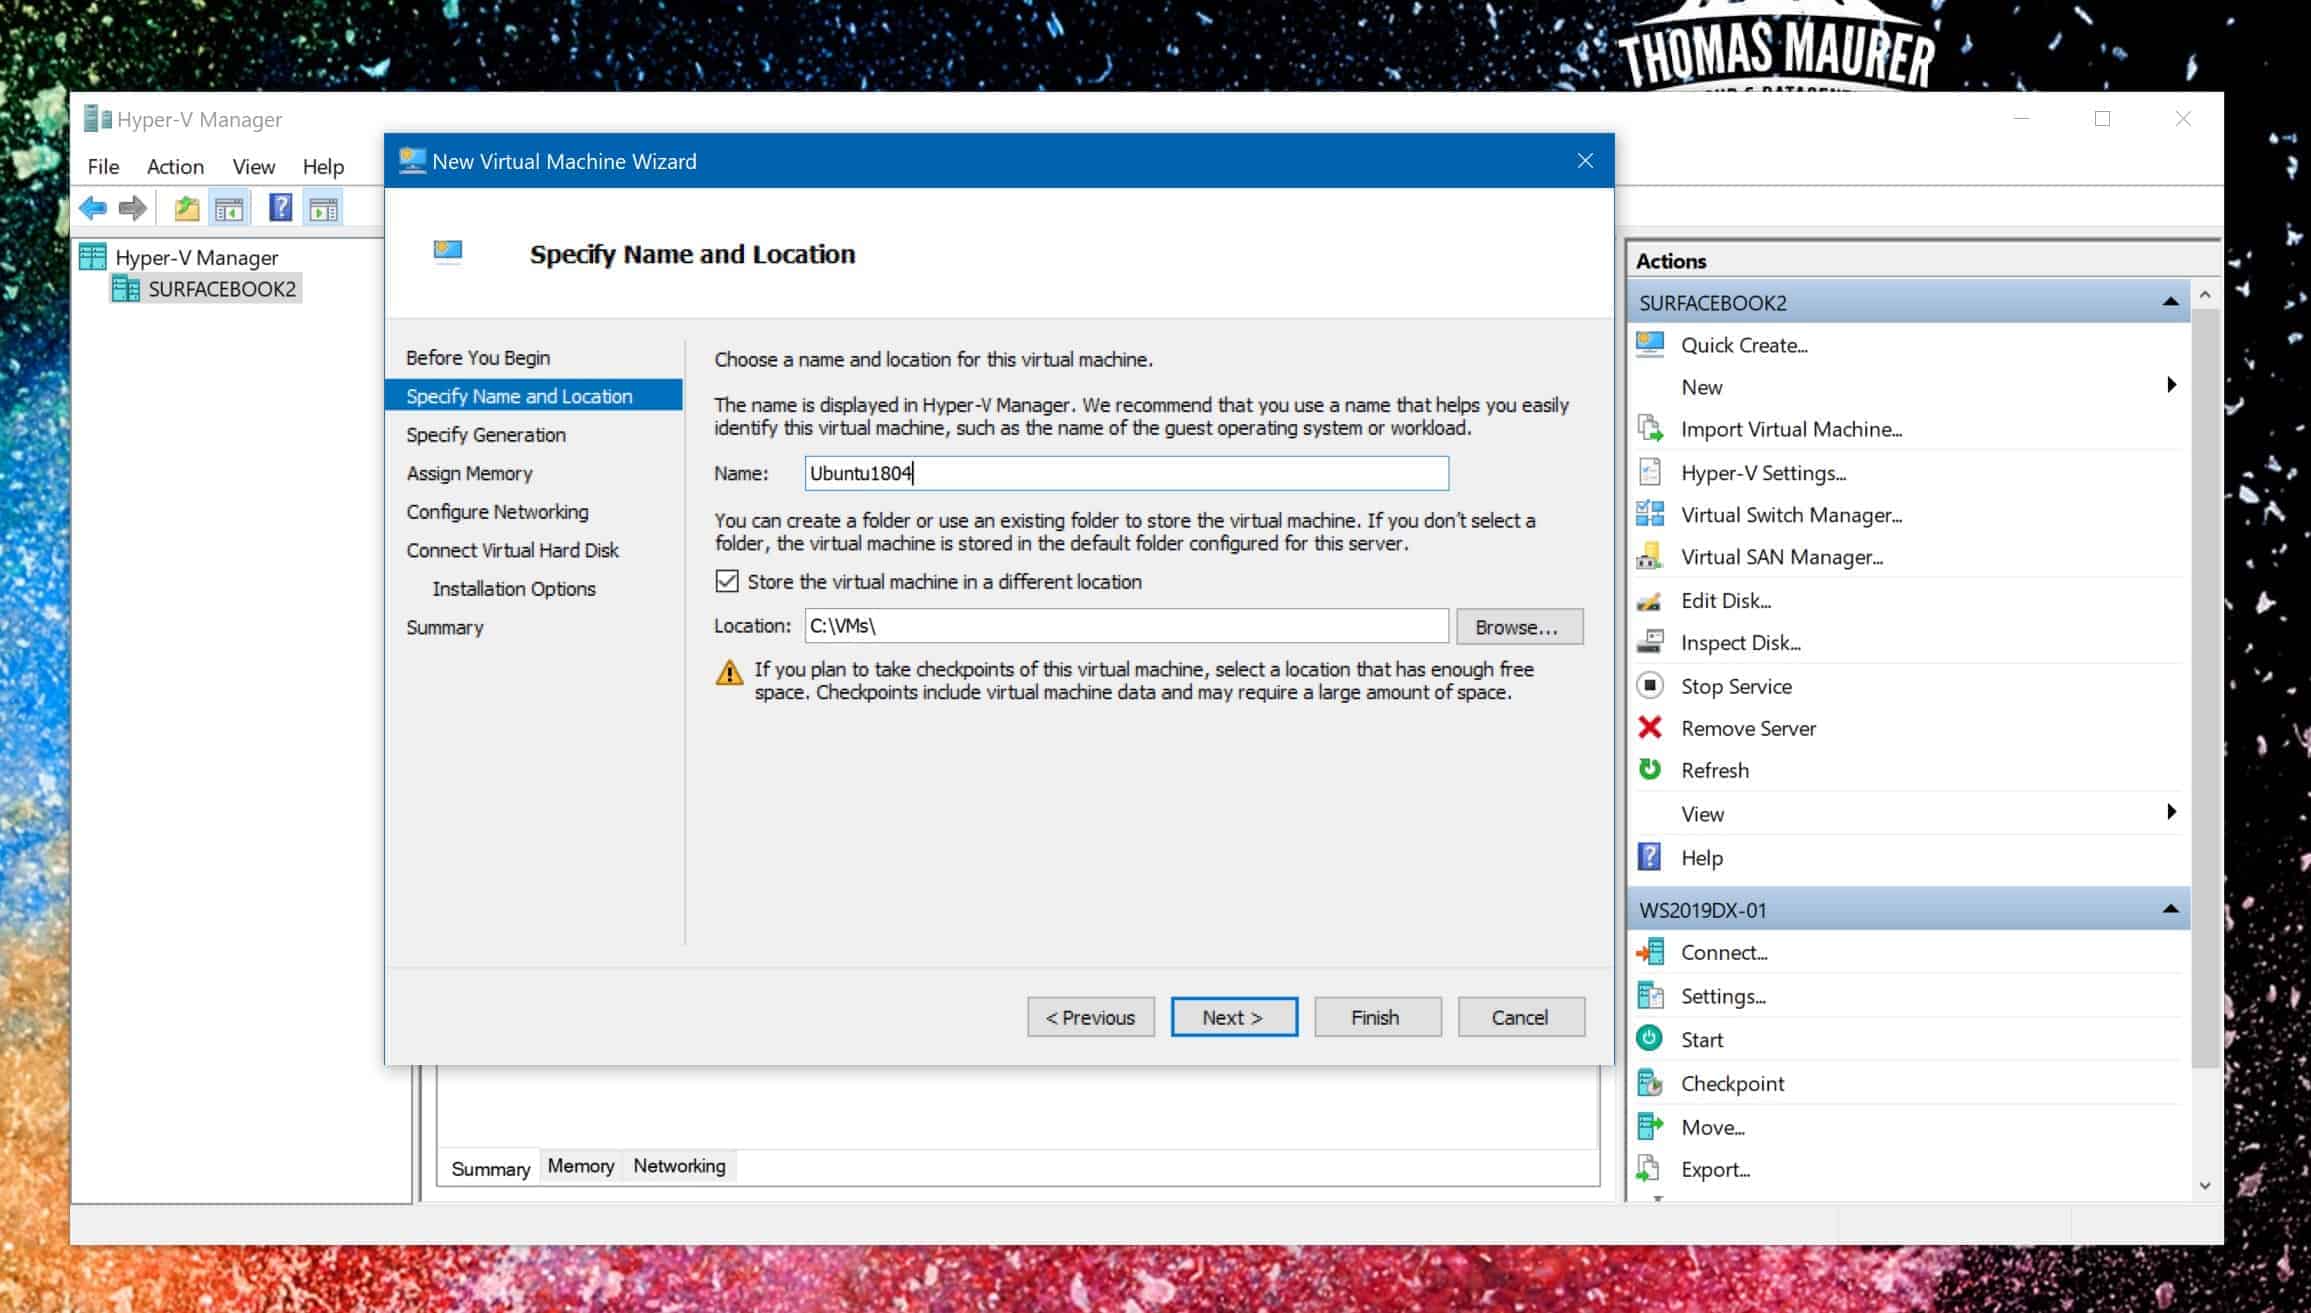
On the Hyper-V Virtual Machine Generation selection screen, choose Generation 2

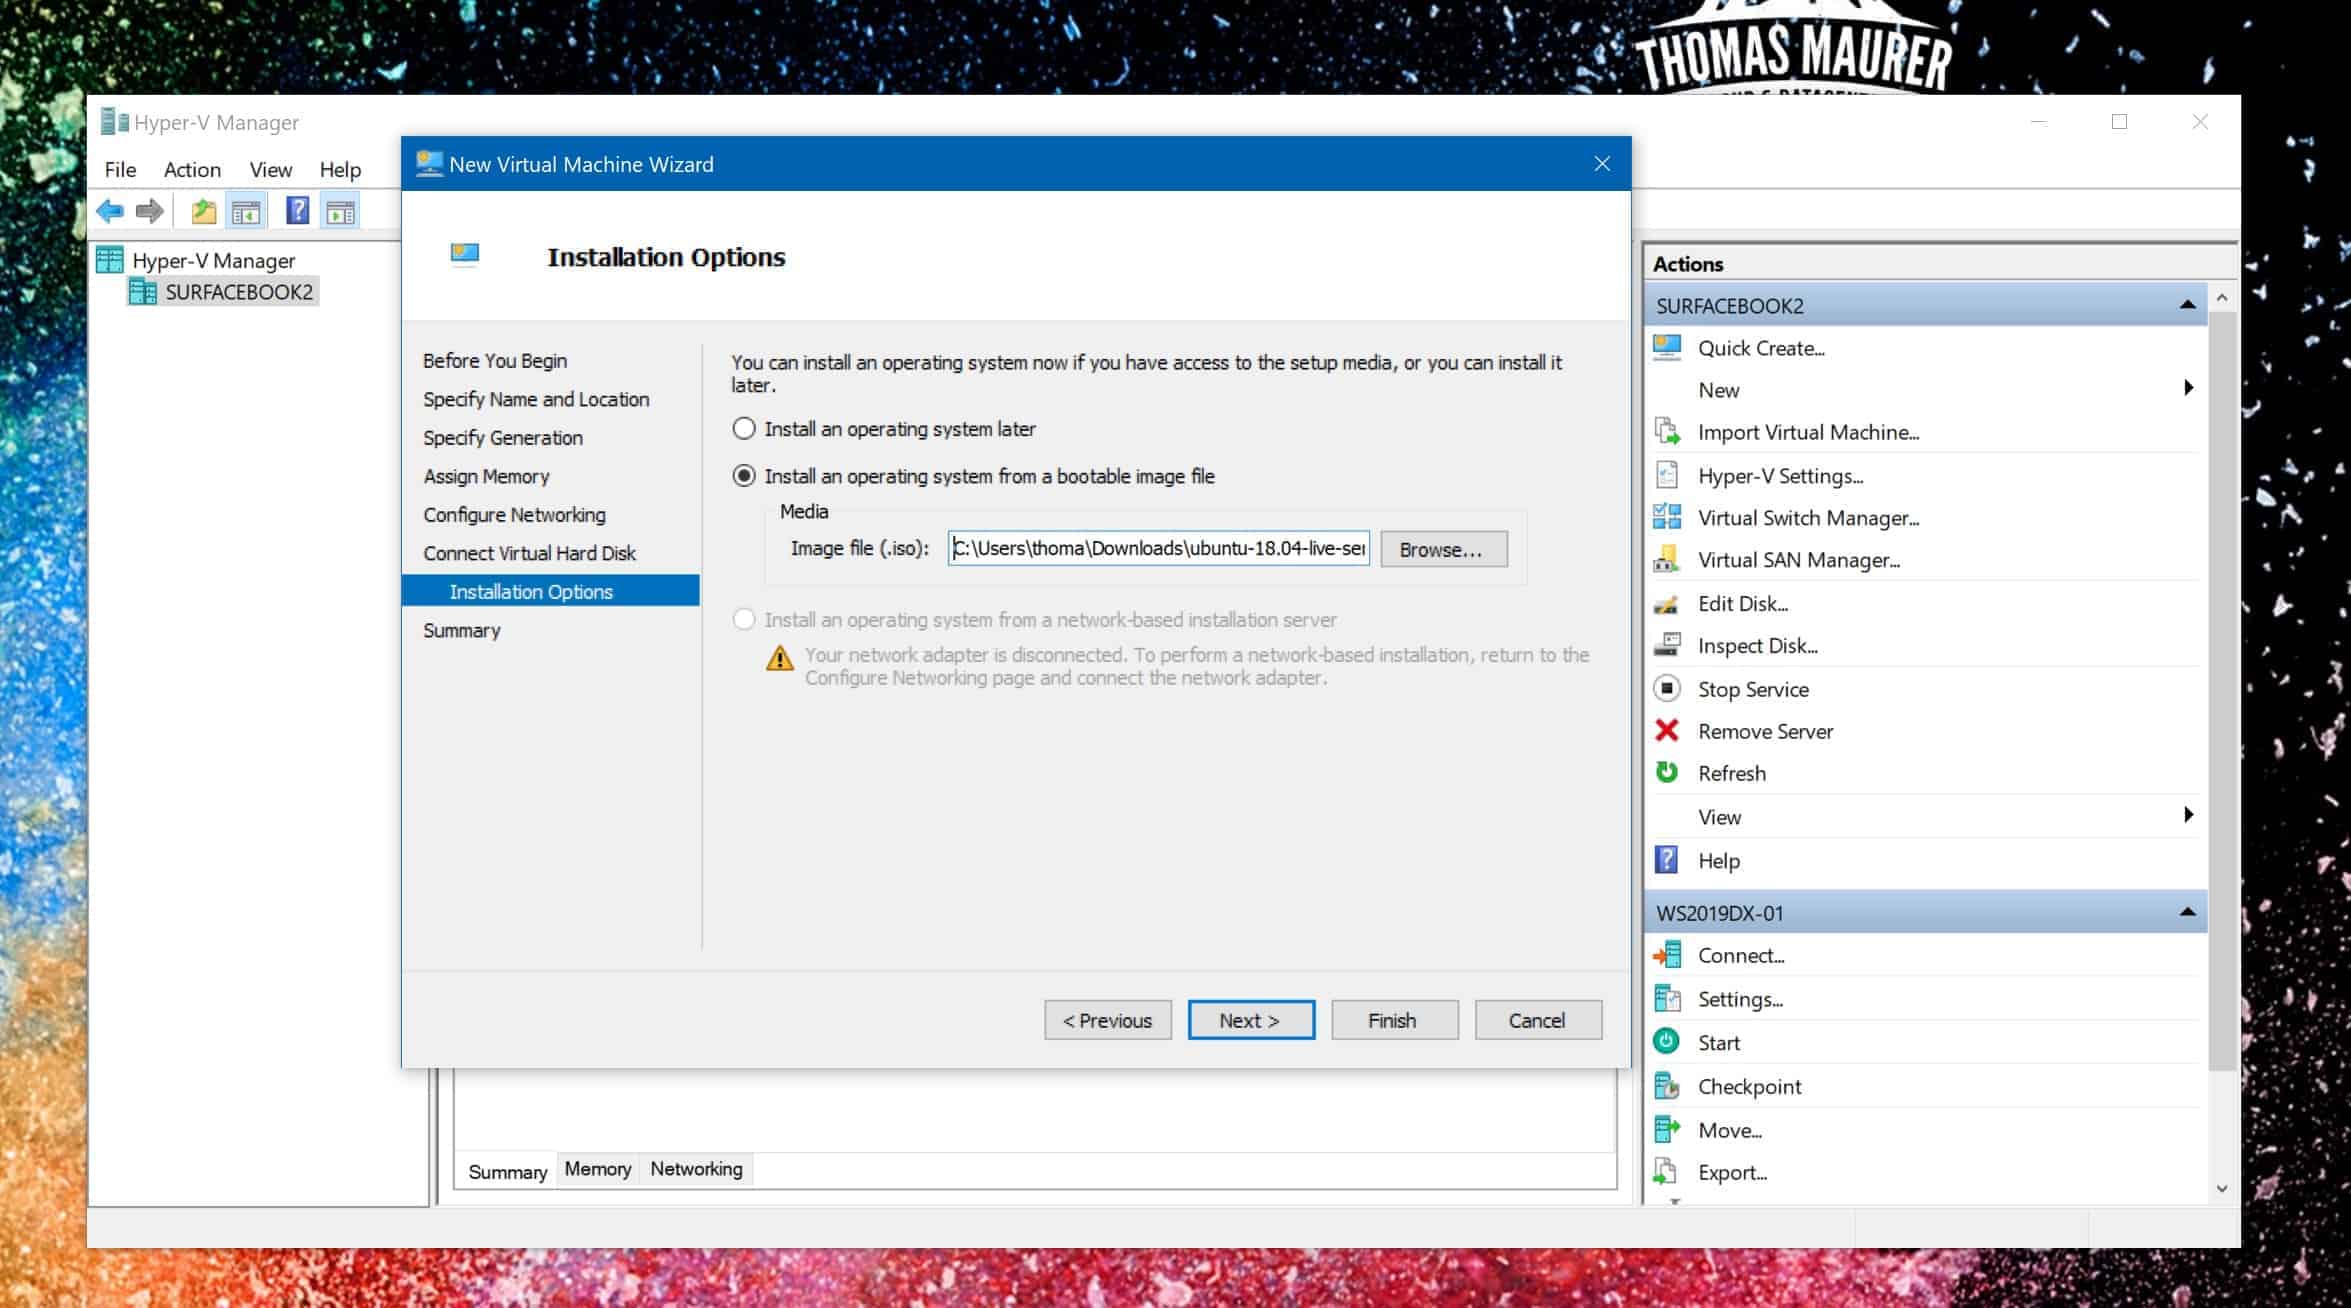
Attach the Ubuntu ISO Image to the virtual machine
After you have created the Virtual Machine using the wizard, go into the settings of the virtual machine. Switch to the Security section and choose the Microsoft UEFI Certificate Authority Secure Boot Template.
Now the Virtual Machine will boot from the Ubuntu ISO, and you can install Ubuntu.
On long-term support (LTS) releases use the latest virtual Hardware Enablement (HWE) kernel for up-to-date Linux Integration Services. To install the Azure-tuned kernel on 16.04, 18.04, and 20.04, run the following commands as root (or sudo):
apt-get update
apt-get install linux-azure
I hope this helps, if you have any questions feel free to leave a comment below.
Tags: Boot from ISO, Hyper-V, Hyper-V Server, Hyper-V Ubuntu, Install Ubuntu on Hyper-V, Linux, Linux Virtual Machine, Linux VM, Microosft, Ubuntu, Virtual Machine, VM, Windows, Windows 10, Windows Server Last modified: February 17, 2021


Thanks for sharing this. I was finally able to install Ubuntu using Hyper-V Gen2.
Happy that my post helped you!
Thank you for sharing the last step: switching to the MS UEFI Certificate Secure Boot Template. Now my Fedora Workstation Image will just start as it should. This specific page should have a higher rank in Google ;)
Thanks a lot! 😊
Using Server 2012, when going into settings this appears to be broke as you can not set the Microsoft UEFI Certificate Authority Secure Boot Template. Is there a way around this?
Hi
You cannot run Generation 2 VMs on Windows Server 2012, You will need to have Windows Server 2012 R2.
Thanks, for those managing Hyper-V with SCVMM the option is in VM properties -> Hardware Configuration -> Firmware
Cheers, Marcin
thanks for adding :)
Is it possible to boot from Linux VM on hyper-v on Windows 10?
Yes, absolutely can you install Linux VMs on Hyper-V running on Windows 10
Thank your for sharing.
Thanks Tom! I had this very issue and your post solved the problem.
Hello Sir,
I have been following the e-mail thread but did not find an answer to my question.
I am trying to install Ubuntu on a nested virtual envoronment. I have VMware running Windows Server 2016 but after adding the Ubuntu vm,( in the nested environment) it keeps telling me that there is not enough memory. I increased the memory, reinstalled Ubuntu, but no luck. If I install Ubuntu on VMware itself, it works fine but not on a nested platform. Could you please help ?
Thanks for this, I never figured out that last bit about the Certificate Authority until reading this. Just for anyone reading this, as of now this works fine for Ubuntu 18.014 but 19.04 fails on the install. i think they still have some problems with the UEFI boot. It tries and flashes a bunch of stuff on the screen but the install ends up failing. I can’t read any of the errors on the console they disappear so fast.
Glad it worked!
Btw also check out this post if you are running Hyper-V on Windows 10: https://www.thomasmaurer.ch/2019/06/how-to-create-an-ubuntu-vm-on-windows-10/
Thanks for sharing, saved me hours of work trying to figure out why it was failing.
Happy it helped :)
Thank you. Have been using VirtualBox for ages. Built a new PC and wanted to use the built-in Hyper-V and was frustrated that Linux ISOs don’t boot. Setting Microsoft UEFI Certificate Authority helped.
Great that this helped you. Let me know if you have more questions :)
I see no Security section in the properties for a G2 VM on 2012 R2…
Hmm, can you upload a screenshot? Which version of Windows or Windows Server are you running?
Do you know whether it’s possible to change this setting for a migrated Ubuntu VM?
I have moved an Ubuntu VM from VMware and set it up on our Hyper-V, and the machine won’t boot.
I tried to change the settings described in this post, but get an error “Cannot modify the secure boot template ID property after the virtual TPM is installed”.
Thanks a bunch!
you’re welcome :)
Thomas Maurer! Thank you for sharing. I’ve been using ESXi since 2010 without any issue with any type of ISO. I’ve just started using Hyper-V and struggled with Linux VM. I’ve to take few moments to “Thank you” because I’ve read Microsoft articles and watched youtube about Linux on Hyper-V but the information was too much and I was unable to find the solution to the problem. I’m very glad to find your post.
————-
After the Virtual Machine is created using the wizard, go into the settings of the virtual machine. Switch to the Security section and choose the Microsoft UEFI Certificate Authority Secure Boot Template. Now, the VM will boot from Linux ISO.
———–
That’s all I need to solve the problem.
Hi Matthew, happy that my blog post helped you :)
Still helpfull in 2021 ;)!!!
Thank you for the advice.
Great to hear! :) Thanks Bert
Since there still seems to be some activity here, I thought I’d ask a question too. :) Thank you also for the tip about using the proper Microsoft UEFI secure boot option. I’m all set up and connected via the console…but performance mousing and navigation performance isn’t great. Years ago I used the RemoteFX 3D video adapter but it looks like that is no longer supported? Anyone else have tips for improving the desktop performance on these Hyper-V Ubuntu VMs?
You can check out the Linux VM Tools https://github.com/microsoft/linux-vm-tools for Enhanced Session mode.
On long-term support (LTS) releases use the latest virtual Hardware Enablement (HWE) kernel for up-to-date Linux Integration Services.
To install the Azure-tuned kernel on 16.04, 18.04, and 20.04, run the following commands as root (or sudo):
apt-get update
apt-get install linux-azure
btw to make it easier, there is also an Ubuntu VM image in the Image gallery: https://www.thomasmaurer.ch/2019/06/how-to-create-an-ubuntu-vm-on-windows-10/
Four years later and your article is still helping folks!
thank you!
I am late to the party, but very grateful for your help, Thomas!
Thank you for this great post. I hope your day will be wonderful :)
Thanks :)
It’s truly remarkable how your post continues to make a positive impact even in the year 2023. Your dedication to helping the community is commendable, and it’s heartwarming to see that your post is still bringing value and support to others. Keep up the excellent work!
Thank you!
Still helpful.
thanks!
There is no Security section in the properties for a Generation-2-VM on Server 2012 R2.