, , , , ,

How to set up Nested Virtualization in Microsoft Azure

5–7 minutes
24 comments on How to set up Nested Virtualization in Microsoft Azure
Azure Nested Virtualization

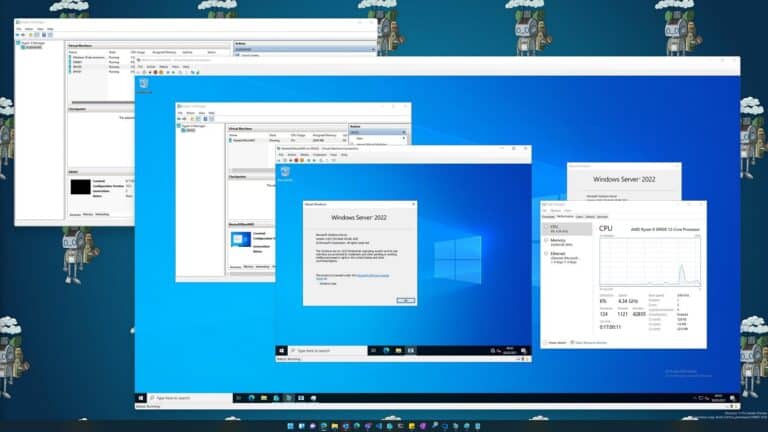
At the Microsoft Build conference this year, Microsoft announced Nested Virtualization for Azure Virtual Machines, and last week Microsoft announced the availability of these Azure VMs. Nested Virtualization allows you to run a hypervisor inside a virtual machine running on a hypervisor, which means you can run Hyper-V within a Hyper-V virtual machine or an Azure virtual machine. Kind of like Inception for virtual machines.
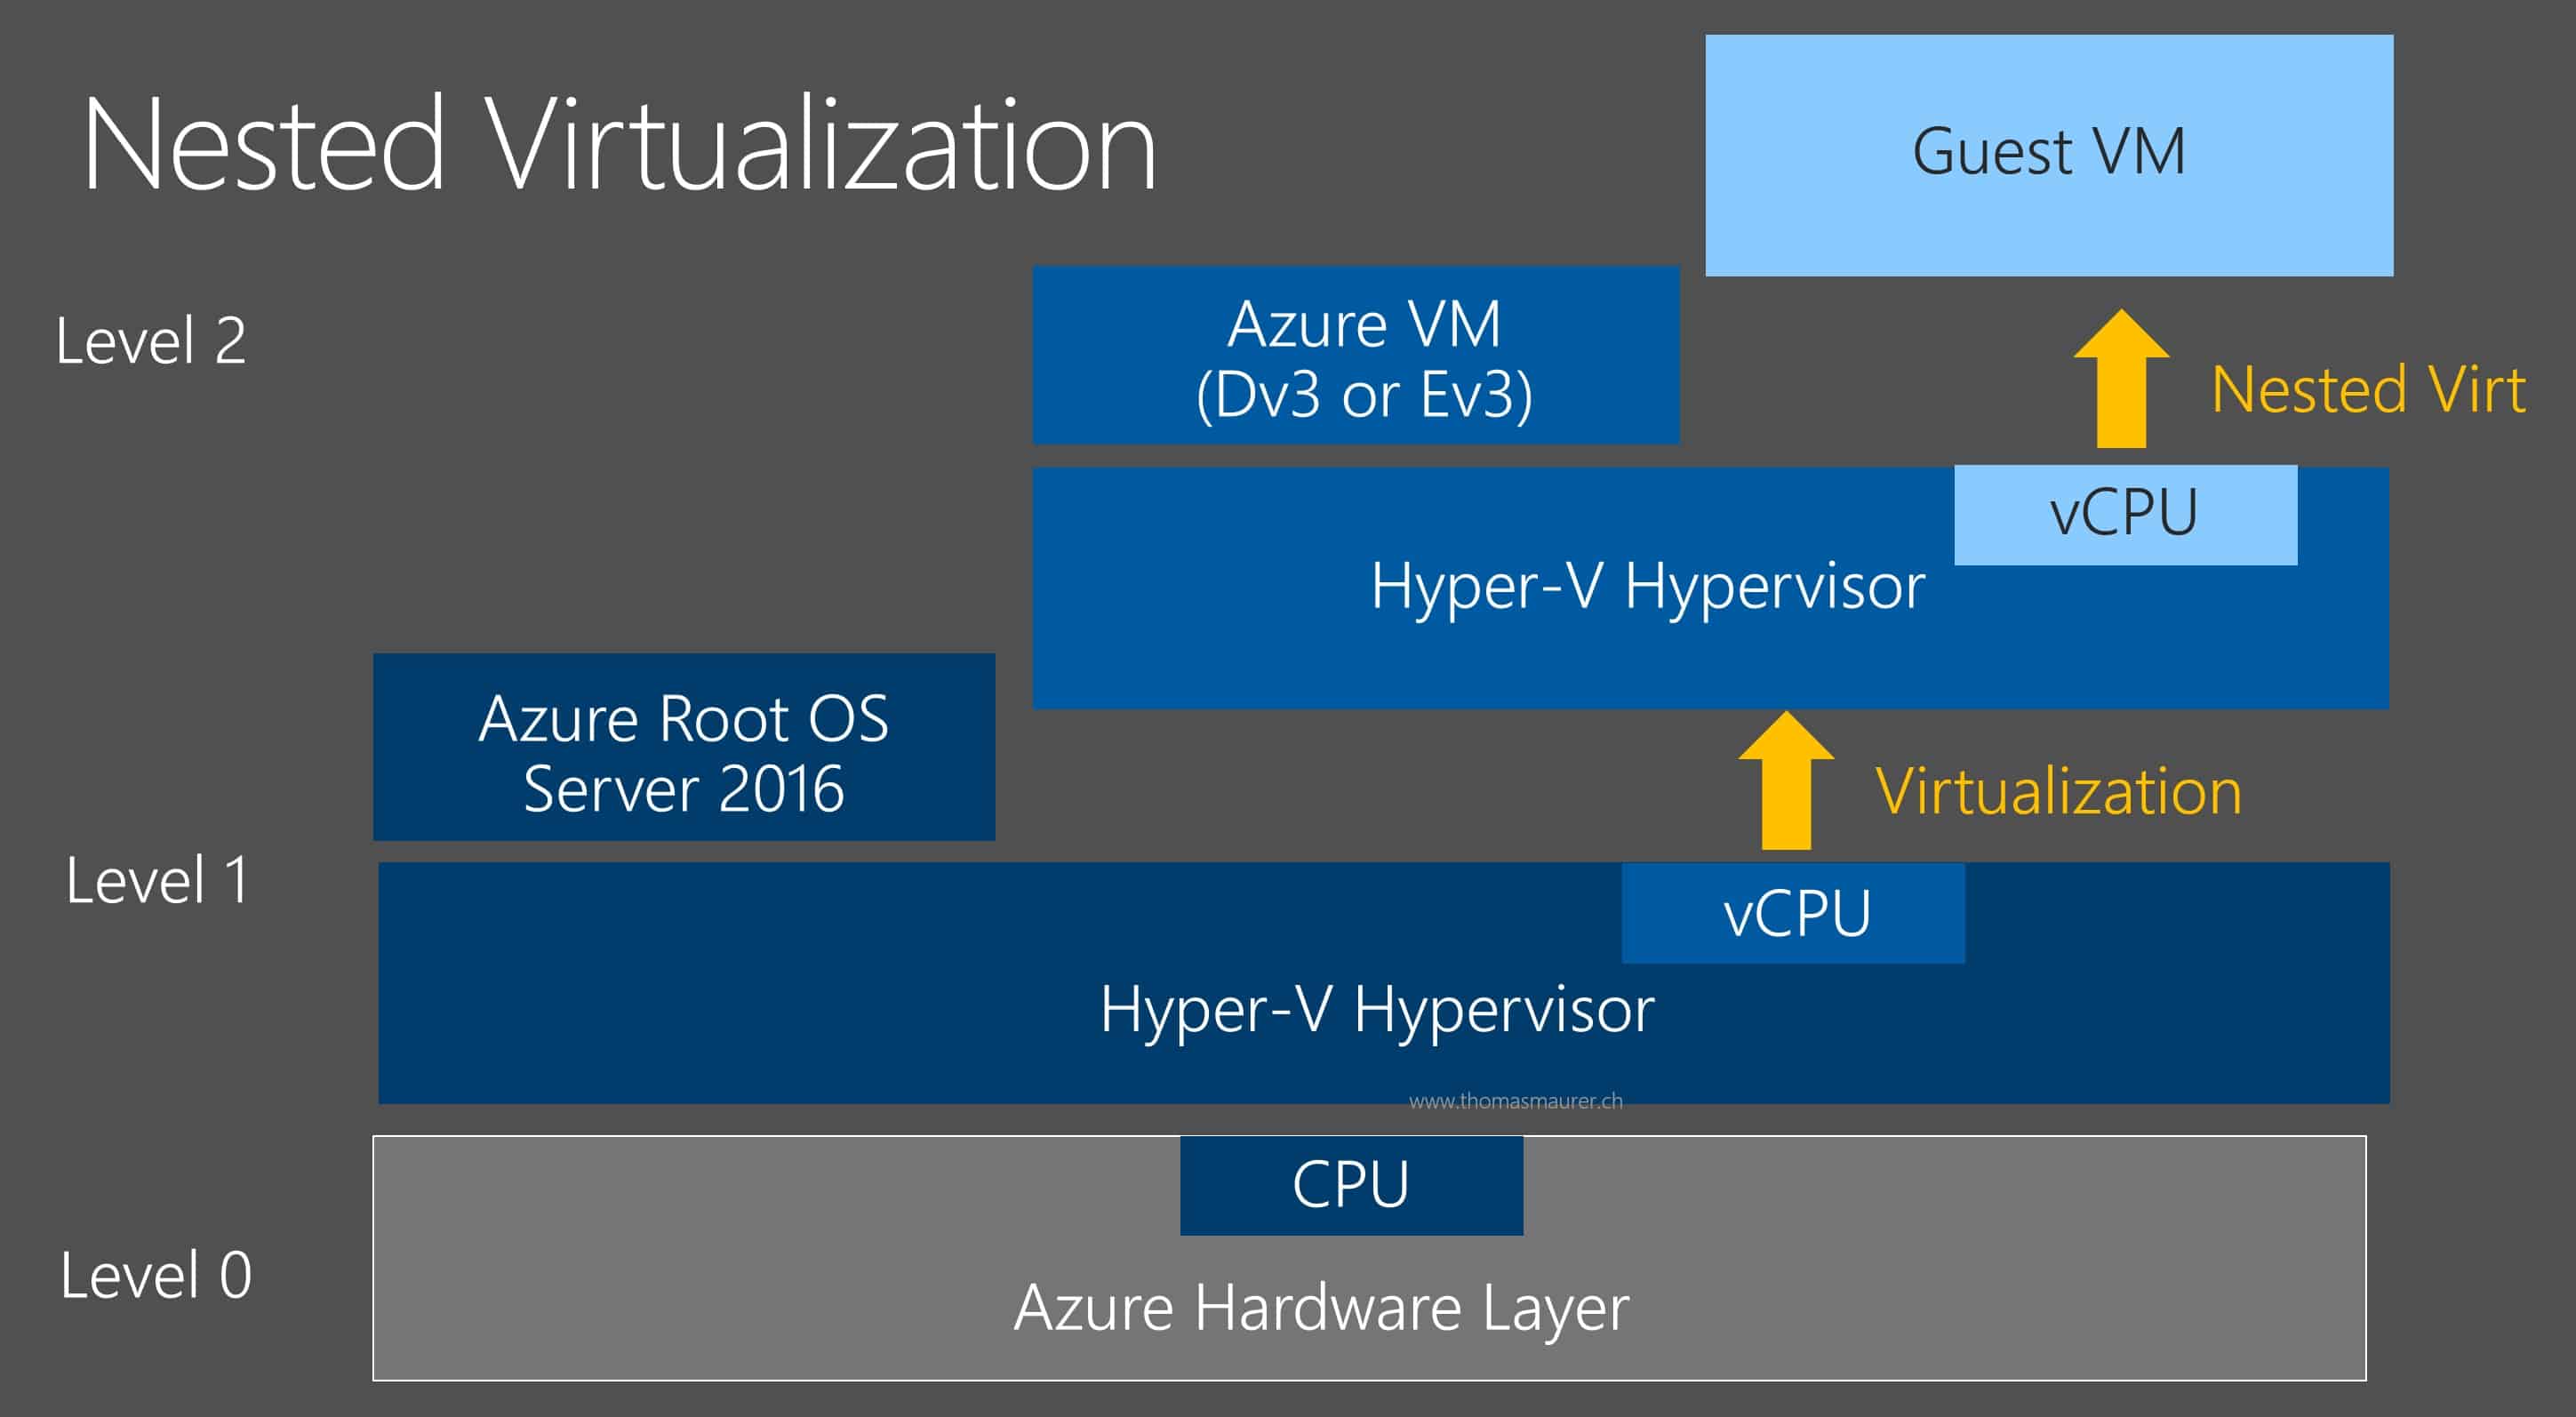
Azure Nested Virtualization

You can use Nested Virtualization since Windows Server 2016 or the same release of Windows 10, for more details on this, check out my blog post: Nested Virtualization in Windows Server 2016 and Windows 10

With the release of the Azure Dv3 and Ev3 VM sizes:

  • D2-64 v3 instances are the latest generation of General Purpose Instances. D2-64 v3 instances are based on the 2.3 GHz Intel XEON ® E5-2673 v4 (Broadwell) processor and can achieve 3.5GHz with Intel Turbo Boost Technology 2.0. D2-64 v3 instances offer the combination of CPU, memory, and local disk for most production workloads.
  • E2-64 v3 instances are the latest generation of Memory Optimized Instances. E2-64 v3 instances are based on the 2.3 GHz Intel XEON ® E5-2673 v4 (Broadwell) processor and can achieve 3.5GHz with Intel Turbo Boost Technology 2.0. E2-64 v3 instances are ideal for memory-intensive enterprise applications.

With the upgrade to new Intel Broadwell processors, Microsoft enabled Nested Virtualization. This will enable a couple of different scenarios if you create a virtual machine running Windows Server 2016 or Windows Server 2019.

  • You can run Hyper-V Containers (Windows Containers with additional isolation) inside an Azure VM. With future releases, we will also be able to run Linux Containers in Hyper-V Containers running on a Windows Server OS.
  • You can quickly spin up and shut down new demo and test environments, and you only pay when you use them (pas-per-use)

How to Setup Nested Virtualization in Azure

Deploy Azure VM

To set up Nested Virtualization inside an Azure virtual machine, you first need to create a new virtual machine using one of the new instance sizes like Ev3 or Dv3 and Windows Server 2016. I also recommend installing all the latest Windows Server patches to the system.

Optional: Optimize Azure VM Storage

This step is optional, but if you want to better performance and more storage for your nested virtual machines to run on, this makes sense.
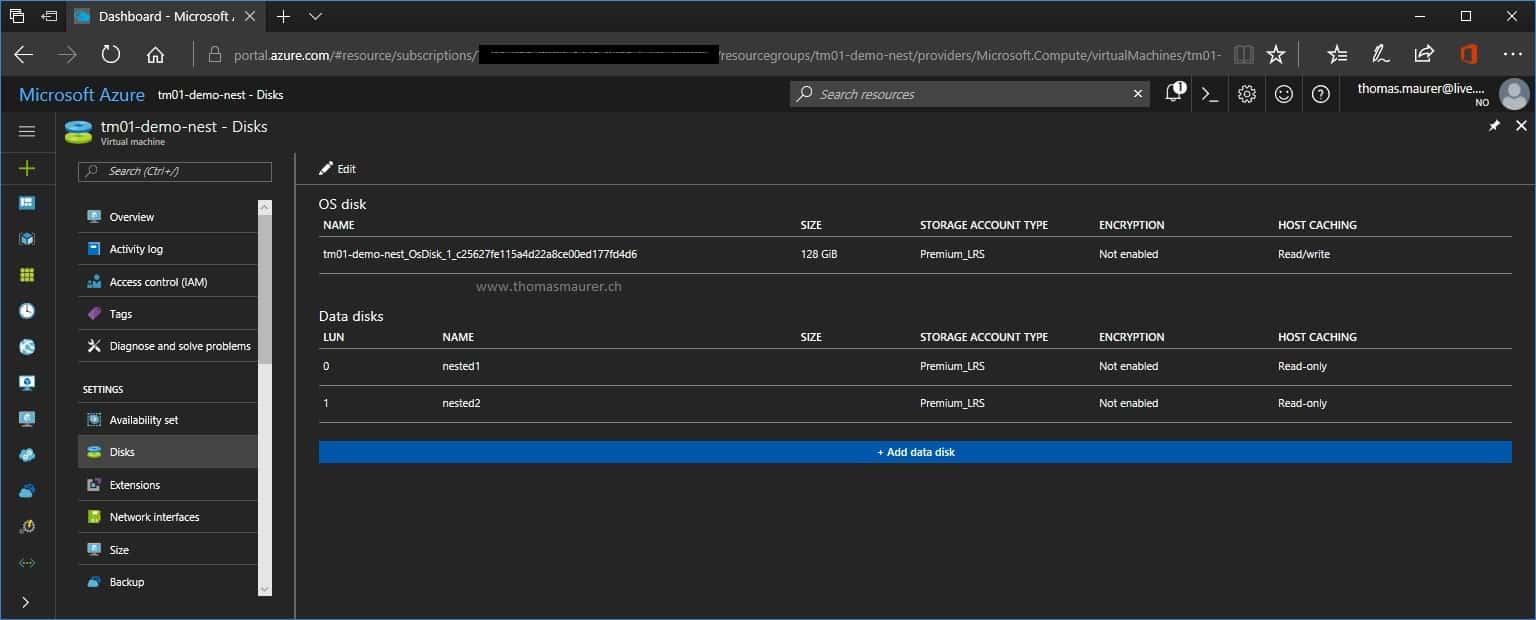
Azure VM Data Disks

In my case, I attached two additional data disks to the Azure VM. Of course, you can choose more or different sizes. Now you can see two new data disk inside your Azure virtual machine. Do not format them, because we are going to create a new storage spaces pool and a single virtual disk, so we get the performance form both disks at the same time. In the past, this was called disk striping.

Azure VM Storage Spaces

With that, you can create a new Storage Spaces Storage Pool and a new Virtual Disk inside the VM using the storage layout “Simple” which configures it as striping.
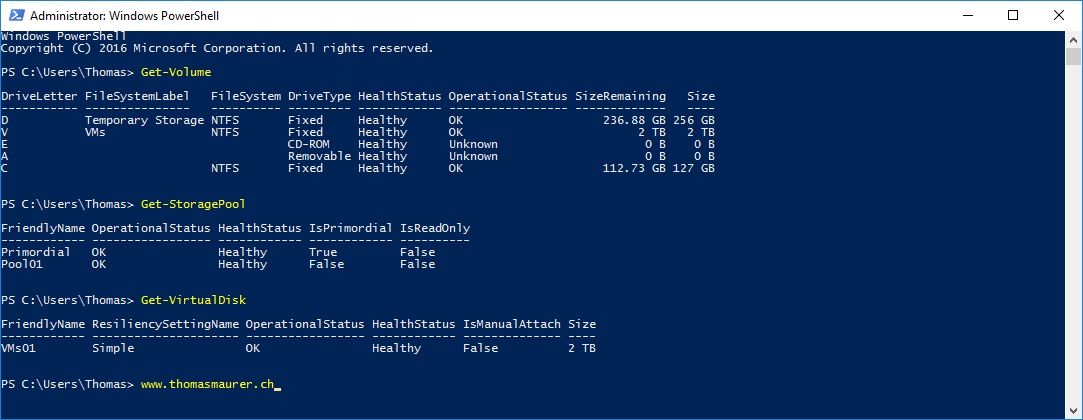
Azure VM Storage Spaces PowerShell

I also formatted the disk and set the drive letter to V, and this will be the volume where I will place my nested virtual machines.

Install Hyper-V inside the Azure VM
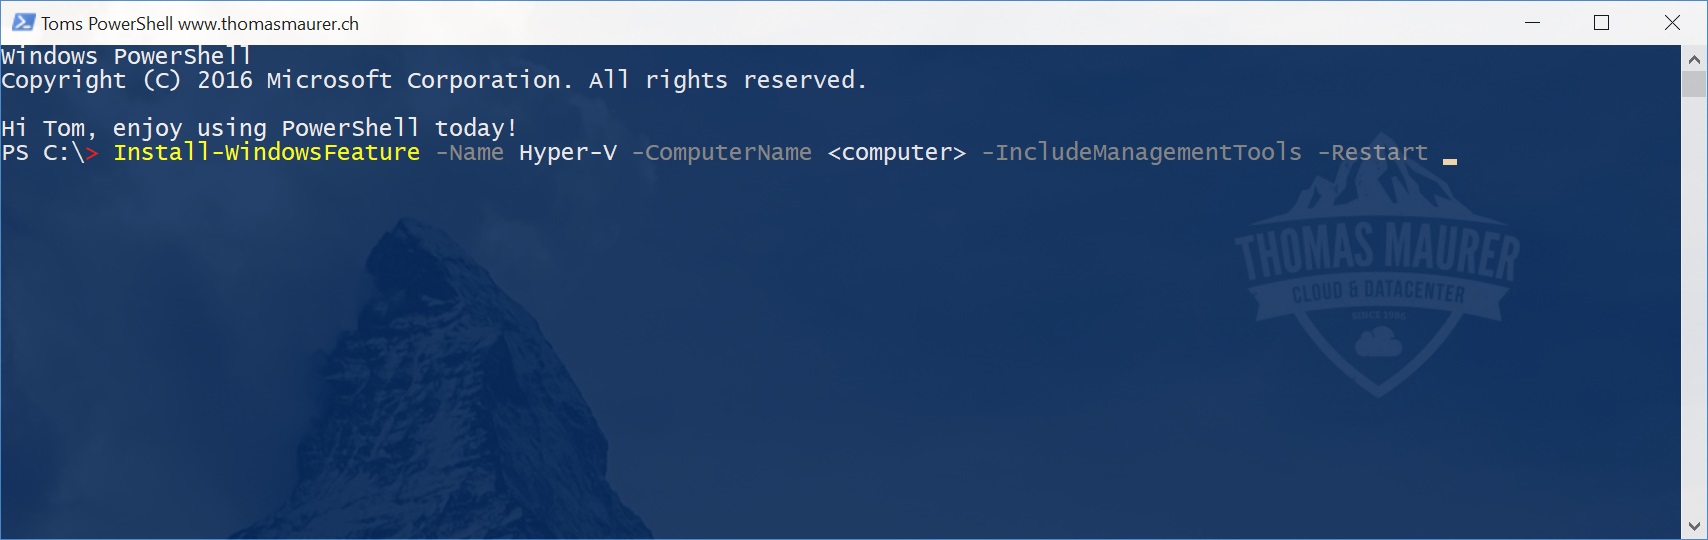
Install Hyper-V on Windows Server using PowerShell

The next step would be to install the Hyper-V role in your Azure virtual machine. You can use PowerShell to do this since this is a regular Windows Server 2016. This command will install Hyper-V and restart the virtual machine.

Install-WindowsFeature -Name Hyper-V -IncludeManagementTools -Restart
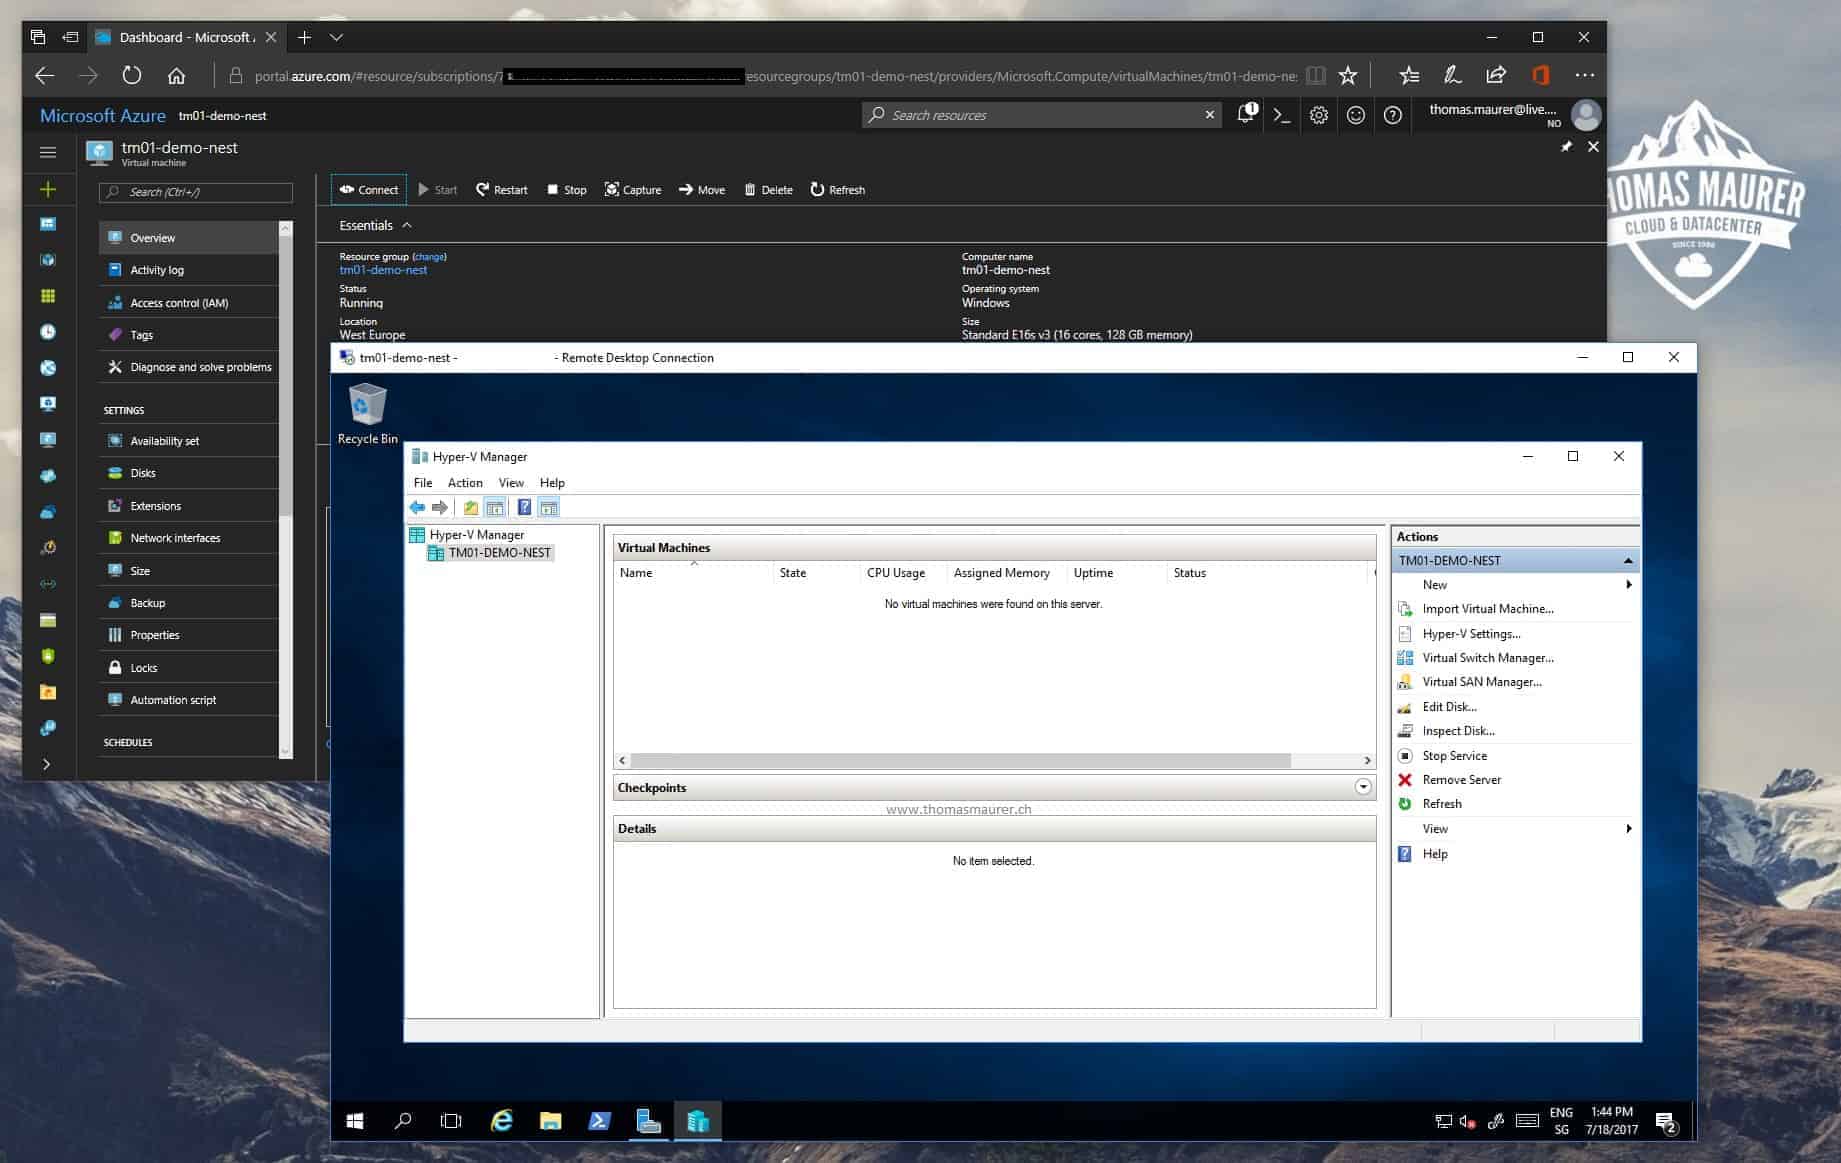
Azure VM Hyper-V

After the installation you have Hyper-V installed and enabled inside your Azure virtual machine, now you need to configure the networking for the Hyper-V virtual machines. For this, we will use NAT networking.

Configure Networking for the Nested Environment
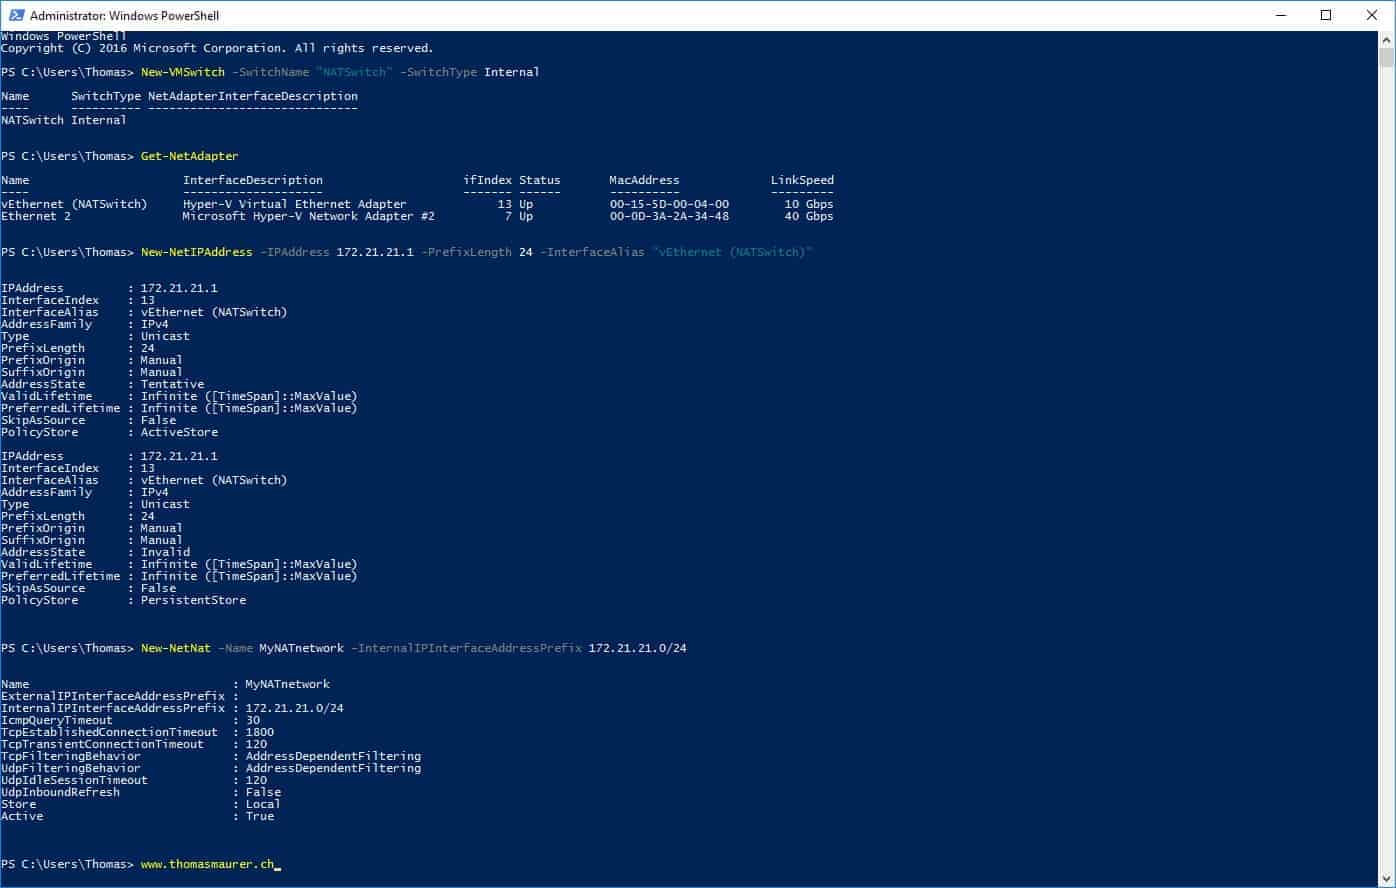
Hyper-V NAT Network inside Azure VM

To allow the nested virtual machine to access the internet, we need to set up Hyper-V networking in the right way. For this, we use the Hyper-V internal VM Switch and NAT networking. I described this here: Set up a Hyper-V Virtual Switch using a NAT Network

Create a new Hyper-V Virtual Switch

First, create an internal Hyper-V VM Switch

New-VMSwitch -SwitchName "NATSwitch" -SwitchType Internal

Configure the NAT Gateway IP Address

The Internal Hyper-V VM Switch creates a virtual network adapter on the host (Azure virtual machine), this network adapter will be used for the NAT Gateway. Configure the NAT gateway IP Address using New-NetIPAddress cmdlet.

New-NetIPAddress –IPAddress 172.21.21.1 -PrefixLength 24 -InterfaceAlias "vEthernet (NATSwitch)"

Configure the NAT rule

After that, you have finally created your NAT network, and you can now use that network to connect your virtual machines and use IP addresses from 172.21.21.2-172.21.21.254.

New-NetNat –Name MyNATnetwork –InternalIPInterfaceAddressPrefix 172.21.21.0/24

Now you can use these IP Addresses to assign this to the nested virtual machines. You can also set up a DHCP server in one of the nested VMs to assign IP addresses automatically to new VMs.

Optional: Create NAT forwards inside Nested virtual machines

To forward specific ports from the Host to the guest VMs, you can use the following commands.

This example creates a mapping between port 80 of the host to port 80 of a virtual machine with an IP address of 172.21.21.2.

Add-NetNatStaticMapping -NatName "MyNATnetwork" -Protocol TCP -ExternalIPAddress 0.0.0.0 -InternalIPAddress 172.21.21.2 -InternalPort 80 -ExternalPort 80

This example creates a mapping between port 82 of the virtual machine host to port 80 of a virtual machine with an IP address of 172.21.21.3.

Add-NetNatStaticMapping -NatName "MyNATnetwork" -Protocol TCP -ExternalIPAddress 0.0.0.0 -InternalIPAddress 172.16.0.3 -InternalPort 80 -ExternalPort 82

Optional: Configure the default virtual machine path

Since I have created an extra volume for my nested virtual machines, I configure this as the default path for virtual machines and virtual hard disks.

Set-VMHost -VirtualHardDiskPath V:\VMs -VirtualMachinePath V:\VMs

Create Nested Virtual Machines inside the Azure VM
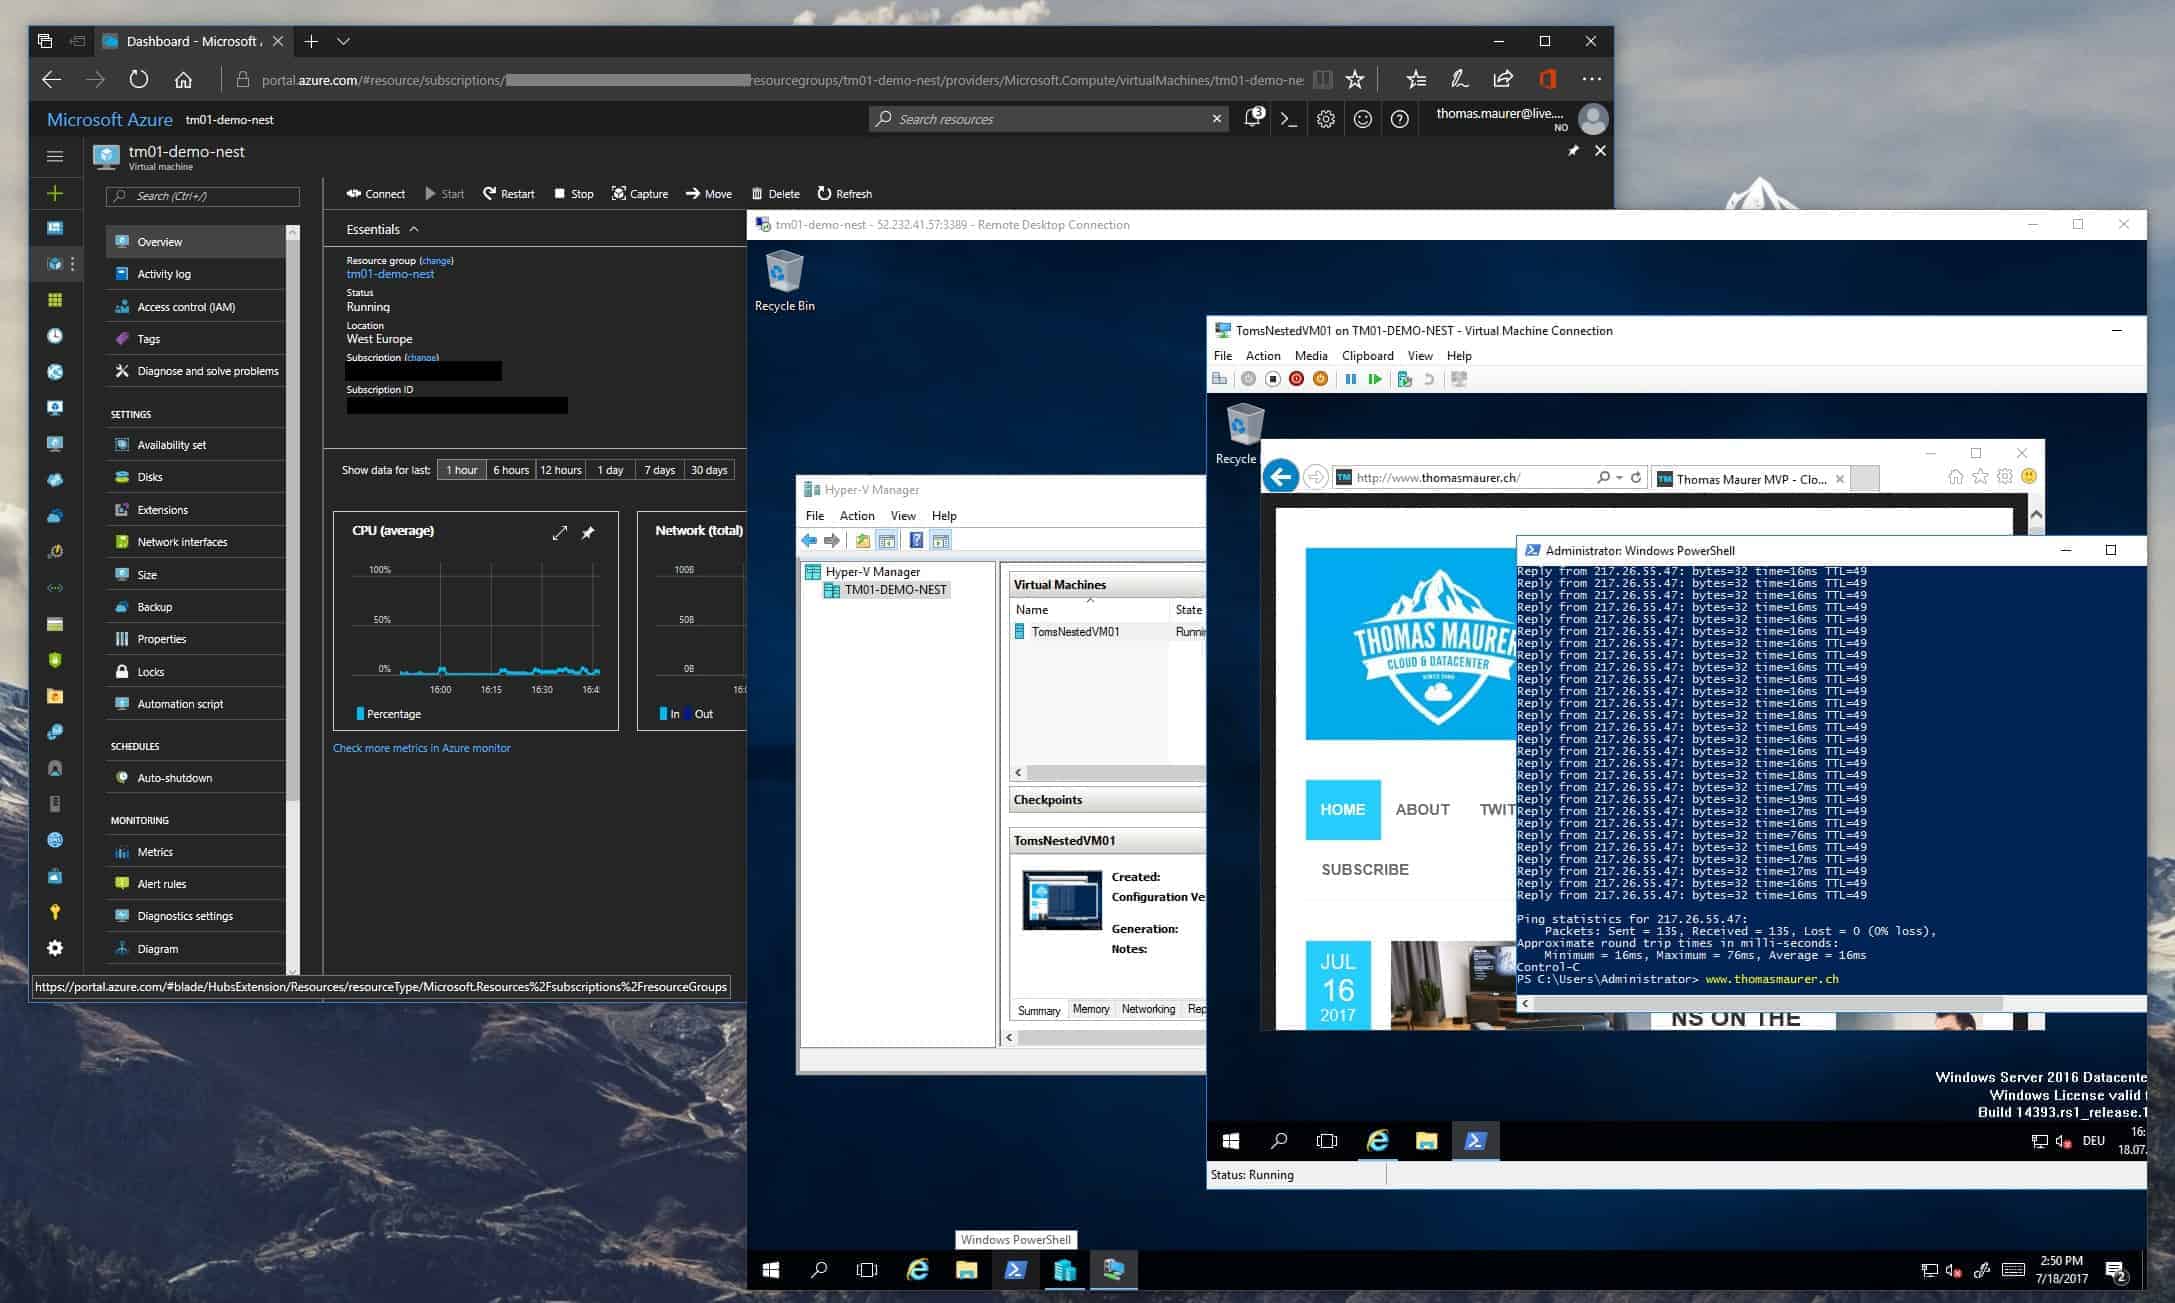
Azure Nested Virtualization

Now you can start to create virtual machines inside the Azure VM. You can, for example, use an existing VHD/VHDX or create a new VM using an ISO file as you would do on a hardware Hyper-V host.

Some crazy stuff to do

There is a lot more you could do, not all of it makes sense for everyone, but it could help in some cases.

  • Running Azure Stack Development Kit – Yes, you can run the Azure Stack Development Kit, if you use large enough Azure virtual machine.
  • Configure Hyper-V Replica and replicate Hyper-V VMs to your Azure VM running Hyper-V.
  • Nested a Nested virtual machine in an Azure VM – You could enable nesting on a VM running inside the Azure VM so you could do a VM inside a VM, inside a VM. Just follow my blog post to create a nested Virtual Machine: Nested Virtualization in Windows Server 2016 and Windows 10

In my opinion, Nested Virtualization is mostly helpful if you run Hyper-V Containers. But it also works great, if you want to run some virtual machines inside an Azure VM, to run a lab or to test something.

24 responses

  1. Boy Avatar

    How i get “internet” enabled in a nested VM-NAT-network?

  2. Bartek Avatar

    Hi,

    Any expirience with hosting production systems/application in nested virtualization in Azure? What is your opinion for such approach like using nested virutalization for production workload ?
    I’m looking for any infromation related to potential support of such environments but no luck :/

  3. Bob Avatar

    Great post. After following the directions I am not able to get out to the internet. I can ping the hosts vEthernet(NATSwitch) but nothing beyond that (not even the primary NICs IP on the same subnet. I am guessing something is wrong with the NetNat but it looks identical to yours. Any thoughts?

  4. Yeong Sheng Avatar
    Yeong Sheng

    Hey Thomas, first off, thank you for a great post. This is my current first go-to to understand how to enable Nested-Virtualization in Azure.

    I have a need to spin up a compute VM to run a ‘packer build’ to generate a Hyper-V OS image that contains my application to be “shrinked-wrapped” and to-be shipped to a customer.

    What I hope to know (as per my searches online come to naught so far), is, whether there is a way to use the azure-cli or azure_sdk (ruby) or Azure REST compute management endpoint to spin up a Compute Windows 10 or Windows 2016 instance that sets the flag with necessary network settings for my materialised instance to have ‘Nested-Virtualization’ enabled?

  5. Fla Avatar

    If I want to access some of the VMs created in HyperV. How do I do that in Azure?

  6. Fla Avatar

    If I want to access some of the VMs created in HyperV via RDP. How do I do that from a machine that is outside the Azure Network?

    1. Thomas Maurer Avatar

      You will need to do a NAT Rule on the Azure VM (Hyper-V Server) to the VM for example:

      Add-NetNatStaticMapping -NatName “MyNATnetwork” -Protocol TCP -ExternalIPAddress 0.0.0.0 -InternalIPAddress IPOFTHEVMINSIDE -InternalPort 3390 -ExternalPort 3389

      See that I used port 3390 from external mapped to 3389 of the VM, so if you use the Azure Public ip with port 3389 you will connect to the Azure VM Hyper-V Server, if you connect using the Azure Puplic Ip with port 3390 you will be connected through the Azure VM to the Hyper-V VM.

      XXX.XXX.XXX.XXX:3389 (Azure VM)

      XXX.XXX.XXX.XXX:3390 (Hyper-V VM in the Azure VM)

  7. Andy Avatar

    Hi Thomas,

    Is it possible to assign Azure VNET IP Address to the Nested VMs?
    Means same network as the HyperV Host.

    1. Thomas Maurer Avatar

      Hi Andy

      As of today, I don’t see any option to make it work. But maybe there will be an option in the future.

  8. Pramod Avatar

    Hey Thomas,

    Is it possible for the guest VMs in 172.21.21.0/24 to access Azure VMs in host network (Azure private network) and viceversa.

    Regards,
    Pramod

    1. Thomas Maurer Avatar

      Hi Pramod

      The Guest VMs can Access Azure VMs in the host network. By default Azure VMs cannot access the guest VMs, for this you will need to set some NAT Rules to make specific ports available to a specific guest VM.

  9. Pramod Avatar

    Hello Thomas,

    I have configured one Internal and one External vSwitch with Internal assigned to VMs. The VMs are using APIPA(169.254.X.X) IPs instead of the IPs from DHCP server hosted in one of the Azure VMs.

    Regards,
    Pramod

    1. Thomas Maurer Avatar

      You will need to configure the Hyper-V Switch as a NAT Switch. You can find here, how you do this: https://www.thomasmaurer.ch/2016/05/set-up-a-hyper-v-virtual-switch-using-a-nat-network/

  10. Rob Avatar

    Any thoughts on what is required to reach a nested VM in Azure across a VPN tunnel? We have a Azure VM with the Hyper-V role enabled and a single guest VM inside Hyper-V, and I can ping my workstation across the VPN tunnel, and the workstation can ping Azure Hyper-V host, but I cannot ping the nested VM. I’ve reviewed the firewall config thoroughly with the vendor.

    1. Thomas Maurer Avatar

      Did you setup the NAT rules to reach the VM?

  11. deepak rajguru Avatar

    Hello Thomas,

    can we access the nested VM over new/same public IP, the way we access Azure VMs?
    wanted to know for both environment, Windows as well Linux?
    please help me with the steps if possible.

    Thanks in advance :)
    Deepak rajguru

  12. Gabriel Luiz Avatar

    Can I put Linux VMs to run?

    1. Thomas Maurer Avatar

      Hi Gabriel, If you want to run Linux VMs on Hyper-V inside the Windows Server VM on Azure, yes you can. :)

  13. avad Avatar

    Hi Thomas,

    First of all thanks for this blog, effectively I have been using this post for such a long time. I have gone ahead and used nested VM for variety of purposes including testing and providing VMs to some development folks.

    To restrict my VM to specific Public IP for security(e.g. public IP of my home router) I use the NSG as far as remoting to VM is concerned. Recently I have been trying to take the remote of my guest VM (I have already configured the NAT rule)
    e.g AZURE PUBLIC IP X.X.X.X:3390 as you mentioned below. But this never works for RDP(I can do port forwarding on 80 /433). Below is the error that I get:

    PS C:\Scripts> Add-NetNatStaticMapping -NatName “NATnetwork” -Protocol TCP -ExternalIPAddress 0.0.0.
    0 -InternalIPAddress 192.168.1.2 -InternalPort 3390 -ExternalPort 3389
    Add-NetNatStaticMapping : The process cannot access the file because it is being used by another
    process.
    At line:1 char:1
    + Add-NetNatStaticMapping -NatName “NATnetwork” -Protocol TCP -External …
    + ~~~~~~~~~~~~~~~~~~~~~~~~~~~~~~~~~~~~~~~~~~~~~~~~~~~~~~~~~~~~~~~~~~~~~
    + CategoryInfo : NotSpecified: (MSFT_NetNatStaticMapping:root/StandardCi…atStaticMa
    pping) [Add-NetNatStaticMapping], CimException

    Any pointers or help would certainly help !

    1. Thomas Maurer Avatar

      Hi I guess in your case port 3389 is already used by the RDP service of the Azure VM, which means you can not use 3389 to forward it. So I think in your case, you want to change Internal Port to 3389 and external port so 3390. Which means that you would use the AZUREPUBLICIP:3390 to access your VM.

  14. dcasota Avatar
    dcasota

    Hi Thomas,

    A few questions, in the following statements as per 1.1.2020, what’s wrong, what’s right?

    – Level 0 Azure hardware virtualization layer inside Azure stack is supported for Level 1 Hypervisor Hyper-V only. Beside Microsoft CSP-specific solutions (like Azure VMware Solution by CloudSimple), there are no Microsoft baremetal-kubernetesified, ipmi/iLO/iDRAC/../bmc-included Virtual Machines offerings.

    – “Level 2 nested virtualization” is supported for Windows Server Virtual Machines with Hyper-V only, in reference to https://docs.microsoft.com/en-us/virtualization/hyper-v-on-windows/user-guide/nested-virtualization, and, only using the Dv3 and Ev3 VM sizes, or premium disk support possible through Esv3. Accelerated Networking is not included.

    Many thanks for clarifying nested virtualization on Azure.

    1. Thomas Maurer Avatar

      Hi Can you share the source of these comments with me and secondly what do you think is wrong with it? Do you have any specific questions about these statements?

  15. Michael Avatar
    Michael

    Hi to everyone

    We are very happy about your instructions but have the same problem as someone already spoke about.

    “I can ping my workstation across the VPN tunnel, and the workstation can ping Azure Hyper-V host, but I cannot ping the nested VM.”

    We have as a test setup for us created a vpn site 2 site connection and can communicate with the Host but not with the vm inside the host… is this normal? can we fix it? and when, how?

    Best regards
    twiix

  16. Michael Avatar
    Michael

    Hi to everyone

    We are very happy about your instructions but have the same problem as someone already spoke about.

    “I can ping my workstation across the VPN tunnel, and the workstation can ping Azure Hyper-V host, but I cannot ping the nested VM.”

    We have as a test setup for us created a vpn site 2 site connection and can communicate with the Host but not with the vm inside the host… is this normal? can we fix it? and when, how?

Leave a Reply

Your email address will not be published. Required fields are marked *

This site uses Akismet to reduce spam. Learn how your comment data is processed.