
Last week Microsoft released Windows Server 2016 Technical Preview 4, which includes a lot of changes and fixes. Since I had some presentations on Nano Server in the past weeks I will quickly cover how you can create a Nano Server VHD or VHDX file.
If you download the ISO with Windows Server 2016 ISO you and mount this file you can see a folder called Nano Server. In this folder you can find the NanoServer.wim file and some PowerShell scripts as well as a folder called Packages, which includes the features, roles, driver and agents for Nano Server.
I usually copy all the PowerShell scripts (and the new module) to C:\NanoServer, even if you don’t have to, but it makes it easier for me.

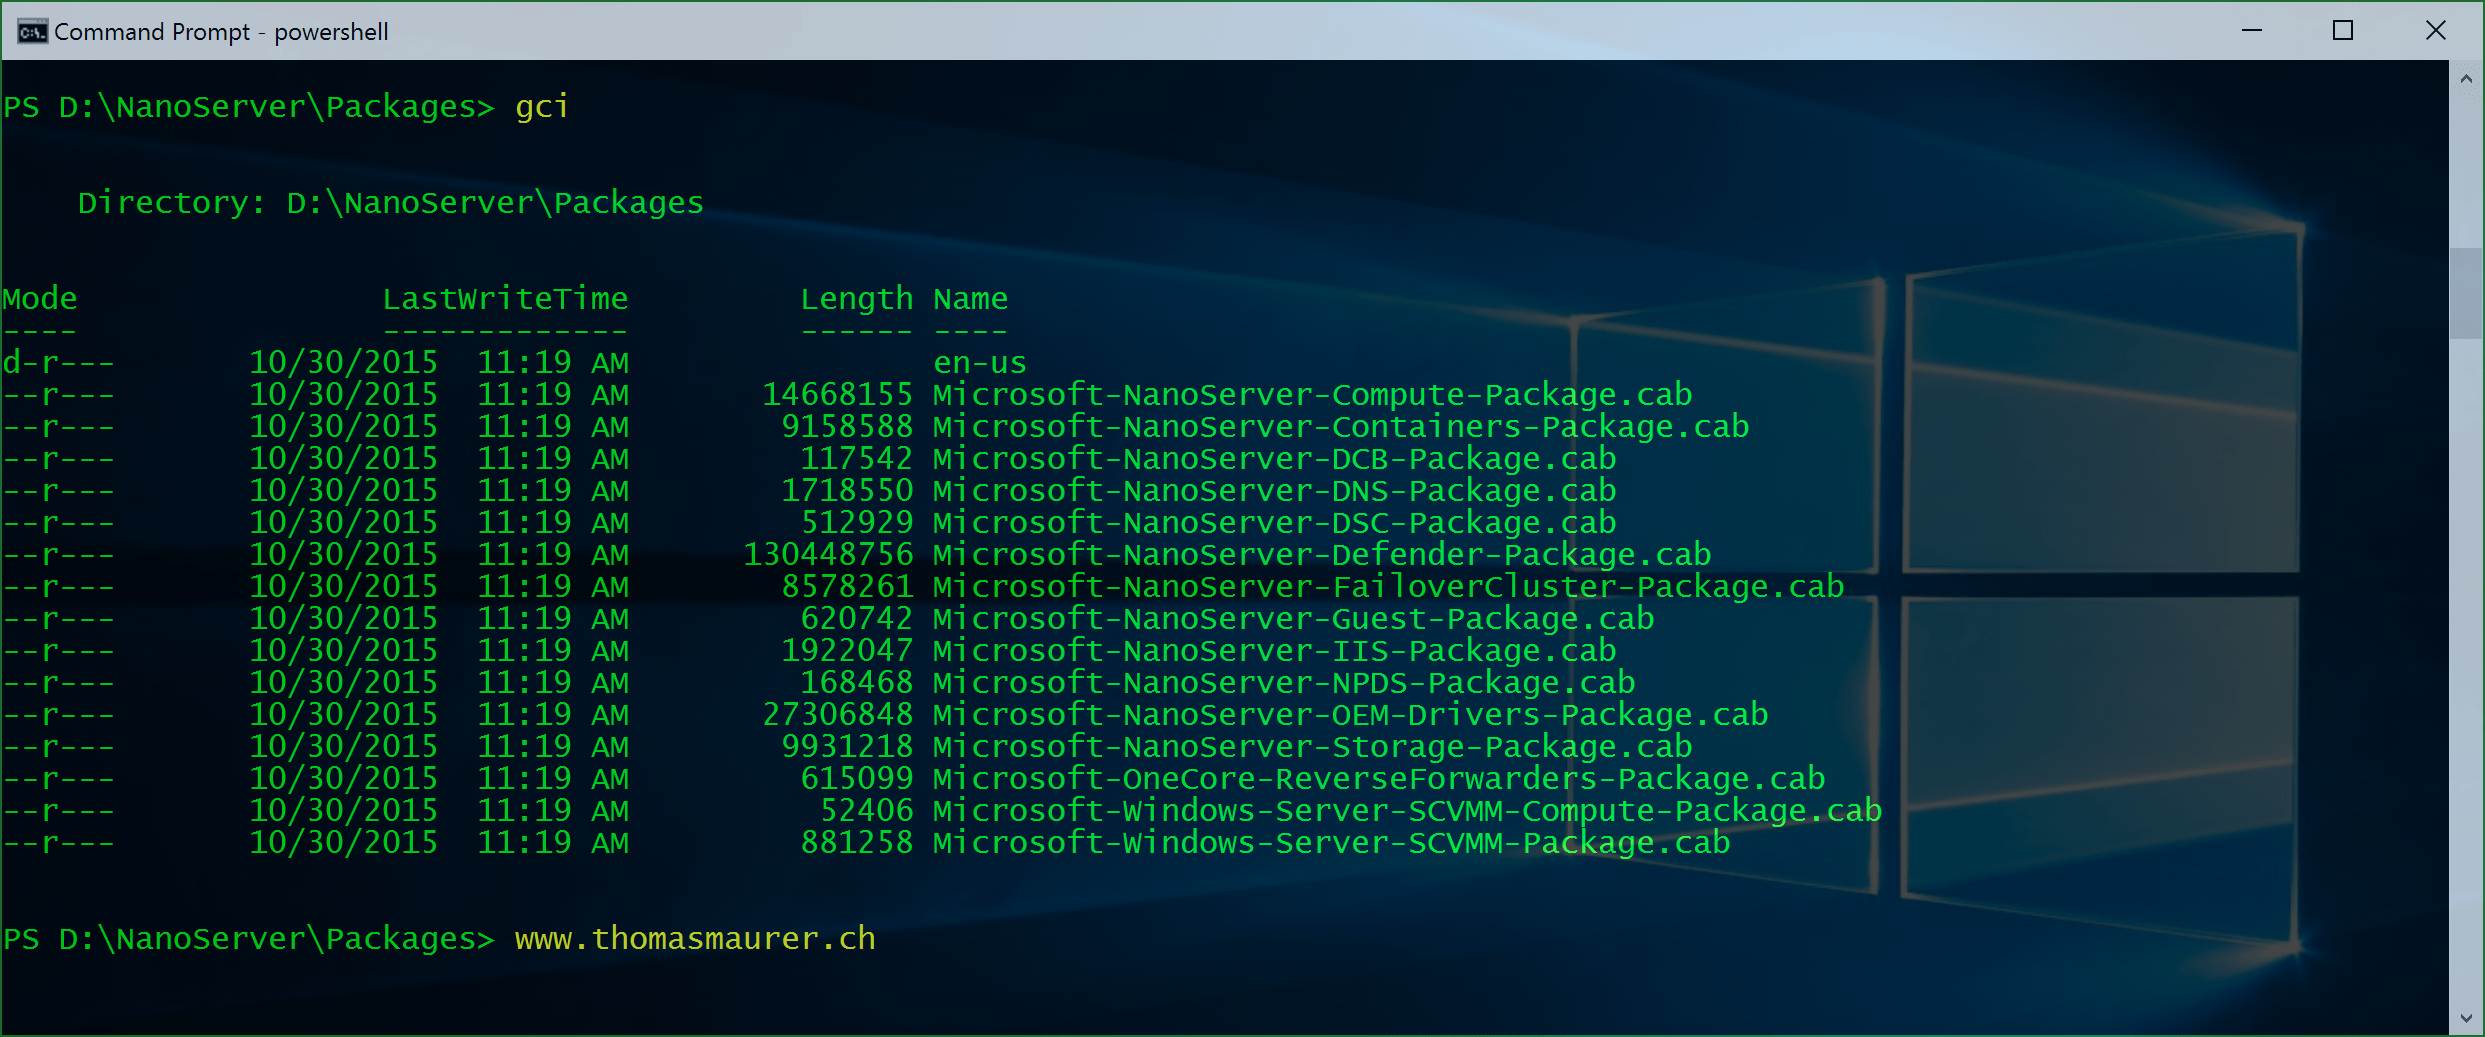
If you have a look at the Packages folder you can find all the available packages for Nano Server:
Now to create a new Nano Server VHD file you can use the following steps:
First go to the directory where you stored the PowerShell files, for me this would be C:\NanoServer
Import the PowerShell Module and use the command to create a new Nano Server Image
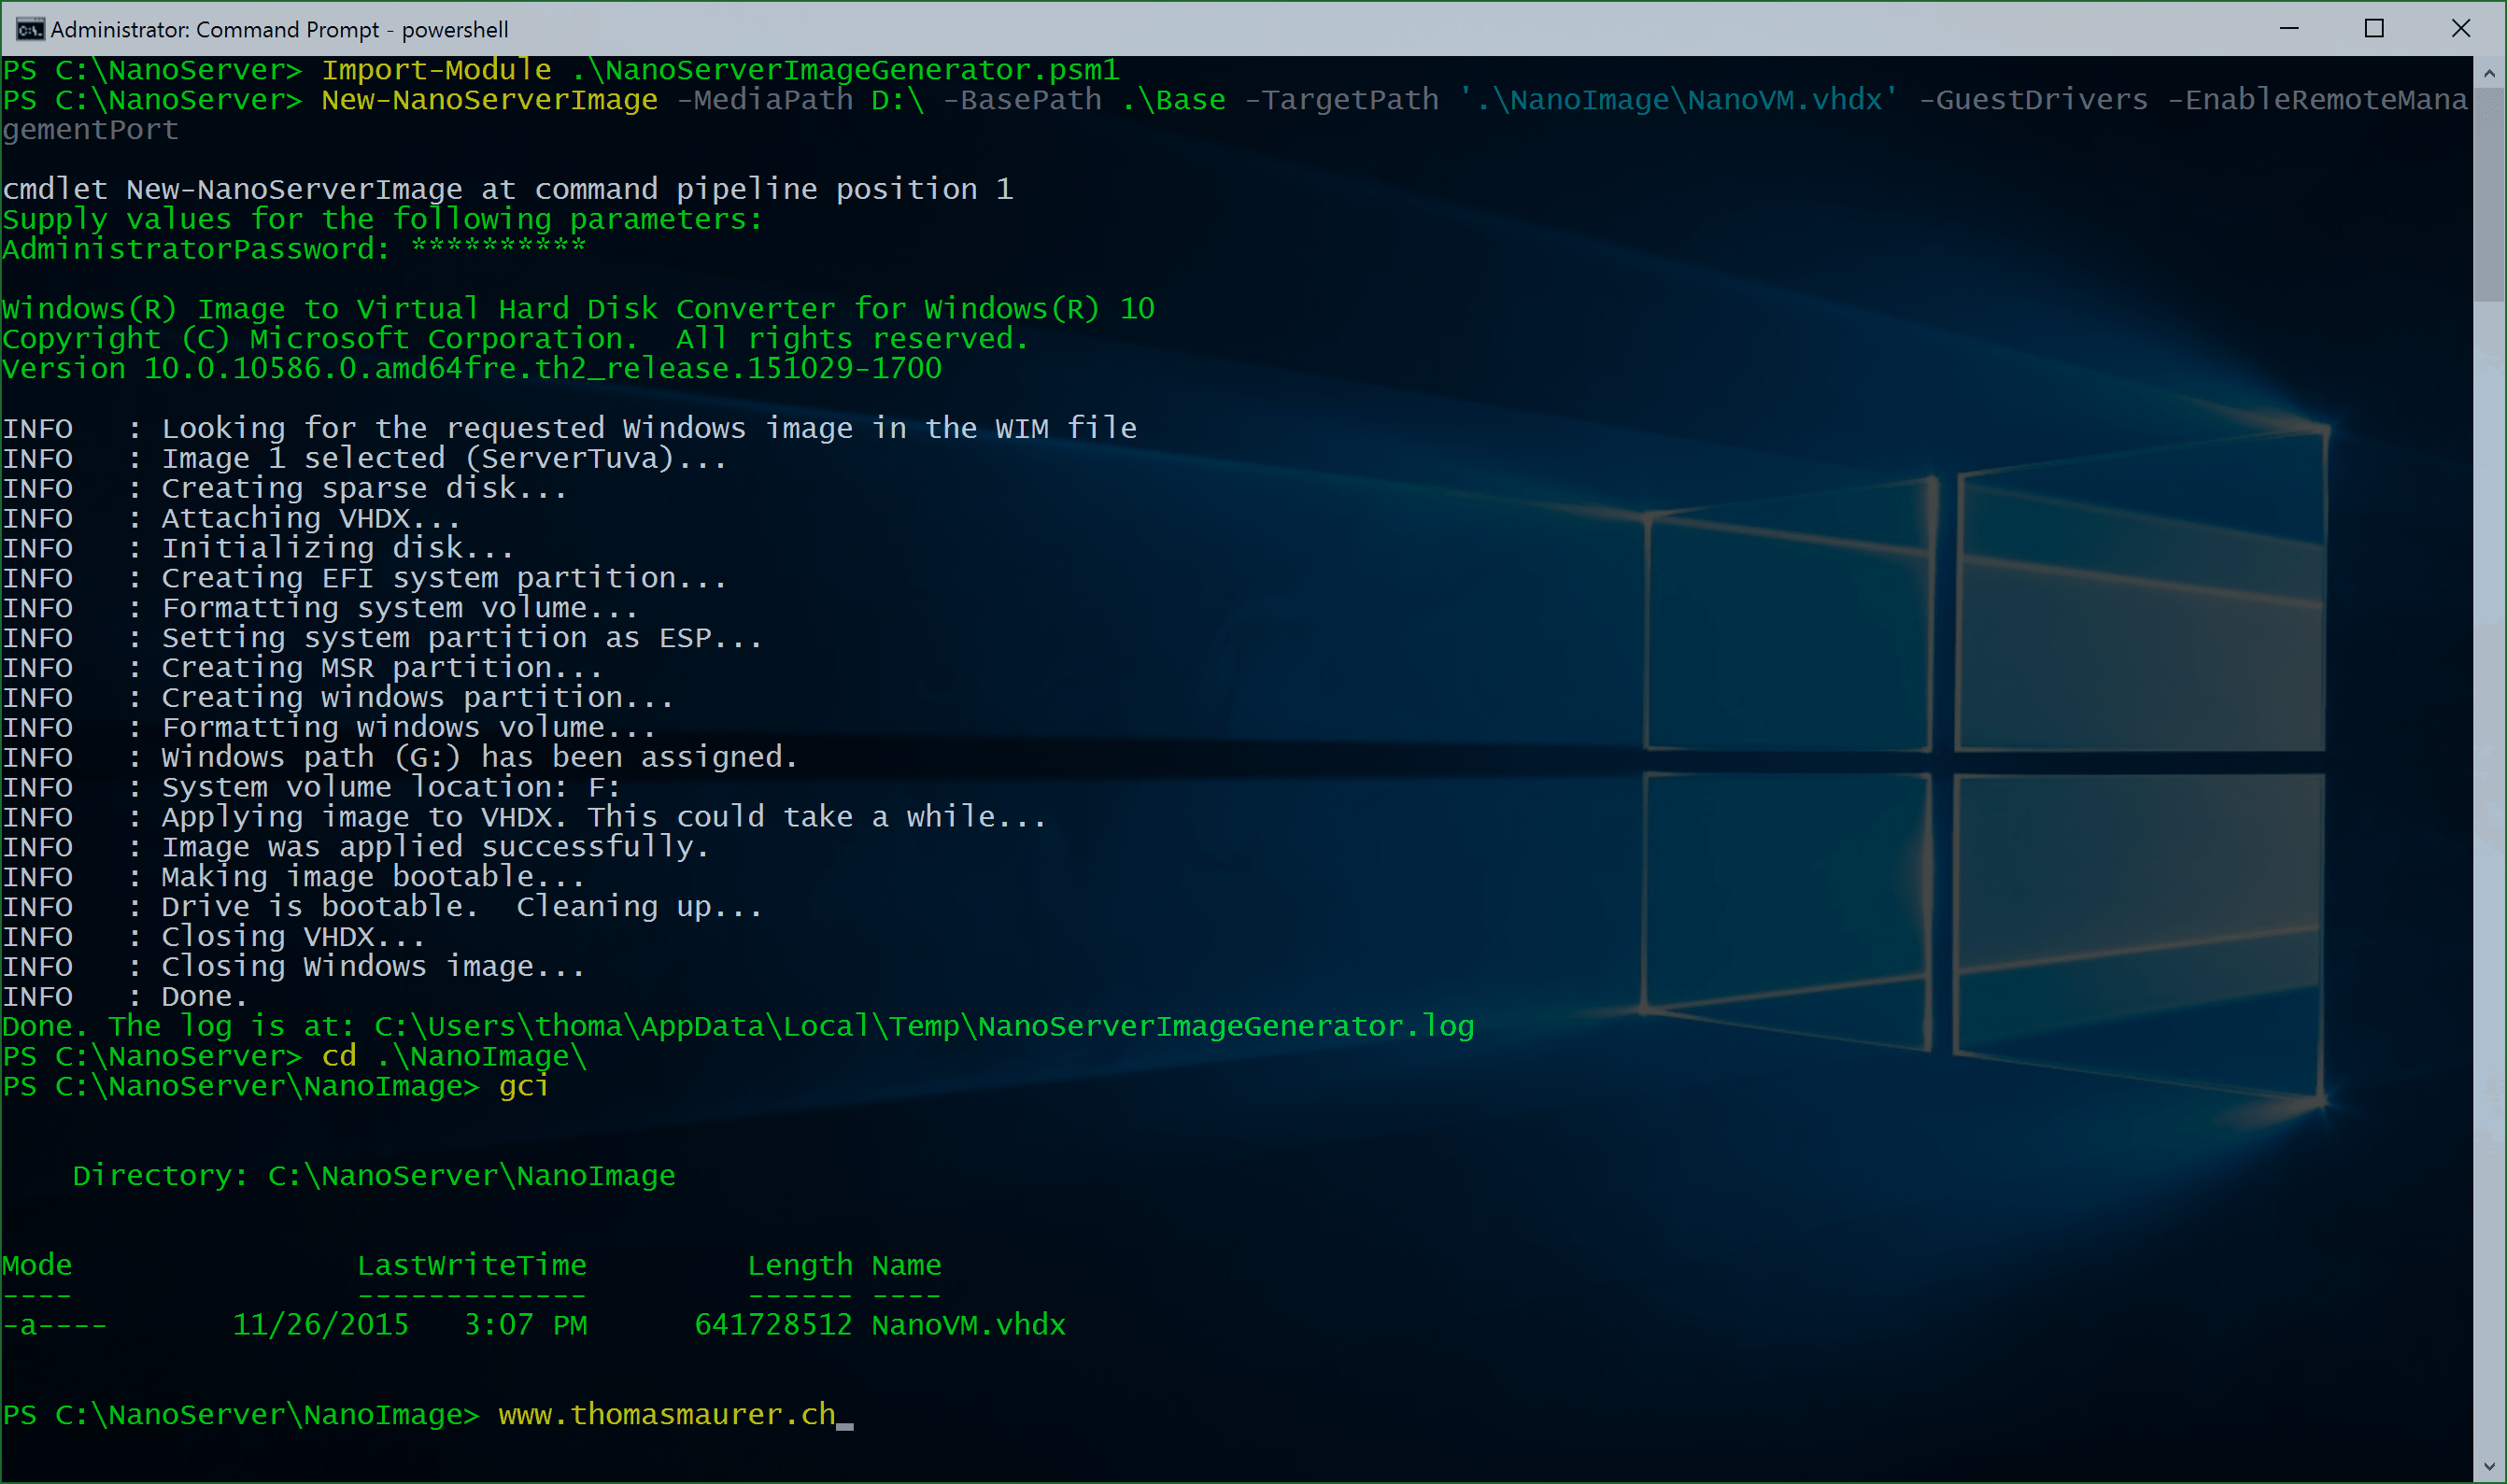
# Change Working Directory
cd C:\NanoServer

# Import Module
Import-Module .\NanoServerImageGenerator.psm1

# Create new Nano Server Image
New-NanoServerImage -MediaPath D:\ -BasePath .\Base -TargetPath '.\NanoImage\NanoVM.vhd' -GuestDrivers -EnableRemoteManagementPort
This will create a new Nano Server Image including the VM Guest drivers and nothing more. The D:\ drive still is the Windows Server Image (ISO), the Base folder is used to mount and create the temporary files and the TargetPath is where you can find the finished VHDX file. You can now create a new Virtual Machine using this VHD file.

Of course you can also create Nano Server including other roles:
Nano Server Container Host:
# Create new Nano Server Image
New-NanoServerImage -MediaPath D:\ -BasePath .\Base -TargetPath '.\NanoImage\NanoConHost.vhd' -EnableRemoteManagementPort -GuestDrivers  -ComputerName NanoConHost -Containers -Compute -MaxSize 60GB -ReverseForwarders
Nano Server for Apps and using a fix IP Address and Computername
# Set IP of Nano Server
$ip = "172.91.91.12"
# Create Nano Server Image
New-NanoServerImage -MediaPath D:\ -BasePath .\Base -TargetPath '.\NanoImage\NanoDev.vhd' -GuestDrivers -EnableRemoteManagementPort -ReverseForwarders -Ipv4Address $ip -Ipv4SubnetMask 255.255.255.0 -ComputerName NanoDev -InterfaceNameOrIndex Ethernet
If you want to try Nano Server running in Microsoft Azure, you can also do this:

Tags: Hyper-V, Microsoft, Nano Server, PowerShell, Server, VHD, VHDX, Windows 10, Windows Server, Windows Server 2016 Last modified: June 26, 2019


This will create a new Nano Server Image including the VM Guest drivers and nothing more. The D:\ drive still is the Windows Server Image (ISO), the Base folder is used to mount and create the temporary files and the TargetPath is where you can find the finished VHDX file. You can now create a new Virtual Machine using this VHD file.
The above line is confusing, you talk about vhd and vhdx.
Sorry about that, it depends on what you are using :)