
In this blog post, we will have a look at how you can enable and set up PowerShell SSH Remoting or PowerShell Remoting over SSh with PowerShell 7. With PowerShell Core 6, Microsoft introduced PowerShell 7 Remoting over SSH, which allows true multiplatform PowerShell remoting between Linux, macOS, and Windows. PowerShell SSH Remoting creates a PowerShell host process on the target machine as an SSH subsystem. Normally, Windows PowerShell remoting uses WinRM for connection negotiation and data transport. However, WinRM is only available on Windows-based machines.
There are also some downsides to it. SSH-based remoting doesn’t currently support remote endpoint configuration and JEA (Just Enough Administration). It is also important to understand that this is not just another PowerShell SSH client.
Use SSH Transport with PowerShell Remoting
To use PowerShell 7 remoting with SSH on Windows, Linux, and macOS machines, you can use the same cmdlets you are already familiar from Windows PowerShell remoting with WinRM.
- New-PSSession
- Enter-PSSession
- Invoke-Command
There are three new parameters for these cmdlets if you are using PowerShell SSH remoting.
- -HostName (Instead of -Computername, you define the SSH target)
- -UserName (Instead of -Credentials you use the -UserName parameter)
- -KeyFilePath (If you are using SSH key authentication you can use the -KeyFilePath parameter to point to the key file)
New-PSSession -HostName tomsssh.server.com -UserName thomas
Enable PowerShell SSH Remoting
There are two ways you can enable and configure PowerShell SSH Remoting. You can do the official manual way, or use a new PowerShell module with a cmdlet called Enable-SSHRemoting, which is currently in preview. I will give you both options right here, starting with the manual option.
To work with PowerShell SSH, you will need to complete the following steps on all systems and machines.
- Install OpenSSH Server and Client
- OpenSSH for Windows is available directly in Windows 10 (1809 or higher) and Windows Server 2019 as an optional feature.
- On Linux, you install OpenSSH depending on your platform
- Install PowerShell 7 on all systems
- Configure the SSH subsystem to host a PowerShell process on the remote machine
- Configure password or key-based authentication
Step by step set up SSH remoting on Windows
Step 1: First, you will need to install PowerShell 7 on Windows. You can follow my blog post to install PowerShell 7.

Install PowerShell 7
Step 2: Install OpenSSH Client and Open SSH Server. To install the ssh client and server and initially configure the OpenSSH server, you can use the following command.
# Install the OpenSSH Client and Server

Add-WindowsCapability -Online -Name OpenSSH.Client~~~~0.0.1.0

Add-WindowsCapability -Online -Name OpenSSH.Server~~~~0.0.1.0

# Initial Configuration of SSH Server

Start-Service sshd

Set-Service -Name sshd -StartupType 'Automatic'

# Confirm the Firewall rule is configured. It should be created automatically by setup.

Get-NetFirewallRule -Name *ssh*

# There should be a firewall rule named "OpenSSH-Server-In-TCP", which should be enabled
Step 3: Configure and edit the sshd_config file located at $env:ProgramData\ssh on the target machine.
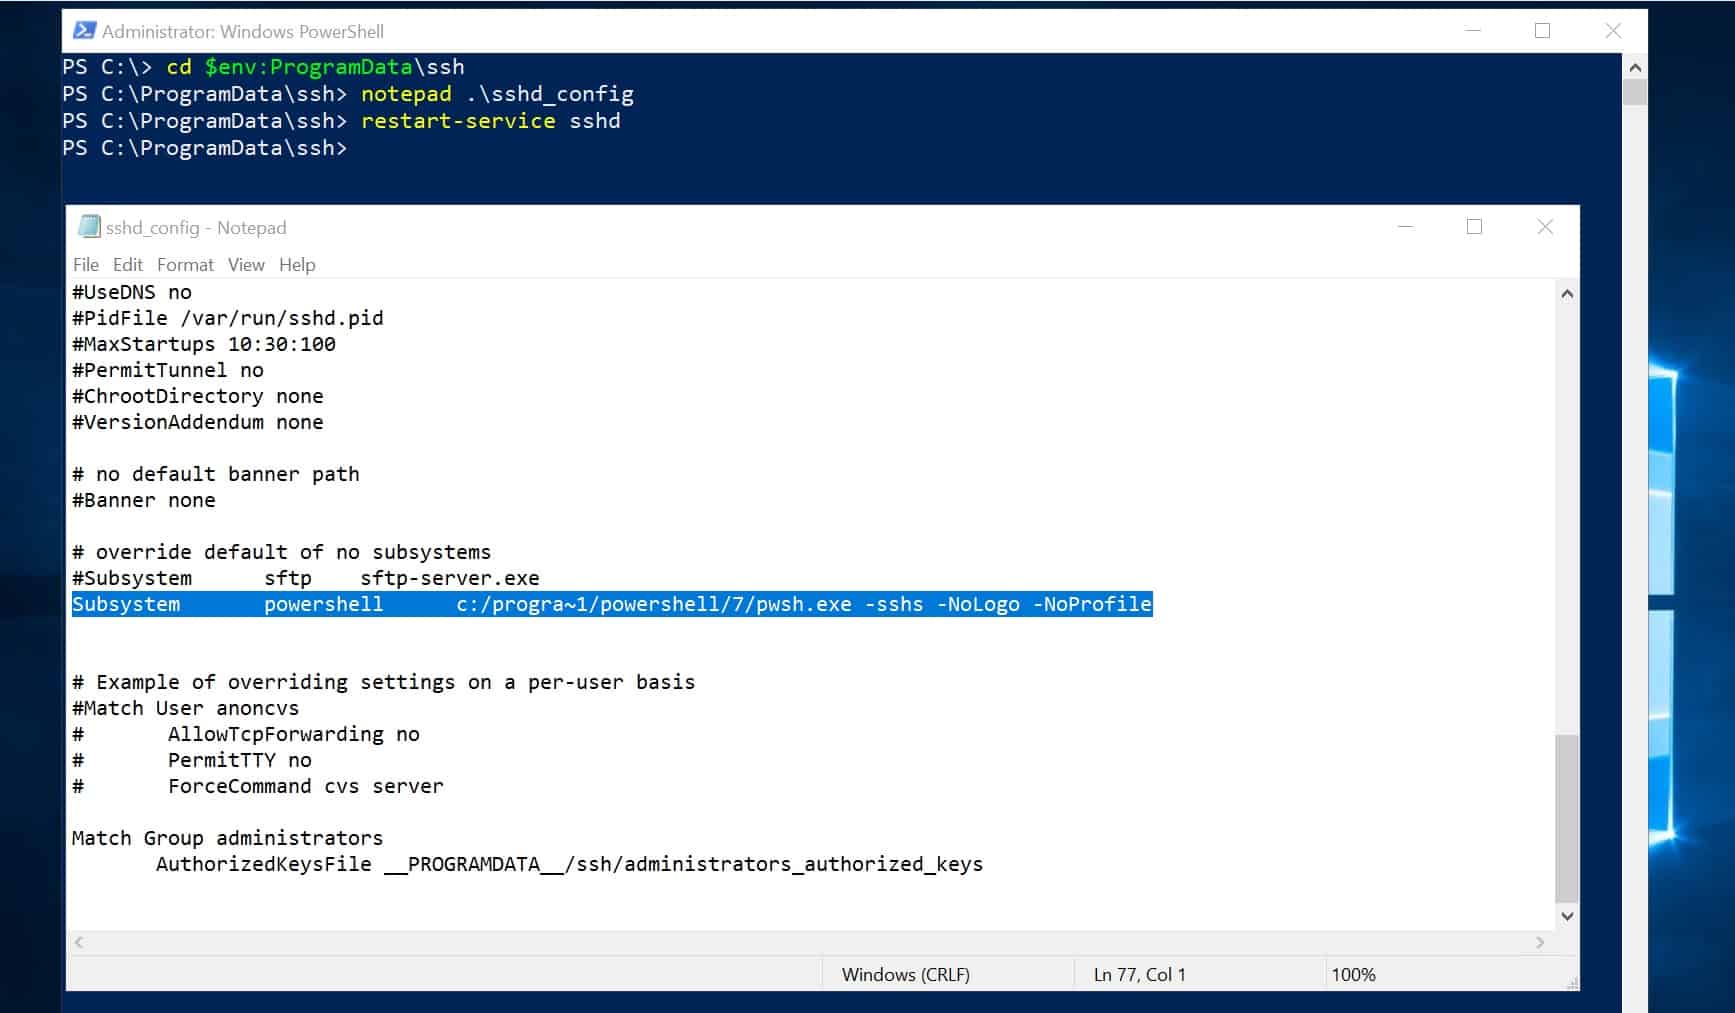
Edit sshd_config for PowerShell Remoting
Check that password authentication is enabled by removing the “#” sign.
PasswordAuthentication yes
Add the Subsystem for PowerShell. You can see that we are using the 8.3 short names for the file paths that contain spaces.
Subsystem powershell c:/progra~1/powershell/7/pwsh.exe -sshs -NoLogo -NoProfile
The 8.3 short name for the Program Files folder in Windows is usually Progra~1. However, you can use the following command to make sure.
Get-CimInstance Win32_Directory -Filter 'Name="C:\\Program Files"' | Select-Object EightDotThreeFileName
Optional enable key authentication
PubkeyAuthentication yes
If you are interested in setting up key-based authentication with OpenSSH on Windows Server, check out the blog post on ITOpstalk.com by Orin Thomas (Microsoft Cloud Advocate).
Step 4: Restart the sshd service
Restart-Service sshdStep by step set up SSH remoting on Linux (Ubuntu 18.04)
Step 1: First, you will need to install PowerShell 7 on Linux. You can follow my blog post to install PowerShell 7.
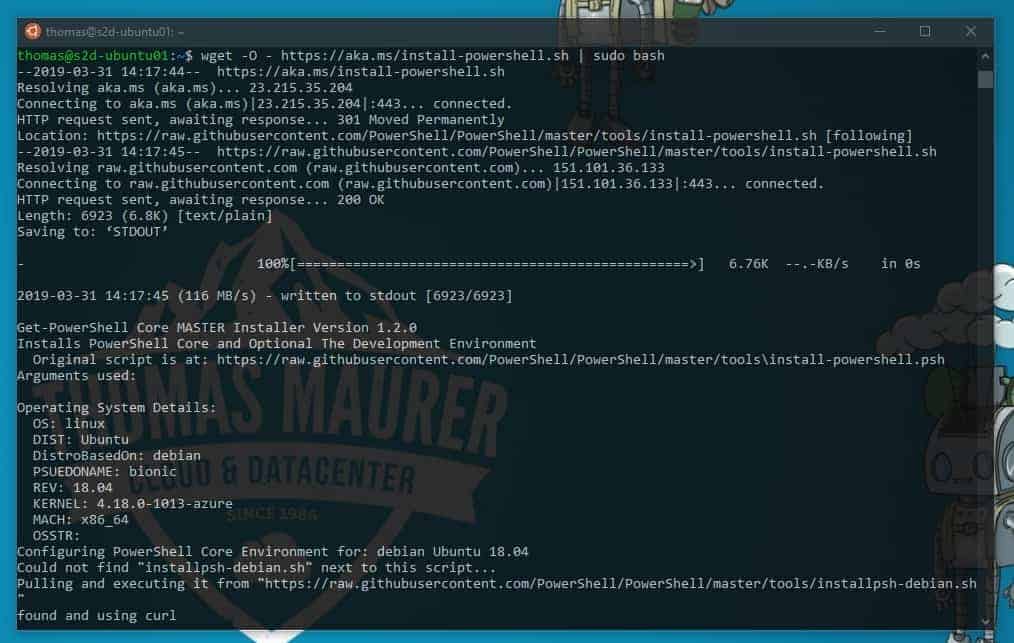
Step 2: Install OpenSSH Client and Open SSH Server. To install the client and server and initially configure the OpenSSH server, you can use the following commands.
sudo apt install openssh-client
sudo apt install openssh-server
Step 3: Configure and edit the sshd_config file at location /etc/ssh on the target machine.
Check that password authentication is enabled
PasswordAuthentication yes
Add the Subsystem for PowerShell
Subsystem powershell /usr/bin/pwsh -sshs -NoLogo -NoProfile
Optional enable key authentication
PubkeyAuthentication yes
Step 4: Restart the sshd service
sudo service sshd restartSetup PowerShell Remoting SSH with Enable-SSHRemoting (Preview)
After releasing my blog post, Steve Lee from the PowerShell team reached out to me, to show me a new simple way to configure SSH remoting, which is currently in preview.
Great article! However, are you aware of https://t.co/UK4DOimcJ0 which contains a cmdlet called `Enable-SSHRemoting`?
— Steve Lee (@Steve_MSFT) April 7, 2020
To make setting up PowerShell Remoting over SSH much more straightforward, the PowerShell team is working on a new module, which will allow you to run a single command to detect missing components and update the SSHD configuration file. The cmdlet works on Windows, macOS, and Linux, and it will do the following:
- Detect the underlying platform (Windows, Linux, macOS).
- Detect an installed SSH client, and emit a warning if not found.
- Detect an installed SSHD daemon, and emit a warning if not found.
- Accept a PowerShell (pwsh) path to be run as a remoting PowerShell session endpoint. Or try to use the currently running PowerShell.
- Update the SSHD configuration file to add a PowerShell subsystem endpoint entry.
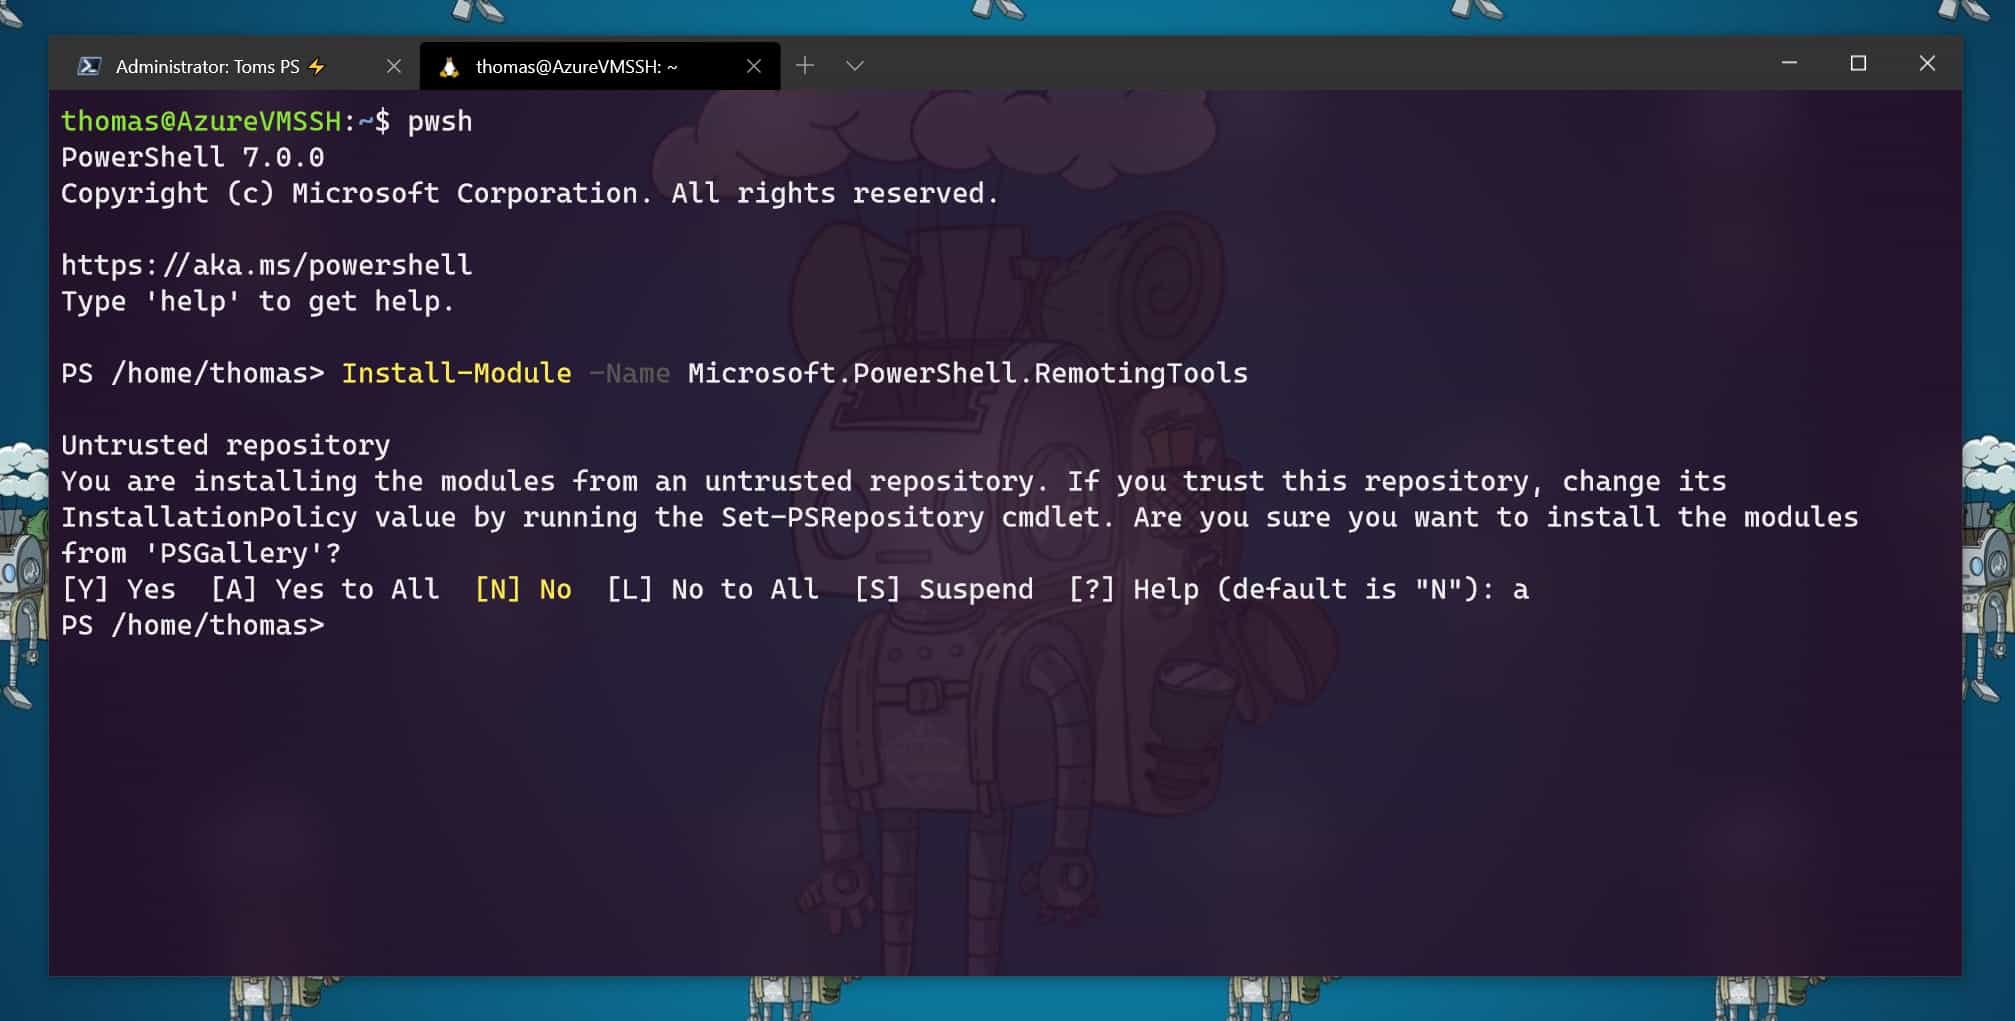
You can simply install the “Microsoft.PowerShell.RemotingTools” PowerShell module.
Install-Module -Name Microsoft.PowerShell.RemotingTools
Install-Module PowerShell Remoting Tools
After that, you can simply run the Enable-SSHRemoting cmdlet.
Enable-SSHRemotingYou can see how this will do all the configuration changes in the background.

Enable-SSHRemoting
After restarting the SSHD service, you can now remote into your machine.

Enter-PSSession using SSH from Windows 10 to Linux
You can try this out today, keep in mind that this is in preview and if you hit any issues you can report them directly on GitHub.
SSH Remoting with PowerShell 7
Now you can start using PowerShell SSH remoting to connect even from different operating systems like Windows to Linux or Linux to Windows.

PowerShell 7 SSH Remoting
As mentioned before, you can use the same commands as you are familiar with, like New-PSSession, Enter-PSSession, or Invoke-Command.
As a client, you can also use the Azure Cloud Shell, which runs PowerShell 7. If you want to know more about what’s new in PowerShell 7, check out my blog post. If you want to know how to set it up with macOS, you can read the following Microsoft Docs article.
Of course, you can also use the PowerShell SSH remoting to connect from Linux to Linux and Windows to Windows. You can find more information about PowerShell SSH remoting on the Microsoft Docs pages. If you have any questions, please let me know in the comments.
Tags: Linux, macOS, Microsoft, PowerShell, PowerShell 7, Powershell Remoting, PowerShell SSH, PSSession, Remoting, SSH, SSH Remoting, Windows, Windows 10 Last modified: April 7, 2020


Hi,
Would you advise a single method of creating Remote Sessions, WSMan or SSH?
We have pwsh 6 SSH sessions from Windows client to Ubuntu server. All Windows to Windows PSSessions use WSMan, would you advise changing to SSH?
any ideas how to add MFA to Windows SSH?
i got this 2 warnings: SSHD service is not found on this machine. SSHD service must be installed and running before PowerShell SSH based remoting can be enabled
SSHDConfigfilePath not provided. using default configuration file location
anyway i am a bit confused with SSH and SSHD, i cant find how to install on kali sshd
Perfect! Thanks very much. Didn’t need to install anything additional on a couple of Raspberry Pi’s. Now have them connected to each other over a crossover while normal traffic is wifi. Thanks again.
This sounds great!
For key authentication, can we add keys in Active Directory, instead of ~/.ssh? I don’t want password authentication :)
I just got it working on a Raspberry Pi 4 running Windows 11Pro Build 22000.co_release.210604-1628 after a but of fiddling around.
nice!