With the Windows 10 Anniversary Update, which was released by Microsoft in Summer 2016, Microsoft included a Windows Subsystem for Linux in Windows 10. This allows you to enable Linux Bash on Windows 10. In this blog post I quickly want to show how you can enable the Windows Subsystem for Linux on Windows 10. This is great if you want to use some Linux tools on your Windows 10 machine. I use it for example to use SSH to connect to Linux Virtual Machines on Azure.
First you have the following requirements:
- Windows 10 Anniversary Update – Windows 10 Build 14393 and higher
- 64-bit versions of Windows 10
- Internet Connection to download the Windows Subsystem for Linux in Windows
- Active Developer Mode in Windows 10
First enable Developer Mode There are two option you can do this
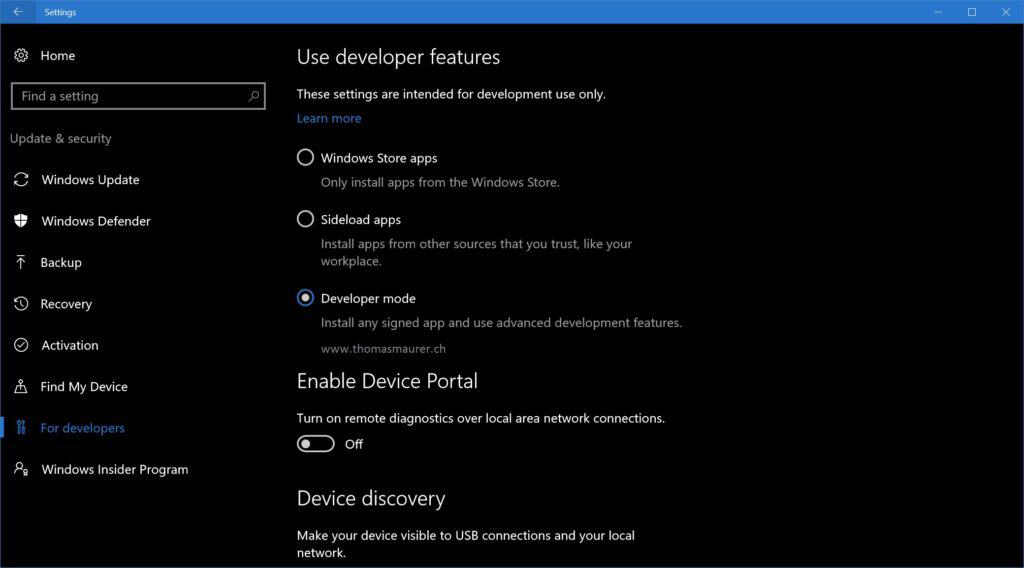
Open the Settings App, go to Update & Security, go to For developers and enable Developer mode:
You can also use the following PowerShell command to enable Developer Mode:
reg add "HKEY_LOCAL_MACHINE\SOFTWARE\Microsoft\Windows\CurrentVersion\AppModelUnlock" /t REG_DWORD /f /v "AllowDevelopmentWithoutDevLicense" /d "1"
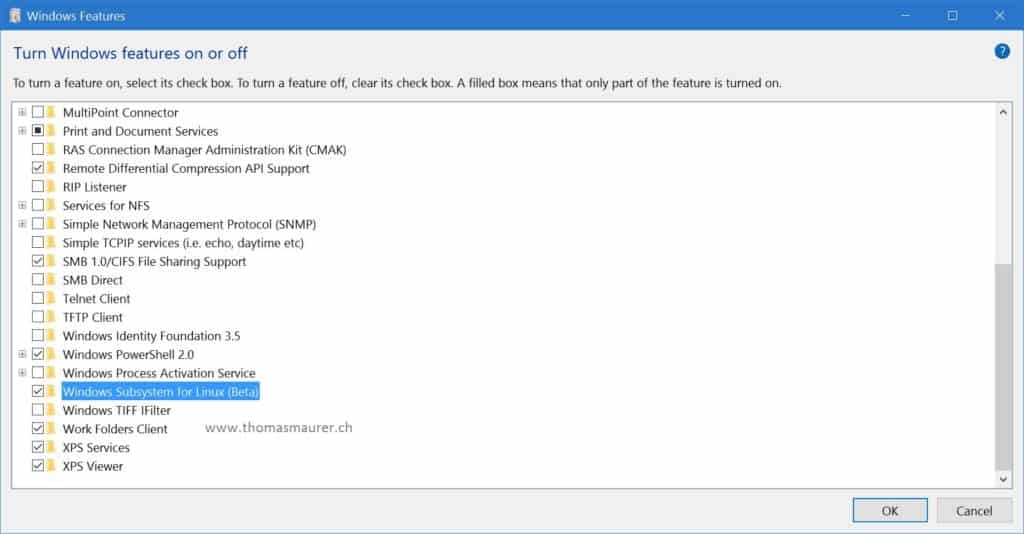
After this you can enable the Windows Subsystem for Linux as a Windows Feature in the Control Panel or PowerShell
Run the following PowerShell command to enable the Windows Subsystem for Linux:

Enable-WindowsOptionalFeature -Online -FeatureName Microsoft-Windows-Subsystem-Linux
After that you will need to restart your computer.
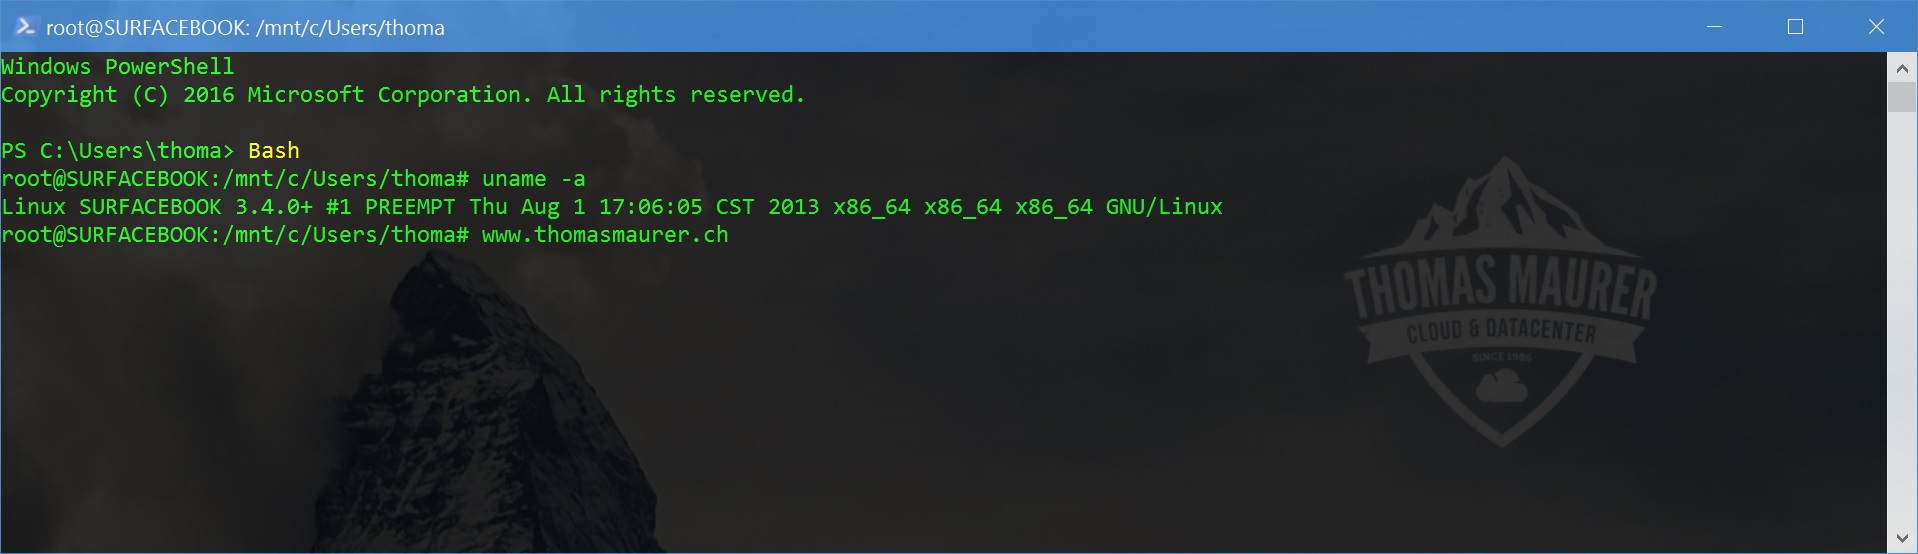
Now you can open up PowerShell or the command prompt and start using bash. (You can also start Bash directly from the Start Menu)

Hope this helps you to get started.
Tags: Bash, Linux, Linux Bash on Windows 10, Linux Subsystem, Microsoft, PowerShell, shell, Subsystem for Linux, Ubuntu, Windows, Windows 10 Last modified: September 1, 2018


Excelent! I had a problem where i couldn’t get rid of the ‘Some settings are managed by your organization’ message that made all the options greyed out. The PowerShell command solved my problem. Thanks.
Great it helped you :)