
Last week Microsoft released Windows Server 2016 with the first GA release of Nano Server. A couple of months back I already wrote a blog post how you can create a new Nano Server Image in Technical Preview 4. This post is an updated version of that this post using Windows Server 2016 GA. In this post I will quickly show you how you can create a new VHD, VHDX or WIM file with your Nano Server configuration.
This is the PowerShell option, you can also use the Nano Server Image Builder.
First you have to download the latest Windows Server 2016 ISO file.

If you open the Windows Server 2016 ISO file you can see a folder called “NanoServer” on the medium. This folder includes:
- NanoServer.wim – This is the Nano Server Image file
- Packages – The Package folder includes the Nano Server Packages, Windows Roles and Features and some basic drivers
- NanoServerImageGenerator – In this folder you can find the Nano Server Image Generator PowerShell Module
I usually create a folder on my C:\NanoServer to store all the things I need, which makes things a little simpler.
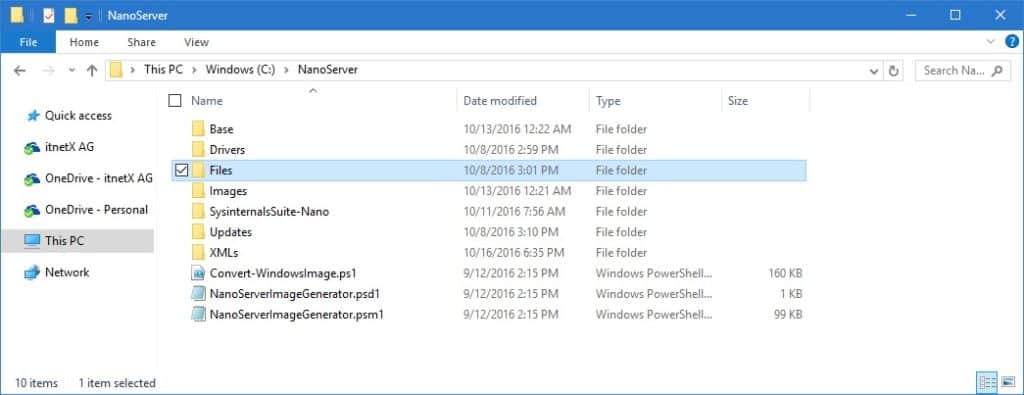
- Base – This is a temporary folder where the images get mounted while updating or creating new images
- Drivers – This is the folder where I copy all the drivers for a physical image
- Files – This is the unpacked Windows Server 2016 ISO image (including, the sources folder, NanoServer folder, support, boot and efi folder as well as the setup.exe file)
- Images – In this folder I store all the new created images
- Updates – In this folder I store the Windows Server 2016 Update cumulative updates (.cab files)
- XMLs – In this folder I store unattend.xml files if I need to do a extended configuration.
Of course you don’t have to use this folder structure, but it makes things easier.
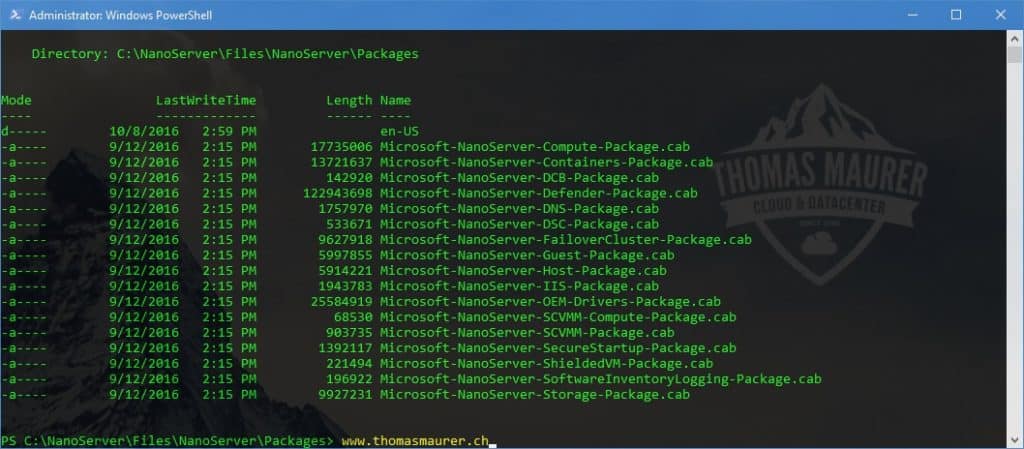
If you have a look at the Packages folder you can find all the available packages for Nano Server:
A new Nano Server Image can be created using the New-NanoServerImage PowerShell cmdlet. This will create a new Nano Server Image in a VHDX including the VM Guest drivers and nothing more.
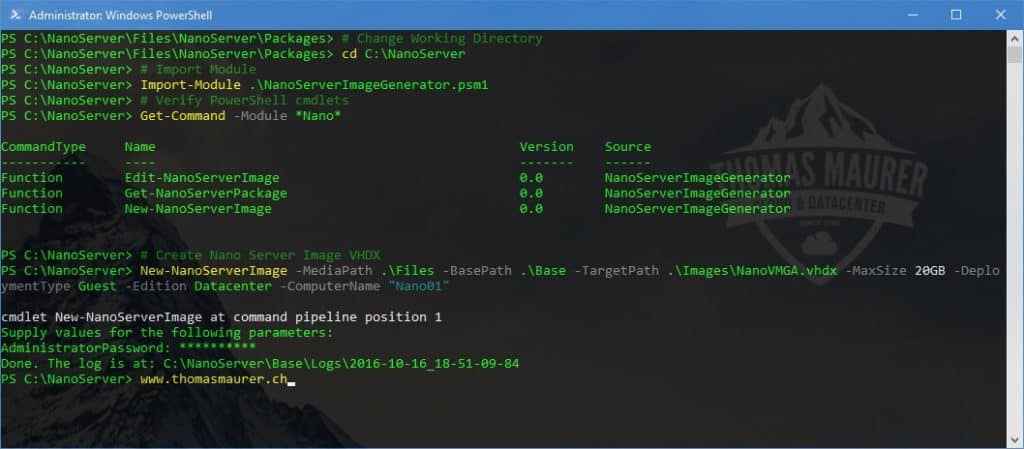
# Change Working Directory
cd C:\NanoServer

# Import Module
Import-Module .\NanoServerImageGenerator.psm1

# Create Nano Server Image VHDX
New-NanoServerImage -MediaPath .\Files -BasePath .\Base -TargetPath .\Images\NanoVMGA.vhdx -MaxSize 20GB -DeploymentType Guest -Edition Datacenter -ComputerName "Nano01"
- MediaPath – The location with the Windows Server 2016 files
- BasePath – Temporary folder to mount the WIM file
- TargetPath – Where the new Image file gets stored. You can create a .wim, .vhd or .vhdx file
- .vhd creates a Image for a Generation 1 VM (BIOS boot)
- .vhdx create a Image for a Generation 2 VM (UEFI boot)
- DeploymentType allows you to choose between Guest and Host
- Guest creates a Virtual Machine
- Host creates a Physical Image
- Edition can be Standard or Datacenter
- ComputerName adds the server name of the Nano Server
- MaxSize changes the Partition size, if you are not using this parameter it will create a default partition of 4GB
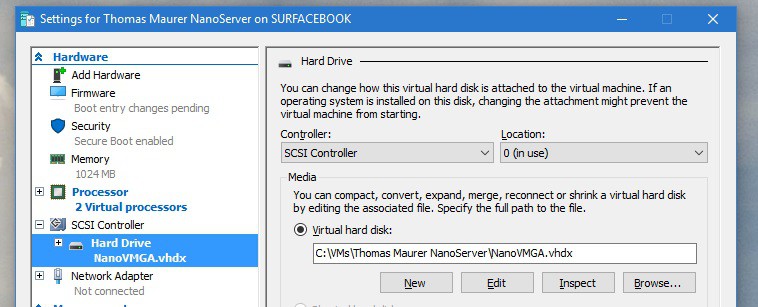
You can now copy the VHDX file from the Images folder, attach this to a new Hyper-V virtual machine and boot.
This will show the Nano Server recovery console:

There are more parameters to add roles and features, updates, drivers and additional configuration like IP addresses and more
For example if you want to add some updates to the Nano Server Image you can use the following cmdlet:
# Create Nano Server Image VHD with updates
New-NanoServerImage -MediaPath .\Files -BasePath .\Base -TargetPath .\Images\NanoVM.vhd -MaxSize 20GB -DeploymentType Guest -Edition Datacenter -ComputerName "Nano01" -ServicingPackagePath ".\Updates\Windows10.0-KB3176936-x64.cab", ".\Updates\Windows10.0-KB3176936-x64.cab"
To add a fixed IP address you can for example use the following cmdlet:
# Create Nano Server with IP address
New-NanoServerImage -MediaPath .\Files -BasePath .\Base -TargetPath .\Images\NanoVMSetupUI.vhdx -MaxSize 20GB -DeploymentType Guest -Edition Datacenter -ComputerName "Nano01" -Ipv4Address "172.21.22.101" -Ipv4SubnetMask "255.255.255.0" -Ipv4Gateway "172.21.22.1" -Ipv4Dns "8.8.8.8"
If you have some advanced deployment you can use for example the following thing, which helps you to set different configuration options. This example here is designed for a physical Hyper-V host
# Nano Server Packages for Image
$NanoPackages = "Microsoft-NanoServer-Compute-Package",
"Microsoft-NanoServer-DCB-Package",
"Microsoft-NanoServer-DSC-Package",
"Microsoft-NanoServer-FailoverCluster-Package",
"Microsoft-NanoServer-OEM-Drivers-Package",
"Microsoft-NanoServer-Storage-Package"

$ServicingPackagePath = ".\Updates\Windows10.0-KB3176936-x64.cab", ".\Updates\Windows10.0-KB3176936-x64.cab"

$UnattanedXML = ".\XMLs\unattend.xml"

$MaxSize = 20GB

$Edition = "Datacenter"

$VHDXName = ".\Images\NanoHost01.vhdx"

$DeploymentType = "Host"

$DriverPath = ".\Drivers"

$MediaPath = ".\Files"

$BasePath = ".\Base"

$ComputerName = "Nano01"
$DomainName = "thomasmaurer.ch"

#IP Configuration if not DHCP
#$Ipv4Address = "172.21.22.101"
#$Ipv4SubnetMask = "255.255.255.0"
#$Ipv4Gateway = "172.21.22.1"
#$Ipv4Dns = "8.8.8.8"
# Nano Image
New-NanoServerImage -MediaPath $MediaPath -BasePath $BasePath -TargetPath $VHDXName -DriversPath $DriverPath -DeploymentType $DeploymentType -Edition $Edition -Packages $NanoPackages -MaxSize $MaxSize -ServicingPackagePath $ServicingPackagePath -UnattendPath $UnattanedXML -ComputerName $ComputerName -DomainName $DomainName
You can for example use this VHDX file now to create a boot from VHDX scenario:
# Boot from VHDX
Mount-VHD C:\VHDX\NanoHost01.vhdx -Passthru | get-disk | Get-Partition | where Size -GE 3GB | Set-Partition -NewDriveLetter V

# Set Boot Partition
cd v:\windows\system32
bcdboot v:\windows

# Unmounted
Get-VHD C:\VHDX\NanoHost01.vhdx | Dismount-VHD
I hope this helps you to get started with Nano Server in Windows Server 2016. I also prepared a blog post how you can create a Nano Server Image using the Nano Server Image Builder tool.
Tags: Create Image, Hyper-V, Image, Microsoft, Nano Server, PowerShell, Server, VHD, VHDX, Windows Server, Windows Server 2016 Last modified: June 26, 2019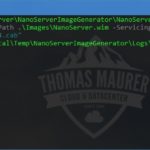


When adding a fixed IP Adress the parameter “-InterfaceNameOrIndex” is needed.
Hi Thomas, this command is right?
New-NanoServerImage -Edition Datacenter -DeploymentType Host -Compute -MediaPath ‘D:\’ -TargetPath C:\Nano1\Nano1.wim -ComputerName Nano1 -DomainName Contoso.com