
Get started with the Azure Arc Jumpstart Project
Yesterday the team announced the new Azure Arc Jumpstart project. We all have been there, and you...
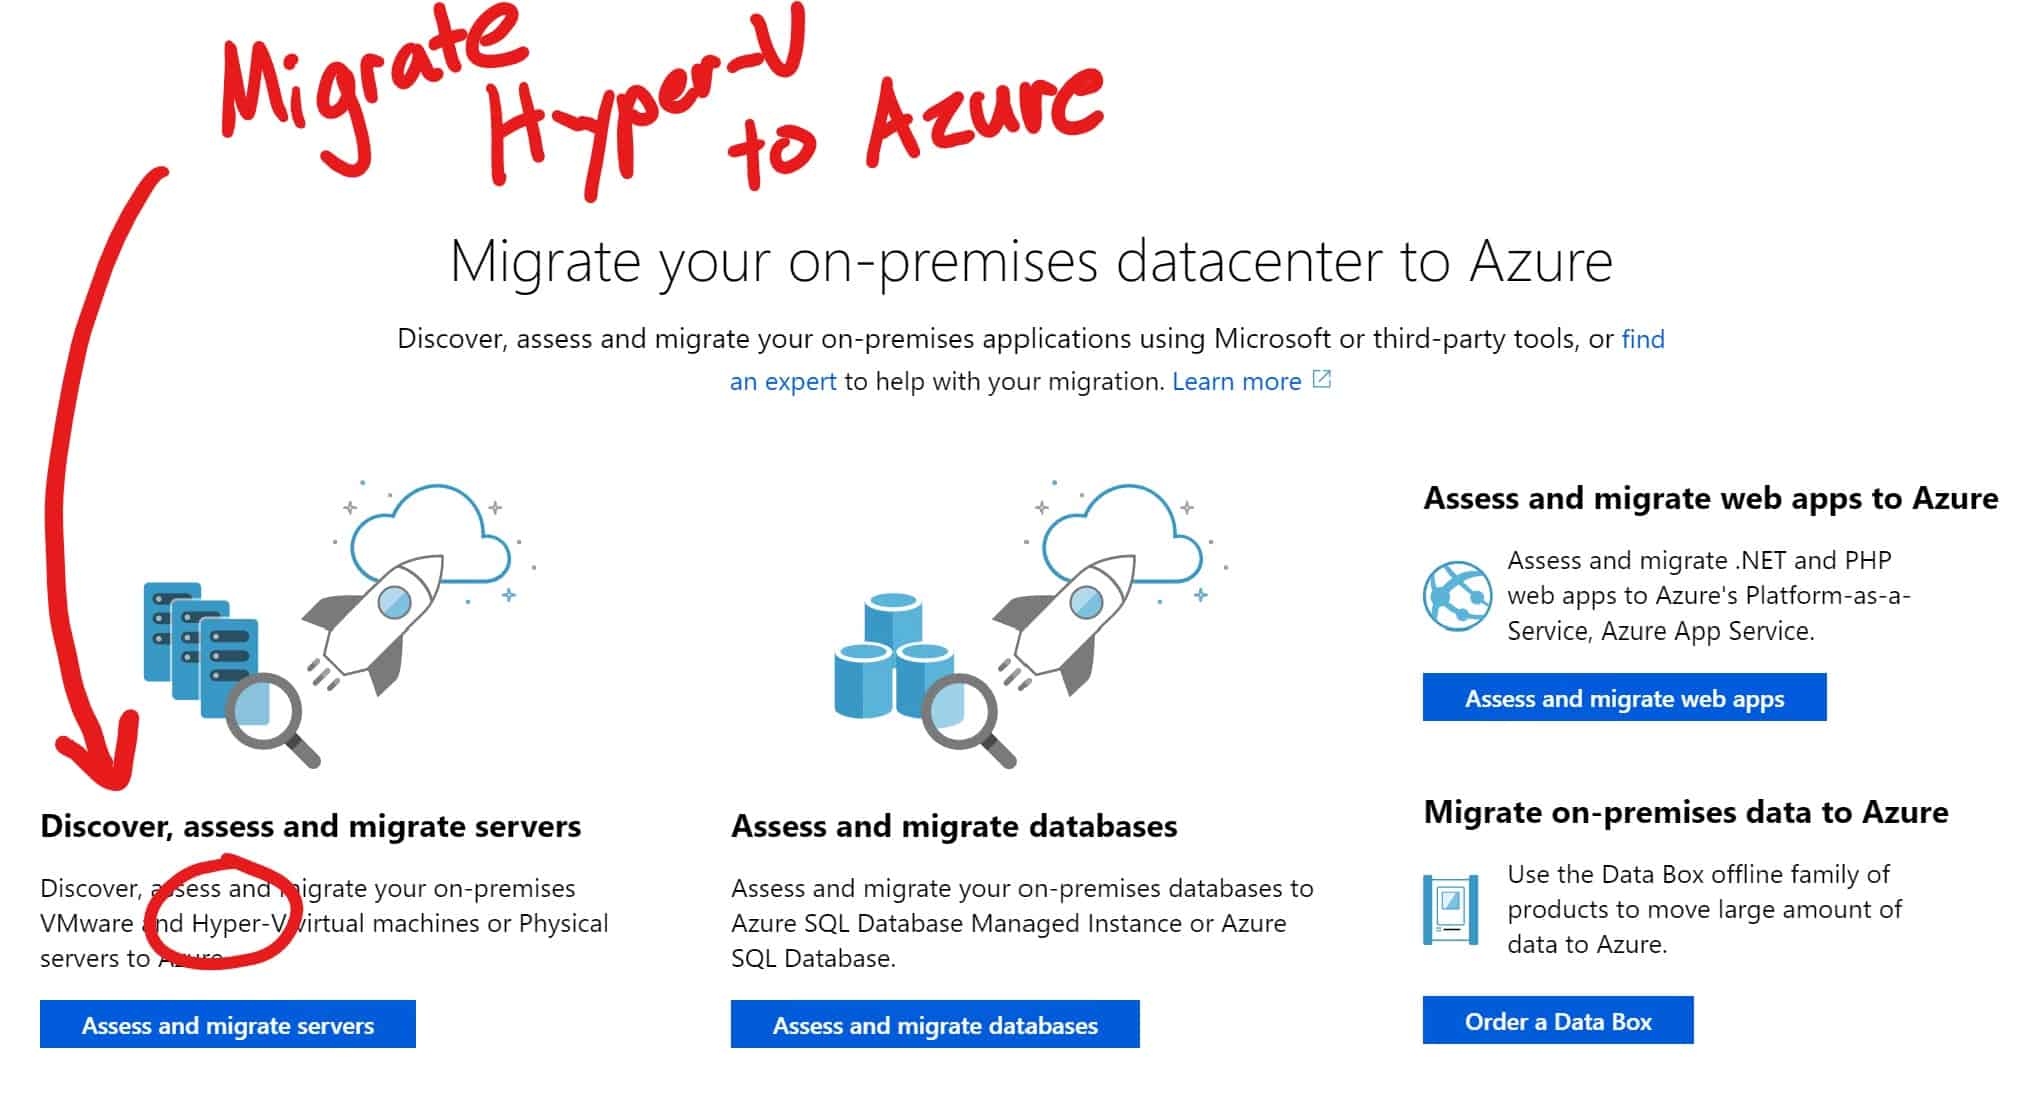
Assess and Migrate Hyper-V VMs with Azure Migrate
Today, the Azure Migrate team launched an update to the Azure Migrate service, which can help you discover, assess, and migrate...

Run your VMware natively on Azure with Azure VMware Solutions
Today the Microsoft Azure team announced the Azure VMware Solutions, which allow you to run VMware natively on Azure. VMware Solution on...
Microsoft’s new VMware migration offer for Windows Server 2016
Microsoft just announced a new VMware migration offer for Windows Server 2016. In a nutshell: If...
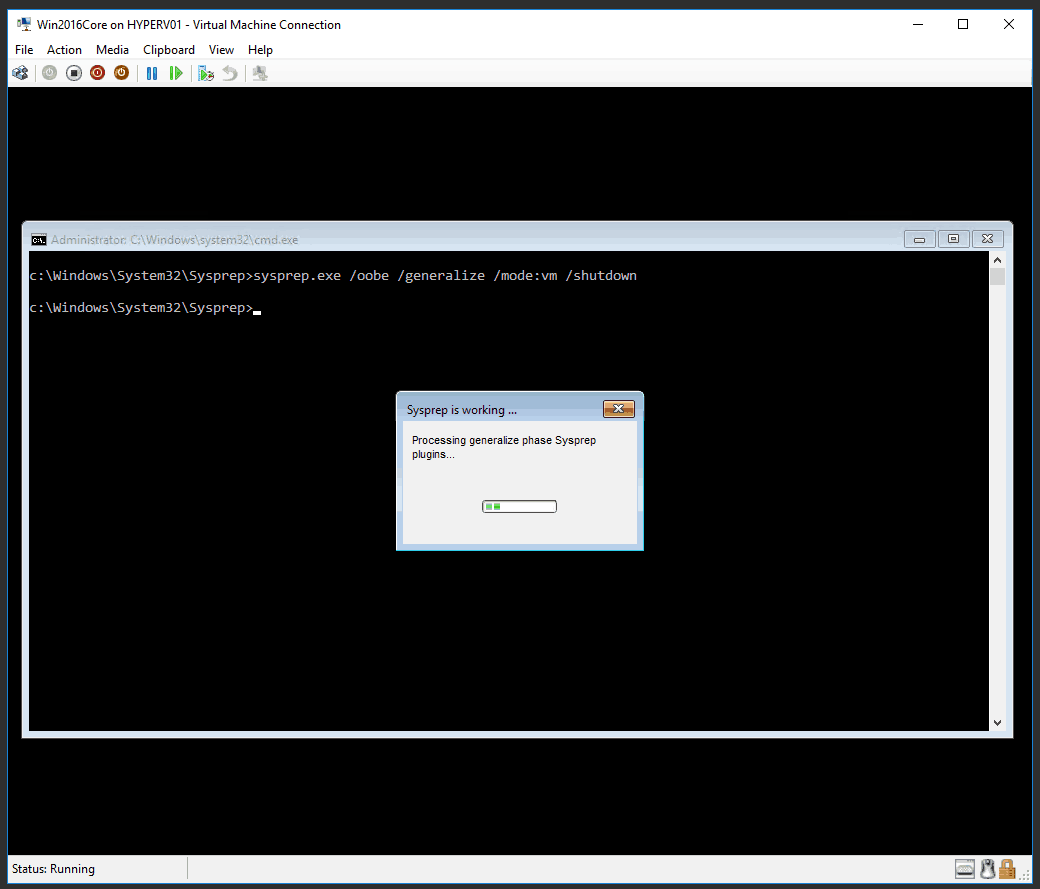
Windows Sysprep for Virtual Machines
For using the same system image for different virtual machines or physical computer, Microsoft created a tool called sysprep.exe. This blog...

Veeam Vanguard 2016
Today I had some great news in my inbox. I got awarded with my second Veeam Vanguard award in a row. I was one of the first Veeam Vanguards...
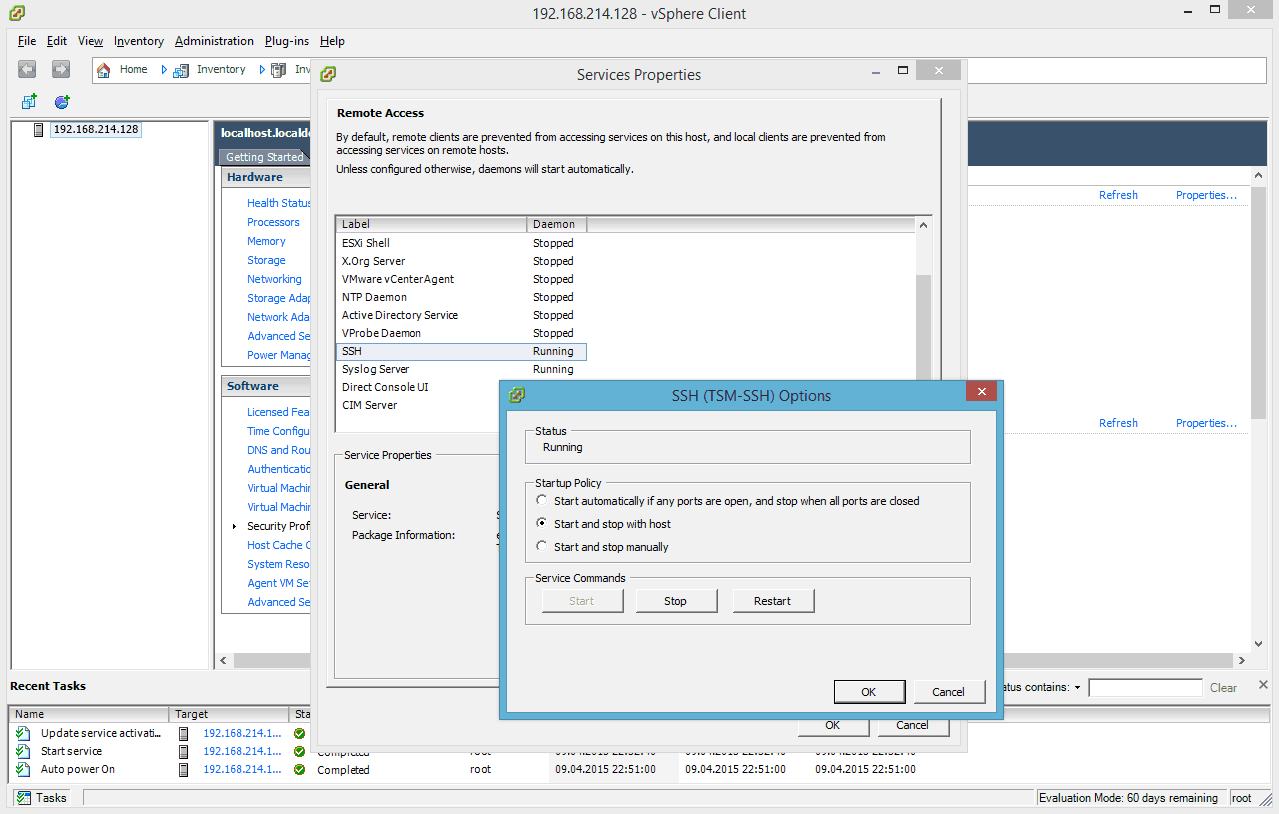
Enable SSH on VMware ESXi 6.0 via vSphere Client
In another blog post I wrote how you can enable SSH on a VMware ESXi 6.0 host directly on the host...

Enable SSH on VMware ESXi 6.0
I already wrote some blog posts how you can enable SSH access for older VMware ESXi versions such as VMware ESXi 4.1, VMware ESXi...
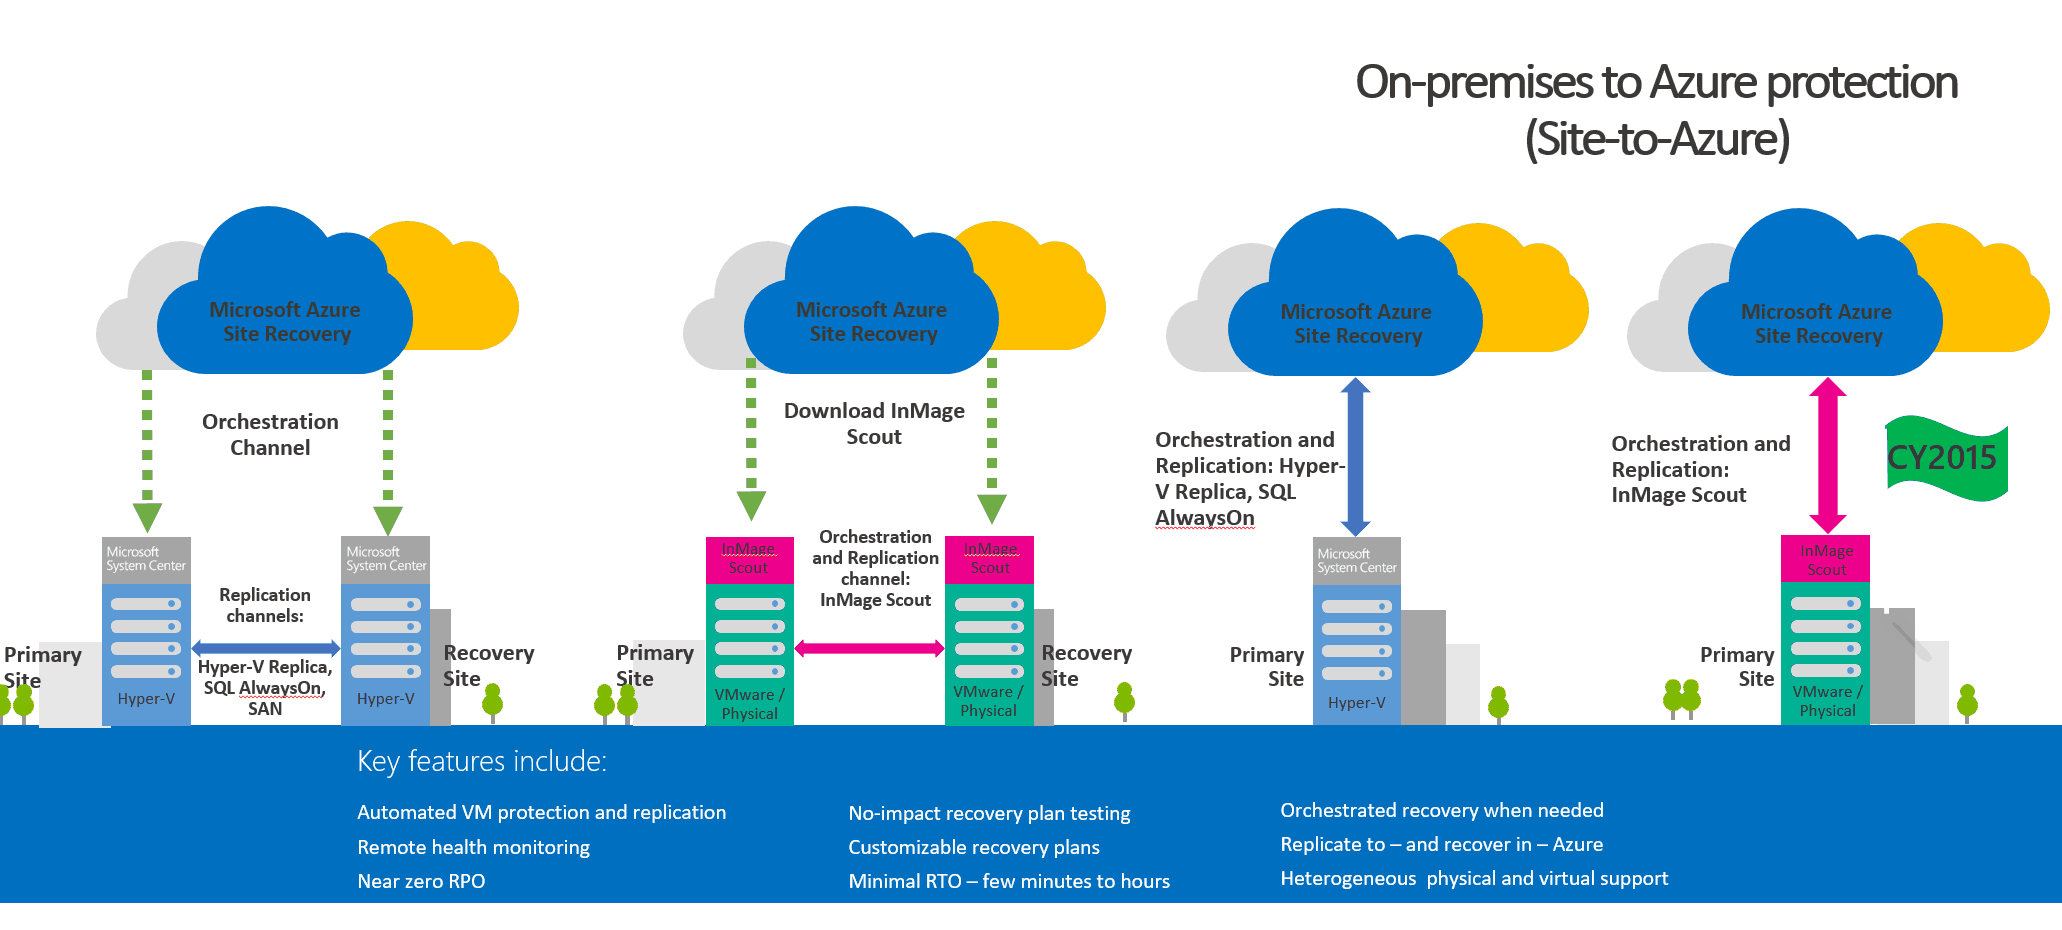
Disaster Recovery using Azure Site Recovery
Nearly a year ago Microsoft released a Disaster Recovery solution called Hyper-V Recovery Manager. This was basically a hosted...
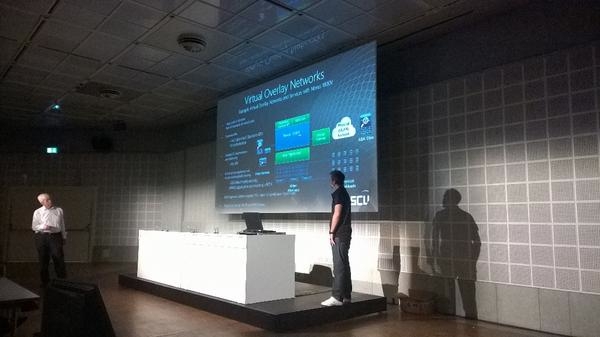
My sessions from System Center Universe Europe 2014 available on Channel9
As I already posted I was presenting at System Center Universe Europe 2014 (SCU Europe) in Basel...


