This blog post is a step by step guide how to install and configure VPN on Windows Server 2019. The blog post shows you how you can easily set up a VPN server for a small environment, branch office, or for a hosted server scenario. This VPN (Virtual Private Network) server allows you to connect from remote clients or firewalls to the Windows Server.
I already did a similar post for other versions of Windows
- How to Install VPN on Windows Server 2008 R2
- How to Install VPN on Windows Server 2012
- How to Install VPN on Windows Server 2012 R2
- How to Install VPN on Windows Server 2016
To install VPN access to a Windows Server 2019, simply follow this step by step guide:
Install Remote Access Role
First, install the “Remote Access” via Server Manager or PowerShell.
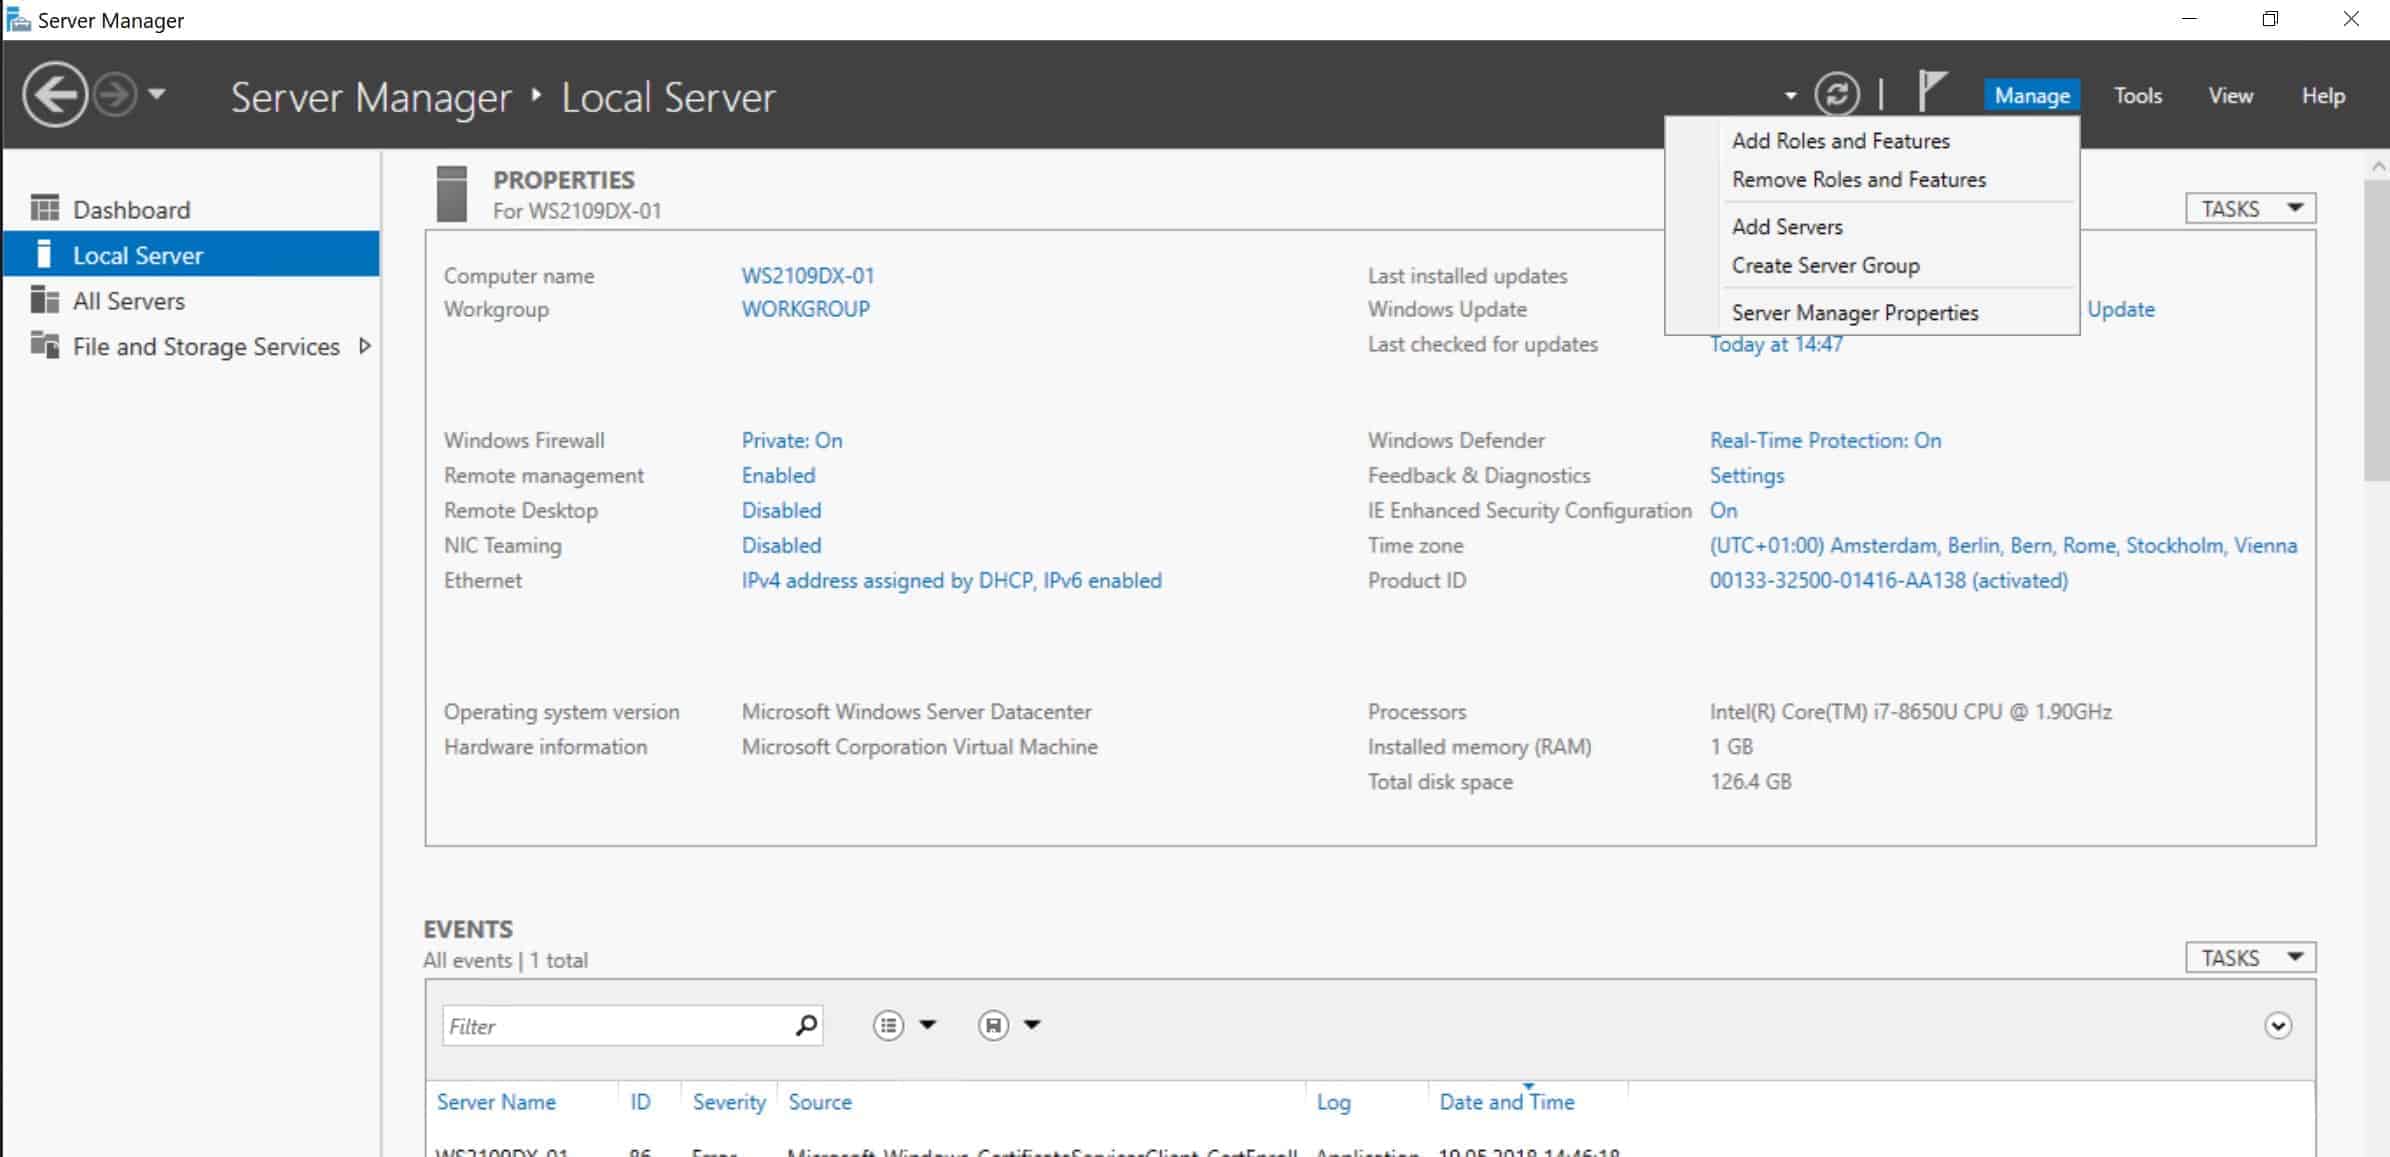
Open Server Manager and select Add Roles and Features
Select the Remote Access Role and click next through the wizard.

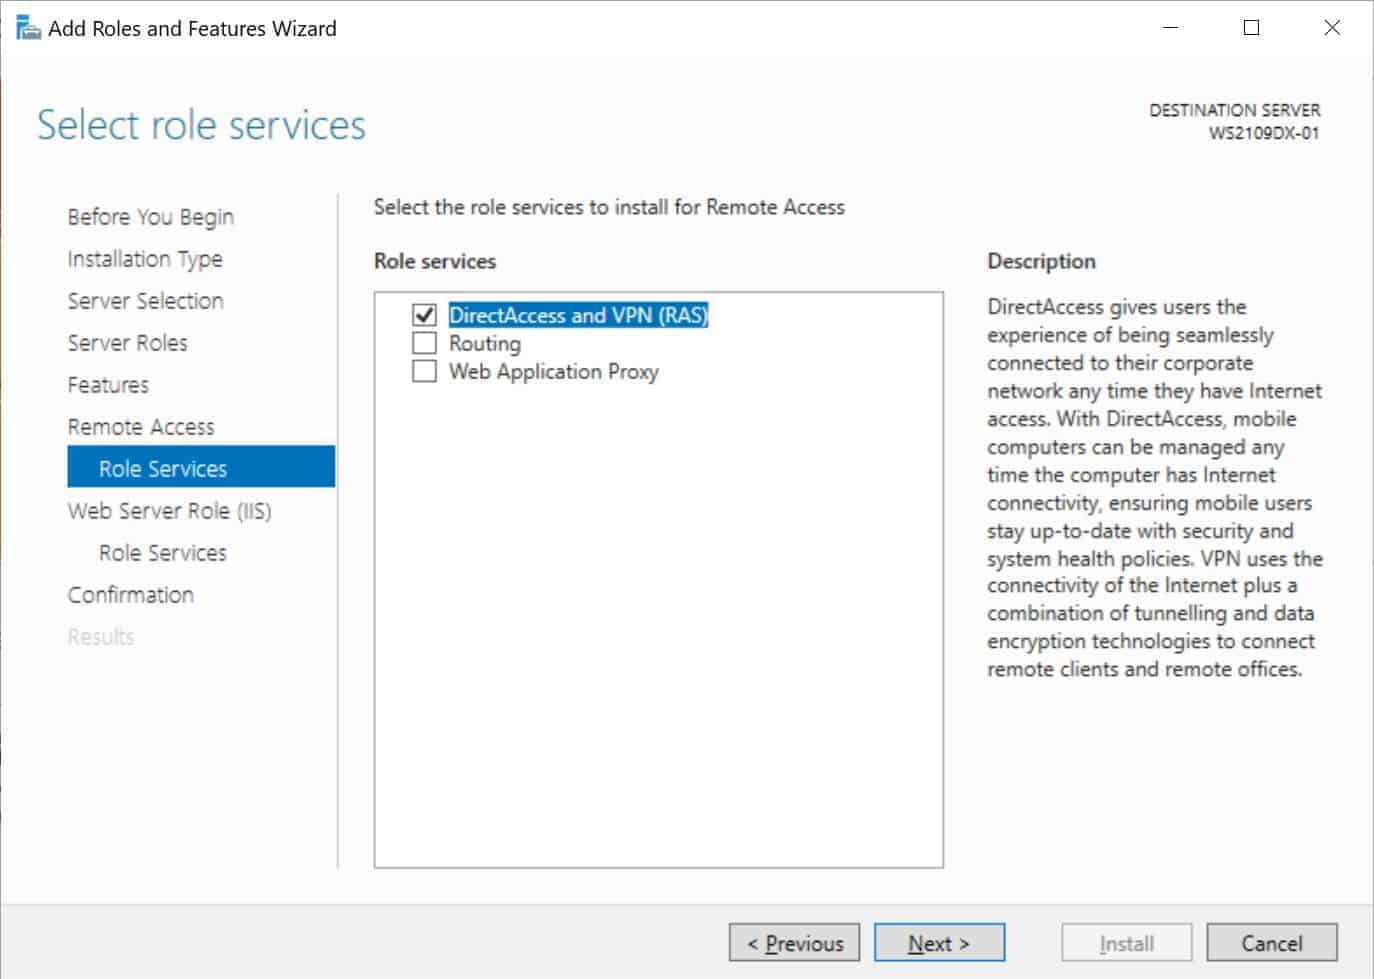
On the step Role Services, select the DirectAccess and VPN (RAS)
On the final step, select install to install the Remote Access role.
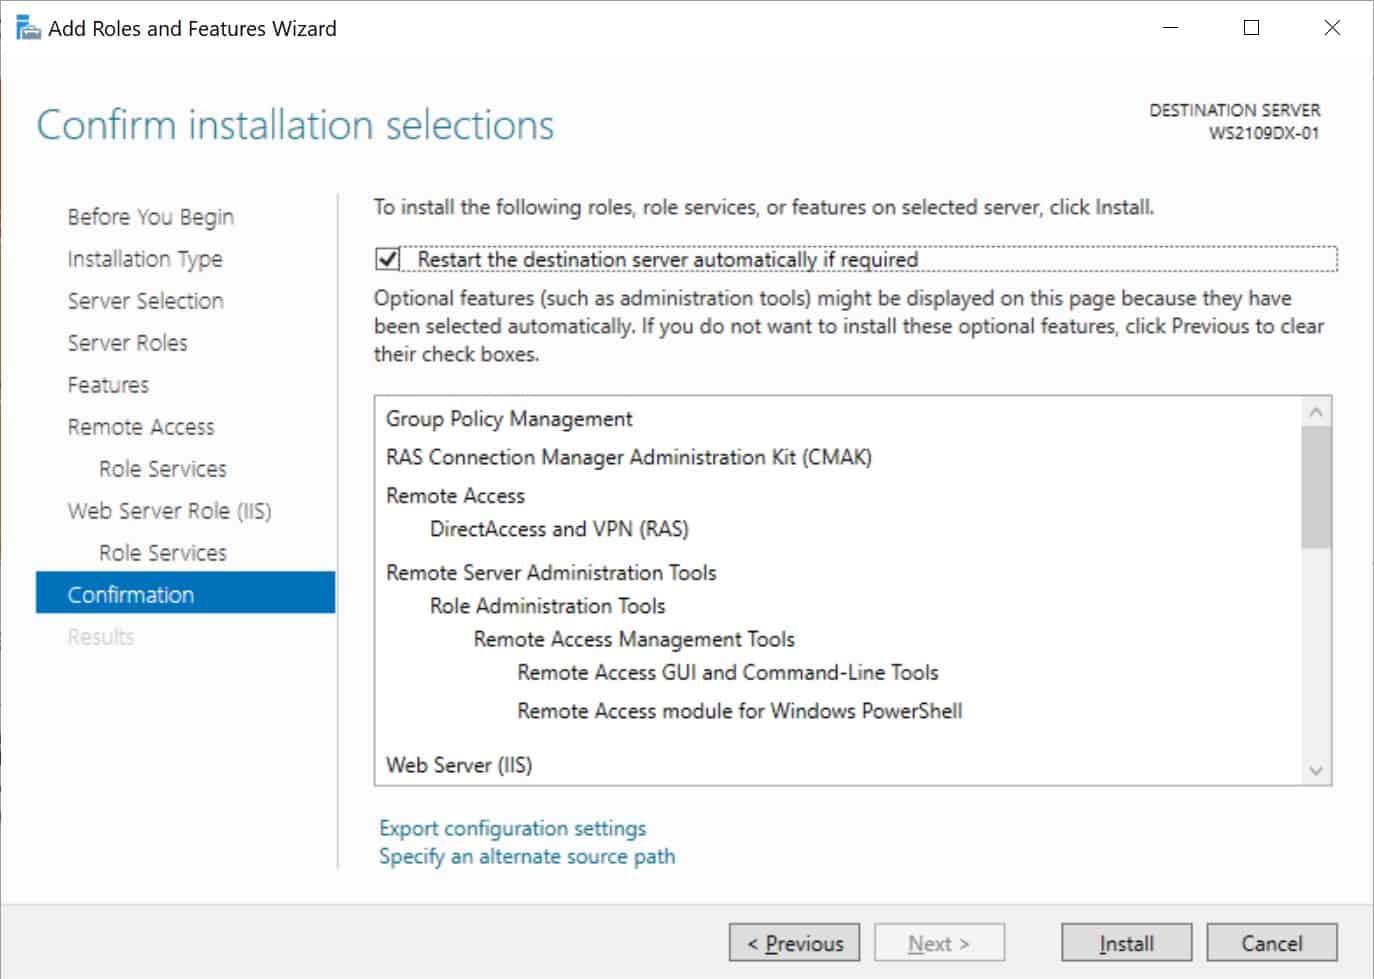
This might requires a reboot of the server.
Install and Configure VPN on Windows Server 2019
After you have successfully installed, now you can start the wizard to install and configure the VPN server in Windows Server 2019.
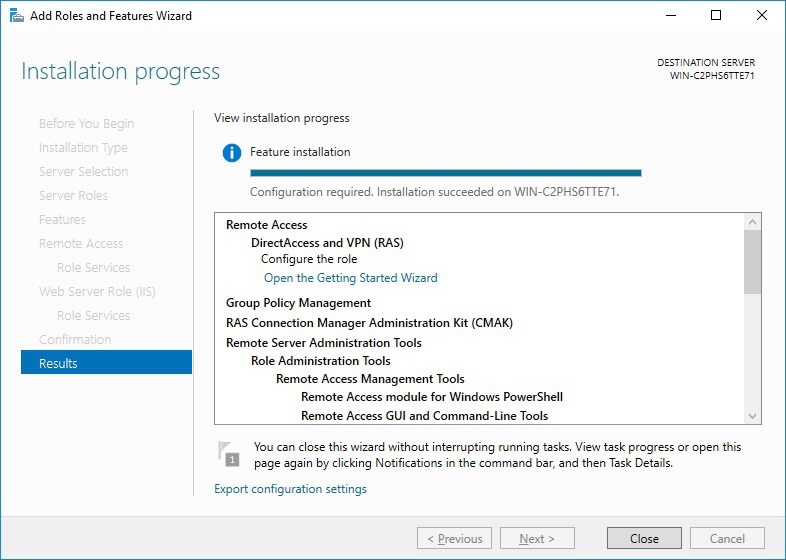
After the features are installed, which can take a while to finish, you see the link for the Getting Started Wizard. Click on “Open the Getting Started Wizard“.
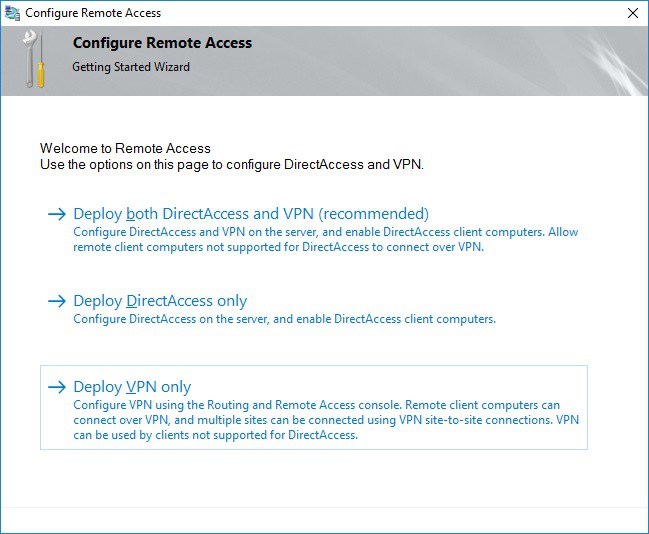
This opens a new wizard which will help you to configure the server. On the first screen, select “Deploy VPN only“.
This opens the Routing and Remote Access Management Console
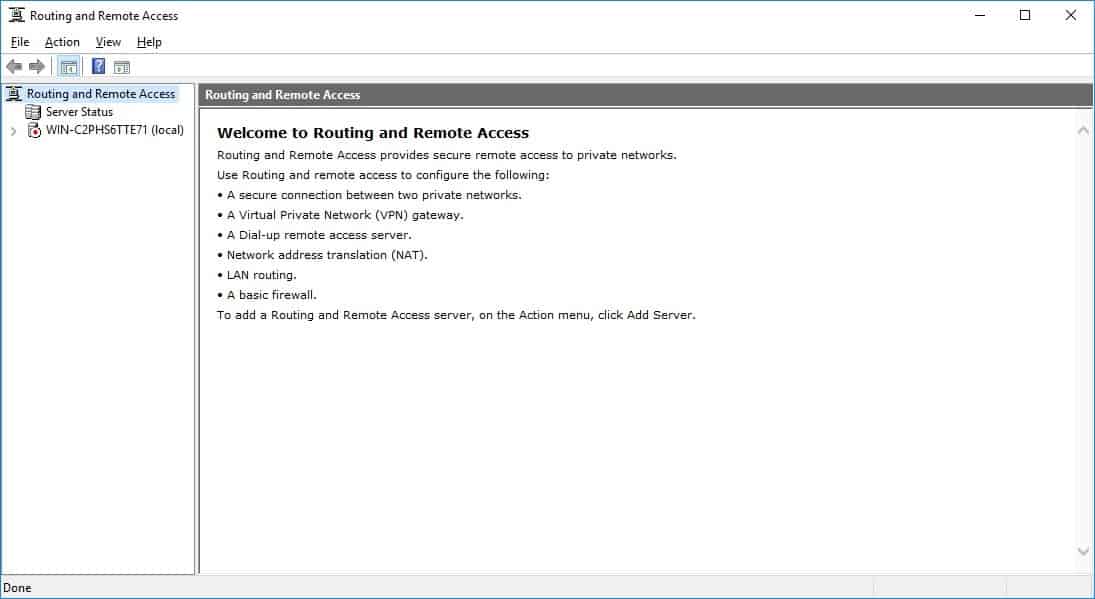
Right click on the Server name and click on “Configure and Enable Routing and Remote Access“.

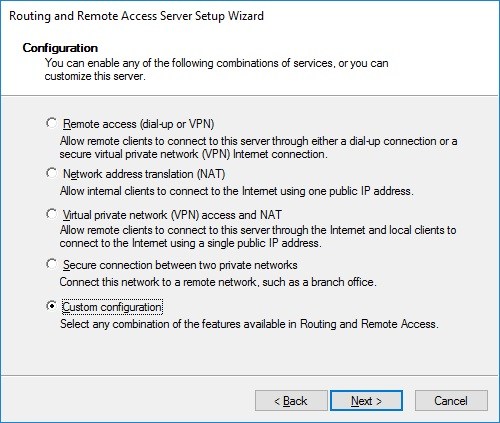
On the new wizard select “Custom configuration“.
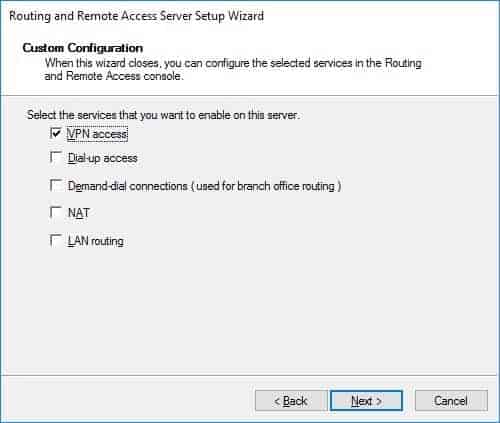
Select “VPN Access“.
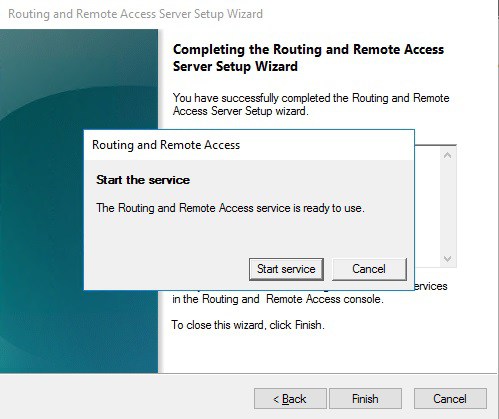
After you have click finish, you can now start the Routing and Remote Access service.
Configure VPN Access Users and Network
If you have a firewall between the internet and your Windows Server you have to open the following Firewall port sand forward them to your Windows Server:
For PPTP: 1723 TCP and Protocol 47 GRE (also known as PPTP Pass-through)
For L2TP over IPSEC: 1701 TCP and 500 UDP
For SSTP: 443 TCP
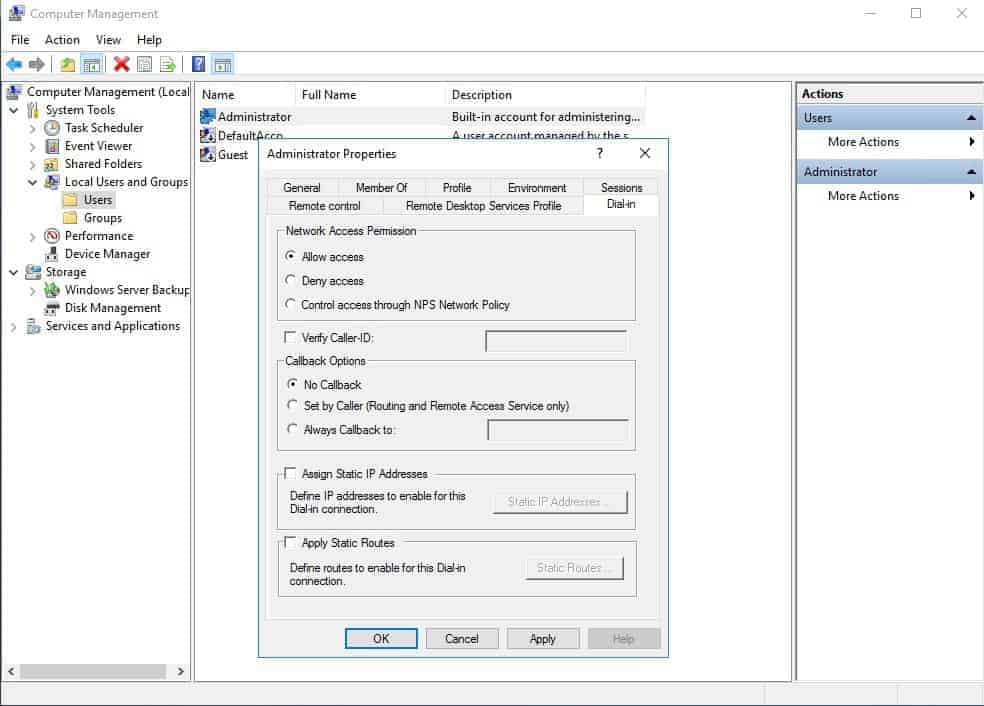
After the installation Users have to be enabled for Remote Access to connect to your VPN Server. On a standalone server this can be done in the Computer Management MMC, in a domain environment this can be done in the user properties of an Active Directory user.
If you don’t have a DHCP Server in your environment, you have to add a static IP address pool. This is often needed if you have a single server hosted at a service provider. In the properties of your VPN server, you can click on the IPv4 tab and enable and configure the “Static address pool”.
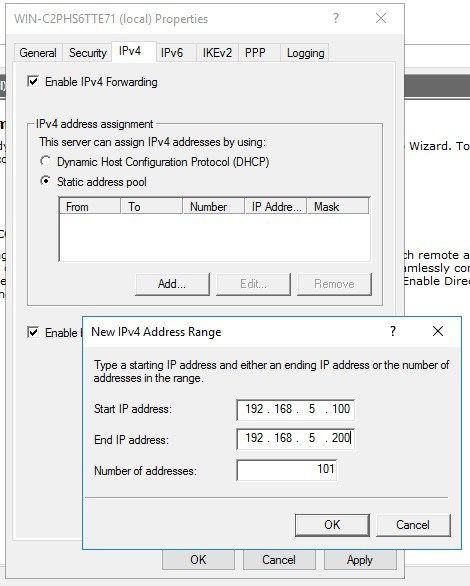
You now have to add an IP address from the same subnet as your static address pool to the network interface of your server so that users can access the server.
I hope this helps you to set up a VPN server in a small environment, lab, or hosted server. You can find more information about Windows Server in the Microsoft Docs.
Tags: DirectAccess, Install VPN Server on Windows Server, Microsoft, Remote Access, Virutal Private Network, VPN, VPN Server, Windows Server, Windows Server 2019, Windows Server 2019 VPN, Windows VPN Last modified: July 7, 2019


Does this configuration work as an always on VPN for Windows 10? I need to test always on VPN in my lab, I was reading a guide on how to install that in Server 2016 and it requires two firewalls which I do not have. Can 2019 work with only 1 firewall?
Hi, well explained. I have set these up several times and I am having trouble under my first 2019 server so thought there might be a trick (for example, granting permission under NPS) but this is the way to do it and I am having a problem connecting. Will look at my hardware firewall.
Any idea of how to get the firewall in the DMZ working? If it is enabled, PPTP and SSTP both get blocked. I even tried creating the rules on top of the built in ones w/ edge transversal enabled, but nothing.
If I set it to default allow on the DMZ NIC, the connections are allowed so I know it is not the internal NIC at issue. However, I’m not too sure if our ISO auditor will like that solution lol.
Jim- I’m having connection problems too and definitely not the firewall. did you ever get it resolved?
My specific error: a connection to the remote computer could not be established. ypu might need to change the network settings for this connection.
found the solution to my issue-
https://social.technet.microsoft.com/Forums/windowsserver/en-US/0270d377-be3a-4b63-82a0-9df076c5e3b3/upgrade-from-2016-to-2019-breaks-dhcp-relay-agent-when-using-rras?forum=ws2019
Thank you Ryan, that issue was driving me nuts for about a week now. Your link really helped out. Kudos!
Hi, I have built a pc and installed Windows server 2019. I have also setup active directory and file server on the pc (both roles on same pc ). I wanted to create a file server that is accessible over the internet on all devices, but I want it secure. I am new to network g and don’t really know what correct terminology is so can’t work out what I need to do to achieve this. I can’t find any straight forward guide as I’m not sure what I am looking for. Any help would be appreciated.
Thank You & Well Done! I appreciate your time in putting together this tutorial.
thanks, Randy, Happy it was useful.
Hi, do this need any special prerequisites? I do it as described but the RAS will not start and runs into eventID 7024 by Service Control Manager. A restart of the RAS send out the error code 8007042a. And why your installation summary of features is so long and needs a scrollbar when my installation will not have one? It seems something is missing to reach the goal you will explain us. Any suggestions?
Hello,
How can I have got access to internet from the VPN access as NordVPN ? I’m beginner !