When you were create a USB media for PCs, notebooks and servers which were using BIOS you could use several tools to do this. Now most of the tools do not really create a USB media drive which can be used to boot and install Windows or Windows Server on a UEFI based system such a new servers and for example the Surface Pro line. But it is very simple to do this now, just follow this steps:
- The USB drive has to be formatted in FAT32
- The USB needs to be GPT and not MBR
- Copy all files from the ISO to the USB drive
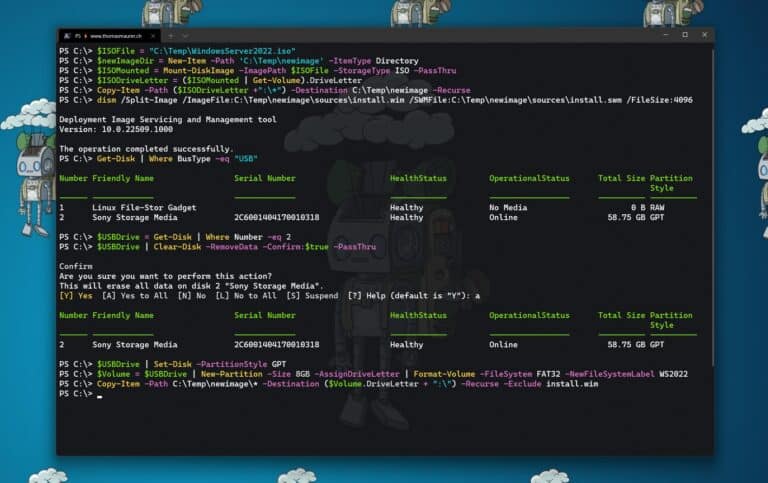
PowerShell to create a Windows Server USB drive
This is it, and here is how you do it:
First plugin your USB drive to your computer. The USB drive should be bigger than 4GB.
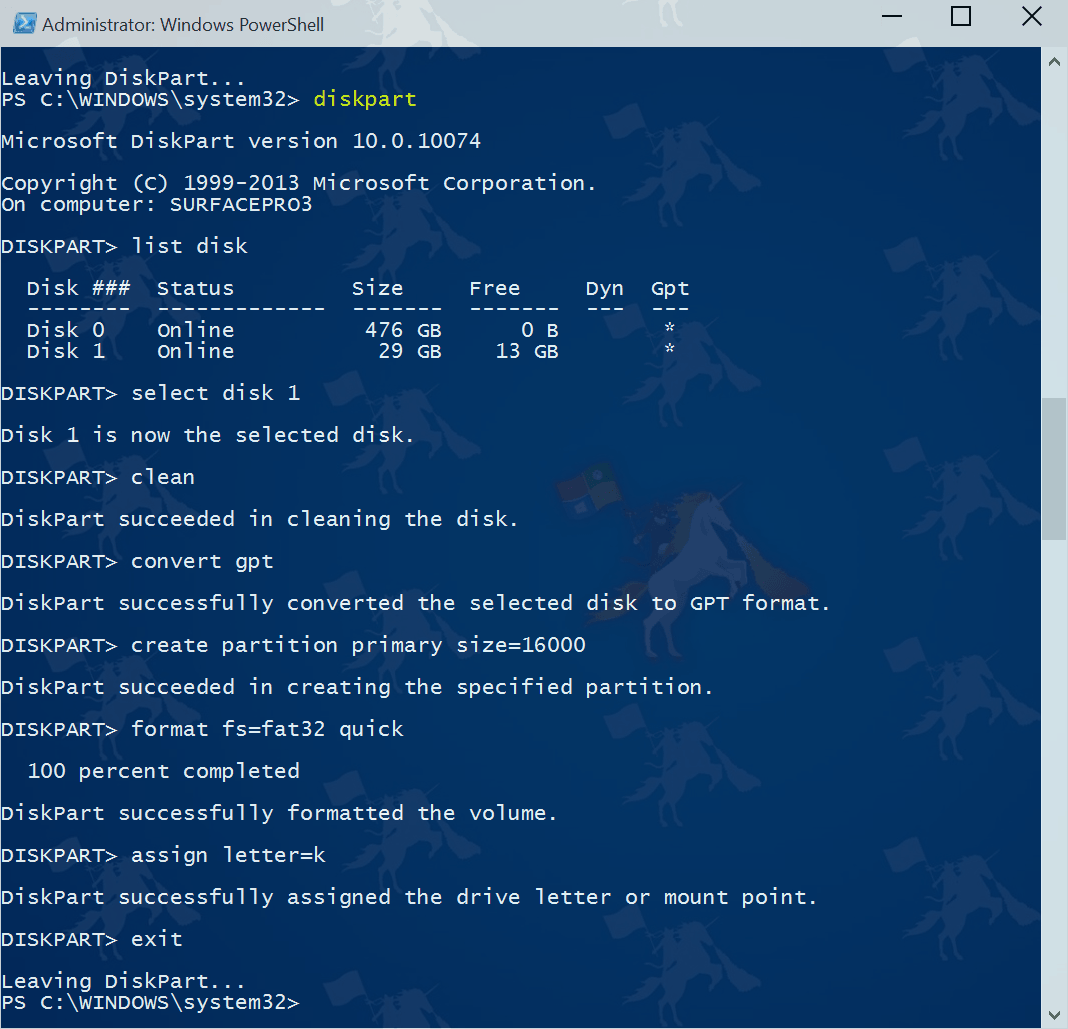
Open a CMD prompt or PowerShell using the Run as Administrator option and open diskpart. Now you can do list all this by using
list disk
Select the USB disk, in my case this was disk 1
select disk 1
Clean the disk. Be careful this will remove all files and partitions on the USB media.
clean
Now convert it to GPT
convert gpt
Create a new primary partition. But make sure the partition is not greater than 16GB otherwise it can be formatted with FAT32.
create partition primary

# If your USB drive is bigger than 16GB use the following command

create partition primary size=16000
Format the partition with FAT32
format fs=FAT32 quick
Assign a drive letter to the volume
assign letter=k
now you can exit the diskpart and copy all files from the Windows or Windows Server to the USB drive and boot it. This works with Windows 8, Windows 8.1, Windows 10, Windows Server 2012, Windows Server 2012 R2 and Windows Server 2016 or even Hyper-V Server in the same editions.