If you have a mixed Hyper-V environment with Hyper-V hosts which have different CPU generations you may cannot live migration Virtual Machines from one Hyper-V host to another without setting the VM CPU Compatibility setting.
Note: I saw a lot of different environments where different generation of Intel CPUs were used, and most of the time Live Migration did still work. I would recommend to set this setting only if you really need it.

If you need to do this for multiple Virtual Machines you may better use Windows PowerShell to do this.
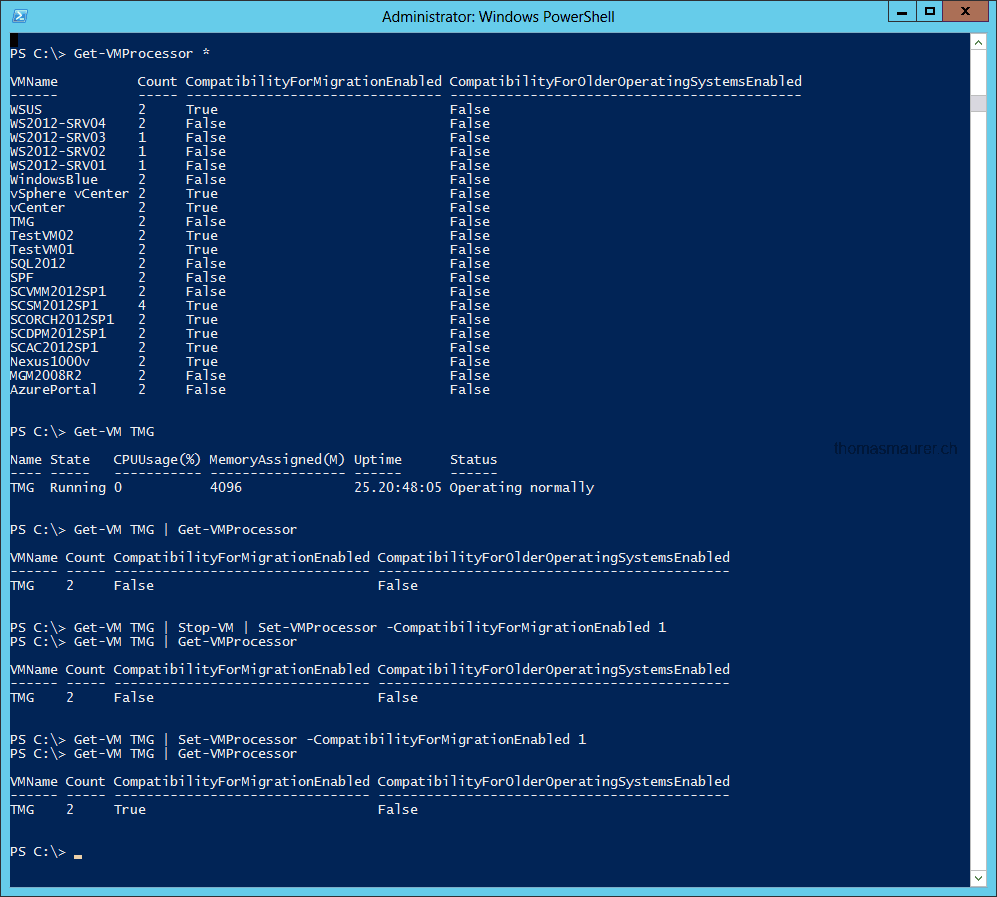
To do this you can use the new Hyper-V PowerShell module and the Get-VMProcessor and Set-VMProcessor cmdlet. With the Get-VMProcessor cmdlet you can get information about the virtual CPU of VMs. You can list this for all virtual machines running on one host by using the following command
Get-VMProcessor *

To change this setting for all virtual machines running on the Hyper-V host you can use the following PowerShell command. This does only working with virtual machines which are not running.
Get-VMProcessor * | Set-VMProcessor -CompatibilityForMigrationEnabled 1

If you want to shut down all the VMs first you can use the following command.
Get-VM | Stop-VM
If you just want to do this for a single VM you can use the following commands.
Get-VM TMG | Stop-VM

Get-VM TMG | Set-VMProcessor -CompatibilityForMigrationEnabled 1
To do a full automation you could do it the following way:
Get-VM * | Stop-VM

Get-VM * | Set-VMProcessor -CompatibilityForMigrationEnabled 1

Get-VM * | Start-VM
As you can see you can also find the “CompatibilityForOlderOperatingSystemsEnabled” property to enable Processor Compatibility for legacy Operating Systems in Windows Server 2012 Hyper-V for example Windows NT 4.0 Server or Windows 2000.