Microsoft just released Windows Server 2016, which comes with a new deployment option called Nano Server. Nano Server is a very small version of Windows Server which addresses a lot of different issues. Now after the release of Windows Server 2016 Microsoft is releasing the first updates for Windows Server 2016 and Nano Server.
Microsoft released the first Cumulative Update for Windows Server 2016 was released on September 26, 2016 (KB3192366) and the prerequisite for this and future Cumulative Update is the Servicing Stack Update for Windows 10 Version 1607 (KB3176939).
Download
You can download the .msu updates from the Windows Server Catalog:
- Cumulative Update for Windows Server 2016: September 26, 2016 KB3192366 Download
- Servicing Stack Update for Windows 10 Version 1607: August 23, 2016 KB3176939 Download
Folder Structure
Just to make it easier for you, here is the folder structure I use:
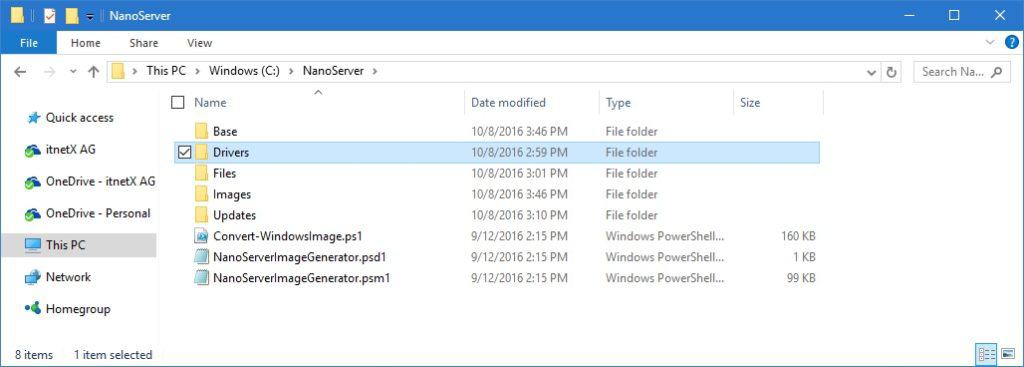
- C:\NanoServer – The Folder where I put all my files and folders to create and manage NanoServer. I copied the NanoServerImageGenerator PowerShell module to this folder

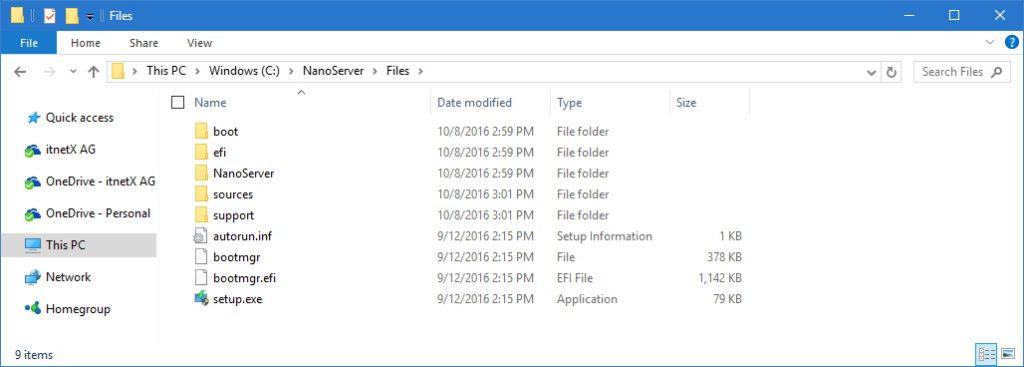
- C:\NanoServer\Files – Copied all the files from the Windows Server 2016 ISO file
- C:\NanoServer\Updates – Downloaded .msu files and extracted .cab files
- C:\NanoServer\Images – Created Nano Server Images
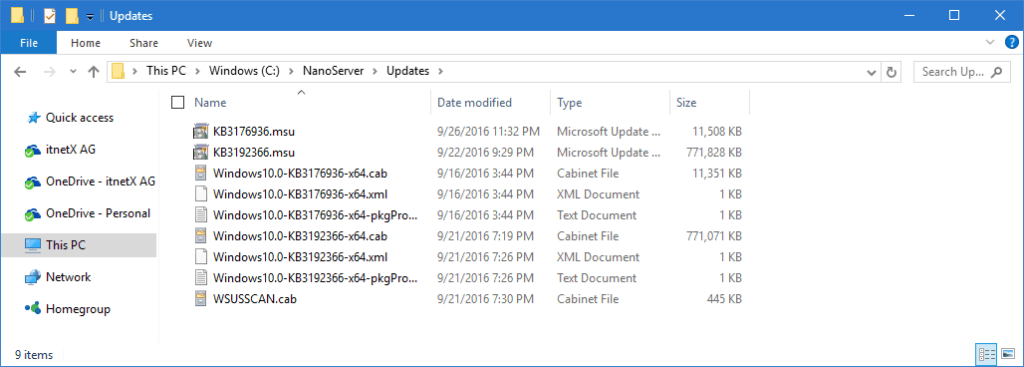
Extract the .cab files from the .msu file
For the most update scenarios you will need the .cab update package , which is included in the .msu file. To extract the .cab file from the .msu file you can use the expand command line utility.
In my case renamed the .msu files to for easier identification and copied both files to C:\NanoServer\Updates.
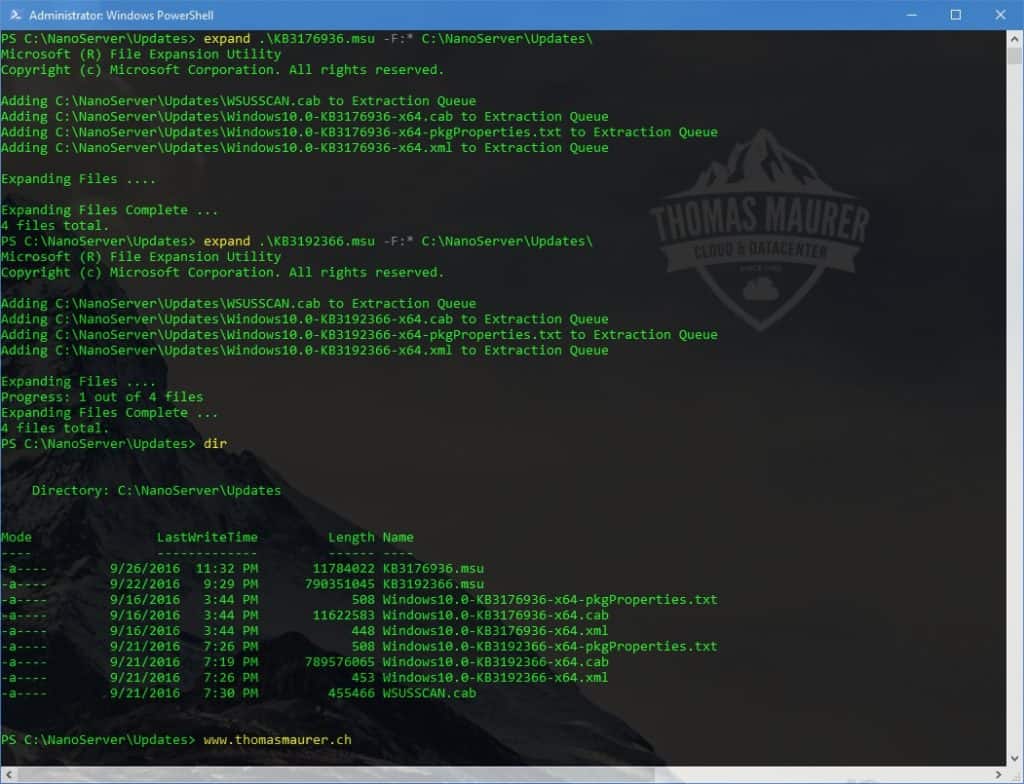
expand .\KB3176936.msu -F:* C:\NanoServer\Updates\

expand .\KB3192366.msu -F:* C:\NanoServer\Updates\
Integrate Updates into a new Nano Server Image
If you create a new Nano Server Image you can simply include the latest updates and cumulative updates while building the image. With that you have a new fresh NanoServer Image which will be fully patched after the first boot.
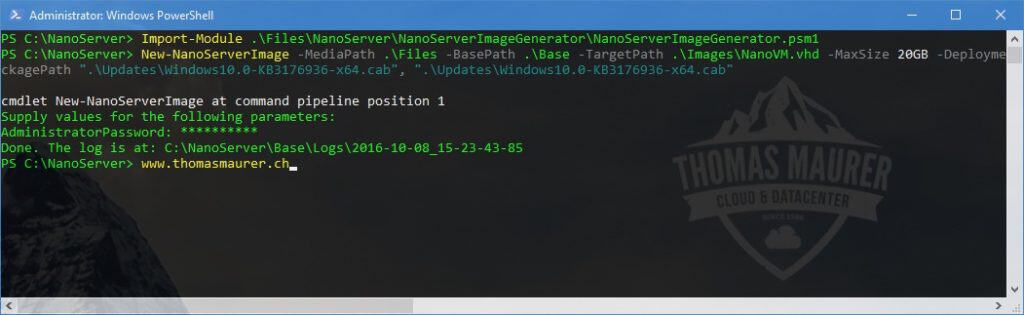
Import-Module .\Files\NanoServer\NanoServerImageGenerator\NanoServerImageGenerator.psm1

New-NanoServerImage -MediaPath .\Files -BasePath .\Base -TargetPath .\Images\NanoVM.vhd -MaxSize 20GB -DeploymentType Guest -Edition Datacenter -ComputerName "Nano01" -ServicingPackagePath ".\Updates\Windows10.0-KB3176936-x64.cab", ".\Updates\Windows10.0-KB3176936-x64.cab"
Integrate Updates into an existing Nano Server Image
If you already have an existing Nano Server Image you can also updates this one.
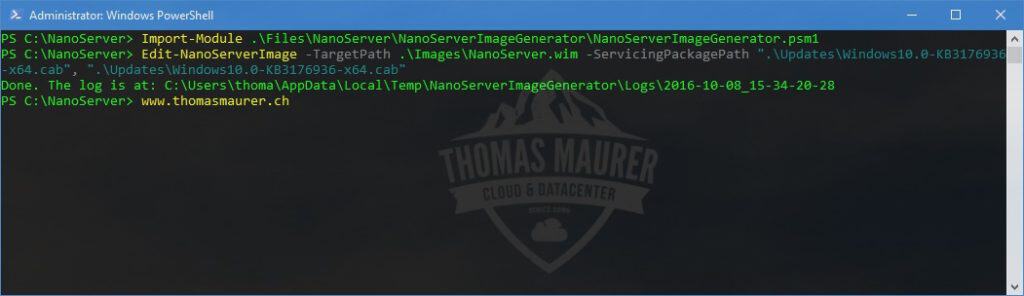
Import-Module .\Files\NanoServer\NanoServerImageGenerator\NanoServerImageGenerator.psm1

Edit-NanoServerImage -TargetPath .\Images\NanoServer.wim -ServicingPackagePath ".\Updates\Windows10.0-KB3176936-x64.cab", ".\Updates\Windows10.0-KB3176936-x64.cab"
Integrate Updates into an VHD or VHDX (offline)
If you have VHD or VHDX templates and you want to integrate new updates you can do this as well using the DISM PowerShell module. You can also update existing Virtual Machines with this if you shutdown the VM (Offline Patching).
Mount-WindowsImage -ImagePath .\Images\NanoVM.vhdx -Path .\Mount -Index 1

Add-WindowsPackage -Path .\Mount -PackagePath  C:\NanoServer\Updates

Dismount-WindowsImage -Path .\Mount -Save
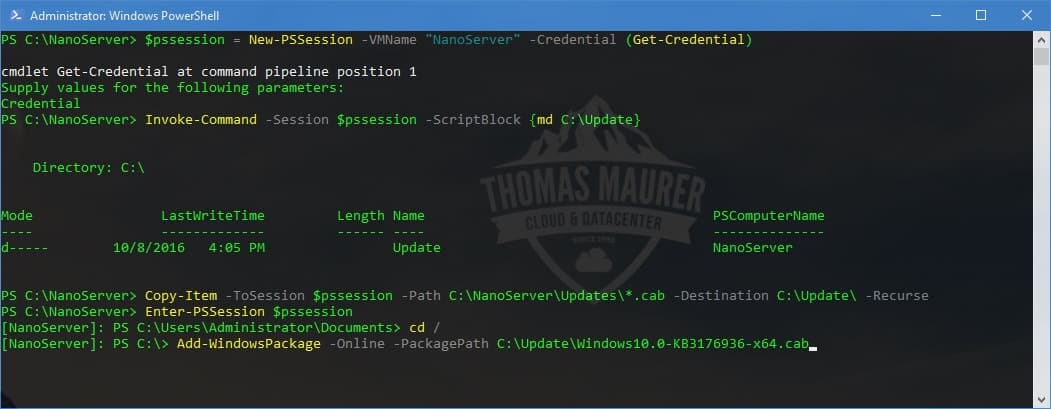
Install Updates on a running Nano Server (online)
If you have a running Nano Server in a virtual machine or on a physical host you can also use the downloaded .cap files and the DISM PowerShell module to install the patches on a Nano Server. For that you will need to use PowerShell remoting to connect to the Nano Server.
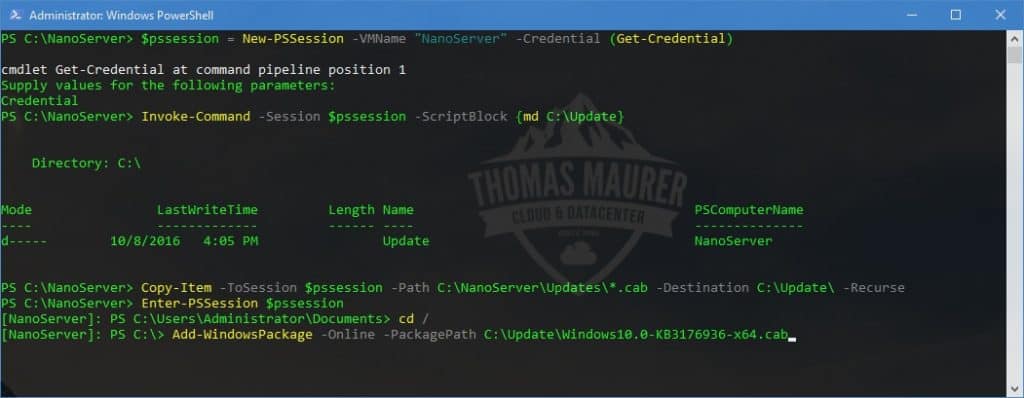
# Copy Update Files to Nano Server
$pssession = New-PSSession -VMName "NanoServer" -Credential (Get-Credential)
Invoke-Command -Session $pssession -ScriptBlock {md C:\Update}
Copy-Item -ToSession $pssession -Path C:\NanoServer\Updates\*.cab -Destination C:\Update\ -Recurse

# Install the servicing stack update first (reboot needed)
Enter-PSSession -ComputerName "NanoServer" -Credential (Get-Credential)
Add-WindowsPackage -Online -PackagePath C:\Update\Windows10.0-KB3176936-x64.cab
Restart-Computer

# Install update after reboot
Enter-PSSession -ComputerName (Read-Host "Enter Nano Server IP address") -Credential (Get-Credential)
Add-WindowsPackage -Online -PackagePath C:\Update\Windows10.0-KB3192366-x64.cab
Restart-Computer
If the Nano Server is running inside a VM, you can also use PowerShell Direct to connect directly to the Virtual Machine from the Hyper-V host.
Download and Install Updates on a running Nano Server from Windows Update (online from Windows Update)
If you have a running Nano Server VM or physical host, you can use the Windows Update WMI provider to download and install the update from Microsoft Update.
Enter-PSSession -ComputerName "NanoServer" -Credential (Get-Credential)

# Scan for updates

$ci = New-CimInstance -Namespace root/Microsoft/Windows/WindowsUpdate -ClassName MSFT_WUOperationsSession
$result = $ci | Invoke-CimMethod -MethodName ScanForUpdates -Arguments @{SearchCriteria="IsInstalled=0";OnlineScan=$true}
$result.Updates

# Install all updates

$ci = New-CimInstance -Namespace root/Microsoft/Windows/WindowsUpdate -ClassName MSFT_WUOperationsSession
Invoke-CimMethod -InputObject $ci -MethodName ApplyApplicableUpdates

Restart-Computer

# List Installed Updates

$ci = New-CimInstance -Namespace root/Microsoft/Windows/WindowsUpdate -ClassName MSFT_WUOperationsSession
$result = $ci | Invoke-CimMethod -MethodName ScanForUpdates -Arguments @{SearchCriteria="IsInstalled=1";OnlineScan=$true}
$result.Updates
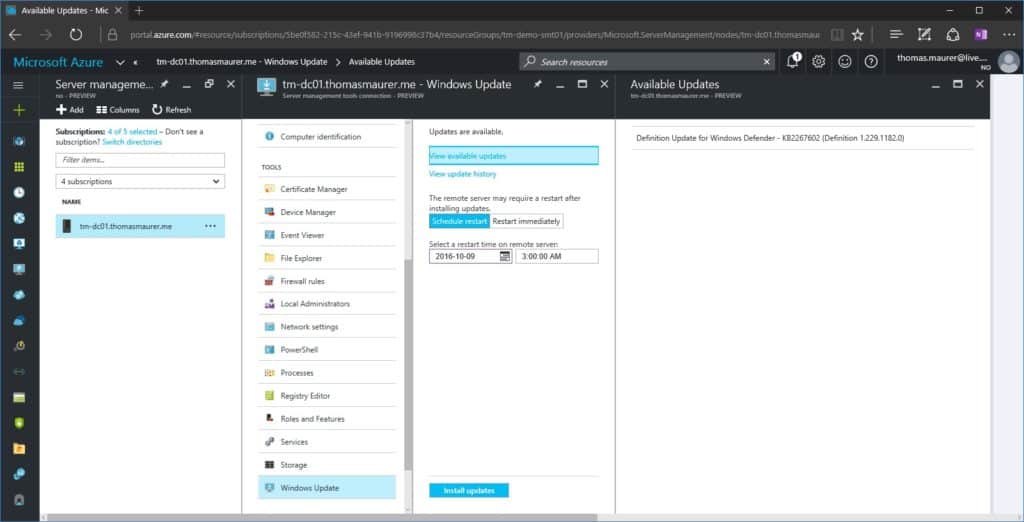
Download and Install Updates on a running Nano Server from Windows Update using the Azure Remote Server Management Tools
You can also use a graphical UI to update Nano Server directly from the Remote Server Management Tools.
You can get more information about Updating Nano Server on this Microsoft blog post.
Tags: Azure, Cloud, DISM, Microsoft, Nano Server, patches, PowerShell, Server Management Tools, SMT, Updates, Windows Server, Windows Server 2016 Last modified: June 26, 2019


Bravo Thomas,
Tested and approved :)
thanks :)
i used the online methode
i download update from https://www.catalog.update.microsoft.com/
thanks a lot very helpful
youcef aliarous
aliarous.com