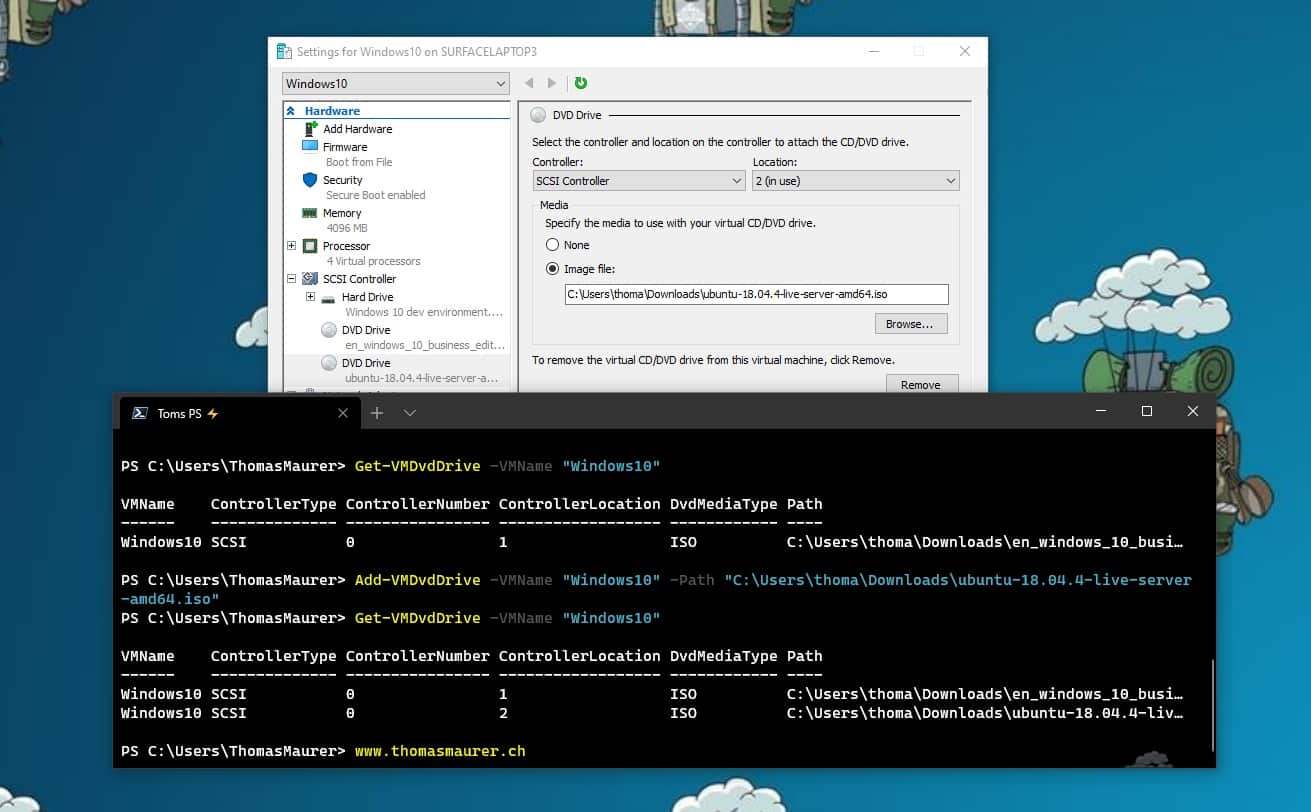
Hyper-V offers the capability to add an ISO image to a virtual CD/DVD drive and you can use Hyper-V Manager to do that, or you can also use PowerShell. Here is how you can add an ISO to a Hyper-V virtual machine (VM) using PowerShell. There are two ways of doing it if you already have a virtual DVD drive attached to the VM or if you need to add a virtual DVD drive.
This works with Hyper-V on Windows Server and on Windows 10.
Attach ISO to an existing DVD Drive on a Hyper-V VM using PowerShell
To attach an ISO file to an existing virtual DVD drive on a Hyper-V virtual machine (VM) using PowerShell, you can use the following command:
Set-VMDvdDrive -VMName Windows10 -Path "C:\Users\thoma\Downloads\ubuntu-18.04.4-live-server-amd64.iso"
Add ISO file and DVD Drive to a Hyper-V VM using PowerShell
If your Hyper-V virtual machine doesn’t have a virtual DVD drive attached to it, you can add a virtual DVD drive including the ISO file with the following PowerShell command:
Add-VMDvdDrive -VMName "Windows10" -Path "C:\Users\thoma\Downloads\ubuntu-18.04.4-live-server-amd64.iso"
If you run this command on a virtual machine, which already has a virtual DVD drive attached, you will simply add a second virtual DVD drive to this machine. You can find more information on the Add-VMDvdDrive cmdlet on Microsoft Docs.
Conclusion
If you want to build some automation around Hyper-V on Windows 10 or on Windows Server, PowerShell is the way to go. If you have any questions feel free to leave a comment.
Tags: add, Add-VMDvdDrive, Drive, DVD, file, Hyper-V, iso, Microsoft, PowerShell, Virtual, Virtual Machine, VM, Windows 10, Windows Server Last modified: August 4, 2020


Great one Thomas, right to the point.
Just one note though. It seems that the cmdlet is expecting a controller number. Running the command without specifying the controller resulted in this error (DVD was already added to the SCSI controller before running the cmdlet):
PS C:\Users\tolga> Set-VMDvdDrive -VMName “RHEL 8.4” -Path “”C:\Users\tolga\Downloads\Software.iso””
Set-VMDvdDrive : Cannot bind parameter ‘ControllerNumber’. Cannot convert value “C:\Users\tolga\Downloads\Software.iso” to type “System.Int32”. Error: “Input string was not in a correct format.”
At line:1 char:50
+ … 1″ -Path “”C:\Users\tolga\Downloads\Softwar …
+ ~~~~~~~~~~~~~~~~~~~~~~~~~~~~~~~~~~~~~~~~~~~~~~~~~~~~~~~~~
+ CategoryInfo : InvalidArgument: (:) [Set-VMDvdDrive], ParameterBindingException
+ FullyQualifiedErrorId : CannotConvertArgumentNoMessage,Microsoft.HyperV.PowerShell.Commands.SetVMDvdDrive
Despite the error, when I switched to the Hyper-V Manager and checked the VM, I could see the ISO file mounted under VM Settings > SCSI Controller > DVD Drive.
After the error, I also tried the same cmdlet above by setting the -ControllerLocation 1 but the error did not change.
Any ideas?
OK – Solved after getting DVD device list with Get-VMDvdDrive and using the -ControllerNumber and -ControllerLocation options.