If you run Windows Server as Core Installation, like Windows Server 2016 Core or any Microsoft Hyper-V Server edition and you want to use SNMP (Simple Network Management Protocol) on that system, you first have to install the SNMP feature on that Core Server. After that you can use the MMC to remotely connect to the services list on the Core Server.
Install SNMP on Windows Server Core
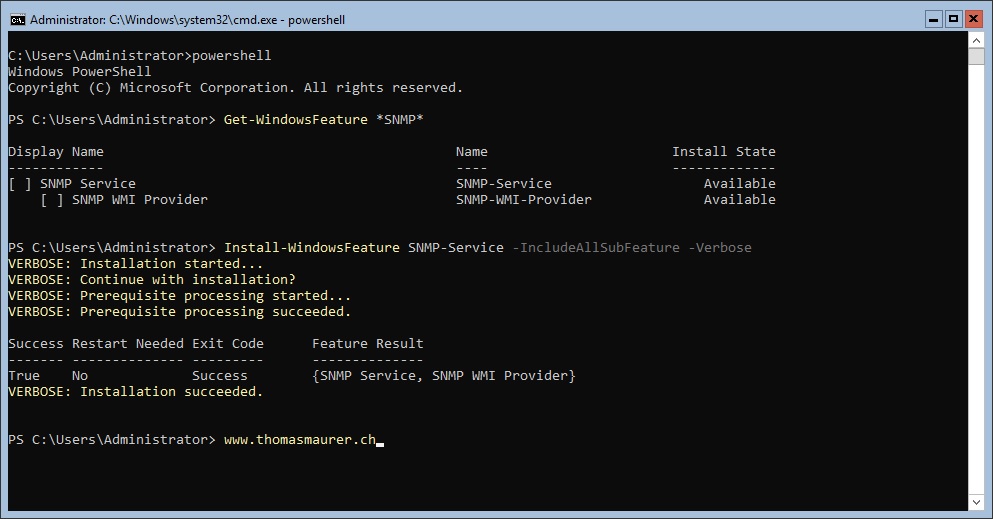
First lets see if the SNMP feature is installed, using PowerShell:
Get-WindowsFeature *SNMP*
By default the SNMP feature is not installed. To install the SNMP feature on Windows Server Core, you can run the following command:
Install-WindowsFeature SNMP-Service -IncludeAllSubFeature -Verbose
Configure SNMP on Windows Server Core
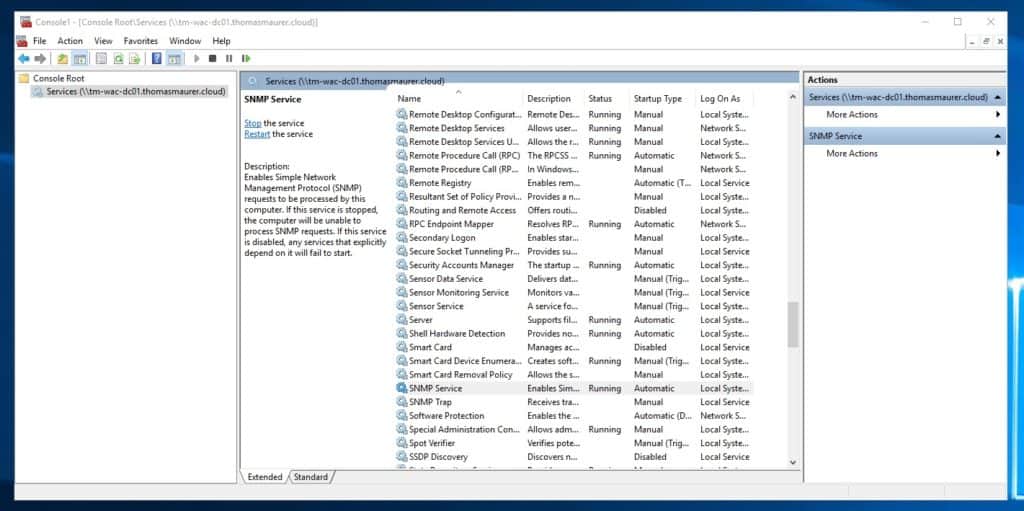
After you have installed the SNMP feature, you and you have enabled Remote Management you can mange and configure smtp via remote MMC.
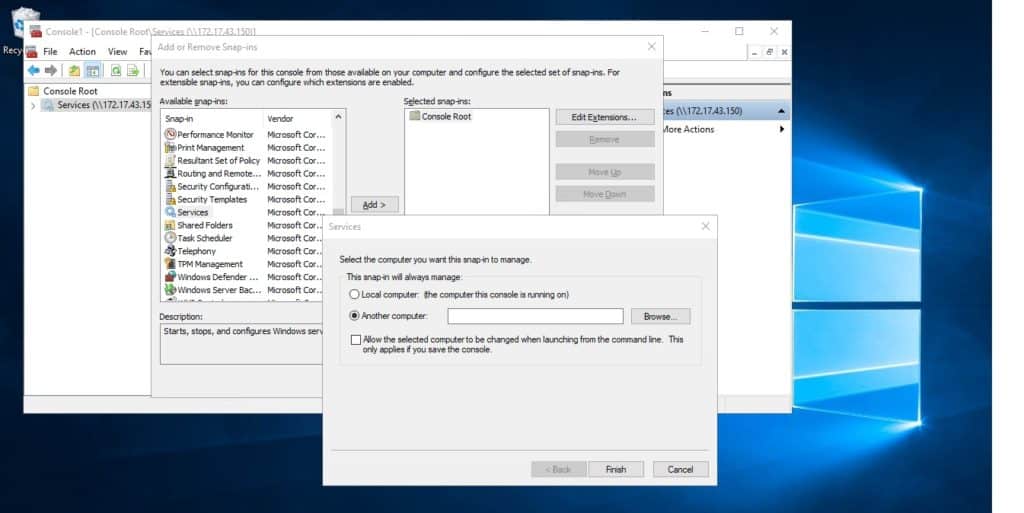
Simply open up MMC click on File and then on Add/Remove Snap-in. Now you can select the Services snap-in and enter the name or IP address of the Windows Server Core you want to configure the SNMP services.
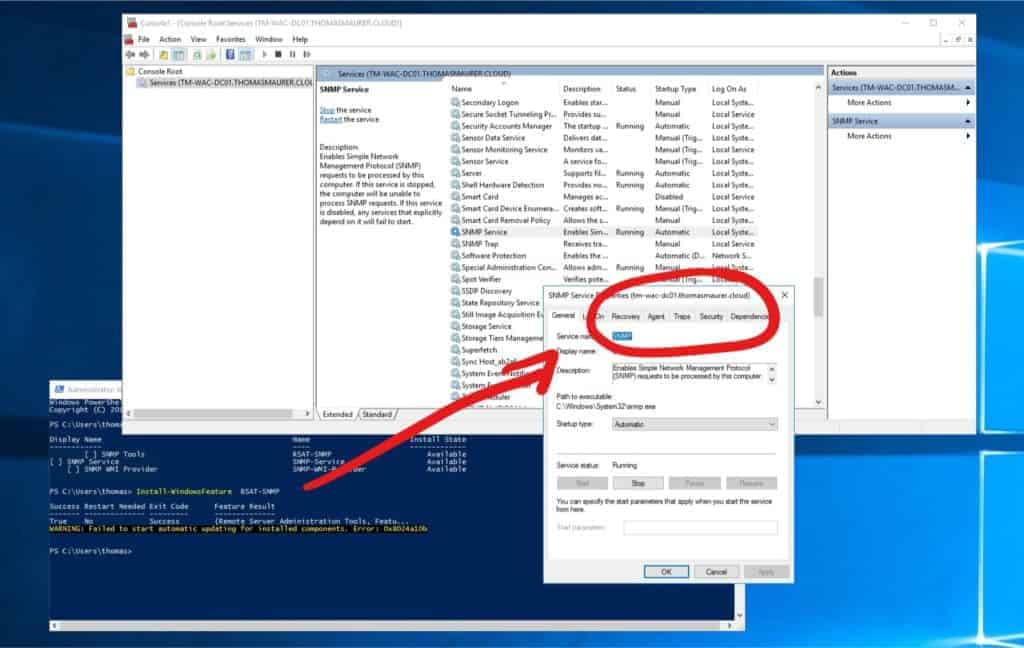
Important: If you need to configure the SNMP Service on a remote machine using the MMC, you have to install the RSAT-SNMP feature on the local administrative computer. Otherwise, you will not see the SNMP specific tabs. In older versions of Windows and Windows Server, you needed to install the SNMP feature instead of the RSAT-SNMP feature.
Install-WindowsFeature RSAT-SNMP -verbose
I hope this blog post was helpful. And it helps you to install and configure the SNMP feature on Windows Server. Especially you should have a look at the remote management part for the SNMP service. It works with all the latest Windows Server versions like 2008 R2, 2012, 2016 and event Windows Server 2019. If you have any question, feel free to comment on this post.
Tags: Core Server, Hyper-V, Install SNMP, Microsoft, mmc, Monitoring, PowerShell, Remote SNMP, RSAT SNMP, snmp, SNMP Feature, SNMP Trap, Windows Server, Windows Server 2012 R2, Windows Server 2016, Windows Server 2019, Windows Server Core Last modified: March 10, 2021








Just curious. You installed SNMP using PowerShell. Why didn’t you go ahead and configure SNMP using PowerShell as well?
@Tom I think this is because there is no powershell cmdlet to actually configure the SNMP service itself (community, traps servers…).
You can only do it by GUI or Regedit.
One way to config SNMP read-only using PS.
# Get current SNMP config
Get-ChildItem HKLM:\SYSTEM\CurrentControlSet\Services\SNMP\Parameters\
# Set SNMP Contact to XXXX
Set-ItemProperty -Path HKLM:\SYSTEM\CurrentControlSet\Services\SNMP\Parameters\RFC1156Agent\ -Name sysContact -Value XXXX
# Set Community to XXXX and READ-ONLY
Set-ItemProperty -Path HKLM:\SYSTEM\CurrentControlSet\Services\SNMP\Parameters\ValidCommunities\ -Name XXXX -Value 4
# Set allowed accepted Host
Set-ItemProperty -Path HKLM:\SYSTEM\CurrentControlSet\Services\SNMP\Parameters\PermittedManagers\ -Name 2 -Value XXXX
# Restart service
Restart-Service SNMP -Verbose
Worth mentioning, if you don’t access the services.msc > remote server from a server with the snmp service installed, the tabs lie agent, traps, and security don’t seem to show. i.e. configure remote services from a server with SNMP installed, not a workstation
I think I mention that in this part: