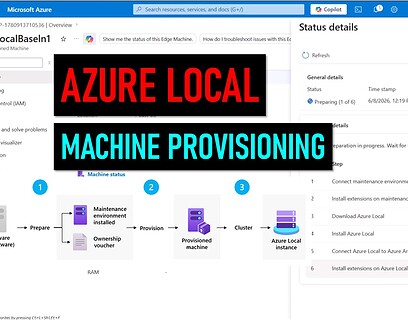
At Microsoft Build 2022 Microsoft just announced the general availability of single-node Azure Stack HCI. Enables you to run single node deployments for new scenarios. In this blog post we will go through how you can set up a single-node Azure Stack HCI cluster and connect it to Azure with Azure Arc. This can be used to install on a physical machine or in a virtual machine as well. In my case I am running this on a single Intel NUC for testing and lab.
What is Single-Node Azure Stack HCI
Azure Stack HCI is a hardware and software stack that customers have been using to extend the Azure cloud to their physical location. The standard hardware configuration is optimized for scale and power, and the new single node offering provides additional options for business scenarios with different requirements.
The new single node Azure Stack HCI, now generally available, fulfills the growing needs of customers in remote locations while maintaining the innovation of native integration with Azure Arc. Specifically, it offers customers the flexibility to deploy the stack in smaller spaces and with less processing needs, optimizing resources while still delivering quality and consistency.
Additional benefits include:
- Smaller Azure Stack HCI solutions for environments with physical space constraints or that do not require built-in resiliency, like retail stores and branch offices.
- A smaller footprint to reduce hardware and operational costs.
- Solutions that can be built to scale, ranging from a single node up to 16 nodes if needed.
You can learn more about the single-node Azure Stack HCI clusters on Microsoft Docs.
Set up Single-Node Azure Stack HCI
First you need to make sure you have all the prerequisites.
- A server from the Azure Stack HCI Catalog that’s certified for use as a single-node cluster and configured with all NVMe or all SSD drives. For evaluation purposes you can also use a virtual machine.
- For network, hardware and other requirements, see Azure Stack HCI network and domain requirements.
- Requires a Windows Active Directory Domain
- Download Azure Stack HCI
- (Optional) If you are running the Azure Stack HCI node in a virtual machine, make sure you enable nested virtualization.
# If you are running Azure Stack HCI for evaluation purposes this is how to enable the virtual machines for nested virtualization
Set-VMProcessor -VMName "VMName" -ExposeVirtualizationExtensions $true
Get-VMNetworkAdapter -VMName "VMName" | Set-VMNetworkAdapter -MacAddressSpoofing On
Install and update the Azure Stack HCI operating system
Installing the Azure Stack HCI operating system is very straightforward and similar to Windows Server.
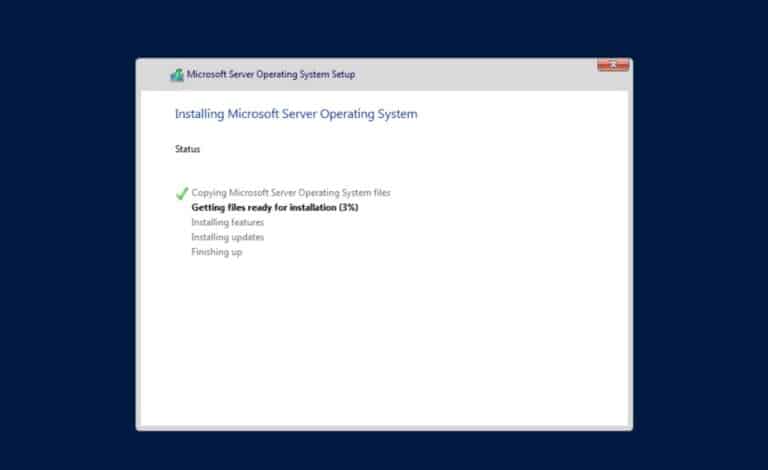
After the installation you will be promoted to set the local administrator password. You can learn more about the installation process here on my blog and on official Microsoft Docs.
Configure the Azure Stack HCI node

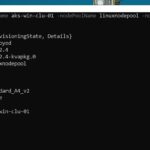
After you have installed the operating system, you can either use the sconfig tool to configure the basic node settings such as IP address, domain, and hostname, or you can also use PowerShell
# Set IP address
New-NetIPAddress -InterfaceAlias "Ethernet" -IPAddress 172.21.21.12 -PrefixLength 24 -DefaultGateway '172.21.21.1'
# Set DNS Server
Set-DnsClientServerAddress -InterfaceAlias "Ethernet" -ServerAddresses ("172.21.21.11")
# Change Computername and join Active Directory Domain
Add-Computer -NewName AzSHCI01 -DomainName tailwindtraders.local
# Restart computer
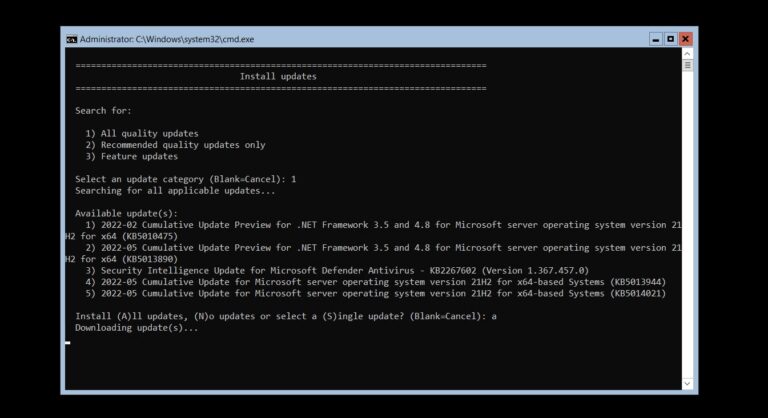
Restart-ComputerAlso make sure you have installed all the latest updates.
Create a single-node cluster using PowerShell
After you have rebooted the server, make sure you login with an Active Directory Domain account. You can also use PowerShell remoting to connect to the server.
Enter-PSSession -Computername "AzSHCI01" -Credential tailwindtraders\thomasNow you can install all the necessary roles and features
# Install Roles & features and restart server
Install-WindowsFeature -Name "BitLocker", "Data-Center-Bridging", "Failover-Clustering", "FS-FileServer", "FS-Data-Deduplication", "Hyper-V-PowerShell", "RSAT-AD-Powershell", "RSAT-Clustering-PowerShell", "NetworkATC", "Storage-Replica" -IncludeAllSubFeature -IncludeManagementTools
DISM /Online /Enable-Feature /All /FeatureName:Microsoft-Hyper-V
Restart-Computer
After all the roles and features have been installed you can now prepare the data drives to be used for Storage Spaces Direct.
Update-StorageProviderCache
    Get-StoragePool | ? IsPrimordial -eq $false | Set-StoragePool -IsReadOnly:$false -ErrorAction SilentlyContinue
    Get-StoragePool | ? IsPrimordial -eq $false | Get-VirtualDisk | Remove-VirtualDisk -Confirm:$false -ErrorAction SilentlyContinue
    Get-StoragePool | ? IsPrimordial -eq $false | Remove-StoragePool -Confirm:$false -ErrorAction SilentlyContinue
    Get-PhysicalDisk | Reset-PhysicalDisk -ErrorAction SilentlyContinue
    Get-Disk | ? Number -ne $null | ? IsBoot -ne $true | ? IsSystem -ne $true | ? PartitionStyle -ne RAW | % {
        $_ | Set-Disk -isoffline:$false
        $_ | Set-Disk -isreadonly:$false
        $_ | Clear-Disk -RemoveData -RemoveOEM -Confirm:$false
        $_ | Set-Disk -isreadonly:$true
        $_ | Set-Disk -isoffline:$true
    }
    Get-Disk | Where Number -Ne $Null | Where IsBoot -Ne $True | Where IsSystem -Ne $True | Where PartitionStyle -Eq RAW | Group -NoElement -Property FriendlyName
To create the single-node cluster and enable Storage Spaces Direct with disabled storage cache.
# Create single-node cluster
New-Cluster -Name <cluster-name> -Node <node-name> -NOSTORAGE -StaticAddress <ipaddress>
# Enable Storage Spaces Direct without storage cache
Enable-ClusterStorageSpacesDirect -CacheState Disabled
Now you can create a new volume using PowerShell
New-Volume -FriendlyName "Volume1" -Size 1TB -ProvisioningType ThinRegister the single-node Azure Stack HCI
You can now register single-node Azure Stack HCI cluster using the following commands.
Install-Module -Name Az.StackHCI
Register-AzStackHCI  -SubscriptionId "<subscription_ID>" -ResourceGroupName <resourcegroup> -TenantId "<tenant_ID>"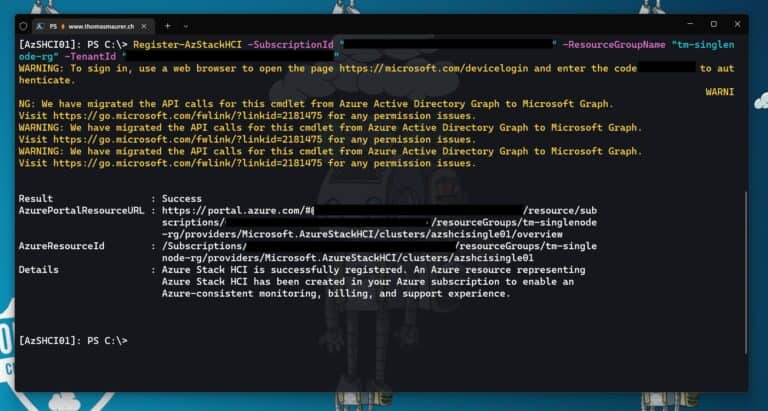
After that your Azure Stack HCI single-node cluster will show up in the Azure portal.
To learn more about setting up a single-mode Azure Stack HCI cluster, you can also check out the Microsoft Docs.
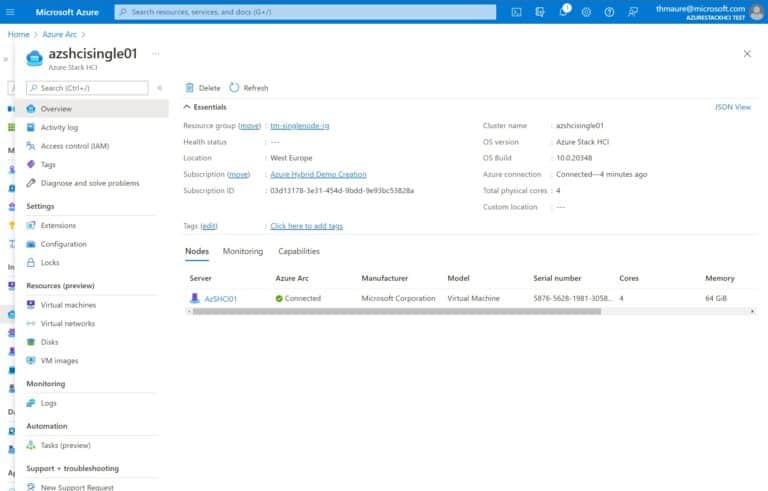
Manage your single-node Azure Stack HCI with Azure Arc
One of the great benefits of running Azure Stack HCI is the deep hybrid cloud integration with Azure using Azure Arc. This allows you to manage Azure Stack HCI directly from the Azure control plane.
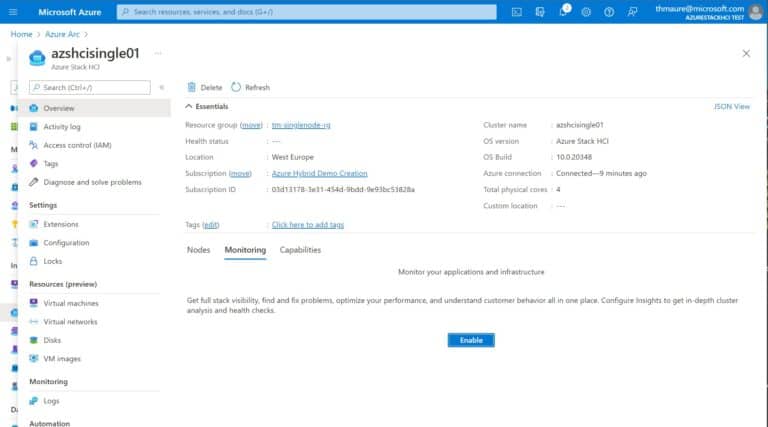
Enable Azure Monitoring for Azure Stack HCI
For one of the benefits of Azure Arc integration you can enable Azure Monitor for your Azure Stack HCI cluster.
There are many other benefits in the works like VM (virtual machine) creation using the Azure Arc resource bridge which is currently in preview.
Tags: Azure, Azure Arc, Azure Stack, Azure Stack HCI, Cloud, Hybrid Cloud, Microsoft, Microsoft Azure, Single-node, Windows, Windows Server Last modified: October 4, 2022