
A couple of days ago, we announced that you now can use Azure Active Directory to authentication Point-to-Site (P2S) VPN connections to your Azure virtual network. Before you were able to connect to your Azure virtual network (VNet) by using certificate-based or RADIUS authentication, however, if you are using the Open VPN protocol, you can now also use Azure Active Directory authentication. In this blog post, I will walk you through how you can set up an Azure P2S VPN connection using Azure AD authentication.
Prerequisites
To set this up, you will need a couple of things in place before we get started. Here are the prerequisites:
- An Azure Active Directory Tenant – Create a new tenant
- Azure AD users – Add users to an Azure Active Directory Tenant
- Gateway with Point-to-Site VPN connection – Configure a Point-to-Site VPN connection to a VNet using native Azure certificate authentication: Azure portal
If you already have this in place, you are good to go.
How to configure Azure P2S VPN with Azure AD authentication
First, you will need to look up your Azure AD Directory ID that you want to use for authentication. It is listed in the properties of the Azure AD page.
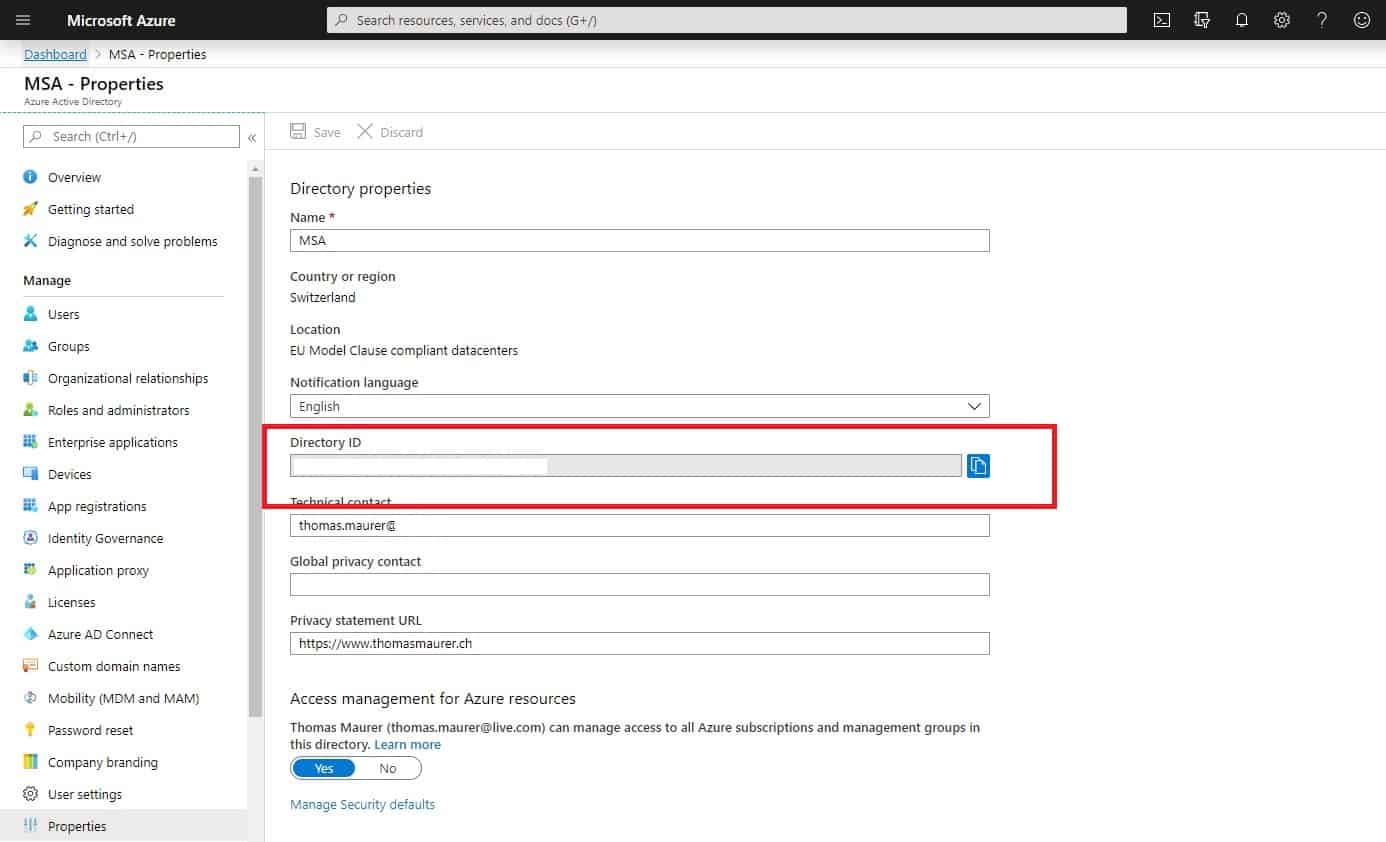
Azure AD Directory ID
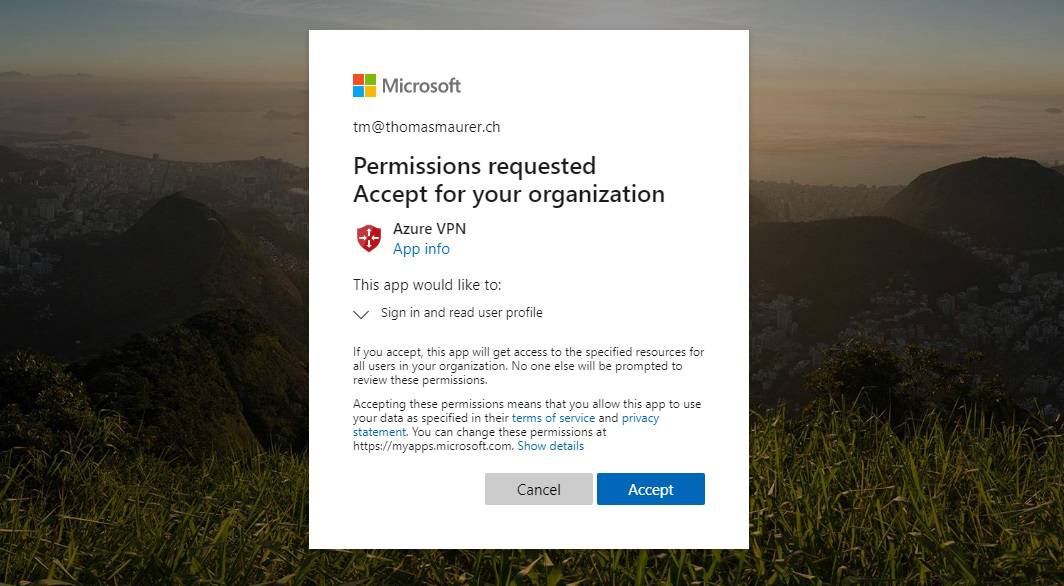
Next, you will need to give admin consent. You can copy this URL to your browser’s address bar. This URL is for Azure Public, if you are deploying in Azure Government, Azure Cloud Germany or Azure China, check out the following Microsoft Docs article.
https://login.microsoftonline.com/common/oauth2/authorize?client_id=41b23e61-6c1e-4545-b367-cd054e0ed4b4&response_type=code&redirect_uri=https://portal.azure.com&nonce=1234&prompt=admin_consent
You will be prompted to accept the Azure AD VPN application. You will need to log in with an account that has Global Admin rights.
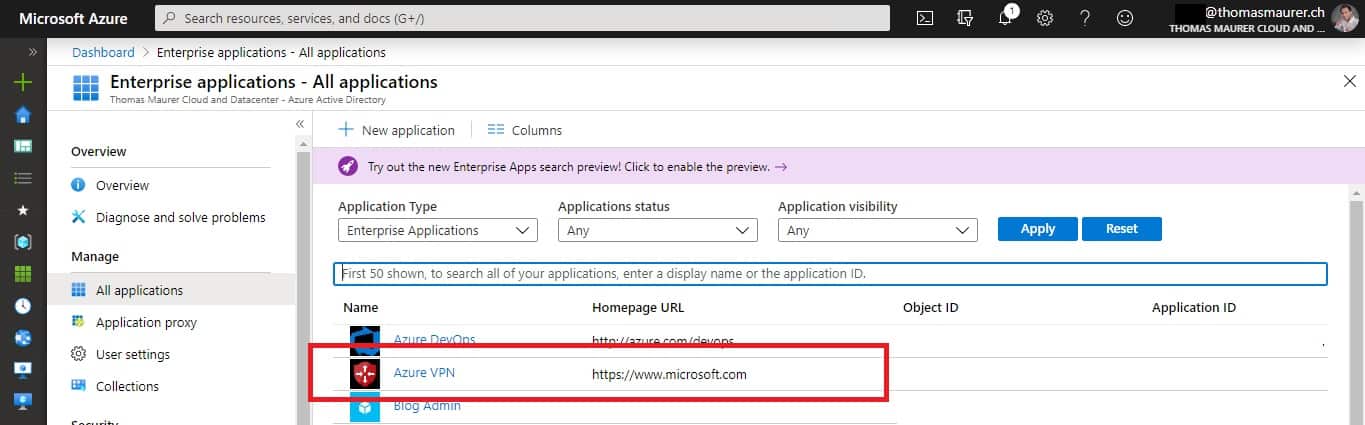
If you now go back to the Azure Active Directory tenant, you can see the in Enterprise applications, and you see Azure VPN listed.
Azure AD Azure VPN App
After that, you will find the Azure VPN application registered in your Azure Active Directory.
Registered App
Enable Azure AD authentication on the VPN gateway
Now we need to configure the Azure Virtual Network Gateway itself. For that, you will need to have a functional point-to-site VPN environment already (see prerequisites). If you don’t have one, you can follow these steps here: Configure a Point-to-Site VPN connection to a VNet using native Azure certificate authentication: Azure portal
To enable Azure AD authentication on the Azure Virtual Network Gateway (VPN Gateway), you need to run the following Azure PowerShell commands.
$gw = Get-AzVirtualNetworkGateway -Name "name of VPN gateway" -ResourceGroupName "Resource group"
Set-AzVirtualNetworkGateway -VirtualNetworkGateway $gw -VpnClientRootCertificates @()
Set-AzVirtualNetworkGateway -VirtualNetworkGateway $gw -AadTenantUri "https://login.microsoftonline.com/your Directory ID" -AadAudienceId "41b23e61-6c1e-4545-b367-cd054e0ed4b4" -AadIssuerUri "https://sts.windows.net/your Directory ID/" -VpnClientAddressPool 192.168.0.0/24 -VpnClientProtocol OpenVPN
You can also modify the client IP address pool if you need to. The GUID 41b23e61-6c1e-4545-b367-cd054e0ed4b4 is the Application ID of the Azure VPN Client in Azure Public Cloud.
Now you can create the VPN profile for the client by running the following Azure PowerShell commands. By the way, you can also run Azure PowerShell directly from Azure Cloud Shell.
$profile = New-AzVpnClientConfiguration -Name "name of VPN gateway" -ResourceGroupName "Resource group" -AuthenticationMethod "EapTls"
$PROFILE.VpnProfileSASUrl
Copy the URL to your browser to download the profile in a zip file.

Download AzureVPN Configuration XML
This zip file contains the azurevpnconfig.xml file, which contains the settings for the VPN connection, which users can import to their Azure VPN client. You can find more information about setting this up on Microsoft Docs.
Configure a VPN client for P2S OpenVPN protocol connections using Azure AD authentication
The next step will be to download the Azure VPN client here.
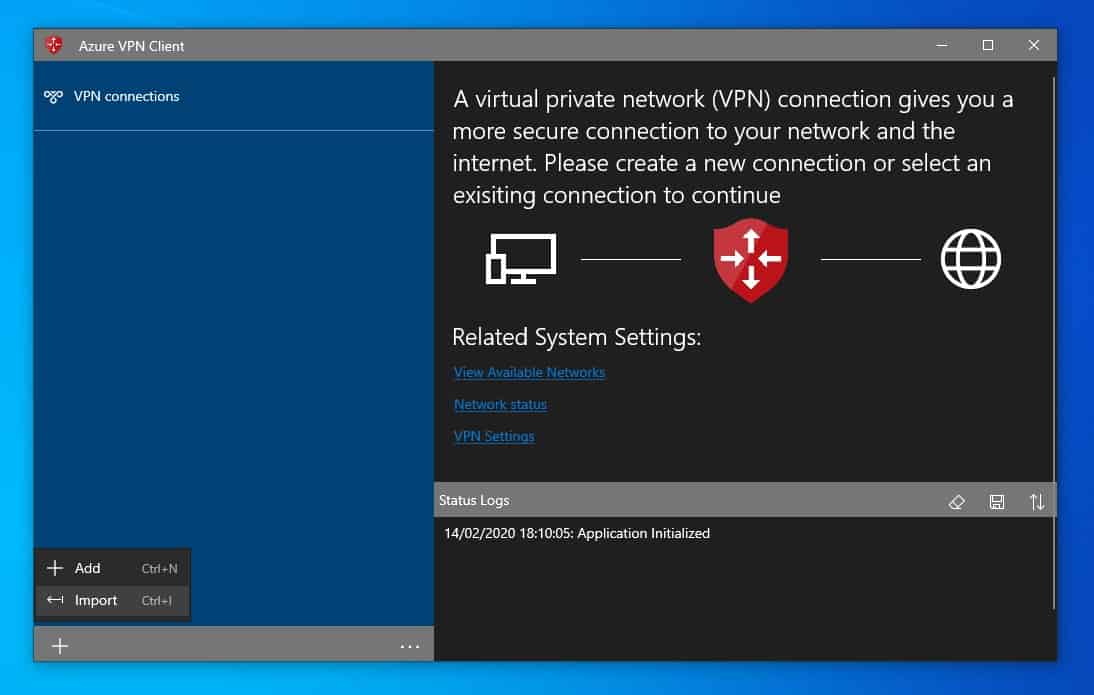
After you have installed the Azure VPN client, you can start configuring the VPN client.
Configure Azure VPN Client
Click on the bottom left on the “+” sign and click on Import. Select the azurevpnconfig.xml file.
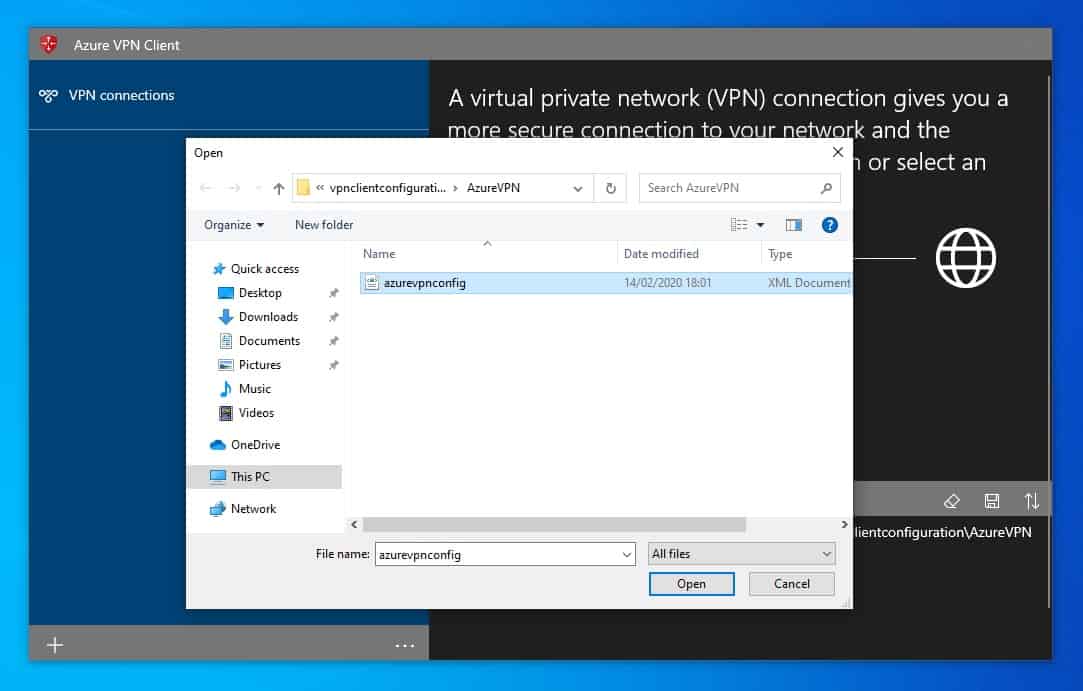
Import azuervpnconfig.xml file
You can now review the settings for the configuration.

Review Settings
You can also set up the configuration manually if you want. It is a link to your Azure AD tenant, and the Audience is the Azure VPN application registered in your Azure AD tenant.
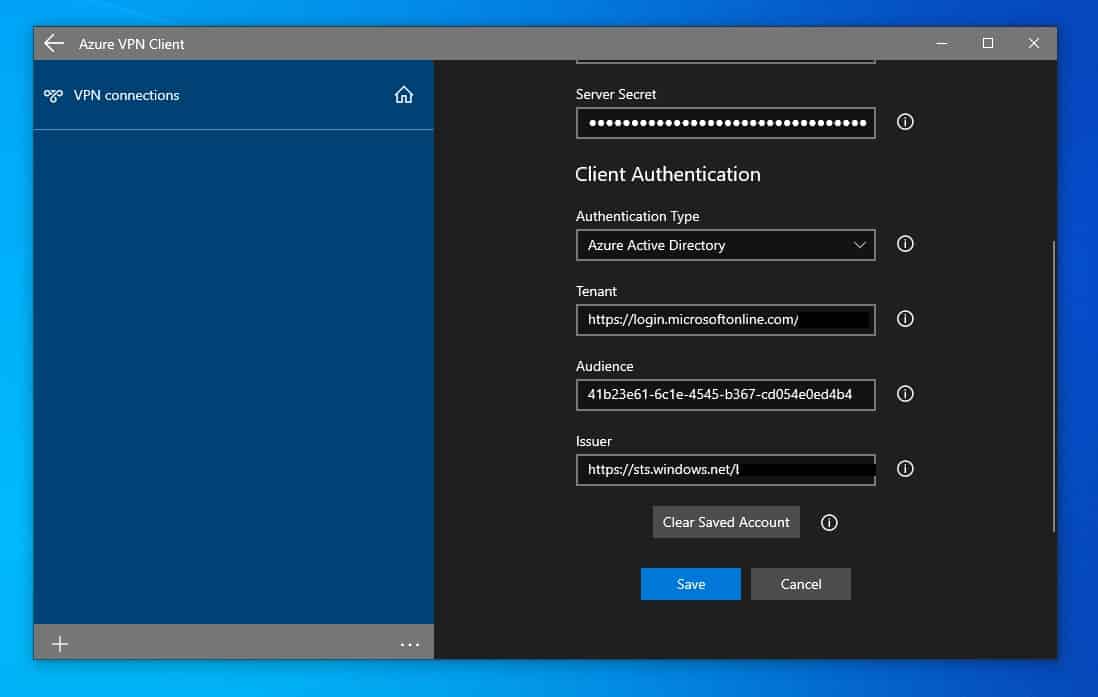
Azure VPN Client Azure AD Configuration
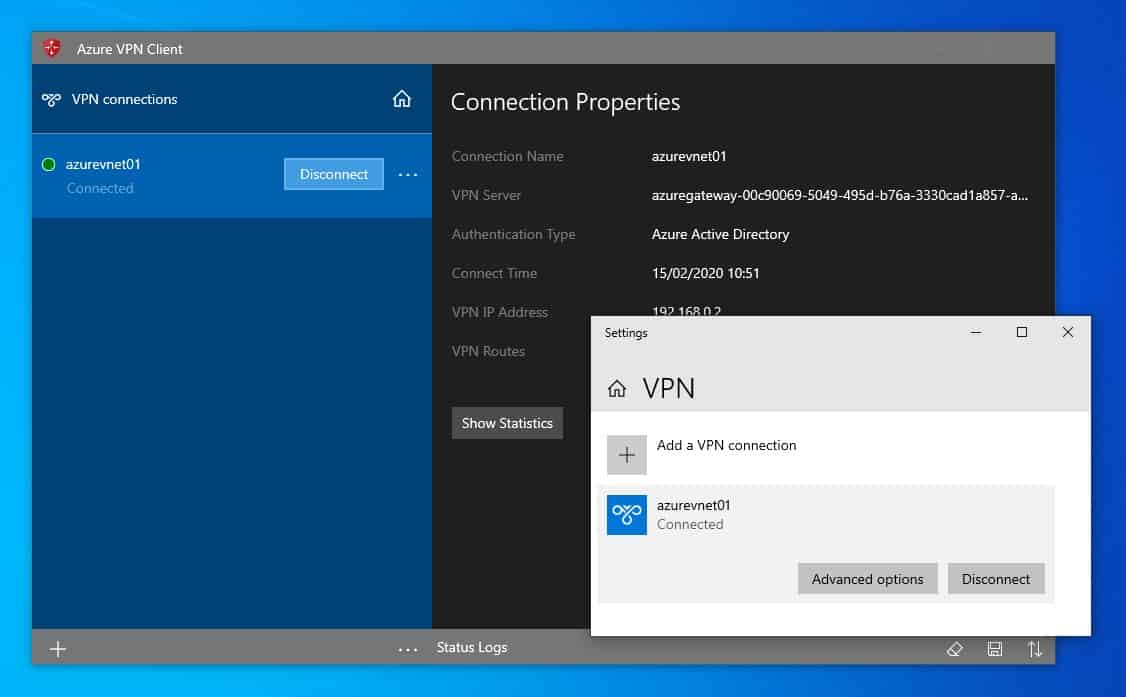
After that, you can now use the Azure VPN client to connect to your virtual network. It will prompt you to login with your Azure AD credentials.
Azure Active Directory Azure VPN connected
If you need more information to set up the VPN client or find some additional troubleshooting information, have a look at this Microsoft Docs article.
I hope this gives you a great overview of how you can set up Azure VPN using OpenVPN and Azure Active Directory (Azure AD) for authentication. You can find the official documentation about configuring your Azure AD tenant as well as the VPN gateway here, and you can find the documentation to configure the VPN client here. If you have any questions, feel free to leave a comment.
Tags: AAD, authentication, Azure, Azure Active Directory, Azure AD, Azure VPN, Microsoft, Microsoft Azure, VPN, VPN Gateway Last modified: March 15, 2020


If a conditional access policy is applied to enforce azure MFA , would this work ? Previously, this feature did not work properly
This is useful for a single user. What if there are multiple users in a company and we want to enforce Azure AD authentication with MFA using VPN how do we do that? What changes are needed to accomplish this?
Well, there are different options depending on your scenario. Are all the users at the same location? If so then I would set up a Site-to-Site (S2S) VPN. https://docs.microsoft.com/azure/storage/files/storage-files-configure-s2s-vpn?WT.mc_id=thomasmaurer-blog-thmaure
And then for MFA, I would look at Conditional Access: https://docs.microsoft.com/azure/active-directory/conditional-access/overview?WT.mc_id=thomasmaurer-blog-thmaure
Can Azure VPN replace the other solutions out there such NordVPN, Perimeter81 etc where a user is securing traffic from client machines ? These solutions offer the option of connecting to a dedicated IP/Gateway
Thomas, I carried out a test deployment of this and it all worked very well, including MFA. We would like to deploy this into production however the organisation I’m working with are currently running Windows 10 v1803 and the Store app required for this states a minimum Win 10 version of 11763/1809. Although the organisation plans to rollout an update at some point, we would like to able to start utilising this solution as soon as possible. Do you know if it is possible to use this with Windows 10 1803?
After configuring everything I am receiving the following error: Dialing VPN connection VNet, Status = VPN Platform did not trigger connection.
I followed the steps and the authentication was done correctly. Do you know what is the issue?
@Jair
Solution
In Windows, go to Settings -> Privacy -> Background apps
Toggle the “Let apps run in the background” to On
Credit: https://docs.microsoft.com/en-za/azure/vpn-gateway/vpn-gateway-troubleshoot-vpn-point-to-site-connection-problems?WT.mc_id=thomasmaurer-blog-thmaure
I have been trying for days to get this configured.
I have follows all the directions to a T.
Seriously in the logs in azure, it shows success, but then interupted and this is the error
Application X doesn’t have permission to access application Y or the permission has been revoked. Or The user or administrator has not consented to use the application with ID X. Send an interactive authorization request for this user and resource. Or The user or administrator has not consented to use the application with ID X. Send an authorization request to your tenant admin to act on behalf of the App : Y for Resource : Z.
On the client
Provider Error 3399614468: AADSTS650057: Invalid resource. The client has requested access to a resource which is not listed in the requested permissions in the client’s application registration. Client app ID: 41b23e61-6c1e-4545-b367-cd054e0ed4b4(Azure VPN). Resource value from request: 493301c7-3a17-4f1d-91f0-c556decf1bc0. Resource app ID: 493301c7-3a17-4f1d-91f0-c556decf1bc0. List of valid resources from app registration: 00000002-0000-0000-c000-000000000000.
Hi Thomas, how are you
i got this error using azure vpn client: Server did not respond properly to VPN Control Packets. Session State: Key Material sent
any other people have this problem too: https://github.com/MicrosoftDocs/azure-docs/issues/45598
do you know how can i fix it?
Hi
We have a mix of windows 10 laptops and Chromebooks. Is it possible to use Azure AD authentication to connect to the VPN gateway.
I know that the azure vpn client is only supported on Windows. If the choice is to user OpenVPN client for Chromebooks how do we configure the vpn gateway, will the user on a chromebook still be able to use Azure AD authentication.