
Azure Backup not only allows you to backup services in Azure or Windows Server and services on-premises, but Azure Backup can also backup your Windows Client PC.
Azure Backup for your Windows 10 PC allows you to backup Files and Folders and store and backup them to the cloud. You can use this for small environments, VIP machines, or machines of remote workers, which are always on the road. Data is encrypted on the on-premises client machine using AES256, and the data is sent over a secure HTTPS link. Backups are stored encrypted in Azure with the customer’s own key.
I use Azure Backup for my own devices. I am often on the road and working on different documents and files. I also use OneDrive and OneDrive for Business, which also allows you to restore files after you delete them. However, the retention rate is way too short, and it is not a backup. Azure Backup, in that case, is a great addition. You can back up your files where ever you are.
Setup Azure Backup for Windows Clients

First, you will need to set up an Azure Recovery Services Vault in Microsoft Azure. This is the service which your backups will be stored.
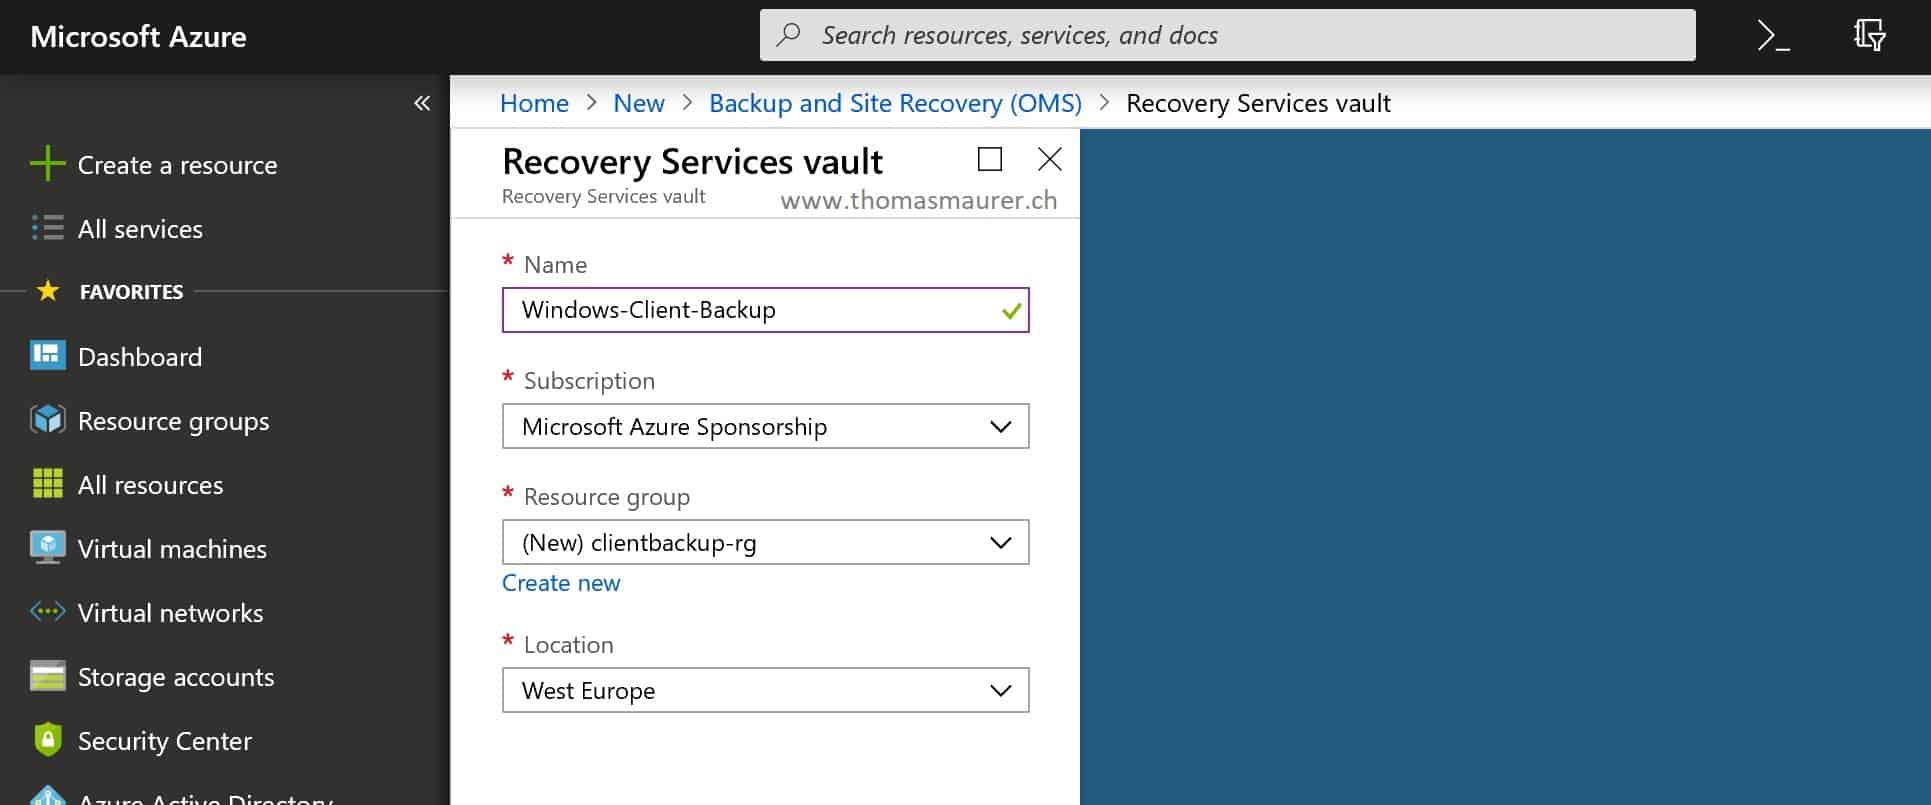
You will need to enter a name for the recovery services vault, select a region, and specify an Azure resource group.

After you the recovery vault has been created, you can now add a new backup source to this recovery vault.
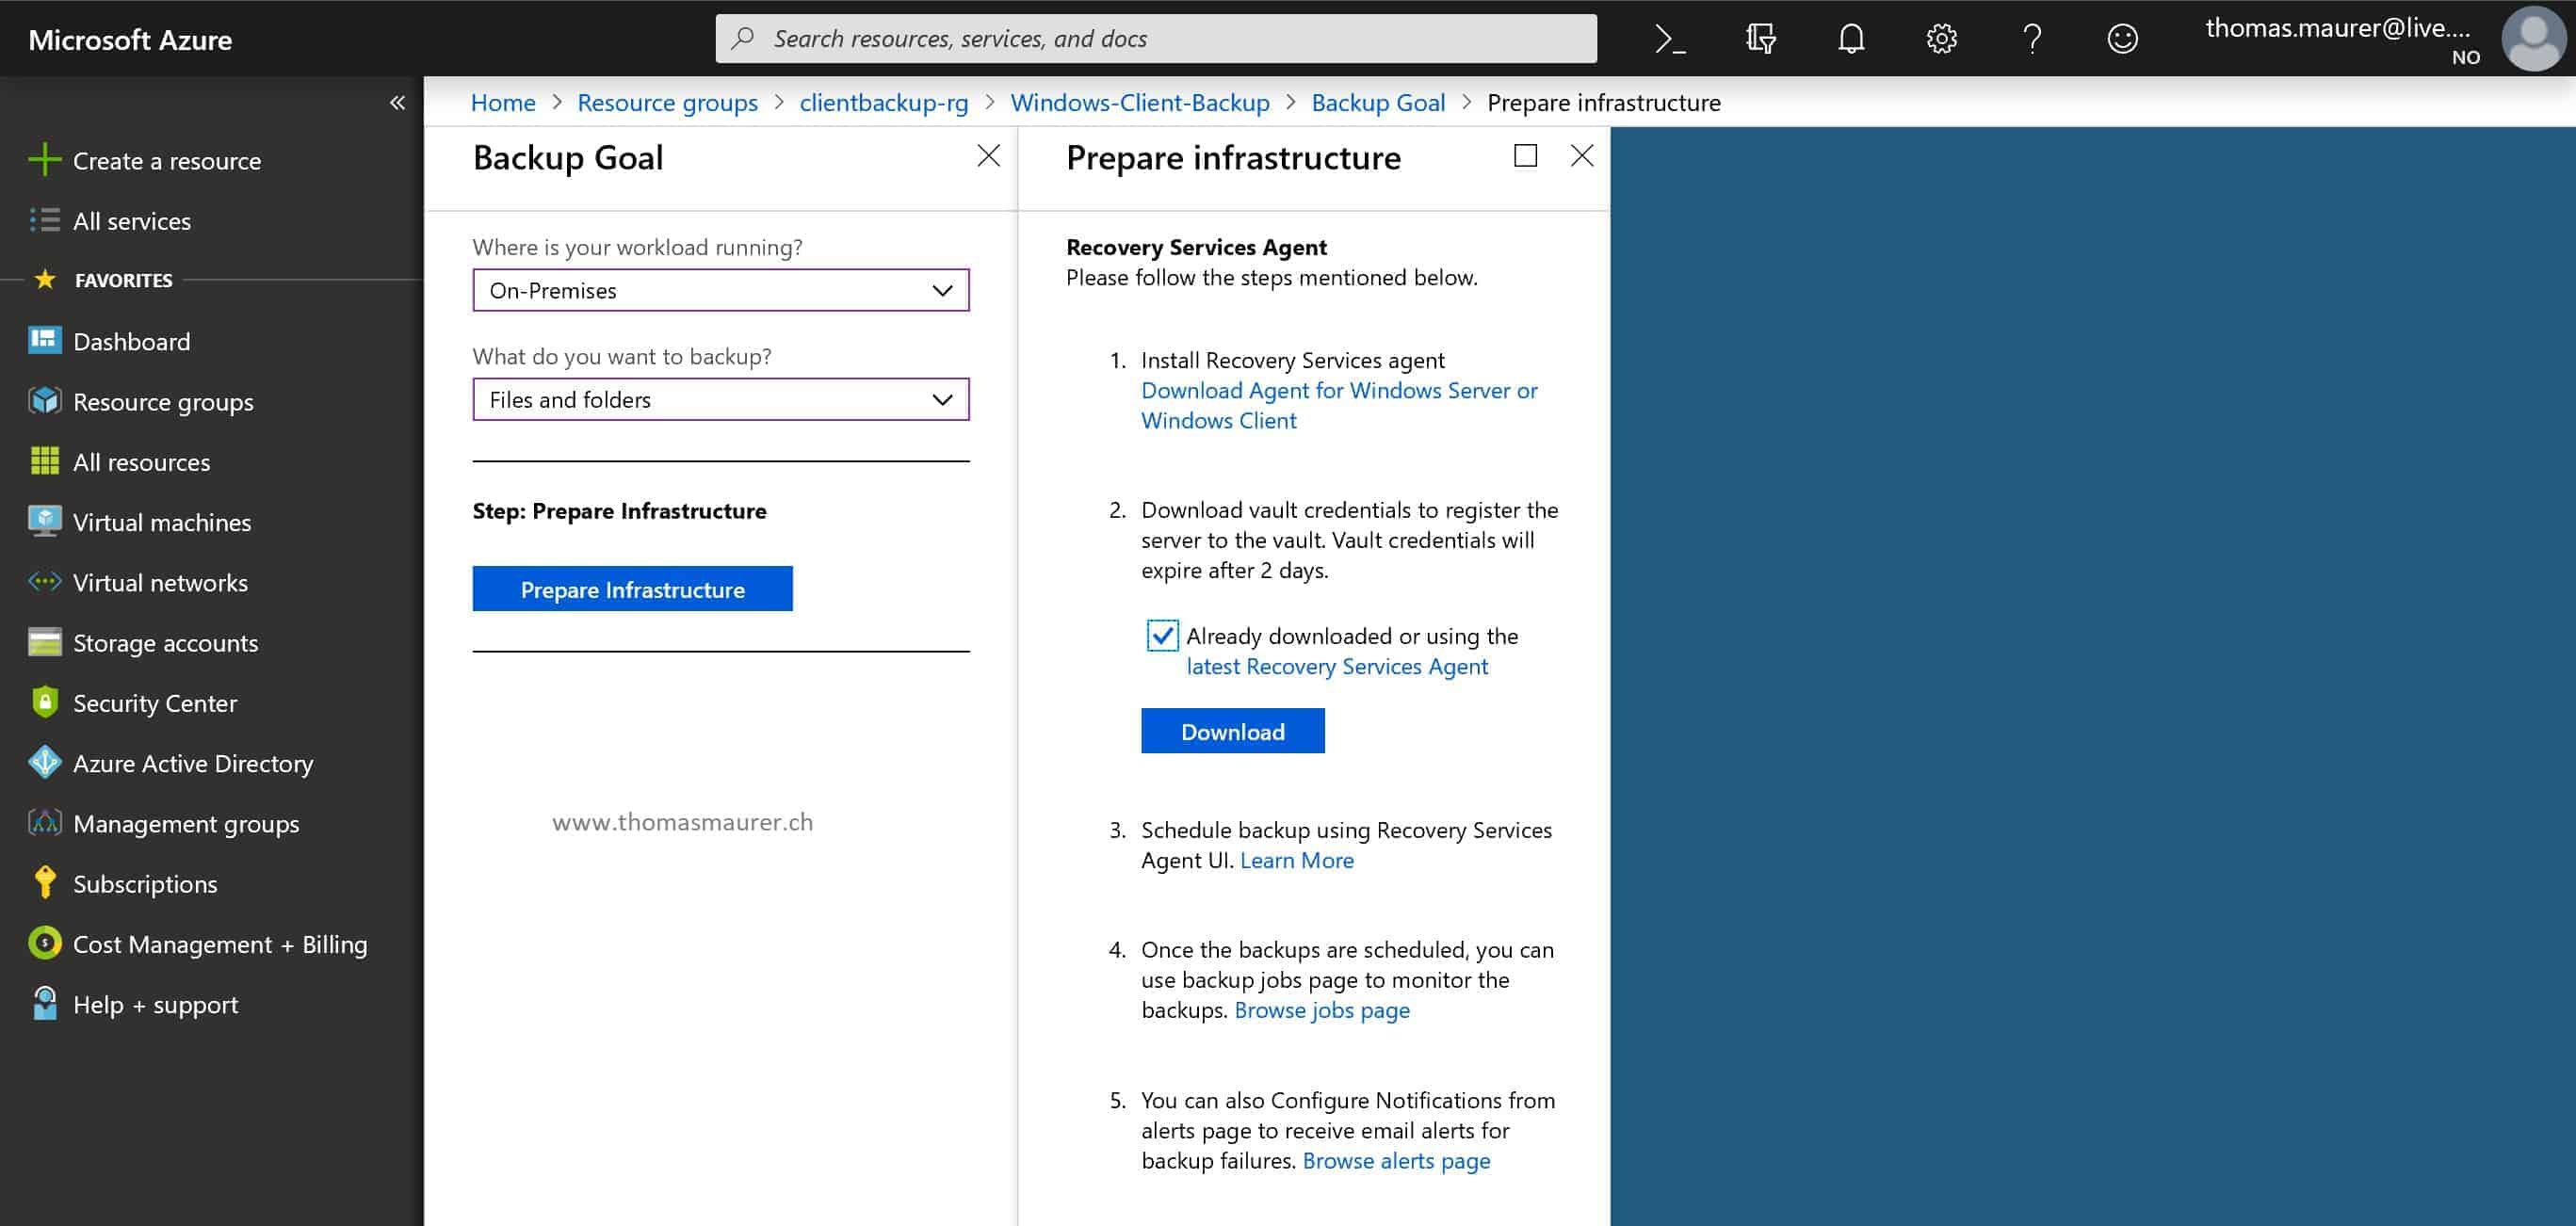
The backup configurator helps you find the right option for the Azure backup configuration. For the Windows Client backup, select “On-Premises” as a workload source and for the workload, select “Files and folders”. This will open up a guide to install and configure the Azure Backup agent.
First, you will need to download the Azure Backup Agent or also called MARS Agent (Microsoft Azure Recovery Services Agent). Secondly, you will need to download the vault credentials, which will allow you to register your devices to the right Azure Recovery Services Vault. After you have downloaded both, you can run the installer for the Azure Backup Agent.

The installation of the MARS Agent is pretty much straight forward, and it allows you to configure proxy settings and more.
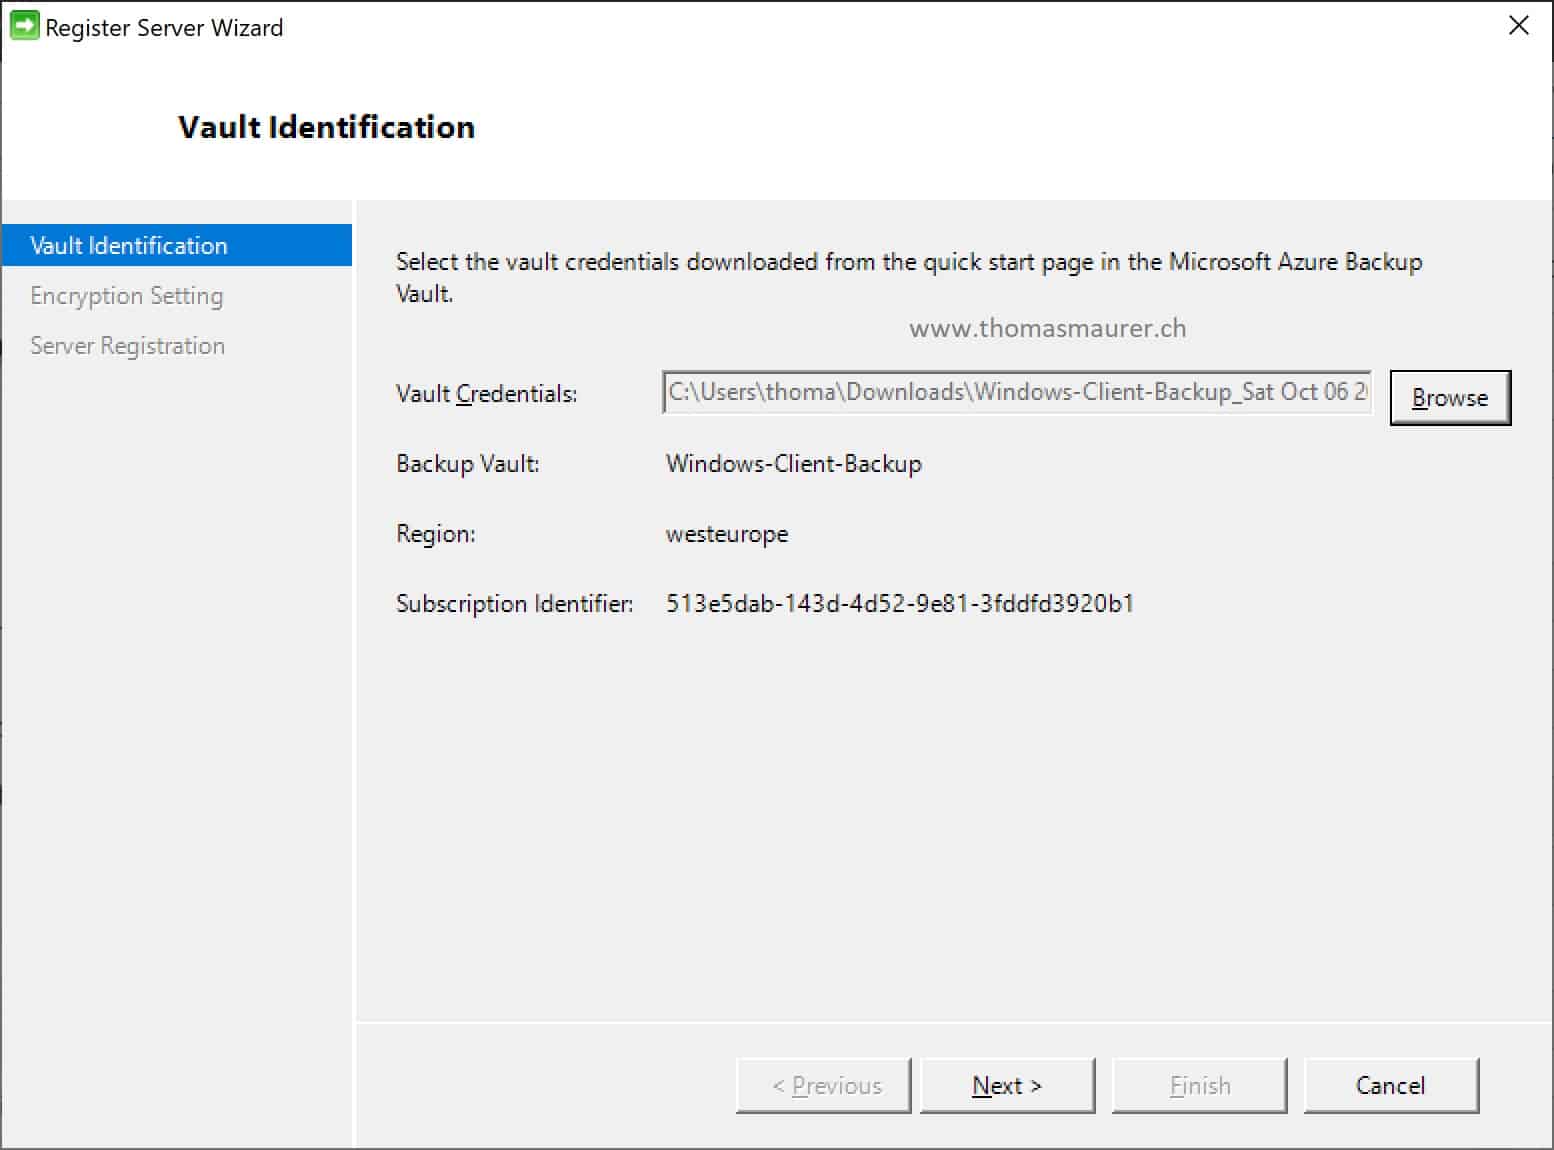
After the installation is done, you will need to register the backup source to the recovery vault. You will also need to define your own passphrase. This is the key used to encrypt and decrypt your backup. For normal restore operations on the same device, you will not need that key. But if you reinstall your device or you are using another machine, you will need to use that key to encrypt and restore the backup. So make sure you store that passphrase carefully. Otherwise, your backups will be lost.
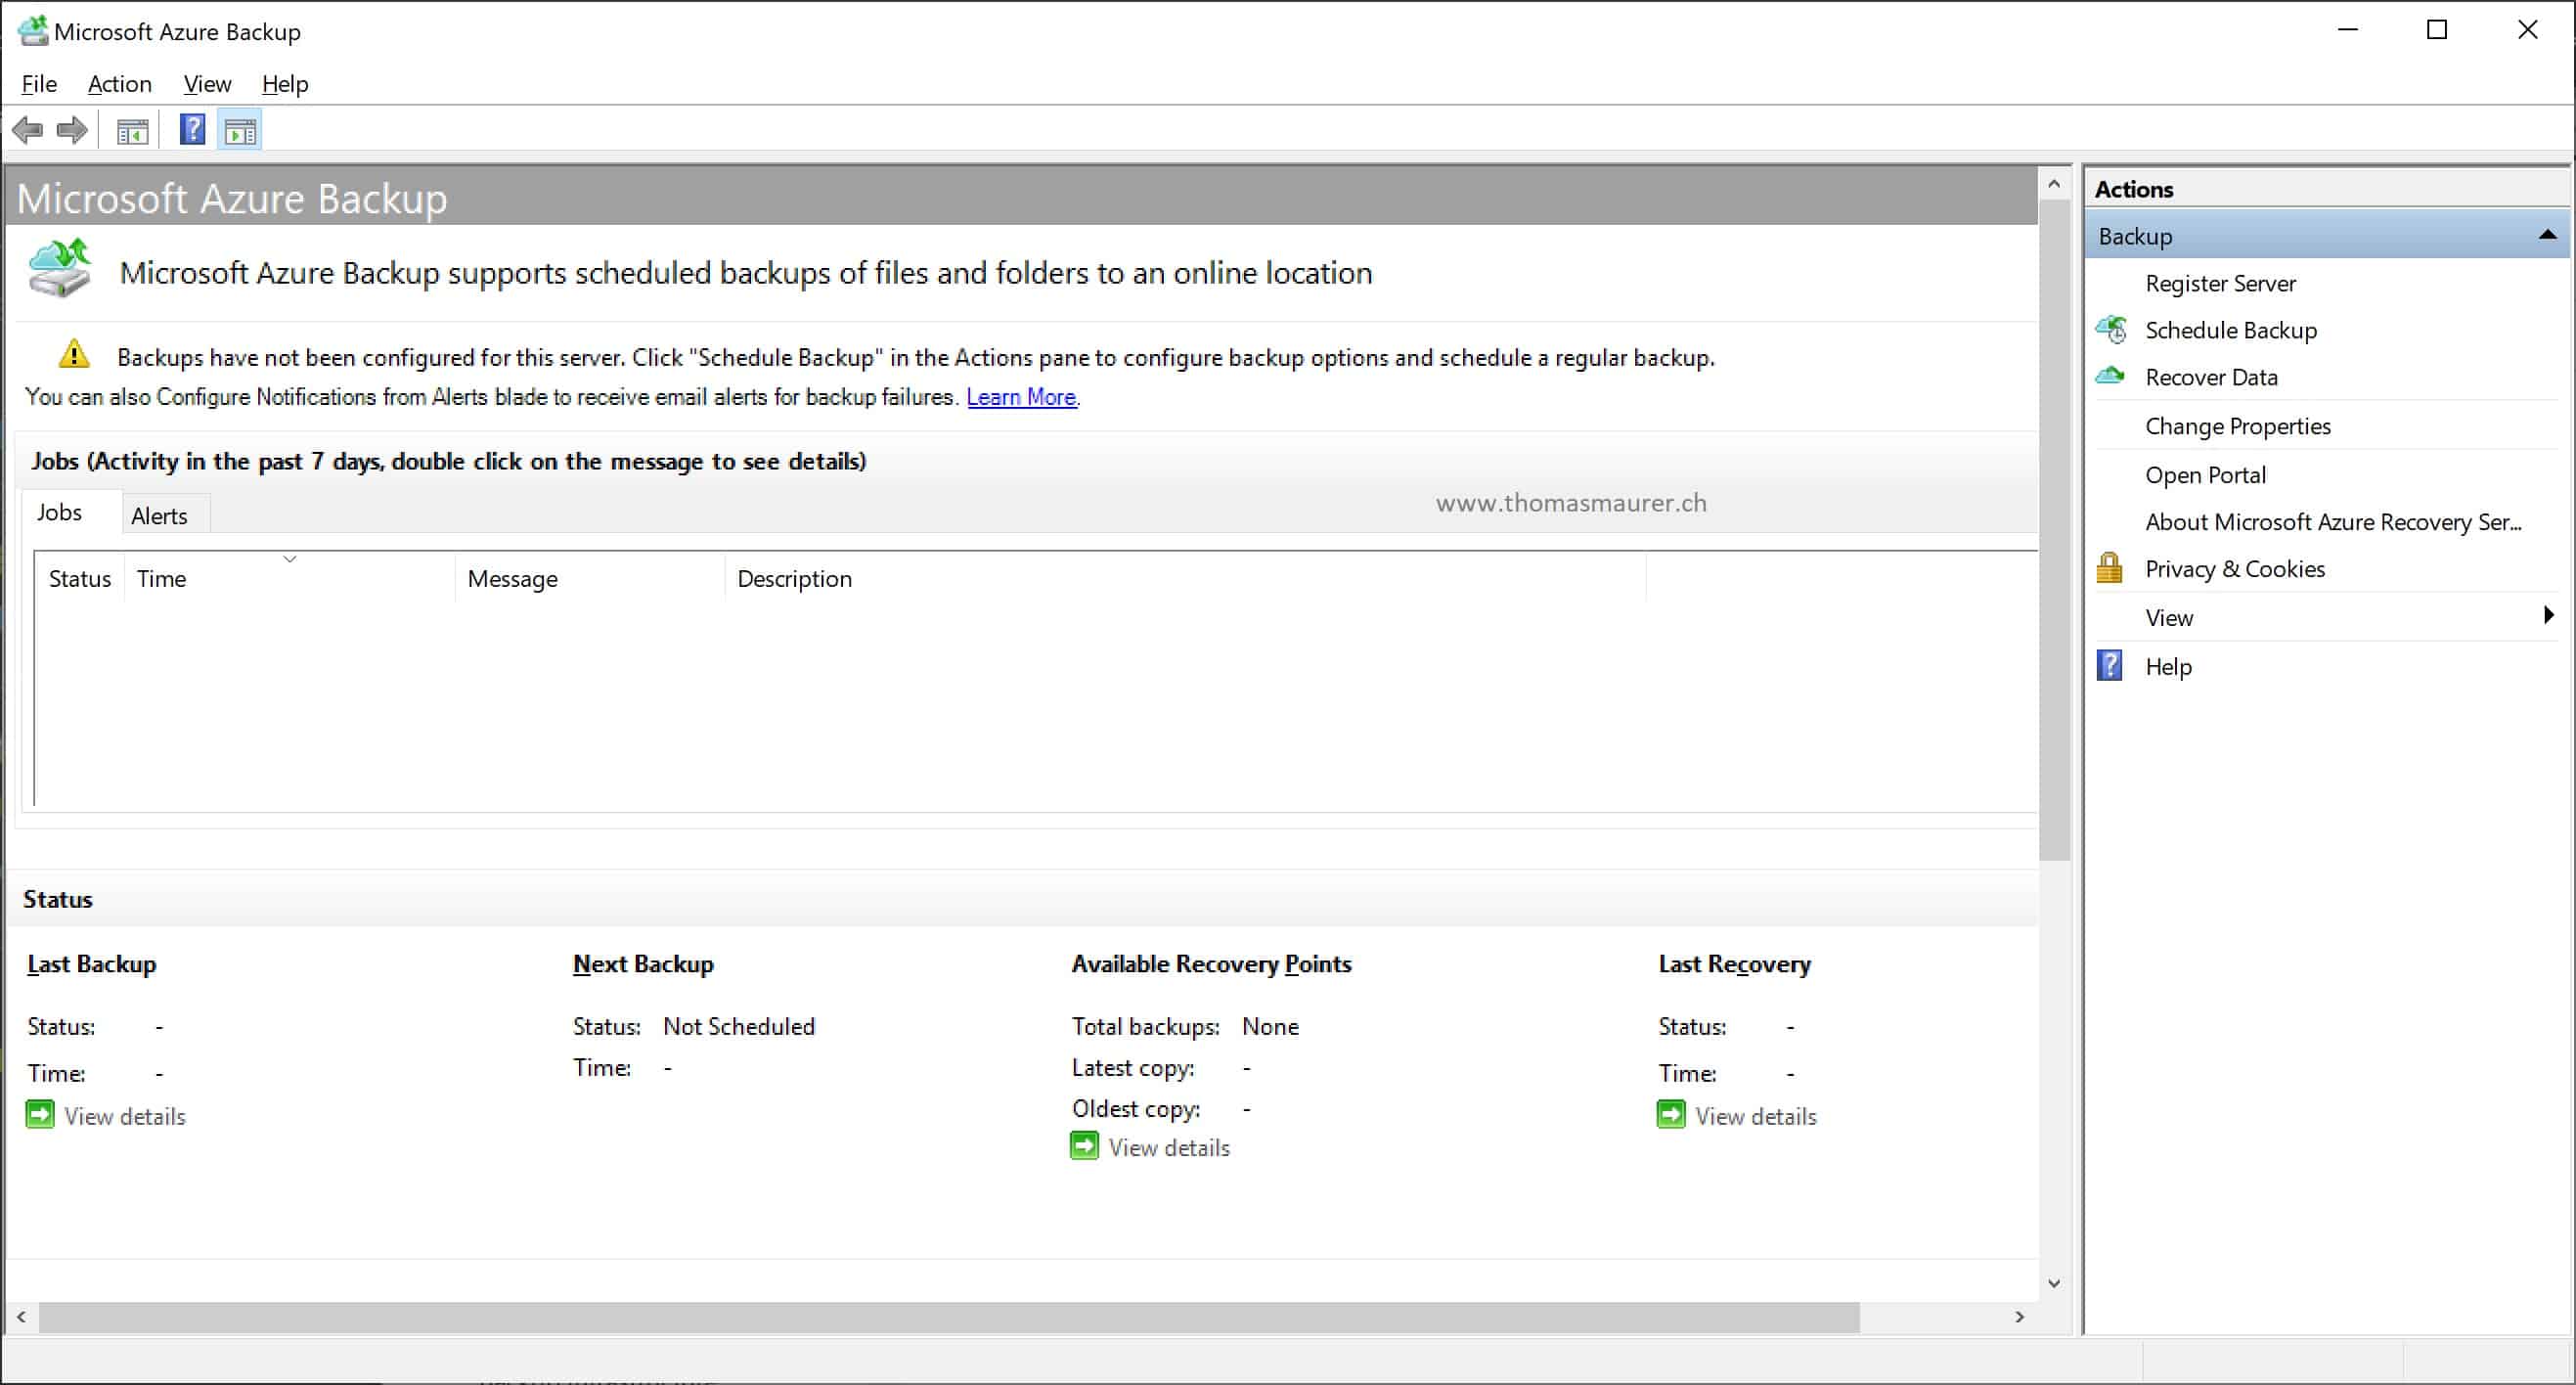
After you have registered your device, you can open the Microsoft Azure Backup console, and now you will need to schedule the Azure Backup and configure what files and folders should be backed up. You also have to specify the retention rate of the backup, which can be up to 99 years.
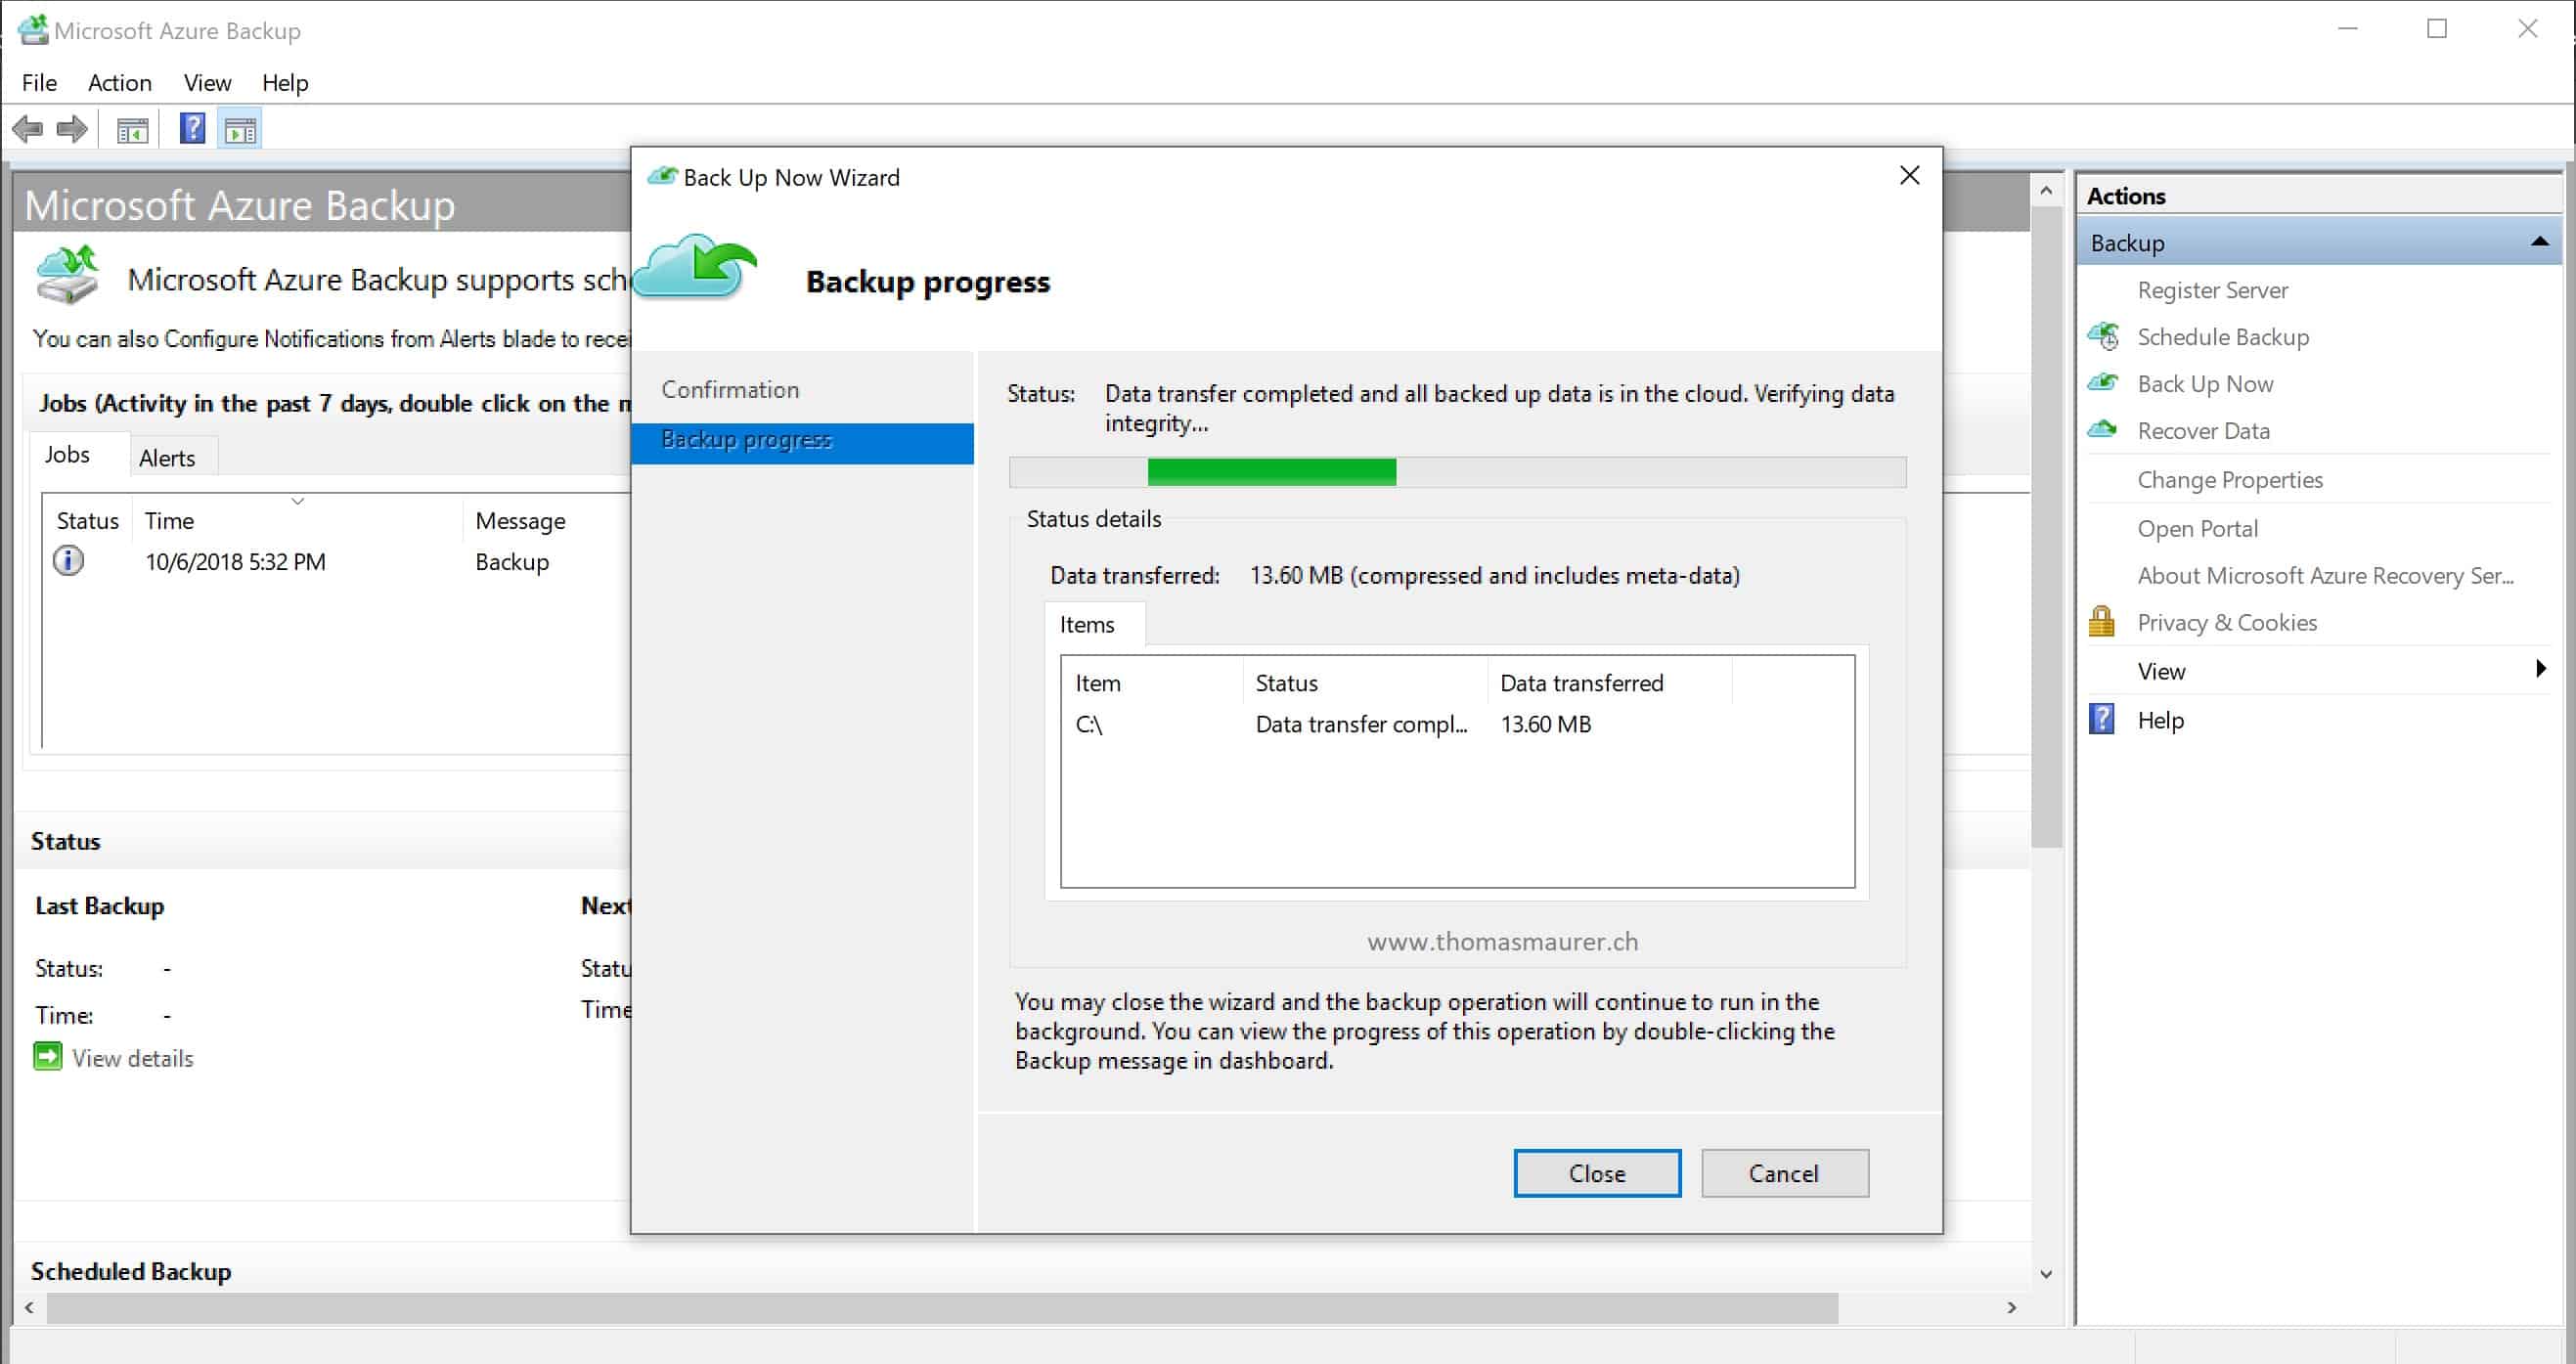
You can also run a backup on demand when you have some files you want to backup.

After the first backup and recovery point is created, the device will be showing up in the Azure portal. All the management, like backup configuration and restores, are done on the device itself. You can learn more about Windows backup using the Microsoft Azure Recovery Services (MARS) agent on Microsoft Docs.
Conclusion
I hope this was helpful, if you have any question about Azure Backup, just leave me a comment.
Tags: Azure, Azure Backup, Backup Windows, Backup Windows 10, Cloud Backup, Microsoft, Microsoft Azure, Windows, Windows 10, Windows Backup Last modified: June 28, 2020


[…] Backup Windows 10 to Microsoft Azure Backup by Thomas Maurer […]
Does MARS support Windows 7 32/64 bit?
Does anyone know if the MARS backup from a Windows 10 workstation would back up open database files, such as SAGE 50 Accounting software? This seems a great point solution for a few backup scenarios. If it can back up accounting workstations, that would be tremendous.
Hi Nigel
The MARS Backup used the Windows Backup mechanism. So you can create a whole Image backup or file backups. So what I would do in that case is create a backup job in the SAGE software, which exports the data to a local folder on the machine, and then backup that folder. Is that a possible option for you?
Hi Thomas, thank you for the response. Yes, the SAGE backup function to create the backup file would be the obvious choice and have been exploring it. However what we are finding is that the conditions in which it triggers don’t fit our business. The application must be placed in Single User mode, and our accounting group normally works in Multi User mode. Additionally even the automatic backup function triggers once the last single mode user exits the system. We have 19 companies. Relying on a user to set the mode, then log in and out of 19 instances to trigger the backup has not proved reliable and I’m looking for something that can back up the data on a schedule regardless of user interaction. For a company as established as SAGE and the importance of financial backups, I have a hard time accepting there isn’t a better solution out there. Just trying to find it. Even Sage support just says to set the mode and trigger a manual backup for each company.
Sage 50 has had an automatic backup wizard for years. It lets you configure the backup, then imports it to windows task scheduler, and can log everyone out of Sage, so just set it to back up at 1am and you are good. It takes 5 minutes to do. It is one of the two icons that Sage puts on the desktop with every installation.