A little while ago, Microsoft announced the Azure Cloud Shell. The Azure Cloud Shell is a perfect tool to manage your Azure resources using the Azure CLI or Azure PowerShell. Wouldn’t it be great also to manage your resources running on Azure Stack? Thanks to the consistency between Microsoft Azure and Microsoft Azure Stack, you can use the same tools to manage your hybrid cloud. In this blog, I am going to show you how you can connect to Azure Stack from Azure Cloud Shell.
First of all, login to your Azure Cloud Shell on shell.azure.com or in the Azure Portal.

After the login you have to register Azure Stack as a new cloud by running the following command:
az cloud register \
-n AzureStack \
--endpoint-resource-manager "https://management.region.url.com" \
--suffix-storage-endpoint "region.url.com" \
--suffix-keyvault-dns ".vault.region.url.com"

Now you can list the new Azure Stack cloud by using:
az cloud list -o table
To switch to the Azure Stack Cloud, use the following command:
az cloud set -n AzureStack
If you are doing this the first time and you use another account, you can use az login to login.
az login
One thing you should do is to switch the profile version to an Azure Stack compatible version
az cloud update --profile 2017-03-09-profile
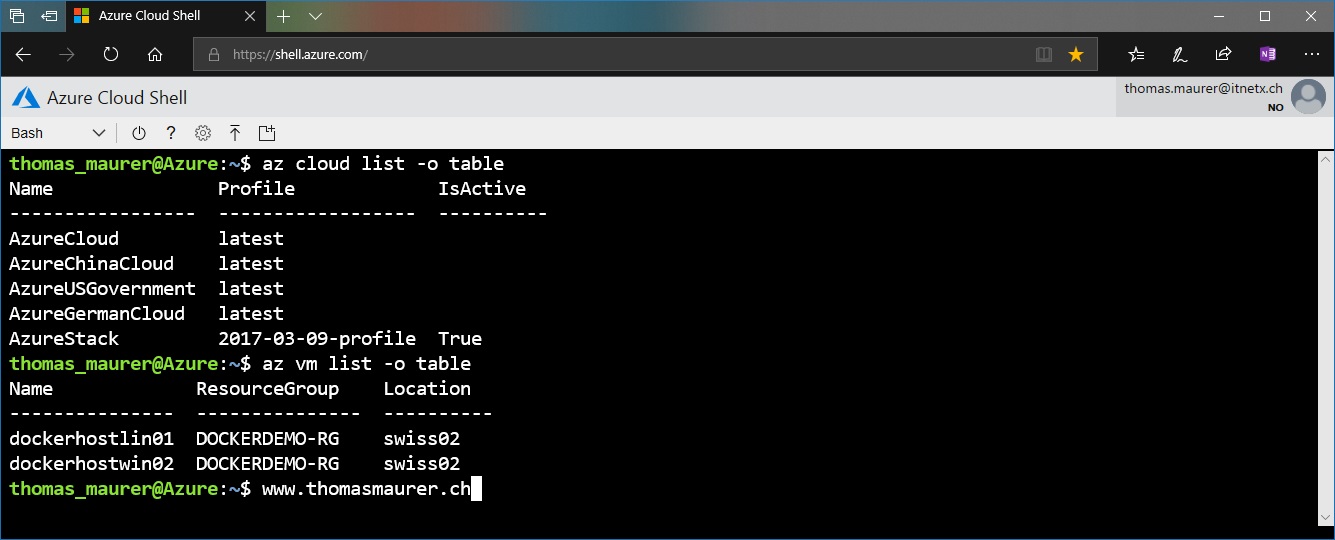
Now you can start using the Azure CLI in the Azure Cloud Shell to manage your Azure Stack. First of all, yes this works also if you use the Azure CLI. In that case, Azure Stack needs to be accessible from the internet. If your Azure Stack is not accessible from the internet, you can use the Azure CLI directly from your management machine.

Azure Cloud Shell is very powerful; you can run Azure CLI as well as Azure PowerShell. Fun Fact, since you can also run the Azure Cloud Shell directly in Visual Studio Code, you can also open up the shell session and start working from Visual Studio Code.
You can learn more in my blog post: Mastering Azure with Cloud Shell.