
Join the Microsoft Ignite Cloud Skills Challenge 2020
You can join the Microsoft Ignite Cloud Skills Challenge 2020 and get a free Microsoft...
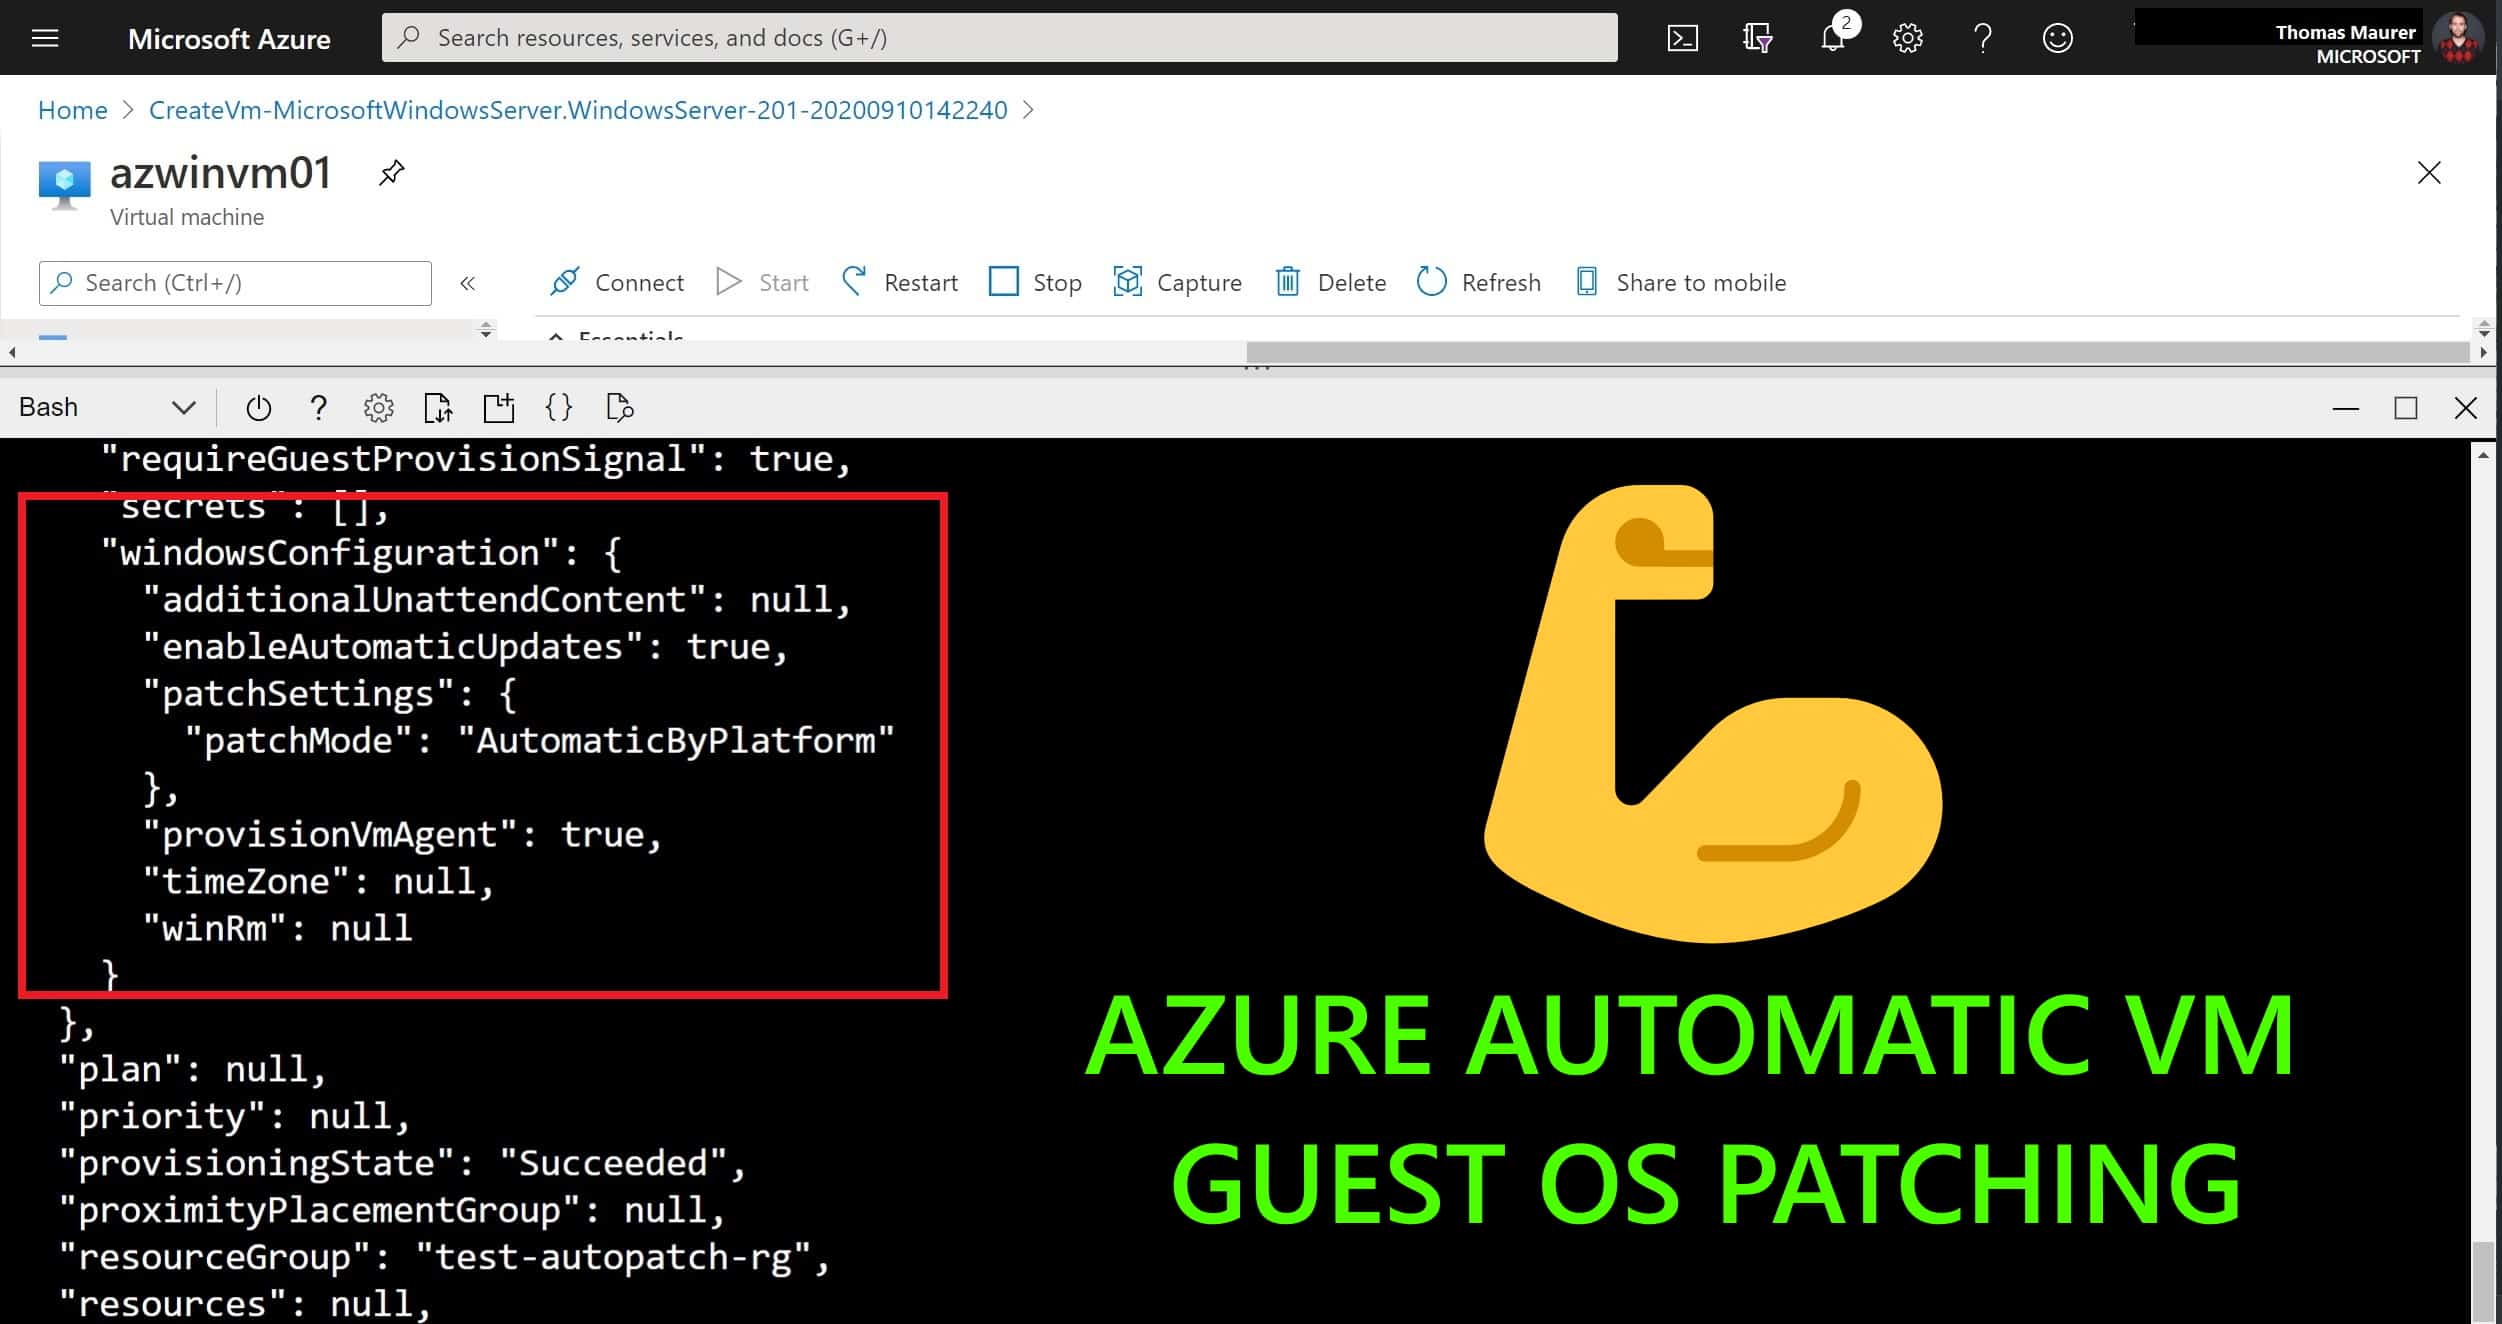
How to configure Azure Automatic VM guest OS patching
If you want to keep your Azure virtual machines (VMs) up-to-date, then there is a service called Azure Update Management, which helps you...
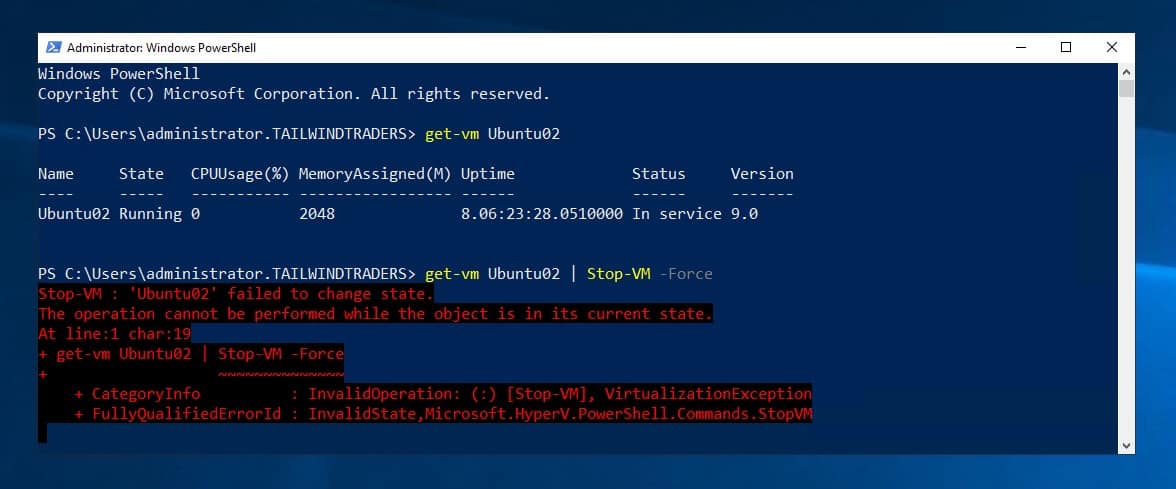
Force Hyper-V Virtual Machine VM to turn off
In this blog post, we are going to have a look at how you can force a Hyper-V virtual machine (VM) to turn off using the HCSDiag tool. A...
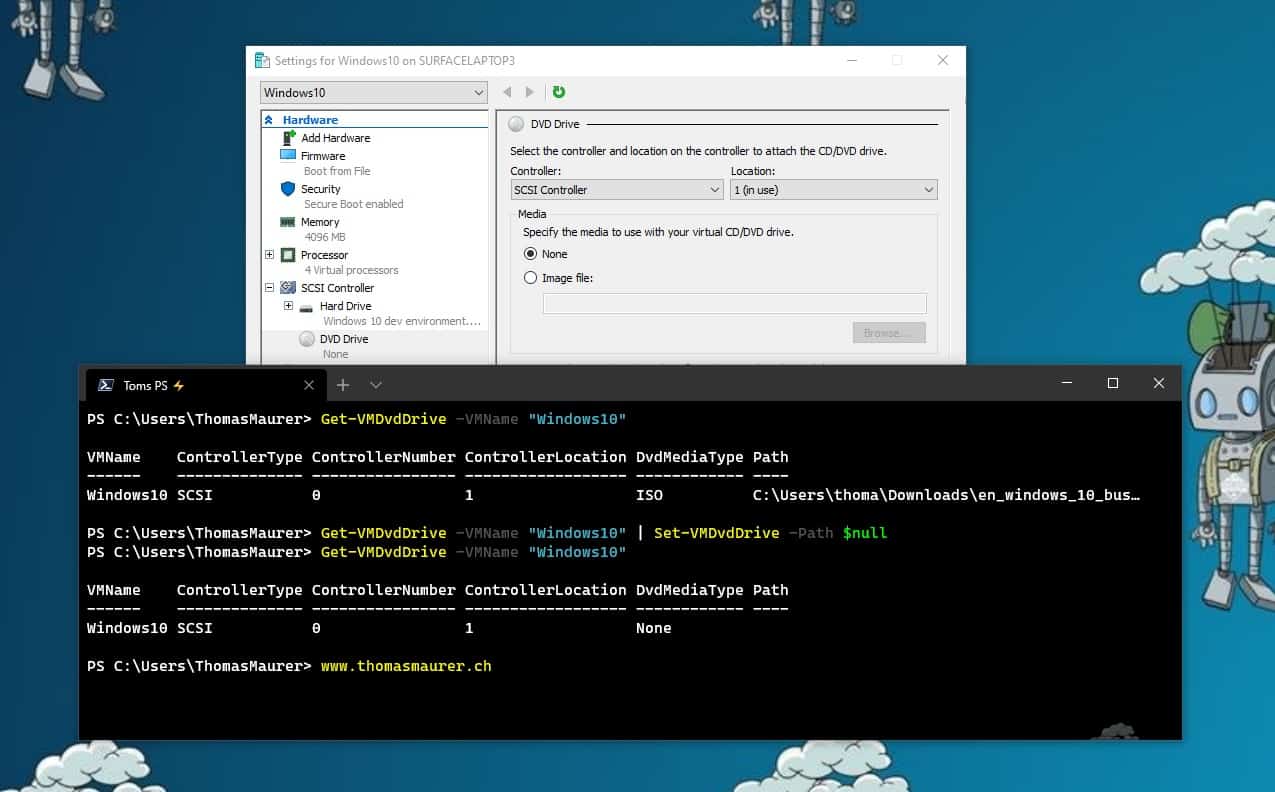
Eject ISO from Hyper-V VM using PowerShell
This is one of these quick and dirty blog posts mostly as a note for myself. Hyper-V offers the...
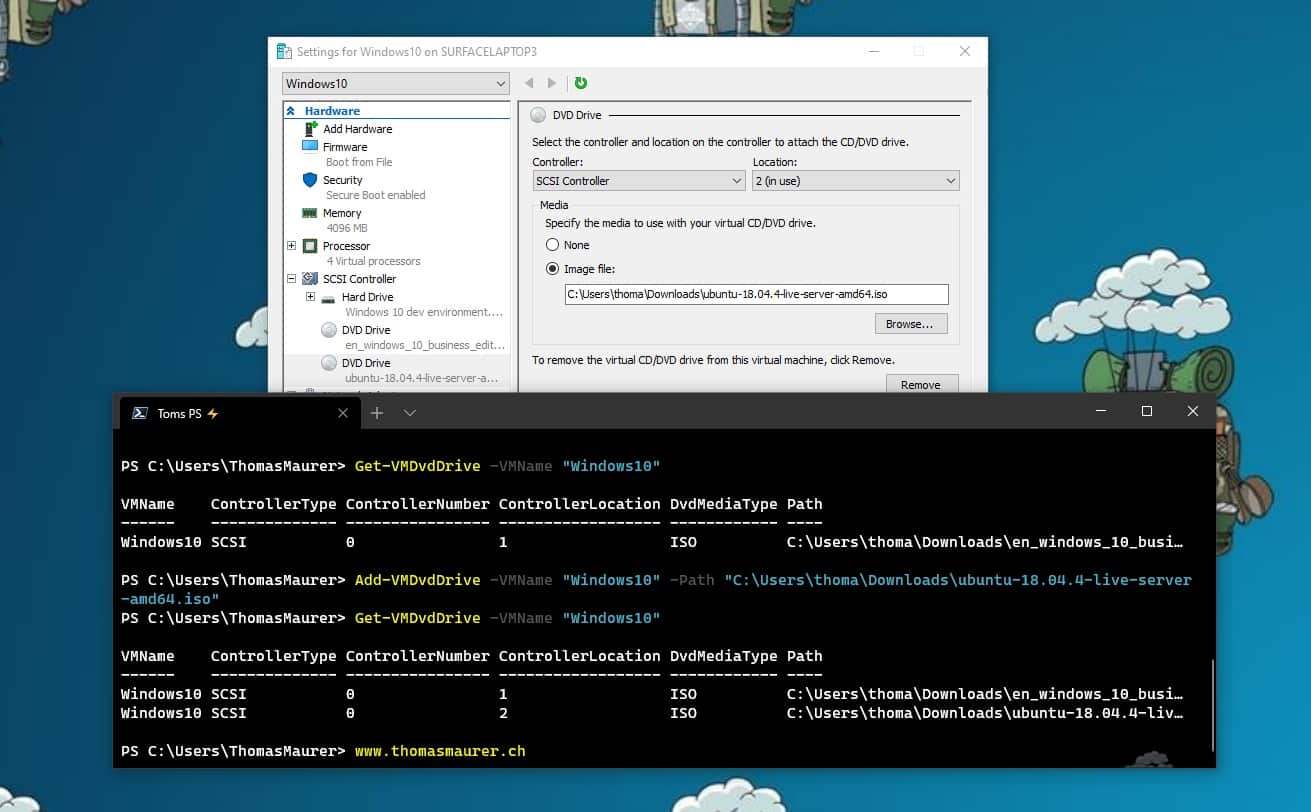
Add ISO DVD Drive to a Hyper-V VM using PowerShell
Hyper-V offers the capability to add an ISO image to a virtual CD/DVD drive and you can use Hyper-V Manager to do that, or you can also use...
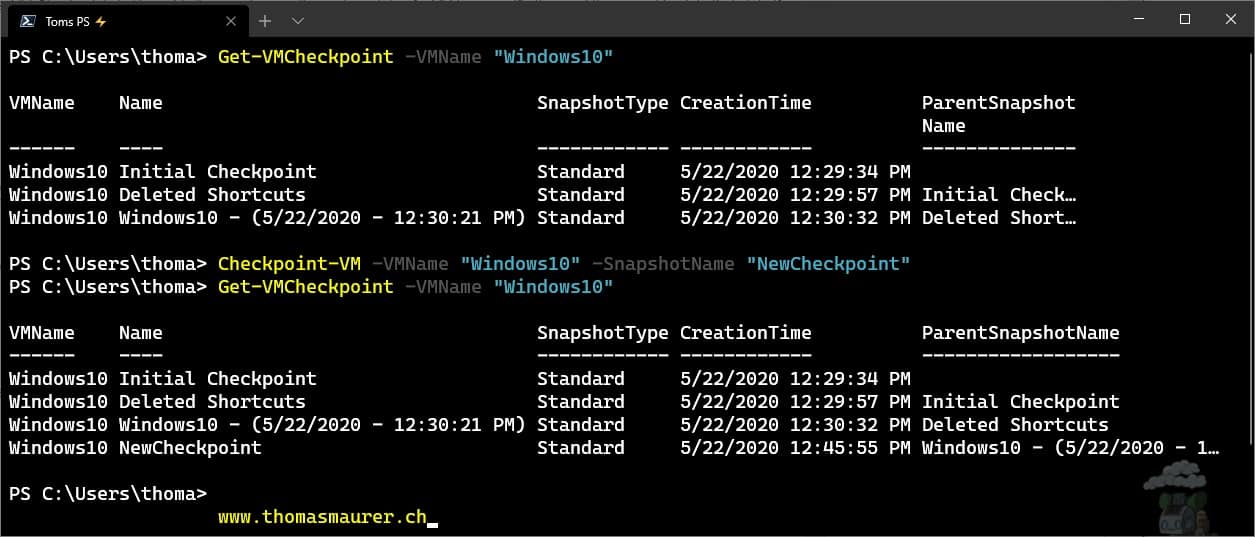
How to Manage Hyper-V VM Checkpoints with PowerShell
In this blog post we are going to have a look at how you can create, manage, apply, and remove VM Checkpoints in Hyper-V using PowerShell....

How to Install PowerShell 7 on Windows 10 on ARM
As you know I am running Surface Pro X as my daily driver, which comes with Windows 10 on ARM. With...
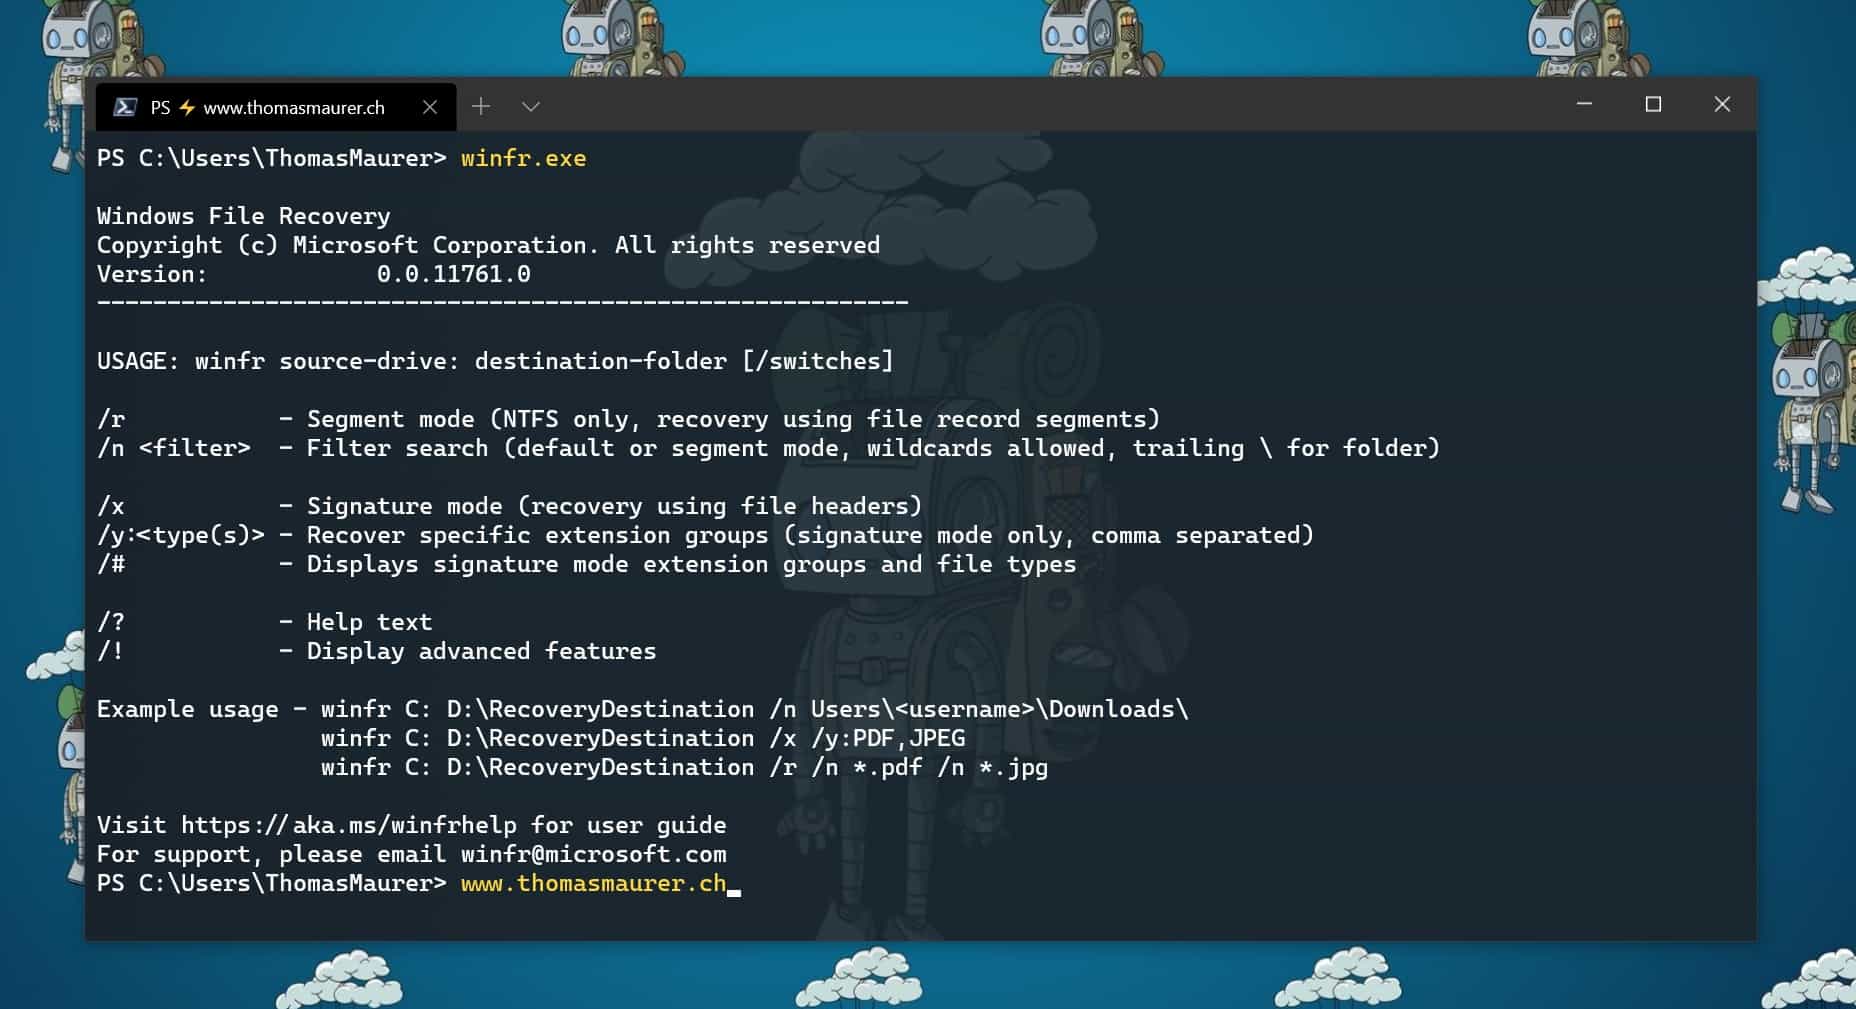
Recover Files on Windows using the Windows File Recovery Tool
Did you accidentally delete an important file, wiping a hard drive or partition, or need to restore corrupted files and data? We all have...
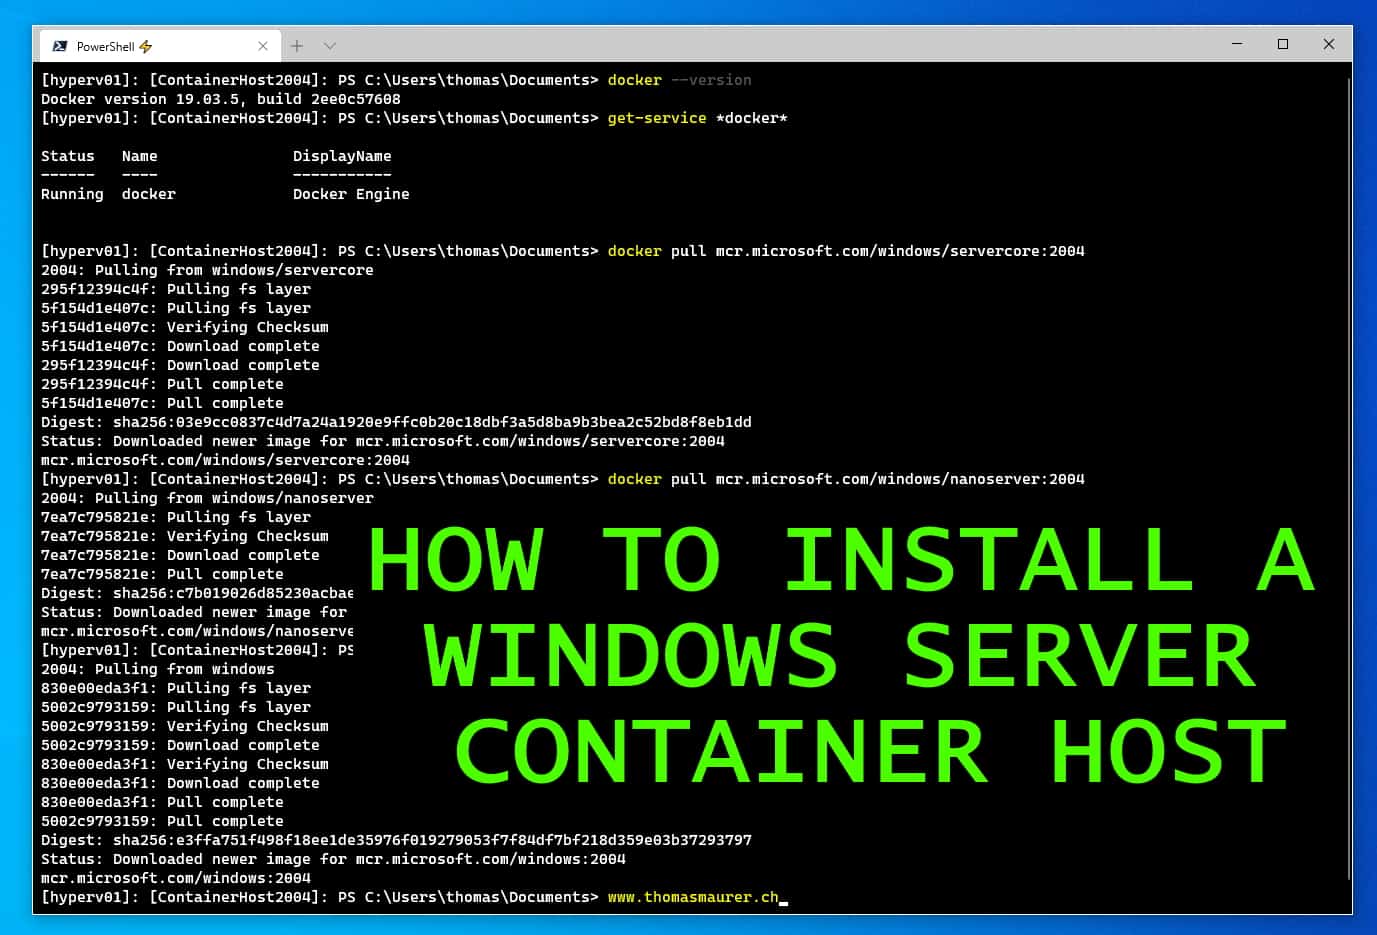
How to Install a Windows Server Container Host
In this blog post, I want to quickly guide you through how you can install a Windows Server Container Host running Docker. This guide will...
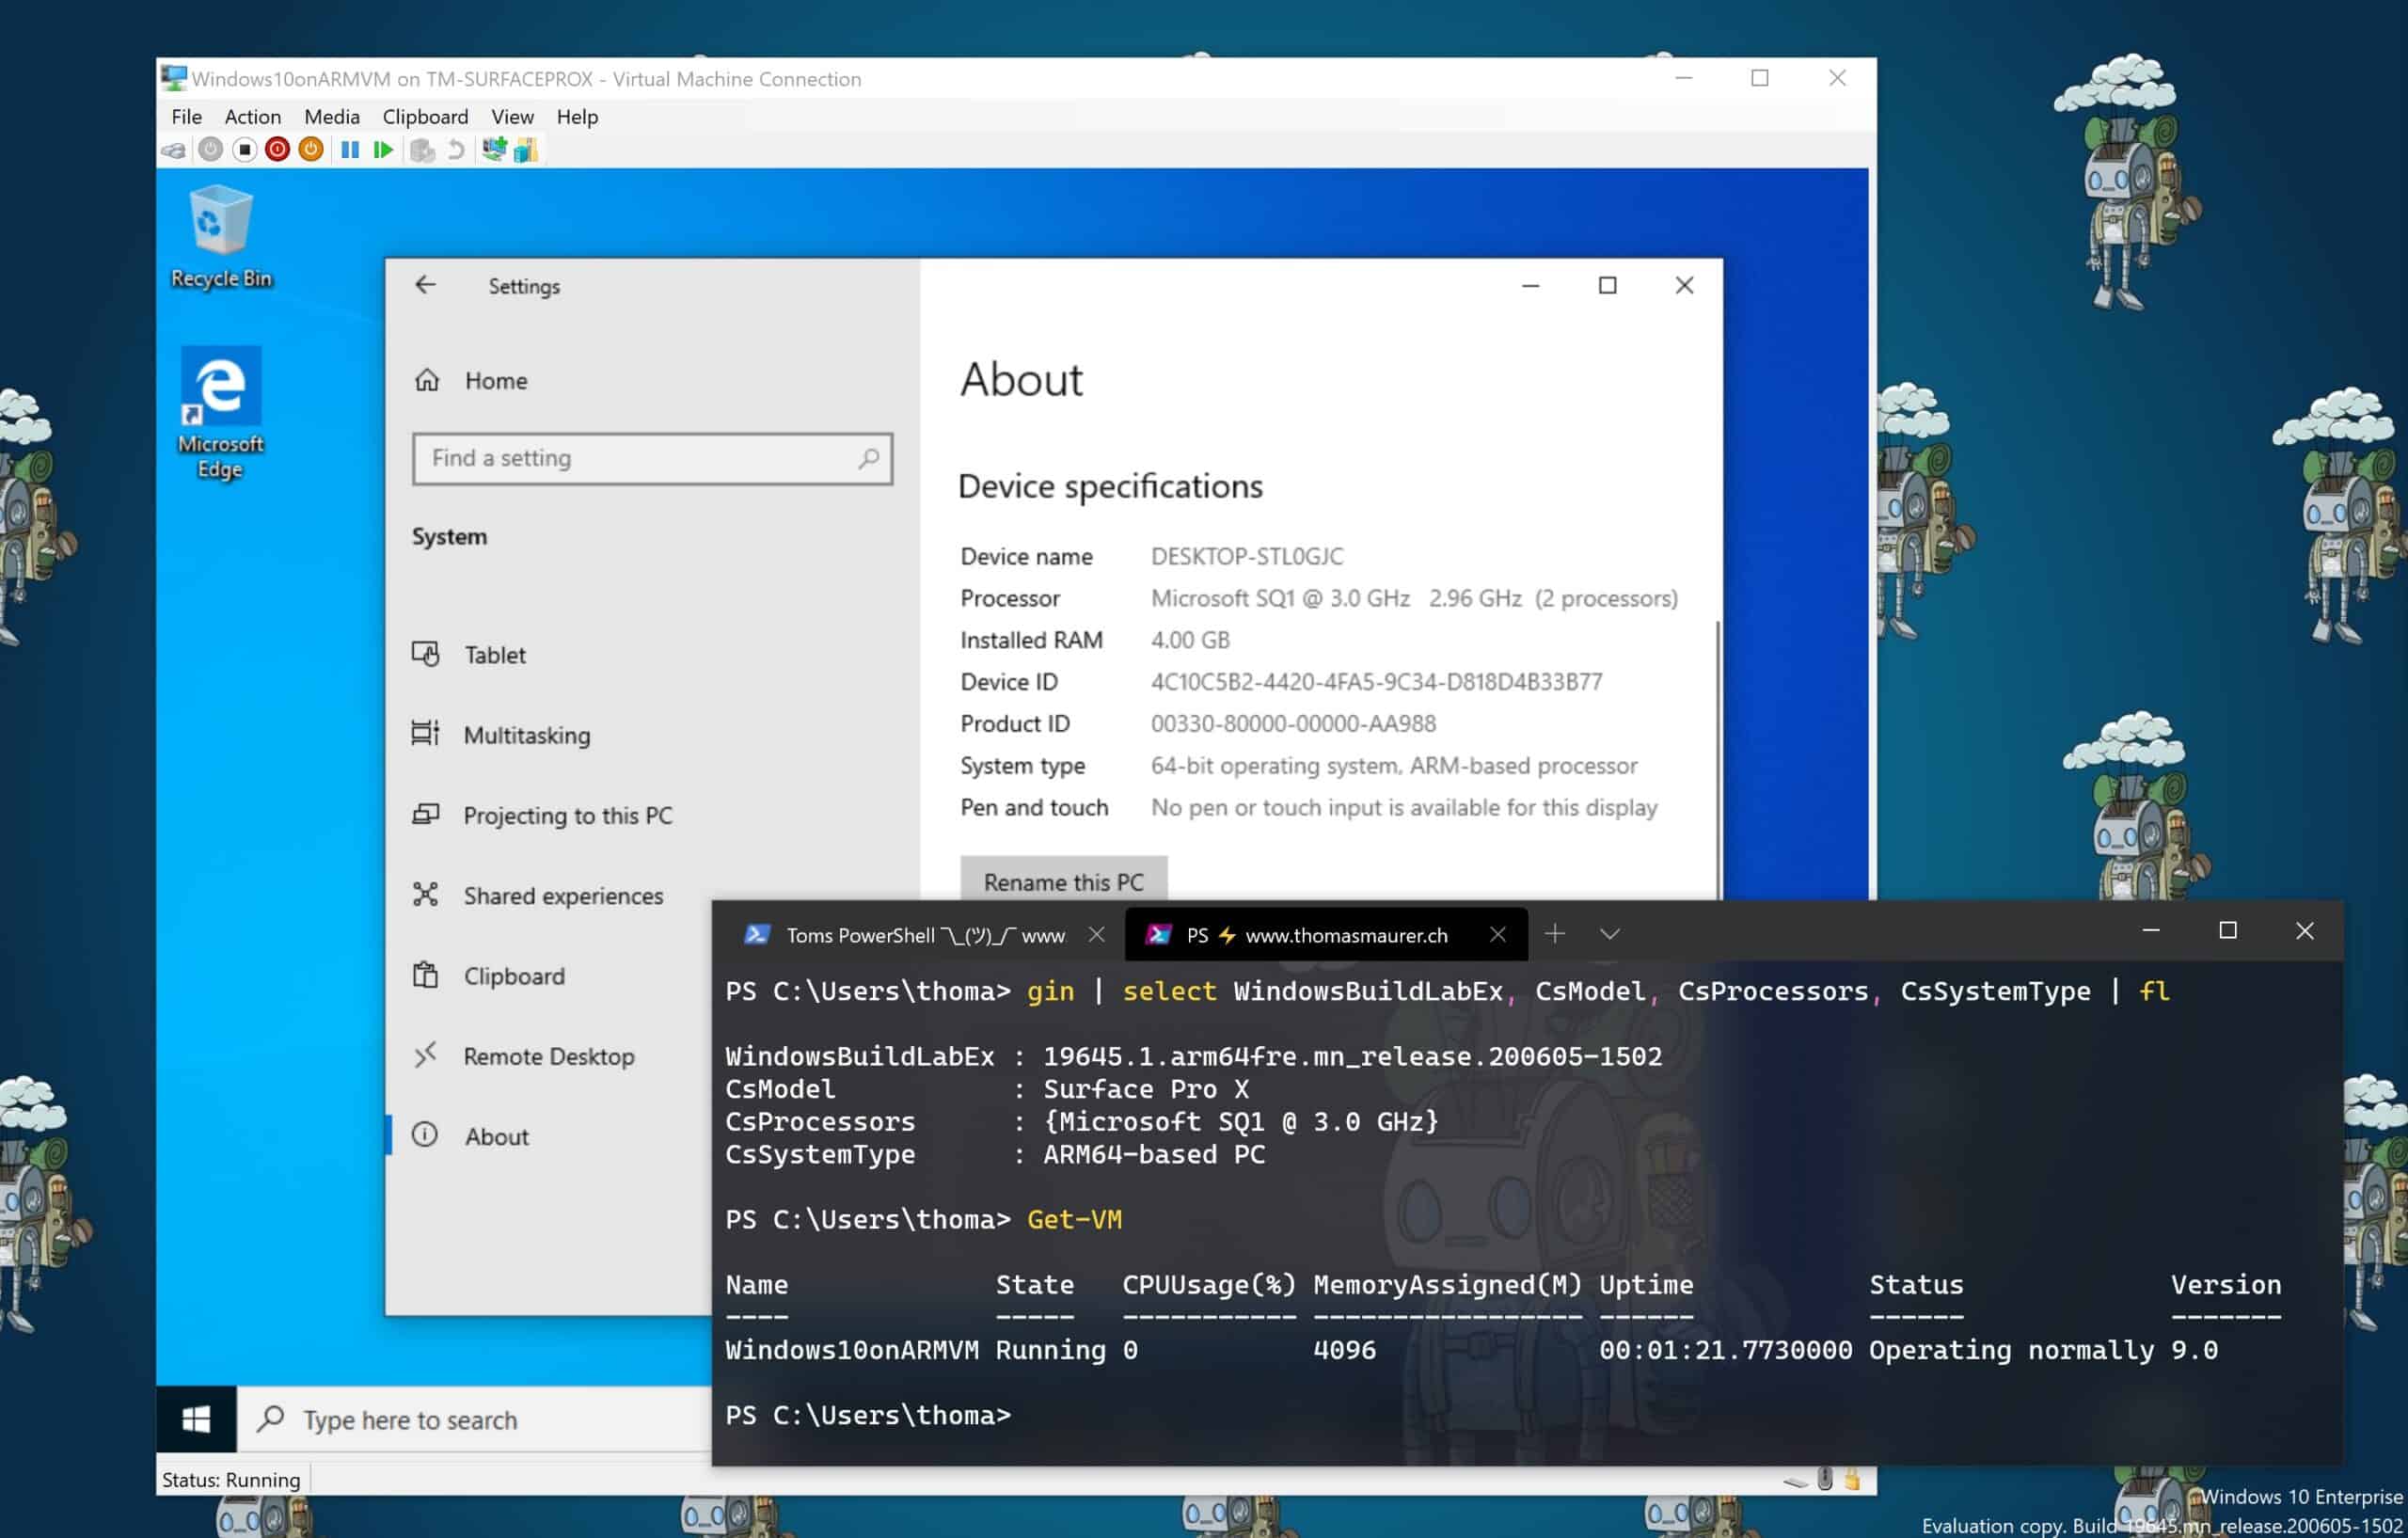
Run Hyper-V on Windows 10 on ARM and the Surface Pro X
Here is a quick blog post on how you can run Hyper-V virtual machines (VM) on Windows 10 on ARM and...


