![]()
Microsoft just announced the preview of Windows Azure Recovery Services which at the moment include Windows Azure Backup and Windows Azure Hyper-V Recovery Manager.
To use Windows Azure Backup you first have to enable the preview in your Azure Portal. After that you can create a new Backup Vault where you can store your data.

After that you have to add a certificate to the Backup Vault. You can do this using this guy here: Upload certificates to the vault
The easiest way to do this for testing with the preview version is to create a self-signed certificate on the host you will register for the Windows Azure Online Backup.
- Download Certificate Creation Tool (makecert.exe) from the TechNet Gallery or MakeCert is available as part of the Windows SDK, which you can download from http://go.microsoft.com/fwlink/p/?linkid=84091.
- Open an elevated command prompt (with Administrator privileges) and navigate to the location where makecert.exe is stored. Then type:
makecert.exe -r -pe -n CN=<certName> -ss my -sr localmachine -eku 1.3.6.1.5.5.7.3.2 -e 12/12/2015 -len 2048 <CertificateName>.cer
The certificate will be created and stored in the same location. - In the vault, click Manage Certificate to upload the .cer file, that contains the public key.

After that you can upload the certificate to Windows Azure by using the Windows Azure Portal.
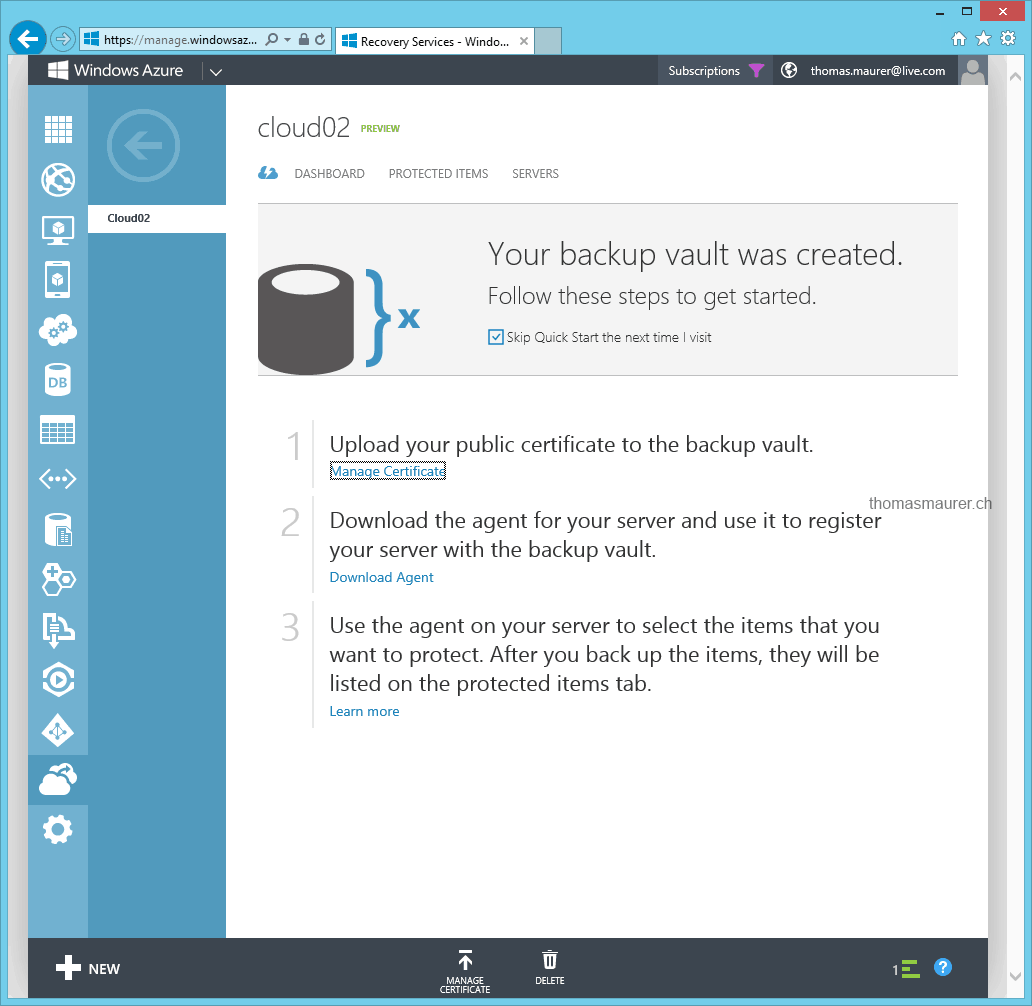
After you have successfully uploaded the certificate you can now download the Windows Azure Online Backup agent. Make sure you pick the right one, you can download one for Windows Server 2012 and System Center 2012 SP1 – Data Protection Manager or an agent for Windows Server 2012 Essentials. The Agent for Windows Server 2012 is around 18MB.
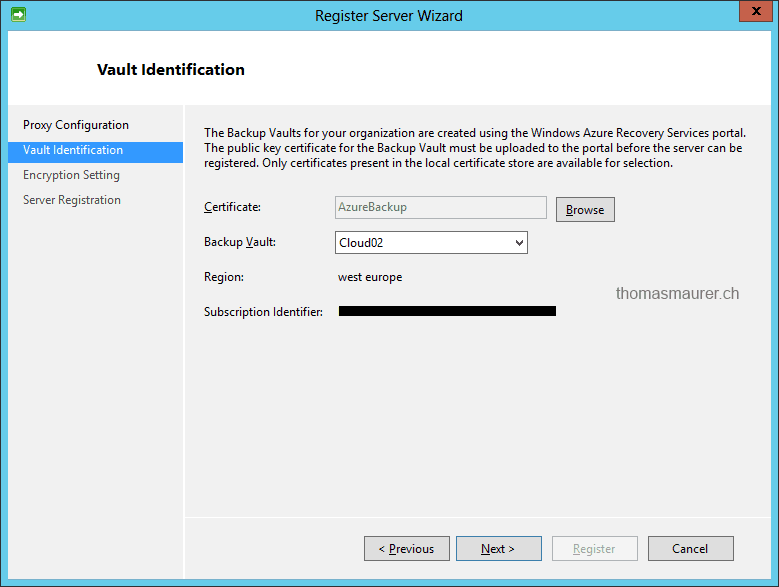
 Install the agent on the server you want to use for Windows Azure Backup. After the agent is installed on your system you can open the Windows Azure Backup Console and register your server. Here you have to select the created certificate and the Backup Vault you have created in the Windows Azure Portal.
After you finally registered your server you can now schedule a backup. At the moment you can do the following configuration settings in the preview.
- Select folders and exclude file types
- You can define backup times (at the moment maximum 3 times per day)
- Choose the retention rate from 7, 15 or 30 days.

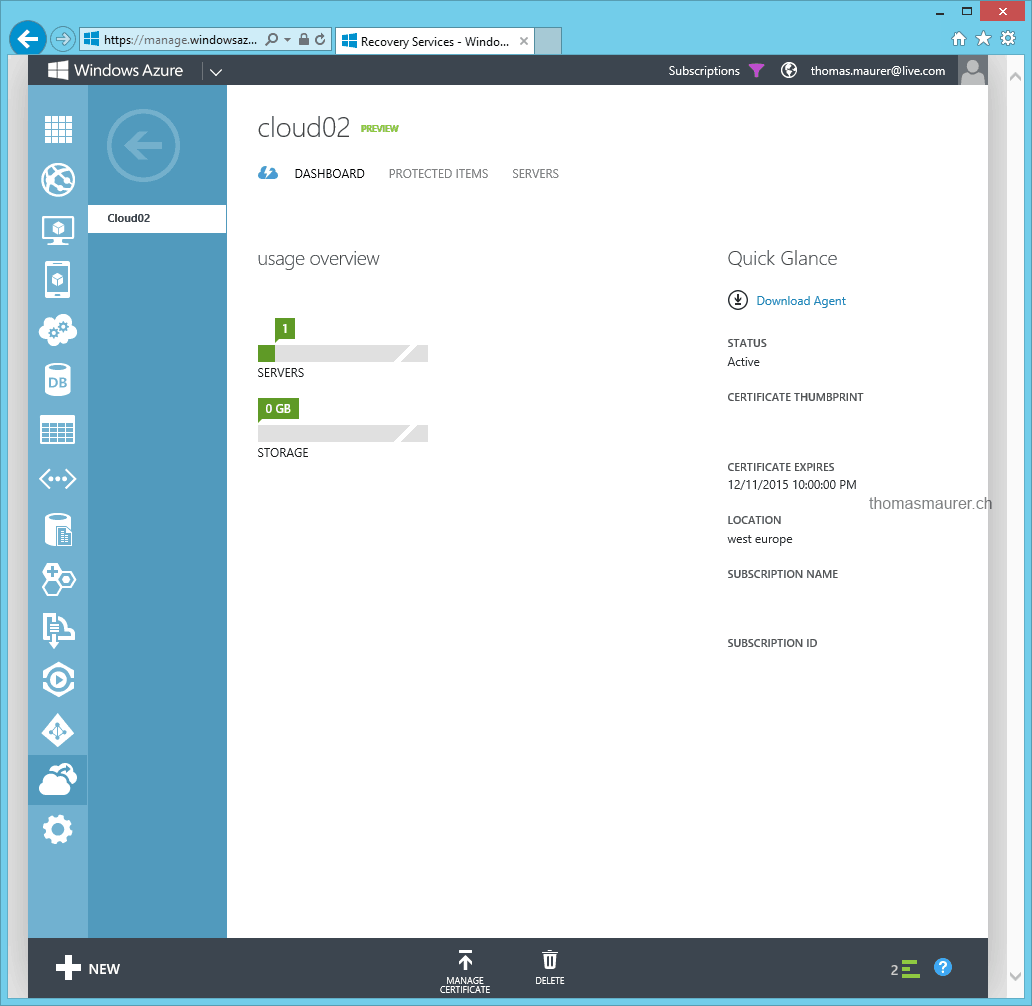
In the Windows Azure Portal you can see the Azure Backup Dashboard with more information about your servers and files.
Tags: Azure, Backup, Data Protection Manager, Microsoft, System Center, System Center 2012, Windows Azure, Windows Server, Windows Server 2012 Last modified: April 22, 2013


Certificate creation tool link results in “This item is not yet published”
Strange but you can get it here:
MakeCert is available as part of the Windows SDK, which you can download from http://go.microsoft.com/fwlink/p/?linkid=84091.