Activate SSH on VMware ESXi 5.0

1–2 minutes
8 comments on Activate SSH on VMware ESXi 5.0

As in VMware ESXi 4.1 you can enable or activate SSH on VMware ESXi 5.0 very simple. VMware ESXi 5.0 is also known as VMware vSphere Hypervisor.

  1. On the start screen press F2 for “Customize System”
    VMware ESXi 5.0 enable SSH
  2. Login with the local password
    VMware ESXi 5.0 enable SSH
  3. Select and enter Troubleshooting Options
    VMware ESXi 5.0 enable SSH
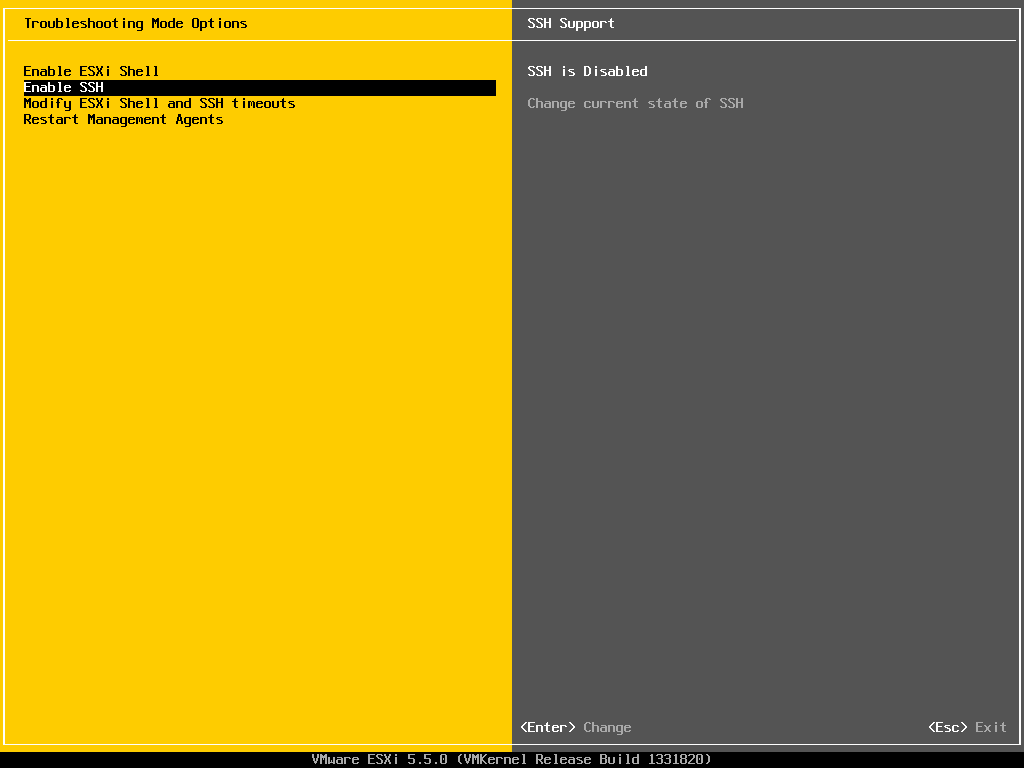
  4. Click on Enable SSH to activate SSH on your VMware ESXi 5.0 host
    VMware ESXi 5.0 enable SSH
  5. After you have pressed the ENTER key you will now see that SSH is enabled
    VMware ESXi 5.0 activate SSH

If you are running Windows, you should also check out my blog post about how to install SSH on Windows 10 or SSH on Windows Server. I also blogged about how you can use SSH with PowerShell.

8 responses

  1. Douglas Avatar

    Thank you very much, needed this right now :)

    Small hint: When using a console over a service processort, you might need to press F2 twice.

  2. Ben Avatar

    Thanks for this!

    Found it very hard to find since it is so different to earlier versions of Exsi server

  3. Esteban Eid Avatar
    Esteban Eid

    Thanks for this info, I have an error connecting from OS X, when I issue the command : ssh -vvv [email protected]

    I get:
    debug1: Reading configuration data /etc/ssh_config
    debug1: Applying options for *
    debug2: ssh_connect: needpriv 0
    debug1: Connecting to 192.168.2.123 [192.168.2.123] port 22.
    debug1: Connection established.
    debug1: identity file /Users/estebaneid/.ssh/id_rsa type -1
    debug1: identity file /Users/estebaneid/.ssh/id_rsa-cert type -1
    debug1: identity file /Users/estebaneid/.ssh/id_dsa type -1
    debug1: identity file /Users/estebaneid/.ssh/id_dsa-cert type -1
    ssh_exchange_identification: Connection closed by remote host

    Any clue?

    Thanks!

  4. Renvorak Avatar
    Renvorak

    Thanks for the quick and easy tip. Nice to see they made this so much easier than using the ‘unsupported’ mode that was in 4.x.

    Worked perfect.

Leave a Reply

Your email address will not be published. Required fields are marked *

This site uses Akismet to reduce spam. Learn how your comment data is processed.