With the latest release of Windows 10 (1903), Microsoft introduced a new feature called Windows Sandbox. Windows Sandbox is based on Hyper-V technology and allows you to spin up an isolated, temporary, desktop environment where you can run untrusted software. In this blog post, I will show you how you can set up and configure Windows Sandbox in Windows 10. I will also cover how you can do an advanced configuration of your Windows Sandbox using Windows Sandbox config files.
The sandbox is great for demos, troubleshooting or if you are dealing with malware. If you close the sandbox, all the software with all its files and state are permanently deleted. It is a Windows 10 virtual machines, with the advantage that it is built into Windows 10, so it leverages the existing OS, which gives you faster startup, less footprint, better efficiency, and easier handling, without losing security.

Source: Microsoft
Windows Sandbox is a lightweight virtual machine with an operating system. The significant advantage which makes it so small is the usage of existing files from the host, for data which cannot change. For the files which can change, it uses a dynamically generated image, which is only ~100MB in size.
There are much more exciting things happening with the Windows Sandbox like smart memory management, Integrated kernel scheduler, Snapshot and clone, Graphics virtualization and Battery pass-through. If you want to find out more about the Windows Sandbox, check out the official blog post.
Prerequisites
Windows Sandbox comes with a couple of requirements. How more powerful your machine is, the better the experience will be.
- Windows 10 (1903) Pro or Enterprise build 18362 or later
- 64-bit architecture
- Virtualization capabilities enabled in BIOS
- At least 4GB of RAM (8GB recommended)
- 1GB of free disk space (SSD recommended)
- 2 CPU cores (4 cores with hyperthreading recommended)
Installation
To install Windows Sandbox feature on Windows 10 (1903) or higher, you need to make sure that the virtualization capabilities are enabled in the BIOS/UEFI. Most of the desktop and notebook CPUs today, will support this. If you are running Windows 10 inside a virtual machine, you will need to enable nested virtualization. You can find more information about enabling Nested Virtualization on my blog: Nested Virtualization in Windows Server 2016 and Windows 10
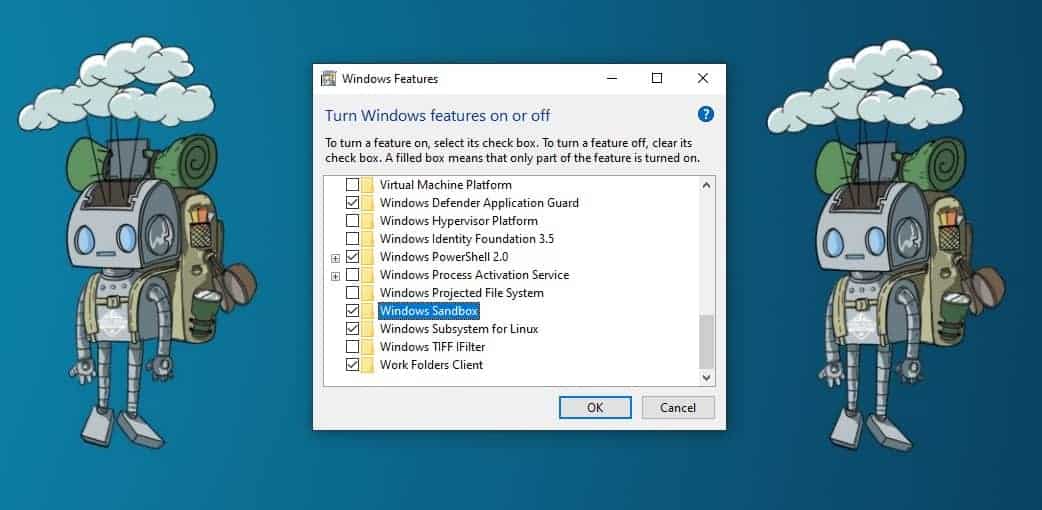
Open Windows Features and select the Windows Sandbox. When you have clicked okay, it might require a reboot of your machine. You can also run the following PowerShell command:
Enable-WindowsOptionalFeature -FeatureName "Containers-DisposableClientVM" -Online
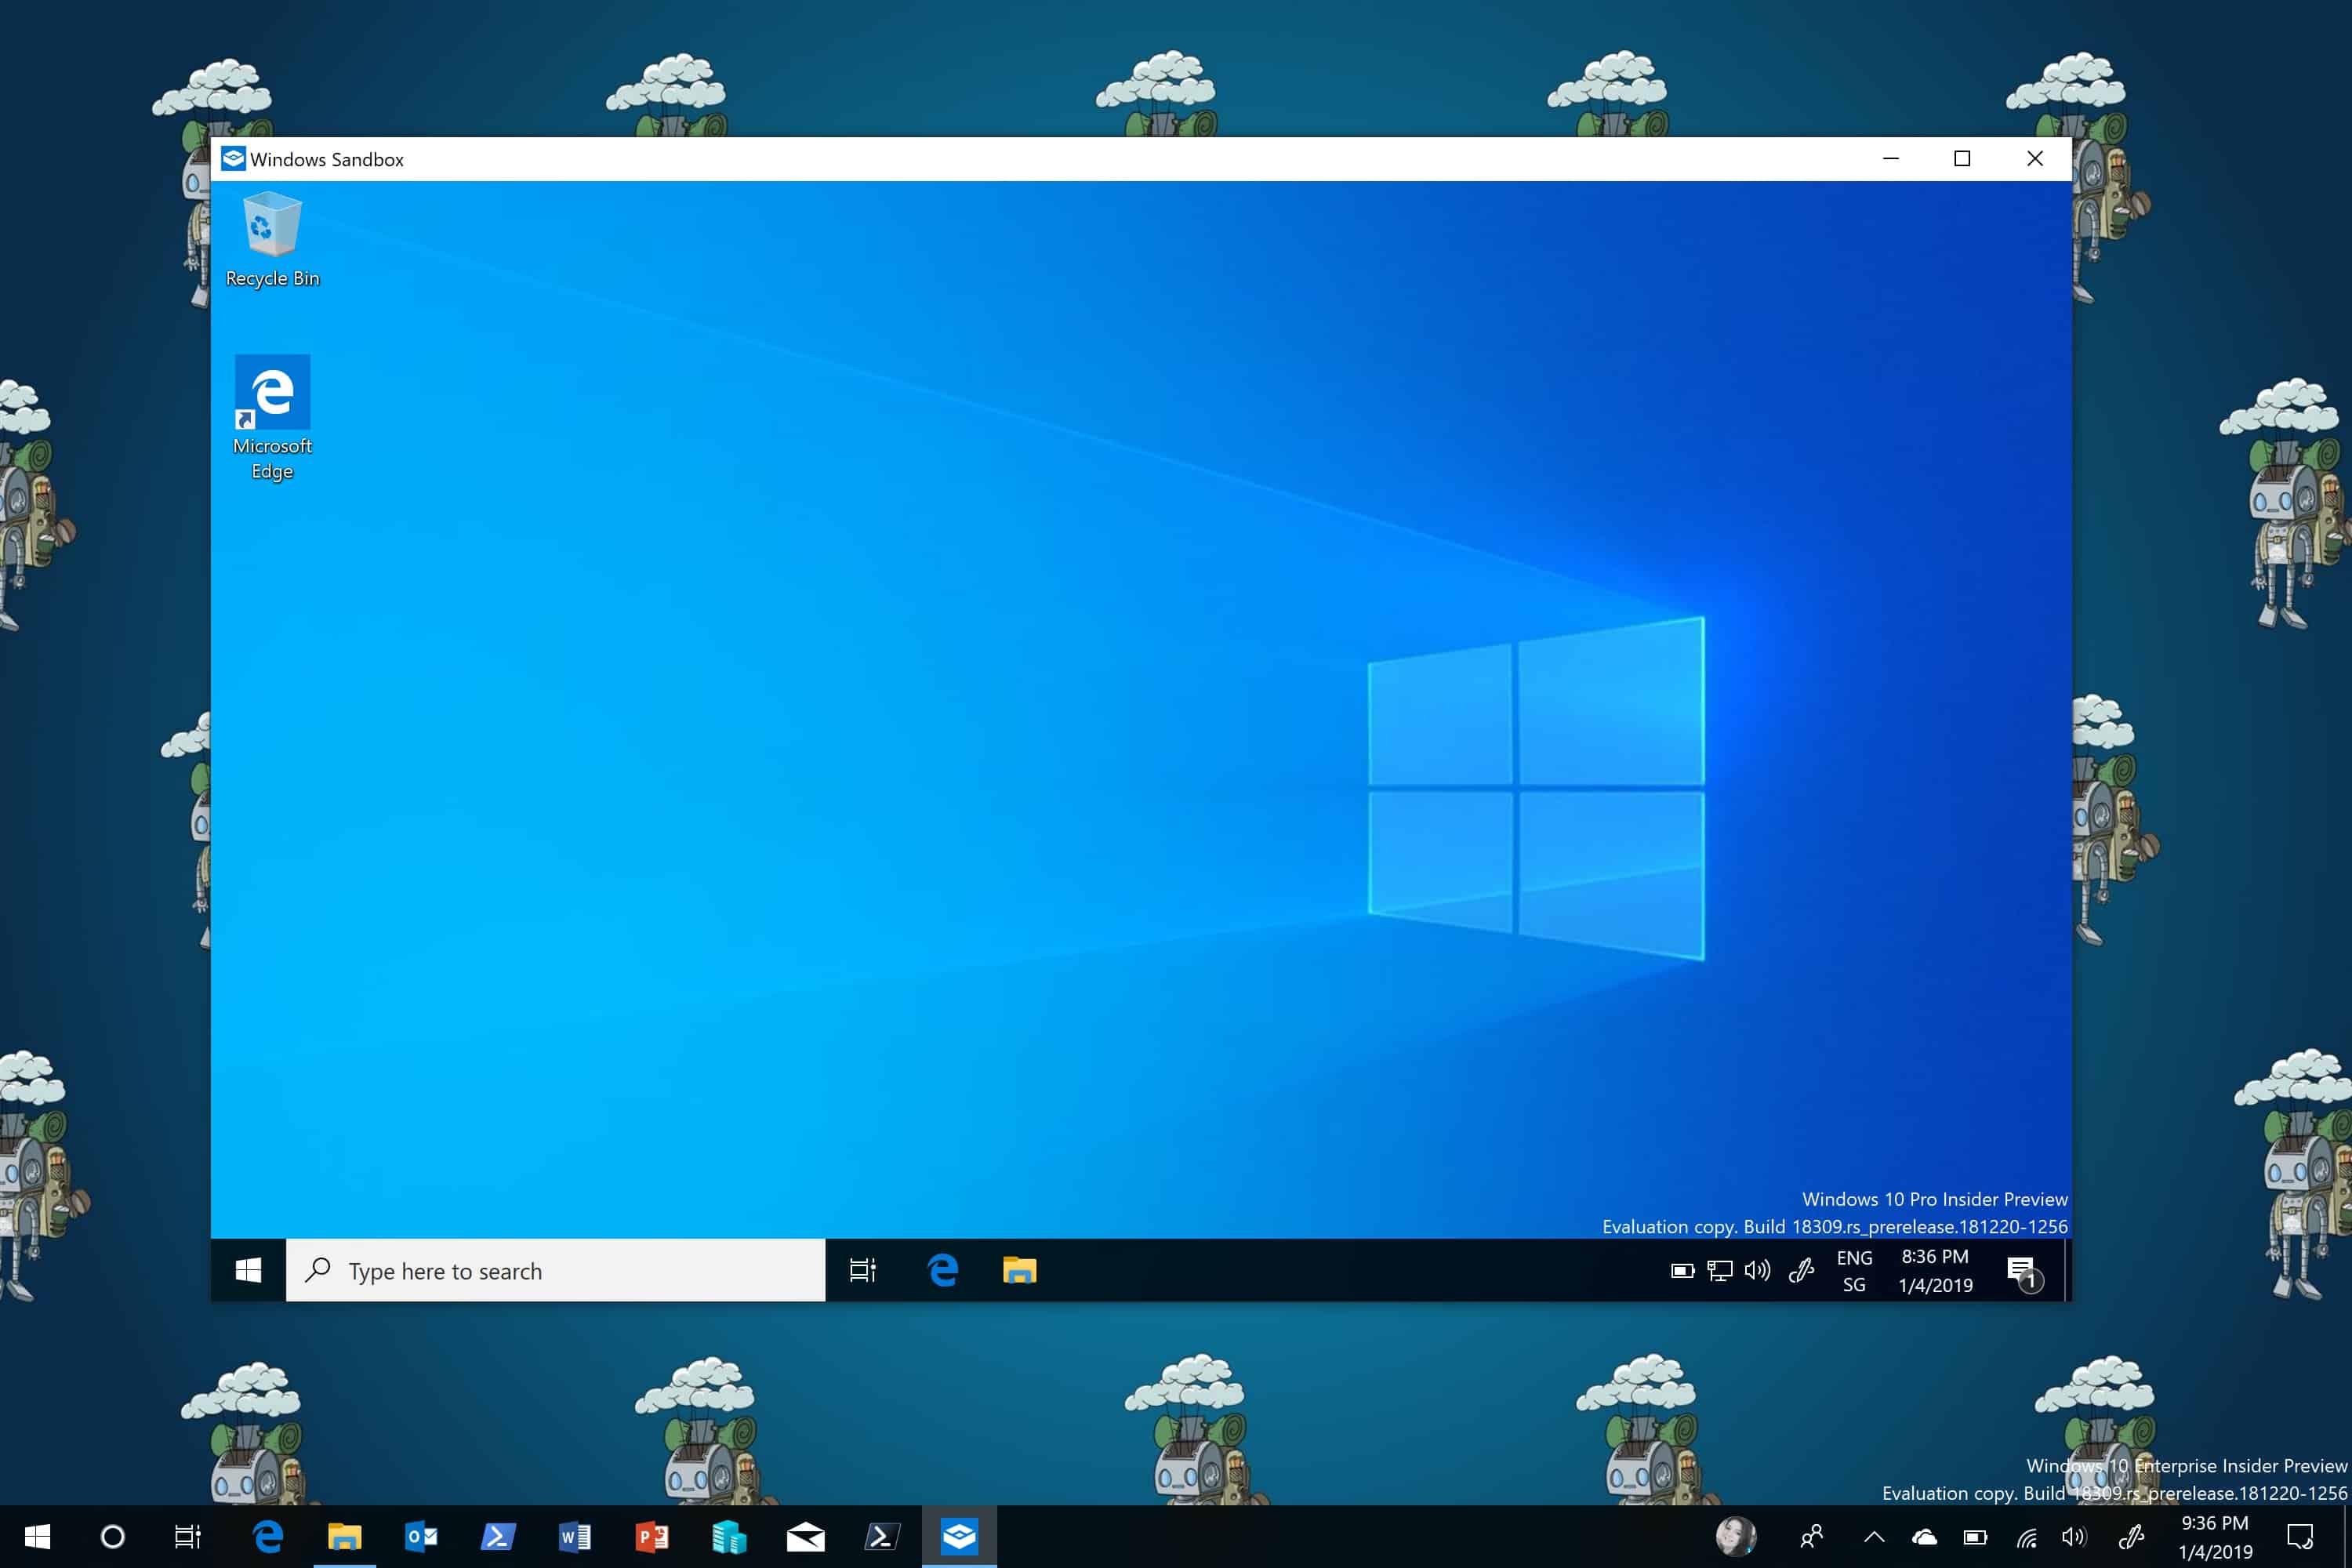
Start and using the Sandbox
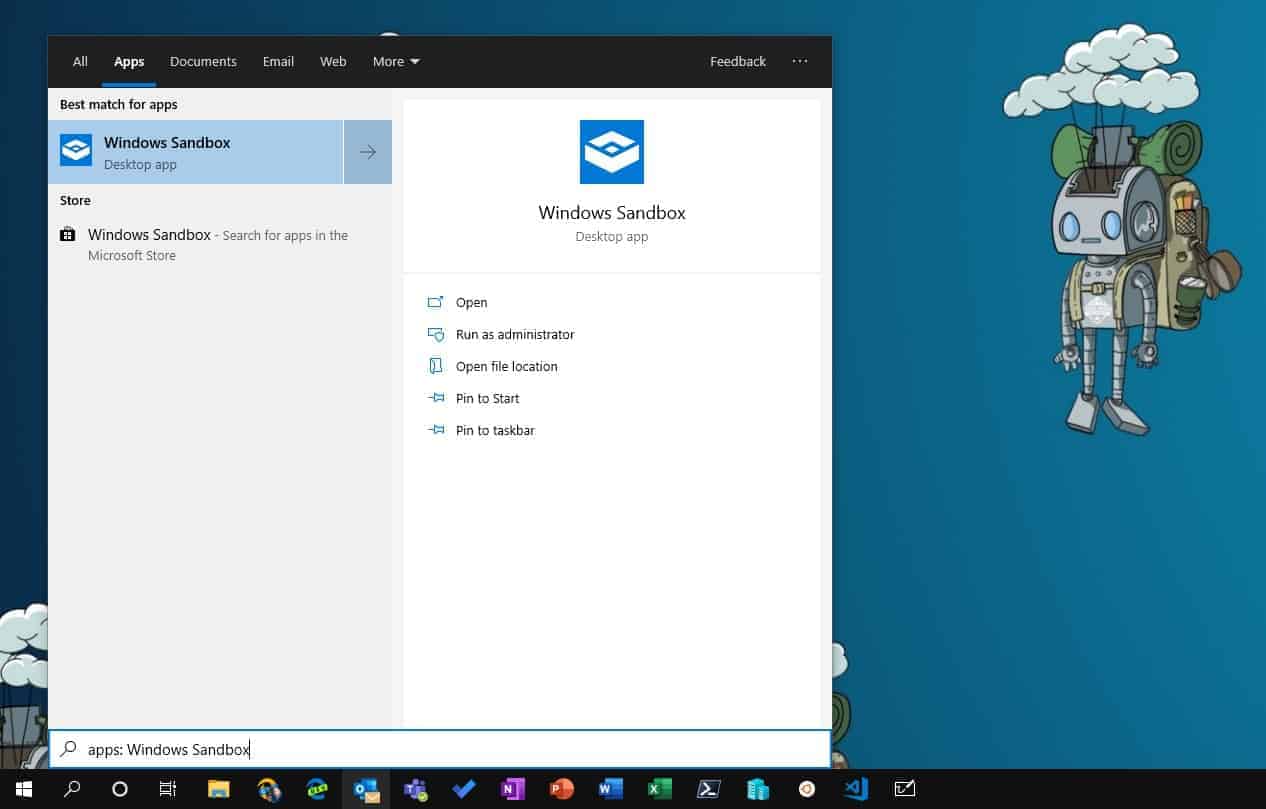
After the installation and the reboot, you can start the Windows Sandbox from the Windows 10 start menu, shortcut on the desktop or just run WindowsSandbox.exe
C:\Users\ThomasMaurer\WindowsSandbox.exe
You can now copy and paste a file from the host to the sandbox and run it in a secure environment.
Windows Sandbox Config Files
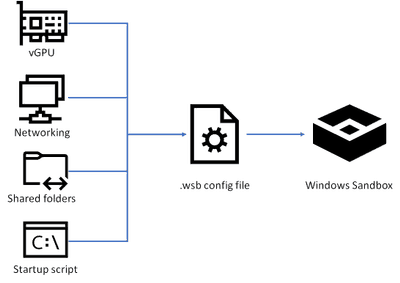
By default, Windows Sandbox spins up a default image. However, in many cases, you want to spin up a customized environment, with already preinstalled tools or access to local files. For that, you can use config files which allow you to customize the sandbox during startup. The sandbox configuration files are formatted as XML and use the .wsb file extension. Today, you can configure four different settings to configure the Windows Sandbox.
- Enable or Disable the virtualized GPU.
- Enable or Disable network access
- Shared Folders – Share folders from the host with read or write access
- Startup Script – allows you to run different commands at startup
Settings Overview
Here is a quick overview of the different settings you can use in the config files.
| Name | Setting | SubSetting | Value |
|---|---|---|---|
| Virtual GPU | vGPU | Disable - Disables vGPU | |
| Default - vGPU enabled | |||
| Networking | Networking | Disable - disables Networking | |
| Default - Networking enabled | |||
| Shared Folder | MappedFolder | HostFolder | Path to the host folder |
| ReadOnly | True/False | ||
| Startup Script | LogonCommand | Command | Command which gets executed |
Example Config Files
To give you a better look about how configuration files are helping you to set up a Windows Sandbox, here are a couple of examples.
Here is one which mounts my local download folder read-only from my host, into the sandbox.
<Configuration>
<VGpu>Default</VGpu>
<Networking>Default</Networking>
<MappedFolders>
   <MappedFolder>
     <HostFolder>C:\Users\thmaure\Downloads</HostFolder>
     <ReadOnly>true</ReadOnly>
   </MappedFolder>
</MappedFolders>
<LogonCommand>
   <Command>explorer.exe C:\users\WDAGUtilityAccount\Desktop\Downloads</Command>
</LogonCommand>
</Configuration>
This means my download folder (C:\Users\ThomasMaurer\Downloads) will be mounted in the desktop folder (C:\Users\WDAGUtilityAccount\Desktop\Downloads) of the sandbox. With the command “explorer.exe C:\users\WDAGUtilityAccount\Desktop\Downloads” it will directly open up the download folder in an explorer window.
The next example is from the official Microsoft blog about the Sandbox configuration files. Uses an additional installation script file to run commands to download and install the latest version of Visual Studio Code. For that, we mount a local folder and run a script file from the folder.
<Configuration>
<MappedFolders>
<MappedFolder>
<HostFolder>C:\Users\thmaure\Code\Repos\Scripts\Windows Sandbox\WindowsSandboxScripts</HostFolder>
<ReadOnly>true</ReadOnly>
</MappedFolder>
</MappedFolders>
<LogonCommand>
<Command>C:\users\wdagutilityaccount\desktop\WindowsSandboxScripts\InstallVSCode.cmd</Command>
</LogonCommand>
</Configuration>
This example installs the Microsoft Edge Insider version inside the Windows Sandbox. I stored the MicrosoftEdgeSetup.exe in my download folder. In the config file, I mount the download folder and run the MicrosoftEdgeSetup.exe.
<Configuration>
<MappedFolders>
<MappedFolder>
<HostFolder>C:\Users\thmaure\Downloads</HostFolder>
<ReadOnly>true</ReadOnly>
</MappedFolder>
</MappedFolders>
<LogonCommand>
<Command>C:\Users\WDAGUtilityAccount\Desktop\Downloads\MicrosoftEdgeSetup.exe</Command>
</LogonCommand>
</Configuration>
If you want to work with Sysinternals, you can also just easily mount the Sysinternals SMB share using the following config file.
<Configuration>
<LogonCommand>
<Command>net use S: \\live.sysinternals.com\tools</Command>
</LogonCommand>
</Configuration>
You can also combine different tasks, depending on what you need. You can also use the mount option or the command option to download files. It depends on your scenario.
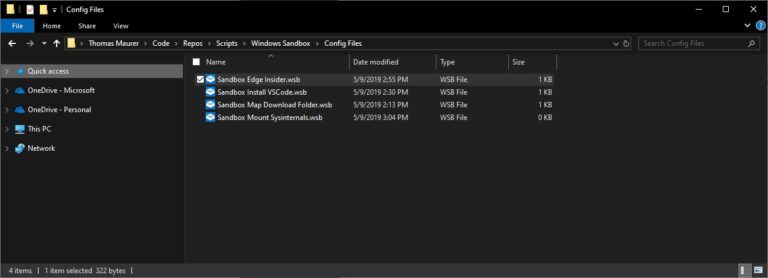
I stored all my configuration files in a folder, so if I want to start a specific configuration of my Windows Sandbox, I can double click the configuration file.
If you want to have more details on the sandbox configuration files, check out the blog post by Hari Pulapaka from the Windows Sandbox team.
It is excellent to see Hyper-V used in different features inside Windows 10, like Windows Defender Application Guard and others. I hope this helps you to set up and configure the Windows Sandbox and if you have any questions, please let me know in the comments.
Tags: automation, Config Files, Configuration Files, Container, Hyper-V, Microsoft, Sandbox, Virtualization, Windows, Windows 10, Windows Sandbox, Windows Sandbox Configuration, wsb Last modified: February 3, 2020


For those of us who like to troll “Windows Support” scammers, can we do so within the sandbox or do we need to use a full HyperV vm?
That is a good scenario ;) Yes you can use Windows Sandbox for that :)
Thanks for your post.
Is it normal that you can’t launch powershell ?
If you try you have the following error message :
Version v4.0.30319 of the .NET Framework is not installed and it is required to run version 3 of Windows PowerShell.
Interesting, for me it works. However, I have installed the .NET Framework on the Host (Windows 10 Machine)
I have .net 4.8.03752 installed on my base machine and it shows the same in the Sandbox, but yet I get that same error when trying to use PowerShell or PowerShell ISE.
That is very interesting. Since I have it running here: https://www.thomasmaurer.ch/wp-content/uploads/2019/05/Sandbox-powershell.jpg
Would you be able to file a bug using the Feedback Hub in Windows 10?
And, maybe needless to say, PowerShell and PowerShell ISE both work fine on the base machine (I tried them specifically to make sure the Sandbox wasn’t inheriting a problem from the recent upgrade).
I have submitted a bug in the Feedback Hub.
I am waiting for my other machines to receive the 1903 updates, as at the moment it is available for none of them, to test the sandbox on them.
There is currently a known issue with Windows Sandbox 1903
“Windows Sandbox may fail to start with ‘ERROR_FILE_NOT_FOUND (0x80070002)’ on devices in which the operating system language is changed during the update process when installing Windows 10, version 1903.”
https://docs.microsoft.com/en-us/windows/release-information/status-windows-10-1903?WT.mc_id=thomasmaurer-blog-thmaure#456msgdesc
@Marc Vanderhaegen You can get the update on your terms instead of waiting for Microsoft: https://www.microsoft.com/en-us/software-download/windows10
@Thomas Maurer I submitted this to Microsoft feedback when it first happened. I have yet to solve the problem.
I updated some of my machines this week-end, the sandbox was running fine until the 2019-05 .NET framework update got installed. As soon as the update is installed I have the error.
Removing the update and rebooting the machines did the trick.
Sandbox installed using an ip range that is already being used on my network. This breaks the host machine access to the ip segment on my network. I’ve changed the ip address on the virtual switch, but the sandbox still gets the conflicting ip address.
Hi Gregg
That is interesting, I will check if I find a workaround. Can you log your issue with more information into the Windows Feedback Hub App?
@Darrell Prichard The Sandbox would be a bad choice for trolling scammers as it makes no attempt to hide that it’s the sandbox. Plus, there are lots of things that will work properly in a VM that don’t work at all in the Sandbox. Stick with the VM.
Hi Marc Vanderhaegen, for your issue it should be because you have done some windows update on your host.
Check in update if the KB4495620 is installed. If yes, uninstall it, then powershell on Sandbox should work again.
Hi Thomas, we don’t have the Windows Feedback Hub App in our corporate environment. Sandbox seems to select a random RFC1918 segment with every boot. Unless we have some control of what address is used, we can’t consider using Sandbox and causing random networking problems. As a side note: Sandbox seemed to cause my PC to boot much more slowly. I’ve given up and uninstalled it. Sandbox doesn’t seem to offer as much protection as an actual virtual machine anyway.
Hi there,
also getting the error “Version v4.0.30319 of the .NET Framework required” when trying to install MSql server 2017 DEV on sandbox.
My machine has Version v4.8 the .NET Framework.
When trying to get the required v4.0.30319 of the .NET Framework it tells me it already exists.
Cannot install it
Hi
This is a known issue with one of the Windows 10 1903 updates. If KB4495620 is installed, you will get this error. The team is on a fix. If you really need it now, I think as others described here, you can uninstall that update.
Why the GPU doesn’t work? I don’t get any hardware acceleration. everything Graphically is slow, youtube is slow, the GUI is slow…
How can I enable it? I tried vGPU Default and Enabled from the WSB script.
How did you check that GPU acceleration is off? And what graphics hardware do you have on your computer. Since the Sandbox is a completely isolated environment it stills need enough resources to run, which means that the performance is also depending on the hardware.
Hi,
AMD 1950x with SMT + Virtualization Enabled + IOMMU .
I have Geforce 1080GTX
I check in youtube and the full screen is just slow like 10 Fps.
If I go to the Task Manager I see GPU Usage barely 5-10% which suppose to be more
Is there an option via a WSB script to set a custom wallpaper?
Like example.jpg
Sure you could just run a PowerShell command or registry command to change the wallpaper with the command block :)
The host folder is not being shared for me. The other parameters work (Networking, VGpu, LogonCommand) but the host folder never gets mapped. Nothing is on the desktop except for Edge. I’ve tried a couple of different folders on my host. That’s the only feature I really need right now too :) Any ideas?
Disable
Enable
C:\Temp
False
explorer.exe
</Configuration
I should mention that my copy/paste didn’t format correctly. It took the xml tags out (and I do have a “>” at the end of configuration that just didn’t get copied). I replaced the GT/LT with brackets.
[Configuration]
[Networking]Disable[/Networking]
[VGpu]Enable[/VGpu]
[MappedFolders]
[MappedFolder]
[HostFolder]C:\Temp[/HostFolder]
[ReadOnly]False[/ReadOnly]
[/MappedFolder]
[/MappedFolders]
[LogonCommand]
[Command]explorer.exe[/Command]
[/LogonCommand]
[/Configuration]
I just attended TechMentor in Redmond and got inspired to check out Windows 10 Sandbox.
Great blogpost on the topic
Believe there is a little typo here: “I will also cover who you can do an advanced configuration”
“Who” should possible be “how”
IMHO the blogpost should include the limitations of Windows 10 Sandbox.
1. You can only run one instance at a time. This isn’t a big issue. But sometimes it would be handy to test multiple things on different machines at the same time.
2. On reboot, every change is lost. This means you can’t test installation of a program that depends on reboot.
Testing malware that behaves different after a reboot, can’t be investigated on Windows 10 Sandbox
Hi Henrik
Great that you liked my blog. Yes, your points are valid. Make sure you log them into the Windows Feedback Hub, so the team can prioritize.
Fixed the typo, thanks :)
I just enabled and tried the Sandbox successfully. However, I just found a major problem with it. Some software installations require a restart afterward, and every time I’ve tried I get a popup error saying “The connection to the sandbox was lost.” It’s error 0x80072746. I submitted the feedback about the issue. This isn’t going to do us a lot of good for testing our development installations if we can’t restart a Sandbox instance. We’ll have to stick with our Hyper-V VMs.
Matt,
I had the same problem, not being able to se my local folders in the Sandbox. Try changing the ‘[ReadOnly]False[/ReadOnly]’ to ‘[ReadOnly]false[/ReadOnly]’, (lowercase ‘f’) that actually did the trick for me.
Yes that worked! Thanks! Would not have guessed that…
Your first example of the configuration XML is all lower case and since XML is case sensitive when you first try it, it doesn’t work!
and as a previous user said before when you copy and paste it the format is all messed up
Should be fixed now :)
Is it possible to allow the Sandbox to access my webcam?
As far as I know, there is currently no way of passing through USB devices to Sandbox. However, I guess it would be possible. I would recommend that you use the Windows Feedback Hub in Windows 10 to give that feedback suggestion to the Product Group.
Hello,
Is it possible to get a log of all the changes that occurred while testing an app in the Sandbox?
Not default specific to Sandbox. But you would use the same tool, you would use on a Windows machine.
Logging every change that was blocked would be fantastically useful. Heck, it would then be useful to test my own installers when I’m having a problem.
Try this out!
explorer “C:\Windows\Resources\Ease of Access Themes\hcblack.theme”
So when you visual enter/exit the sandbox, it is easy to see!
Try this out for LogonCommand!
explorer “C:\Windows\Resources\Ease of Access Themes\hcblack.theme”
So when you visual enter/exit the sandbox, it is easy to differentiate!
Hi Thomas,
I just tried Windows Sandbox and it seems pretty good. When I use cinebench r15 to neshcmark my cpu it hit 830 in the sandbox and 950 on the “host” (my computer) so it’s about 10% performances lost.
When I try Hyper V through, the Vm runs at 100% but the host cpu (my computer) only shows 67%.
It’s been days I’m trying to figure out why Hyper V can’t fully use my cpu for the VM.
In this regards it seems the sandbox does a much better job, which is really weird as Hyper V should be a much more “pro” version of the sandbox.
Any thoughts about Hyper V for this?
Great info nevertheless for the sandbox,
Thanks
Stan
Hi Thomas,
Great article.
You do mention that it is possible to start a windows sandbox using preinstalled tools
>> “However, in many cases, you want to spin up a customized environment, with already preinstalled tools or access to local files”
How can I do this? I want to install Visual Studio 2019 Enterprise on a windows sandbox, and preserve that image, so that I can launch that image again and use VS in my new sandbox.
Is this possible?
Thanks
Amit
Hi Admit, yes this is done using these custom configuration files you can find in the blog post
Hi Amit,
Did you manage to take a snapshot of sandbox for next use or always install again?
Arnon
Hi Arnon
There is no such feature for Sandbox. If you want to use something like this, I would recommend using Hyper-V Virtual Machines on Windows 10. There you can create Checkpoints/Snapshots for different configurations.
Hyper-V on Windows 10: https://docs.microsoft.com/en-us/virtualization/hyper-v-on-windows/about?WT.mc_id=thomasmaurer-blog-thmaure
How to Install Hyper-V on Windows 10: https://www.thomasmaurer.ch/2017/08/install-hyper-v-on-windows-10-using-powershell/
Hyper-V Checkpoints: https://docs.microsoft.com/en-us/virtualization/hyper-v-on-windows/user-guide/checkpoints?WT.mc_id=thomasmaurer-blog-thmaure
How to speed up Windows Sandbox by add more cpu and ram
play game flash online in Windows Sandbox is very hard and slow
Ho installato Windows Sandbox su PC con SO win10 Home. Sembra che la procedura sia andata a buon fine invece quando tento di avviare il programma la finestra a comparsa mi dice:
“Non è stato trovato alcun hypervisor”
“Abilita il supporto dell’hypervisor”
“Error 0xc0351000”
“Nessun hypervisor presente nel sistema”
How to increase ram from default 4gb?
How can I increase storage space?
I had everything running in my previous Win 10 installation.
Now, I just performed a clean new Win 10 installation on the same machine, and Windows Sandbox comes up with an error:
The Sandbox splash screen is being shown for a minute and then I get:
Windows Sandbox failed to start.
Error 0x80041002
Any ideas?
Thanks in advance for any efforts taken!
Best regards,
Stefan
Hey is it possible to run multiple instances of sandbox at the same time?
Currently, you can only run one instance of Windows Sandbox
Hello Thomas,
I am new to Sandbox.
I want to know how to define a printer because when I open Sandbox there is none defined.
Thank you.
And sorry for my English …
Sandbox wants me to activate as Win10 Enterprise?
Thomas, thanks for all this. Here’s a question for you, or other readers: while the .wsb config option exists to allow us to access host files/folders from within the sandbox, does anyone have a suggestion for the reverse: accessing sandbox folders from within the host?
I do realize I can copy/paste things out of the sandbox to the guest (and vice-versa), and that I could setup up an FTP server if I had to (though curiously, I find that the “turn windows features on and off” does not work within the sandbox, so enabling the IIS FTP server is not so trivial).
FWIW, I’m asking about wanting to see from the host a folder created by an installer run within the sandbox. I want to do some file/folder comparisons.
Any ideas, anyone? I’ve tried to access the folder within the Sandbox using UNC paths. I’ve tried doing a shares. None seem to work, but I could have made a mistake, of course. Thanks.
hello so I have a question about windows sandbox is it possible to increase the storage of sandbox?
Hi :)
Is there any way to make Windows Sandbox’s disk space larger than 40GB?
I hope you still around updating this post. I have a question:
I need to be able to connect to a printer on the network 192.168.0.1/24. When I am using Sandbox it gives me and IP address in the 172.0.0.0 network. I need to know if its possible to change the IP address on the sandbox to the 192.168.0.1/24 network and be able to communicate.
Printer: 192.168.0.2/24
Sandbox: 192.168.0.3/24
I had them both connected to a dumb switch.
I tried and I was not successful, am I missing something? Or this is not possible?
Thank you.
Hi! Is there a technical support for SandBox?
Does it support a multyply logon commands? Not just one…!?