There are multiple ways to interact and manage resources in Microsoft Azure. You can use the Azure Portal or command line tools like the Azure PowerShell module or the Azure CLI, which you can install on your local machine. However, to set up a cloud management workstation for administrators and developers can be quite a lot of work. Especially if you have multiple computers, keeping consistency between these machines can be challenging. Another challenge is keeping the environment secure and all the tools up to date. The Azure Cloud Shell addresses this any many more things.
Cloud Shell is not brand new, Microsoft announced Cloud Shell at Build 2017. This blog post is about how you can master Azure with Cloud Shell and give you an overview of the possibilities of Cloud Shell.
What is Cloud Shell
Cloud Shell offers a browser-accessible, pre-configured shell experience for managing Azure resources without the overhead of installing, versioning, and maintaining a machine yourself. Azure Cloud Shell is assigned per unique user account and automatically authenticated with each session. This makes it a private and secure environment.
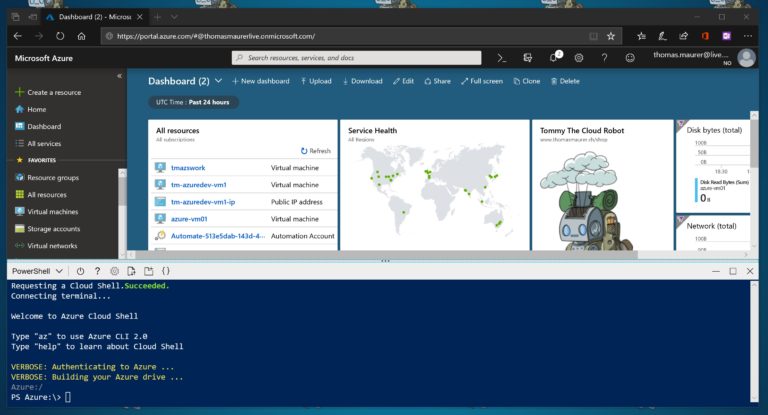
You get a modern web-based command line experience which can be accessed from several endpoints like the Azure Portal, shell.azure.com and the Azure mobile app, Visual Studio Code or directly in the Azure docs.
In the backend, Azure uses containers and automatically attaches an Azure File Share to the container. You can store the data on it, so your data is persistent. This persists your data across different Cloud Shell sessions.
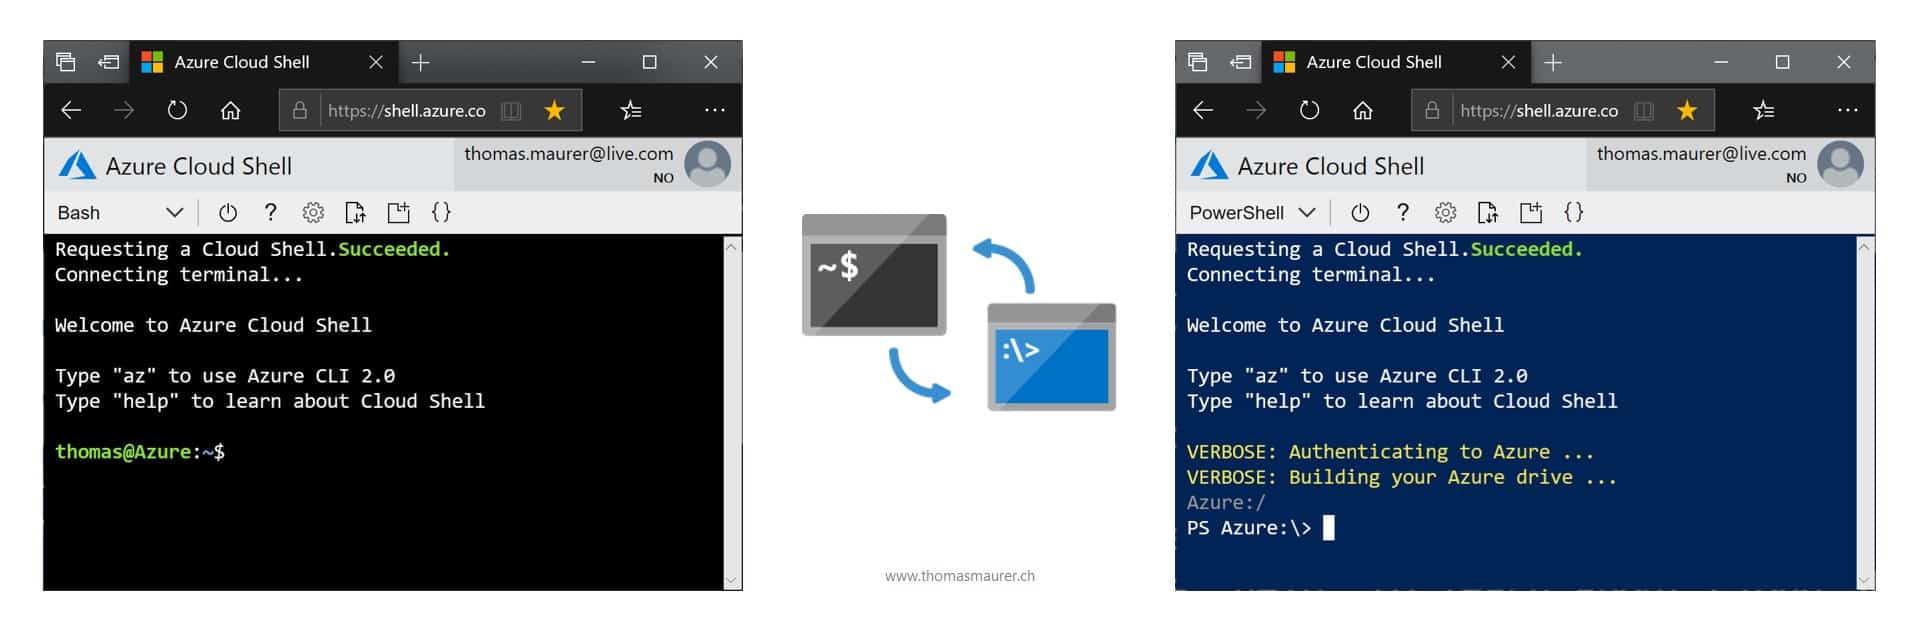
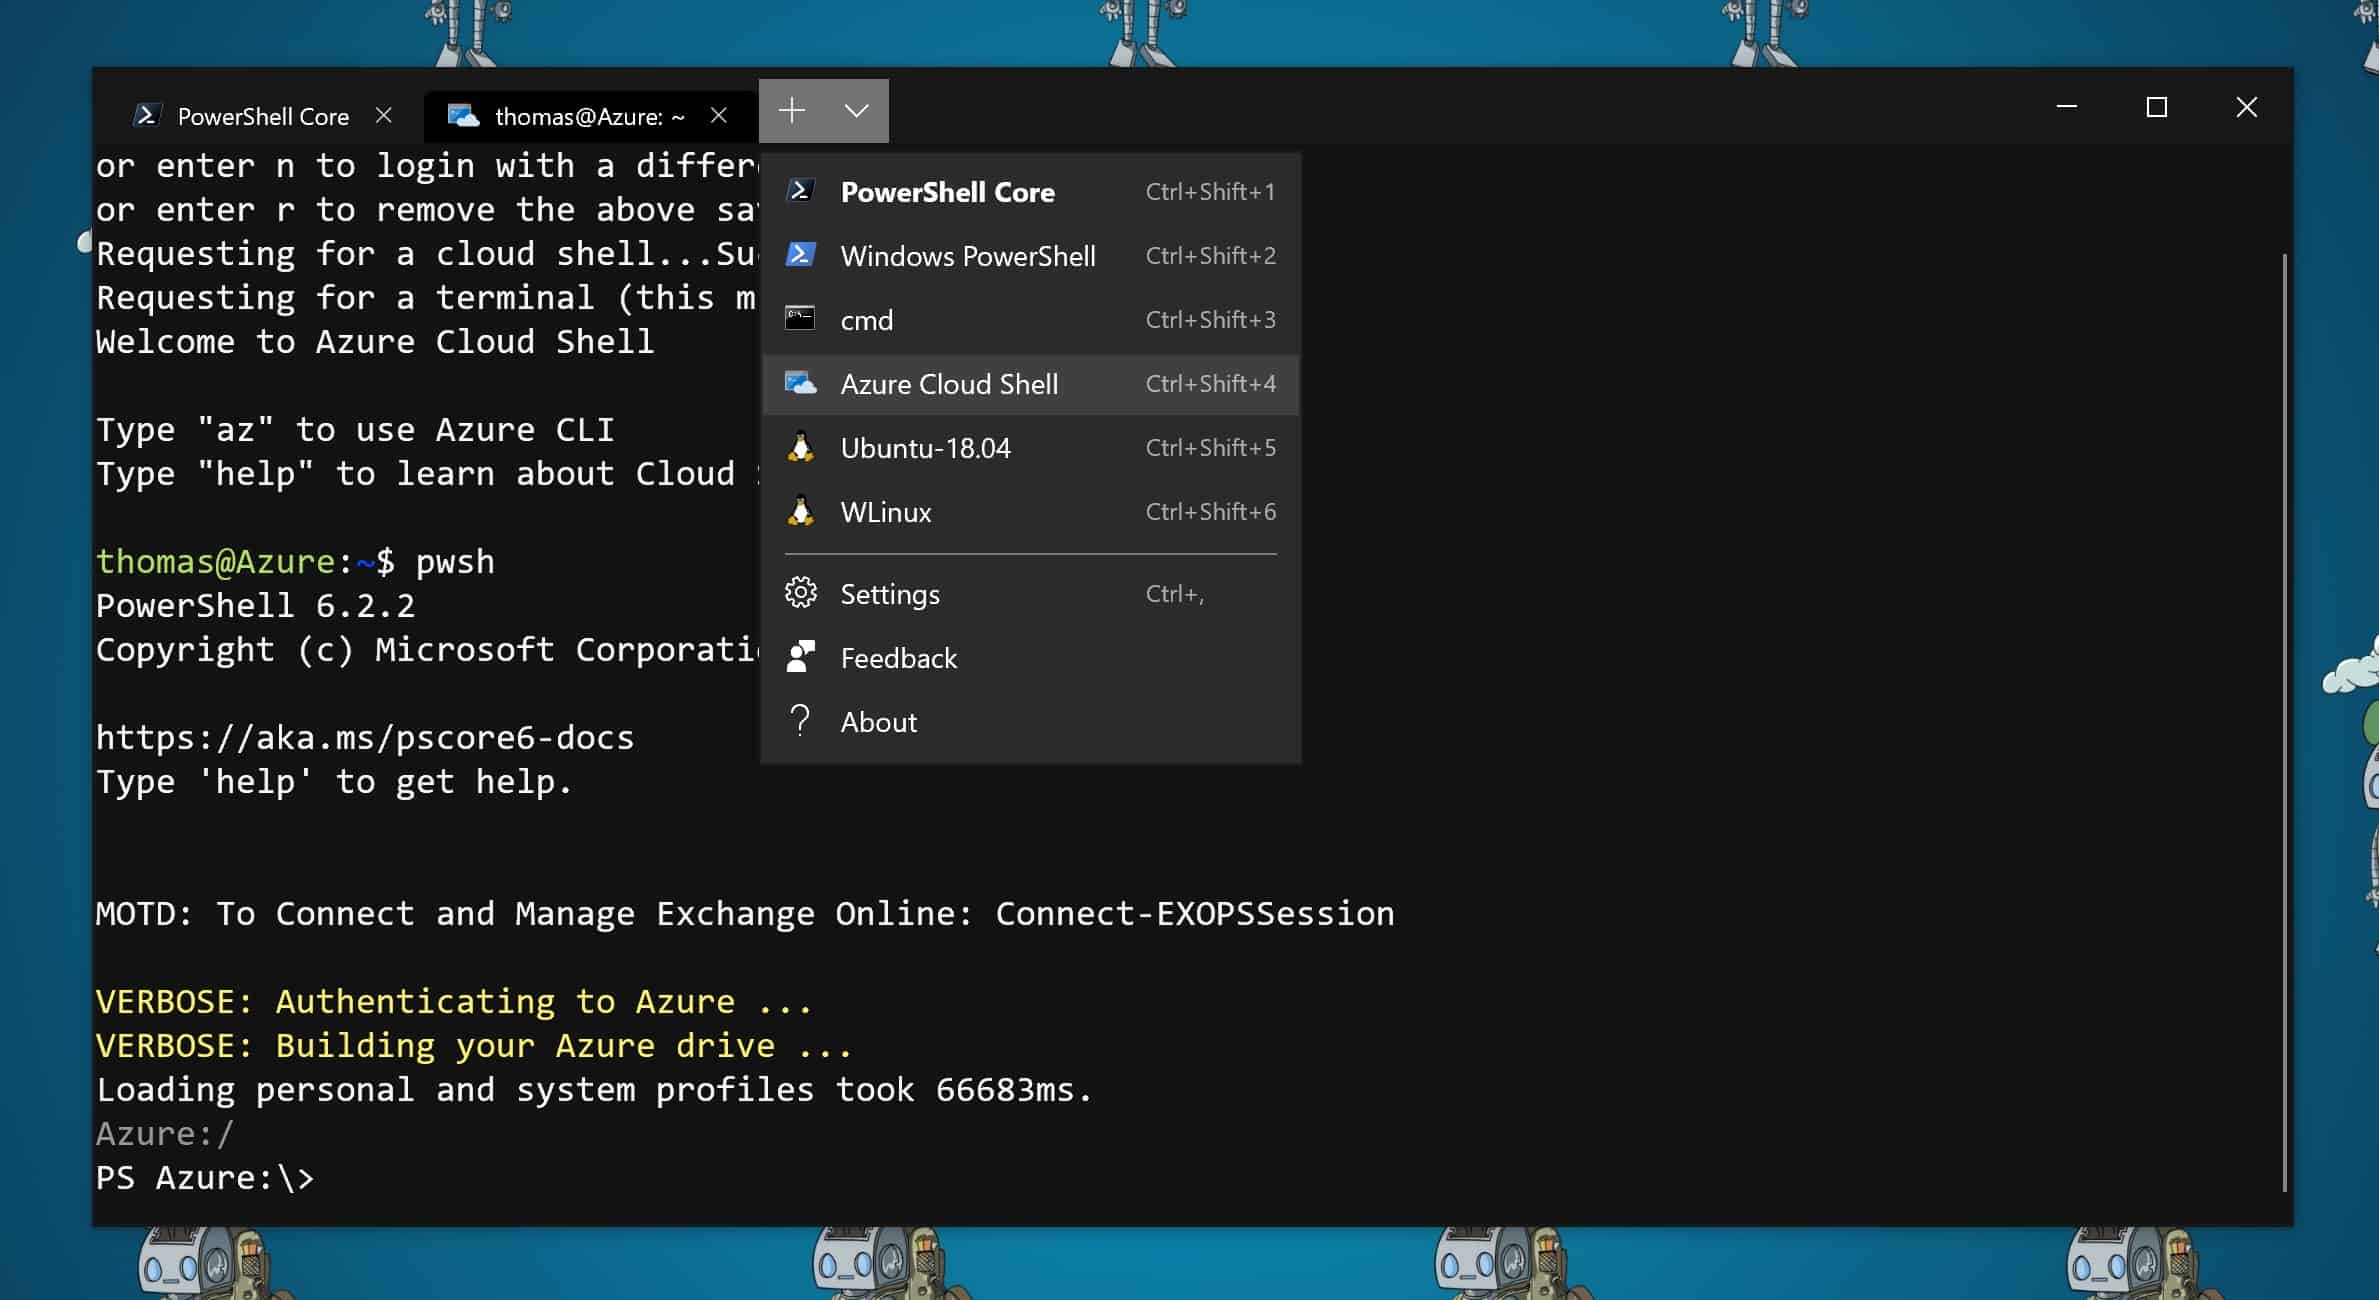
You can choose your preferred shell experience. Cloud Shell supports Bash and PowerShell and included your favorite third-party tools and standard tools and languages. If something like a module is missing, you can add it.
Azure PowerShell vs. Azure CLI
A lot of questions I get from customers is, what Azure command line option should we use, Azure PowerShell or Azure CLI. It all comes down to personal preferences. Both options have dedicated and growing development teams. Yes, there are currently some inconsistencies between the two option, where some commands are not available in the CLI, but they are available in PowerShell. Microsoft is working with the feature teams on the consistency. In addition, both shells are open source, and you can find them on GitHub (Azure PowerShell and Azure CLI).
I am more of an Azure PowerShell guy since I am coming from the Windows world. However, since the new Az PowerShell module is based on PowerShell Core, both shells work on all platforms like Windows, macOS, and Linux. I still prefer the object model of PowerShell versus the text streams of the CLI.
Getting started with Cloud Shell

To begin with, if you haven’t used Cloud Shell before, you will need to setup it up for the first time. When you open the shell for the first time in the Azure portal, the dedicated Cloud Shell site or even in Visual Studio Code, you will be prompted to configure the storage and the resource group where Cloud Shell will be hosted.
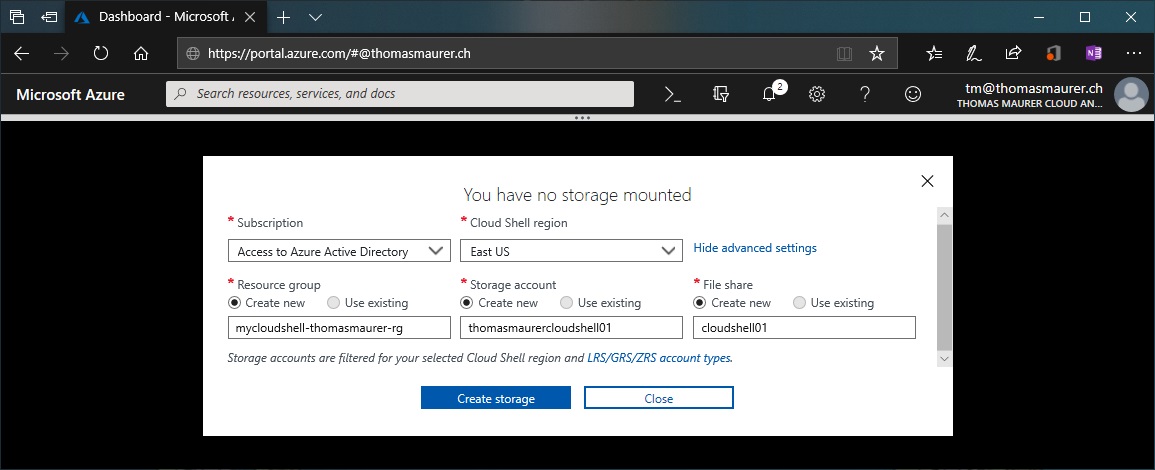
If you want to have a quick look at it, I recommend clicking on the advanced settings link. This will allow you to set the name for the resource group, the storage account as well as for the Azure File Share.
You can always remove the Cloud Shell by deleting the Azure resource group, which you used during that setup process.
UI Management

You cannot only configure the shell experience by choosing which shell you want to use, but you can also set the font and font size. You can also upload and download files and if needed restart the container.
Files can also upload using drag and drop directly into the browser.
In the PowerShell experience, you also get the cmdlet Export-File, which allows you to download a file quickly.
SSH in Cloud Shell
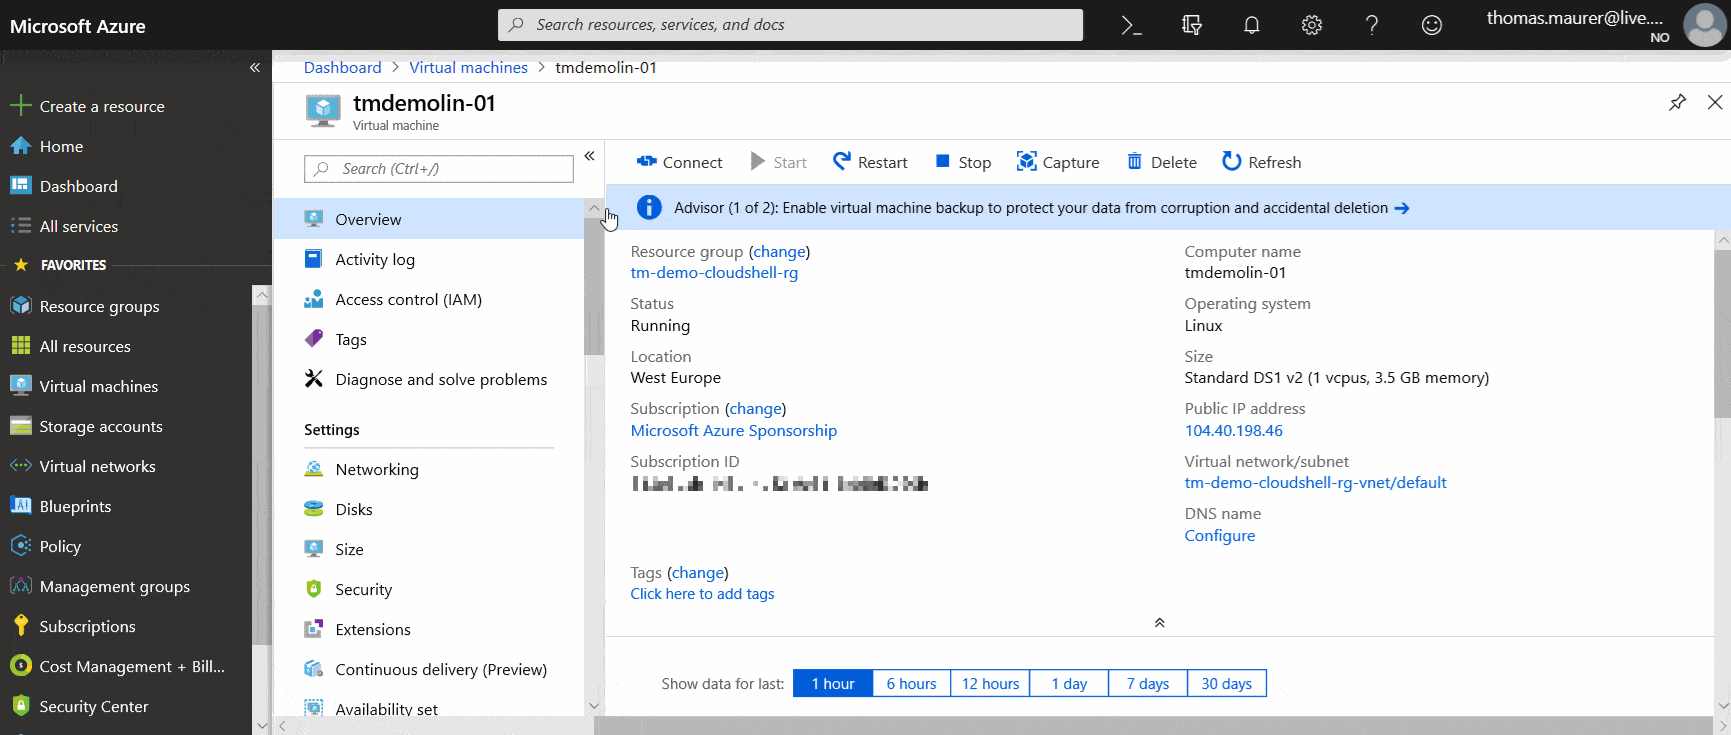
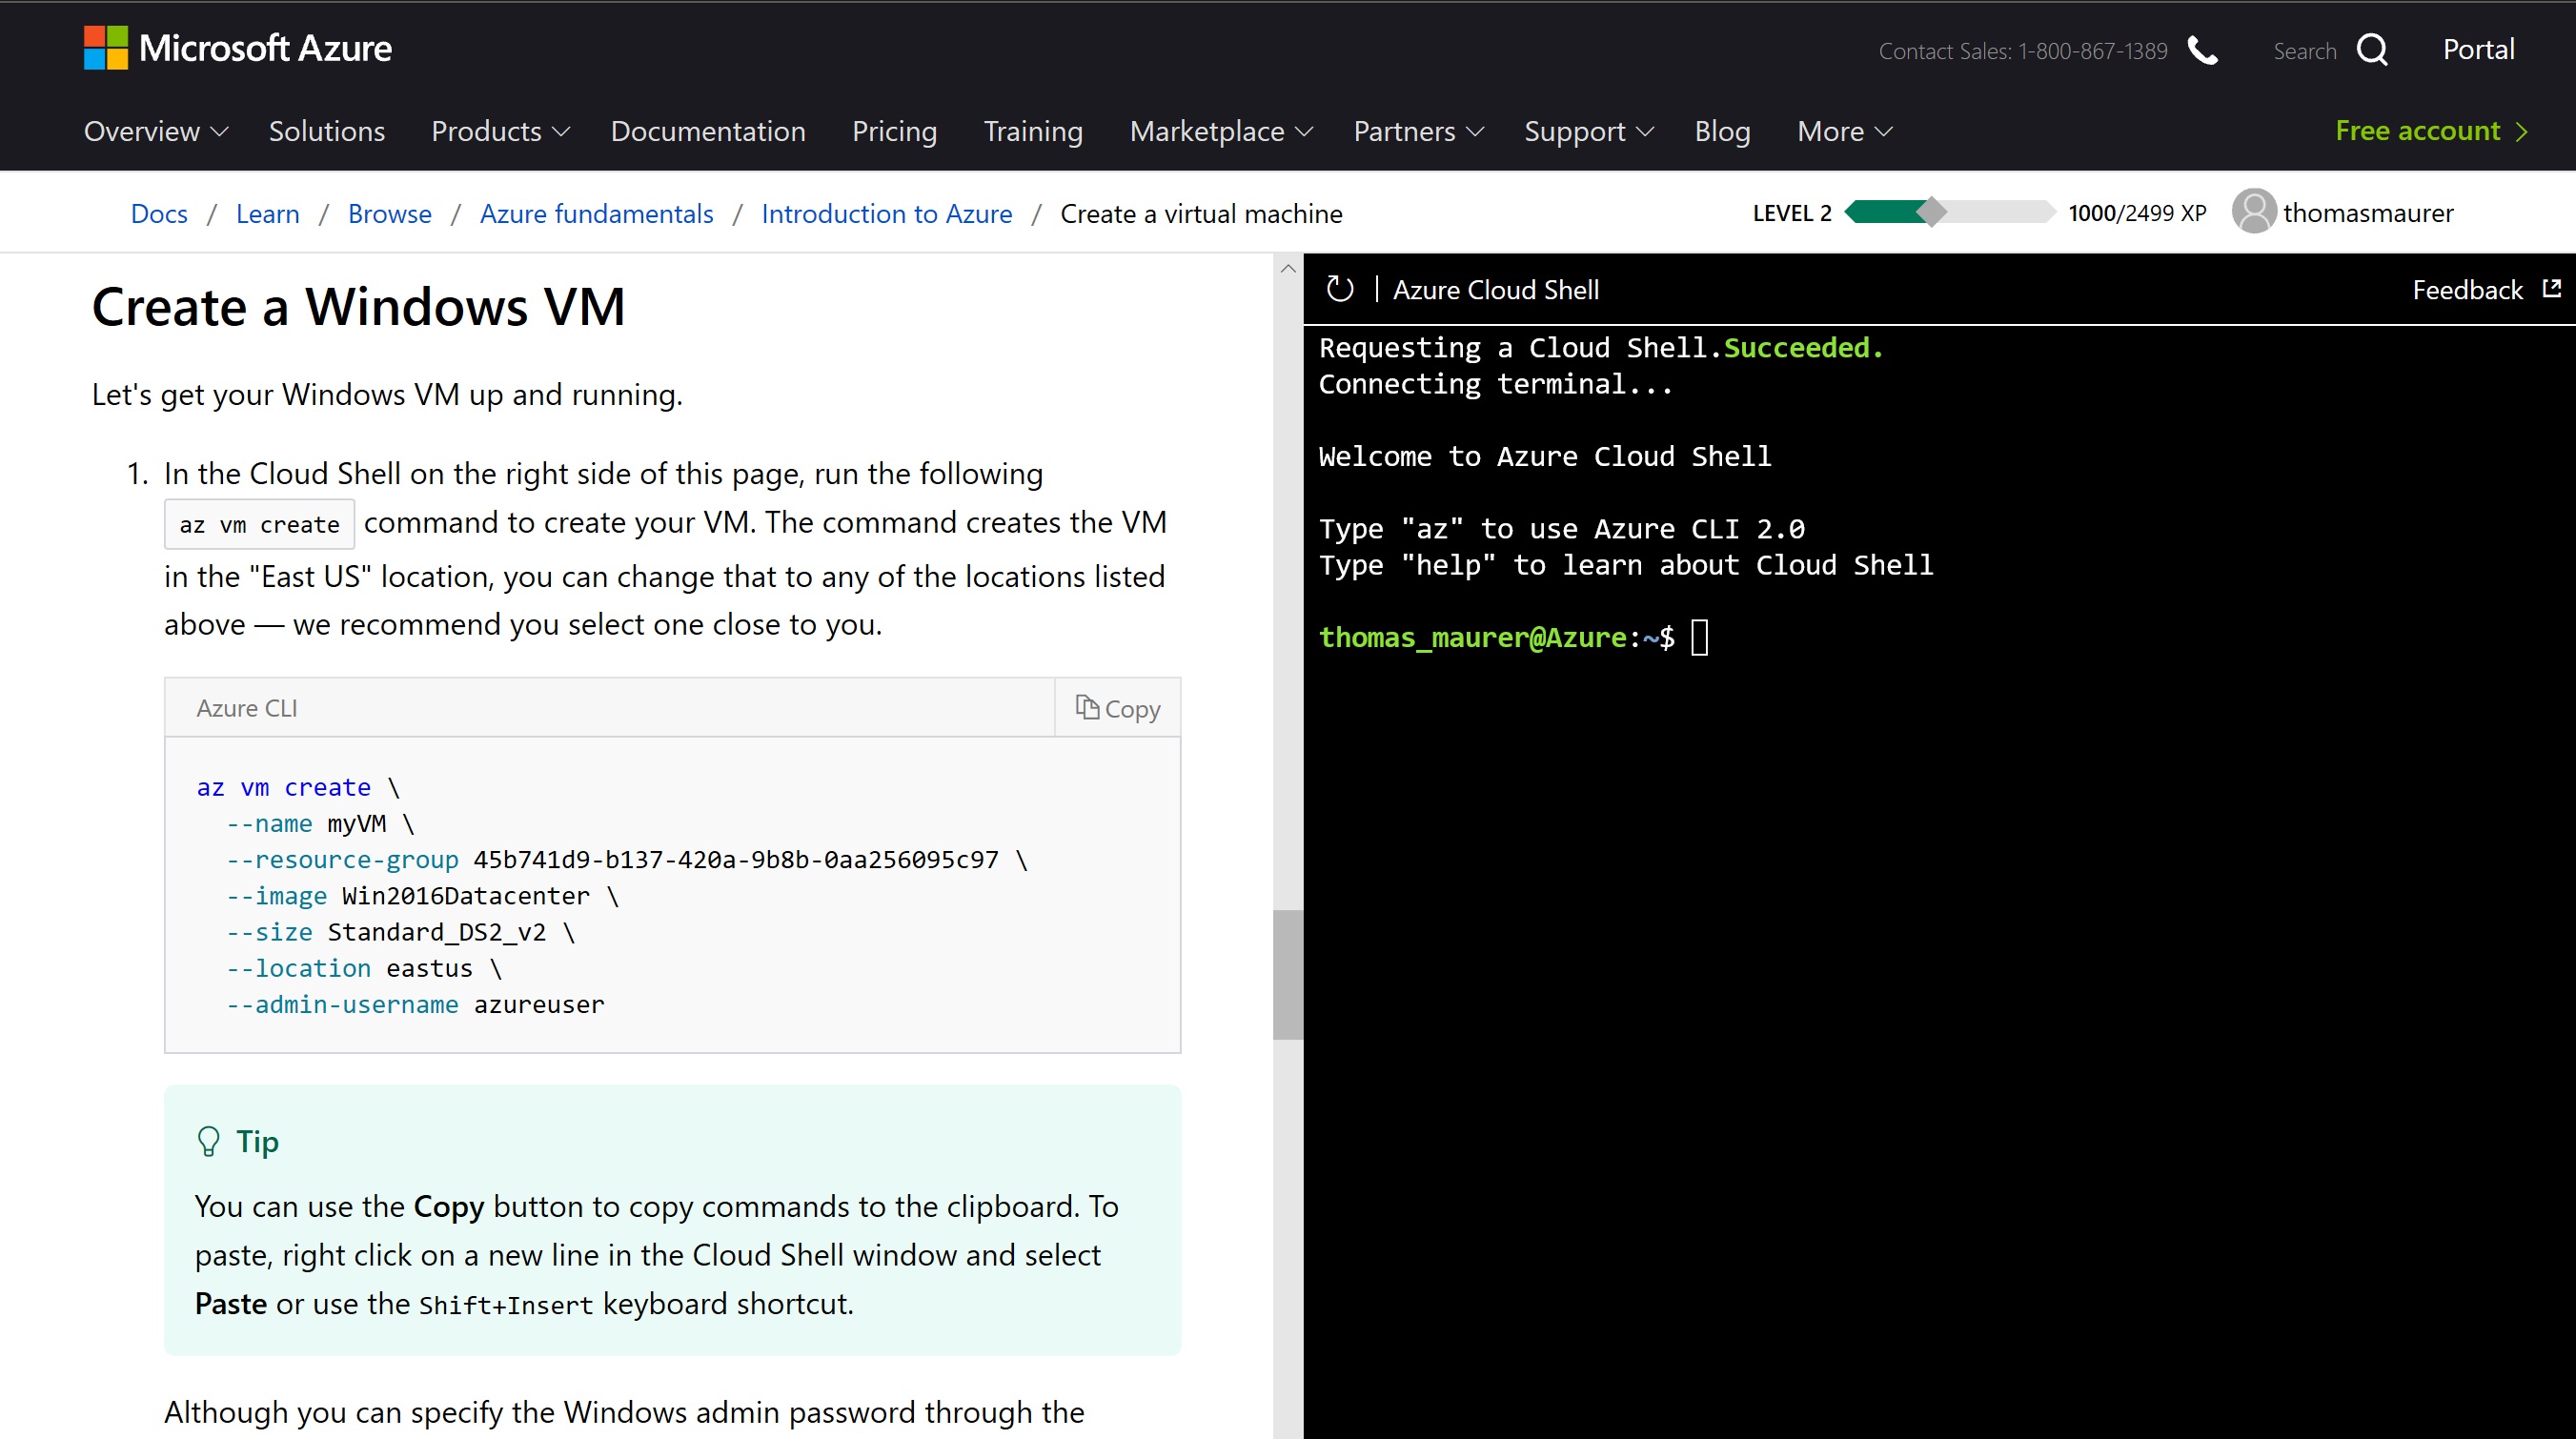
One of the great features of Cloud Shell is that you will find many tools already installed; one of them is SSH. If you want to connect to your VM directly from the Azure portal using SSH, you can fire up Cloud Shell and do so. This makes managing Linux much more comfortable. You can create and deploy and manage virtual machines directly from your web browser.
Cloud Shell Persistent Storage

There are two ways to persists files in the following methods:
- There is a disk image created for your $HOME directory to persist all data and contents within the directory. This disk image is saved on the Azure File Share as acc_<username>.img (example acc_thomas.img) under the following path: https://<storageaccountname>.file.core.windows.net/<filesharename>/.cloudconsole/acc_<User>.img
- Cloud Shell attaches an Azure Files share to persist your data. On first use, it will prompt to create a file share in Azure Files (or attach an existing one) to persist your data across sessions, and Cloud Shell will automatically re-attach it for subsequent sessions. This means all your configuration and files you want to keep; you should store on that persistent share. Per default it mounts clouddrive in your $HOME directory which means it maps /Home/<User>/clouddrive to https://<storageaccount>.file.core.windows.net/<filesharename>
Manage CloudDrive in Cloud Shell

In the bash experience, you have a command called “clouddrive” to manage your CloudDrive, in the PowerShell you have the cmdlets Get-CloudDrive and Dismount-CloudDrive.
Cloud Shell Editor
Cloud Shell comes with common editors like nano and vi, but even cooler is the build in Cloud Shell editor, which will give you a great editor. It is an editor based on the Visual Studio Code open-source project Monaco. Monaco is the same web-standards based editor that powers Visual Studio Code, and the editor is now integrated directly into Cloud Shell. To open the editor, you can type “code” or use the button in the menu.
As you can see, you also get syntax highlighting with various languages and ARM templates.
Manage Azure VMs from Cloud Shell – AzVM Remoting
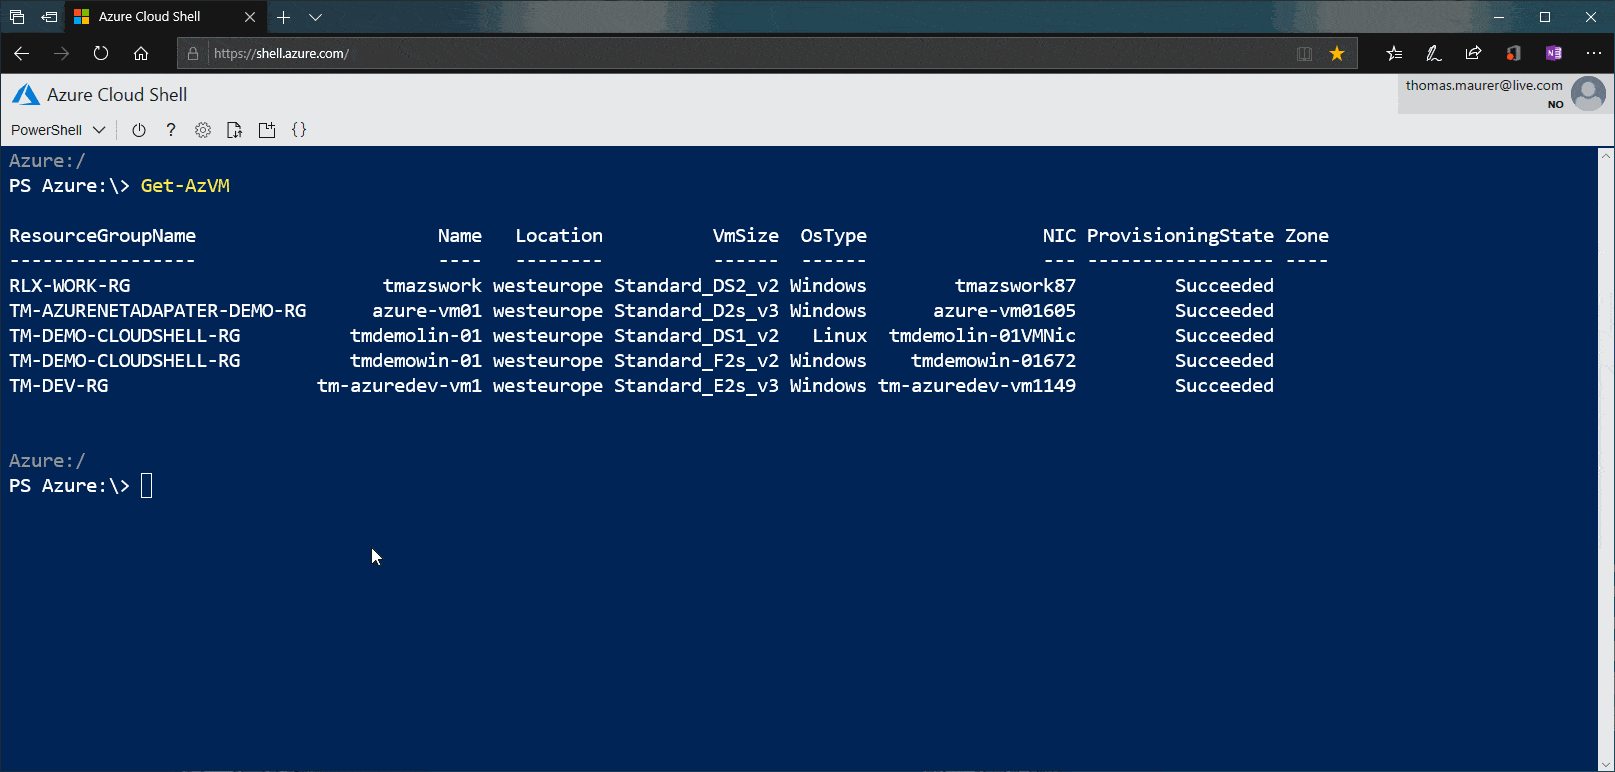
PowerShell in Cloud Shell has some remoting command lets built-in in the PSCloudShellUtility module. These modules allow you to quickly set up remoting into Linux and Windows virtual machines running on Azure.
You can run the Enable-AzVMPSRemoting cmdlet to enable remoting for a specific VM. This will set up and configure the remoting and NSGs in Azure.
# Windows VM
Enable-AzVMPSRemoting -Name tmdemowin-01 -ResourceGroupName TM-DEMO-CLOUDSHELL-RG -Protocol https -OsType Windows

# Linux VM
Enable-AzVMPSRemoting -Name tmdemolin-01 -ResourceGroupName TM-DEMO-CLOUDSHELL-RG -Protocol ssh -OsType Linux
With the Invoke-AzVMCommand, you can send a command to the operating system.
# Windows VM
Invoke-AzVMCommand -Name tmdemowin-01 -ResourceGroupName TM-DEMO-CLOUDSHELL-RG -ScriptBlock {get-service win*} -Credential $cred

# Linux VM
Invoke-AzVMCommand -Name tmdemowin-01 -ResourceGroupName TM-DEMO-CLOUDSHELL-RG -ScriptBlock {uname -a} -UserName thomas -KeyFilePath /home/thomas/.ssh/id_rsa
The Enter-AzVM command allows you to have an interactive session with the virtual machine.
Enter-AzVM -name tmdemowin-01 -ResourceGroupName TM-DEMO-CLOUDSHELL-RG -Credential $cred
For Linux virtual machines you can use password or certificate authentication.
PowerShell Azure Drive

The Azure PowerShell based Cloud Shell has something called the Azure Drive. Azure Drive is based on a PowerShell provider called ShiPS. The Azure Drive lets you navigate through Azure resources just like a file system.
A PowerShell provider allows any data store to be exposed like a file system as if it were a mounted drive. In other words, the data in your data store can be treated like files and directories so that a user can navigate data via cd or dir. SHiPS is a PowerShell provider. To be more precise it’s a provider utility that simplifies developing PowerShell providers.
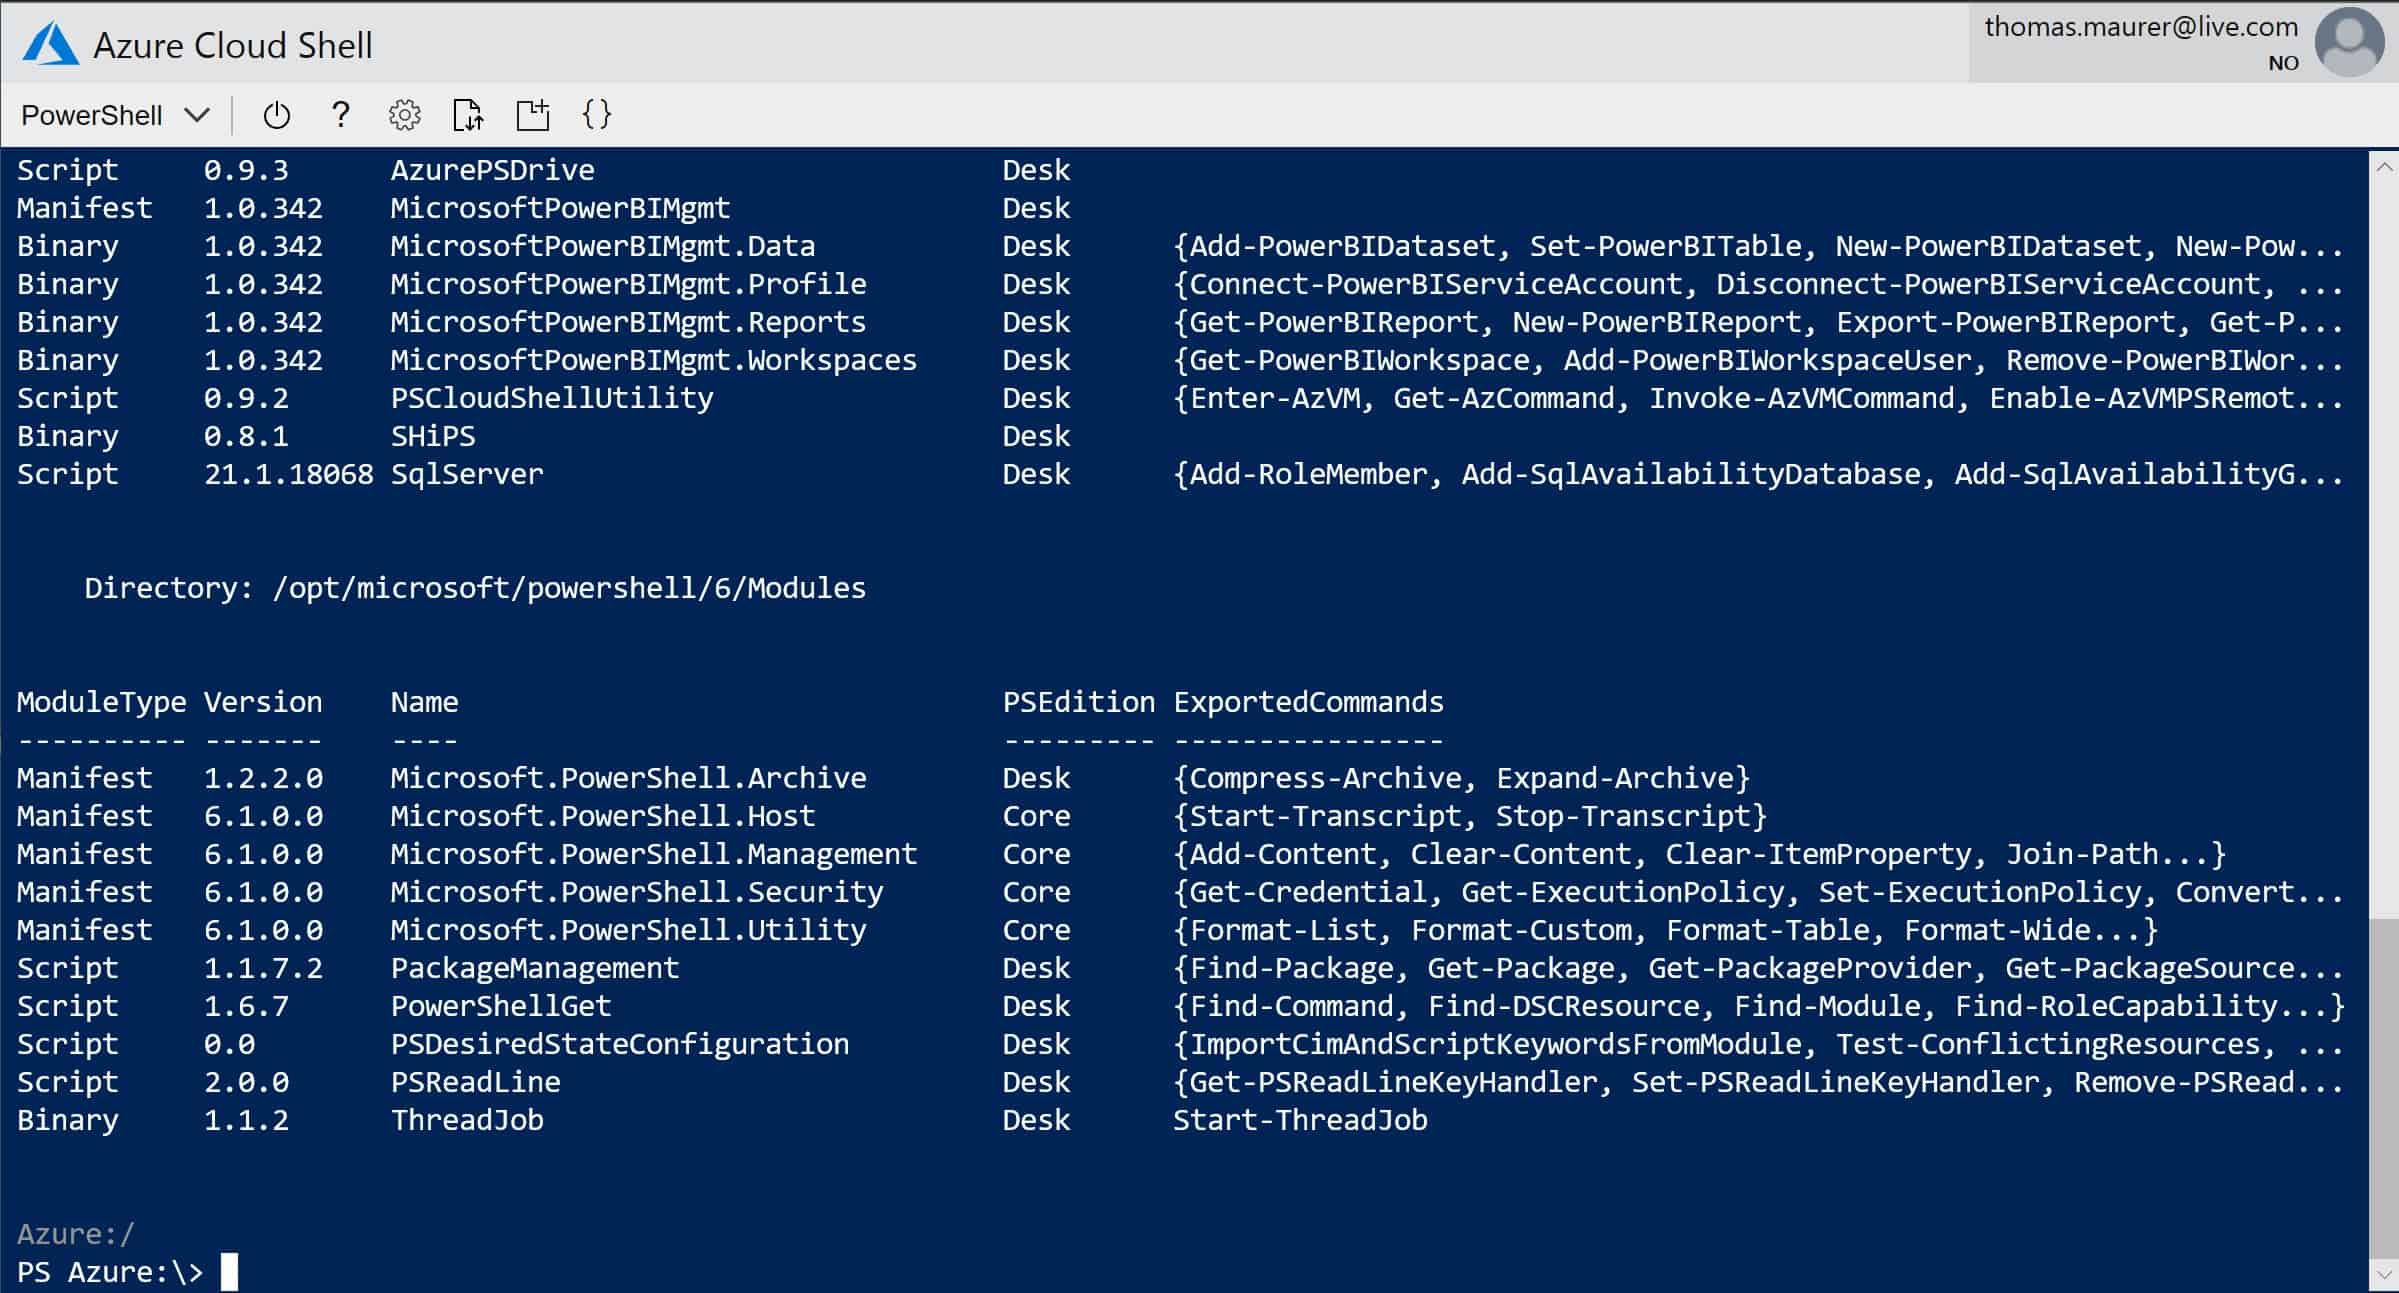
Tools in Cloud Shell
There are not just Microsoft tool preinstalled in the Cloud Shell. Not only do you have multiple alternatives to the Cloud Shell editor, like emacs, Nano or vi installed. There are numerous third-party applications like Git, Terraform, Ansible, Docker, Kubectl and many more third-party tools and languages installed.
Here is a short list of different tools, pre-installed and ready for you to use.
| Category | Name |
|---|---|
| Linux tools | bash |
| zsh | |
| sh | |
| tmux | |
| dig | |
| Azure tools | Azure CLI |
| AzCopy | |
| Service Fabric CLI | |
| Batch Shipyard | |
| blobxfer | |
| Text editors | vim |
| nano | |
| emacs | |
| code | |
| Source control | git |
| Build tools | make |
| maven | |
| npm | |
| pip | |
| Containers | Docker Machine |
| Kubectl | |
| Helm | |
| DC/OS CLI | |
| Databases | MySQL clinet |
| PostgreSql client | |
| sqlcmd utility | |
| mssql-scripter | |
| others | iPython client |
| Cloud Foundry CLI | |
| Terraform | |
| Ansible | |
| Chef InSpec | |
| PowerShell modules | Az |
| AzureAD (Preview) | |
| Exchange Online (In development) | |
| MicrosoftPowerBIMgmt | |
| SqlServer |
On the Microsoft docs, you can find a current and full list of tools.
Manage Office 365 Exchange Online
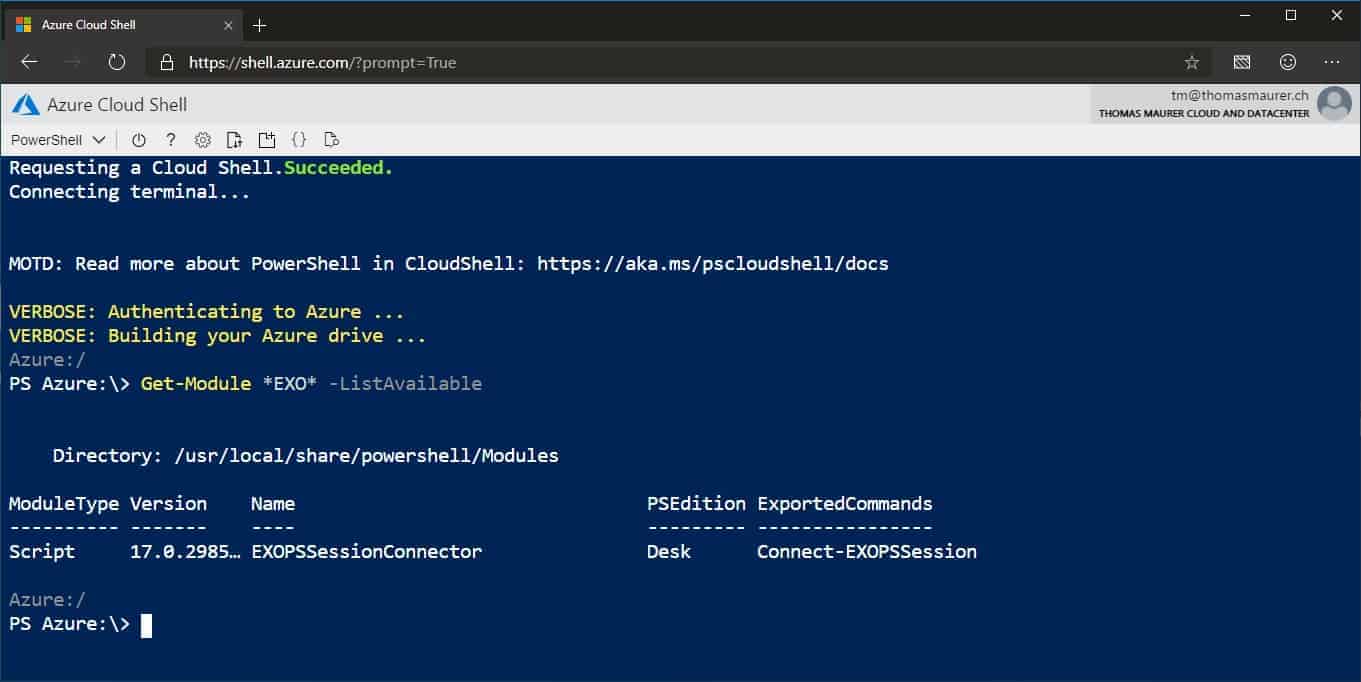
You can not just manage Azure services, there is also a PowerShell module which allows you to manage Office 365 Exchange Online from Cloud Shell.
Cloud Shell in VS Code

If you are working on your device in Visual Studio Code, you can directly open and use Cloud Shell in the Visual Studio Code terminal. This allows you to keep consistency, even if you are working directly in the editor on your device. You can run your scripts and commands straight out of Visual Studio Code. To do that, you will need to install the Azure Account extension for VS Code.
- Press CTRL+SHIFT+P
- Sign in to Microsoft Azure, by typing Azure: Sign In
- A browser window will open to login to Azure
- Press CTRL+ SHIFT+P
- Type Open PowerShell in Cloud Shell or Open Bash in Cloud Shell
- This will connect you directly to your Cloud Shell running in Azure.
Cloud Shell in the new Windows Terminal
Windows Terminal
You might have heard about the new Windows Terminal. The new Windows Terminal is open-source and it comes with a couple of improvements which are coming to the new Windows Terminal like; multiple tabs support, GPU accelerated DirectWrite/DirectX-based text rendering engine, advanced configuration settings, and much more. Besides running shells like PowerShell Core, Windows PowerShell, Windows Subsystem for Linux 2, you can also run Azure Cloud Shell.
Manage additional Microsoft services
As mentioned before, Cloud Shell has a lot of third-party tools installed. It also has some extra Microsoft PowerShell modules and tools to manage not only Azure but also other Microsoft services. This means it becomes a real Microsoft Cloud Shell to manage all sorts of services, servers, applications, and tools.
As of today, you get the following PowerShell modules:
- Azure AD Management (Preview)
- Exchange Online (In development)
- MicrosoftPowerBIMgmt
- SqlServer
Use Git repositories in Cloud Shell
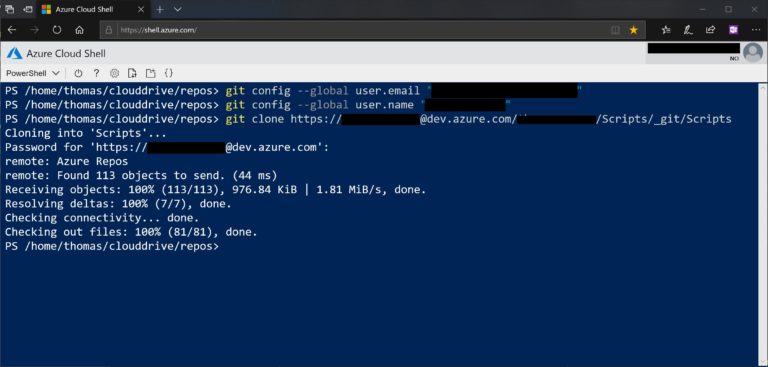
At the beginning of this blog post, I showed you how you can upload and download files. This is great if you want to run a quick script, but if you’re going to work a little bit more serious, you might have a Git repository, where you store your files. I store my personal scripts in an Azure DevOps repository. It comes with Git pre-installed, and you can clone a repo to your cloud drive.
You can also use GitHub or any other repository as long as it is reachable from Azure.
To clone a Git repository, you need to create a personal access token and use it as the username. You can clone the repo like this:
git clone https://<your-access-token>@github.com/username/repo.git
Preview Web Apps with Web Preview
The Azure Cloud Shell Web preview feature allows you to run web applications on the Cloud Shell container instance and preview them before you deploy them. You can run web applications that listen to HTTP requests on the Cloud Shell from port 1025-8079 and 8091-49151.

This will allow you to map a port and access it from your browser. If you want to know more about the web preview feature, check out my blog post.
Azure mobile app

If you have the Azure mobile app for iOS or Android, you can manage your Azure resources directly from your mobile. If you look closer, you will also find the option to run Cloud Shell within the Azure mobile app, which gives you access to the shell from anywhere.
Integration with Microsoft Docs
Another great thing is the direct integration into the Microsoft docs pages. If you are opening the Azure documentation, you will not only find the information, you have a “try it” button, which directly opens up Cloud Shell in the documentation page.
Microsoft Learn
If you want to learn more about Cloud Shell or other Microsoft services, check out the Microsoft Learn platform. This is not only a guide which shows you how to use the specific services; it directly integrates into Microsoft Learn. You can use the following links to learn about Azure PowerShell and Azure CLI:
Costs and Pricing
The great thing, it is free; the costs behind it are coming from the Azure File Share and the storage you consume. Billing is based only on the Azure Files share used to persist your data. Your total costs depend on how much you store, the volume and type of storage transactions and outbound data transfers, and which data redundancy option you choose.
I hope this was useful and that you learned more about Cloud Shell. Try it and if you have any questions, let me know!
Tags: Azure, Azure CLI, Azure Cloud Drive, Azure Cloud Shell, Azure Drive, Azure Portal, Azure PowerShell, AzVM, Bash, Browser, Cloud, Cloud Drive, Cloud Shell, CloudDrive, code, Devops, Docker, Git, Microsoft, Microsoft Azure, Microsoft Cloud Shell, Microsoft Learn, PowerShell, Remoting, SHiPS, SSH, Visual Studio Code, VS Code Last modified: September 22, 2019


This is a great and perfect summary of Cloud Shell! Thanks a lot for sharing this.
I really like the create GIFs. do you have a tool-recommendation for GIF-creation out of screen recording sessions?
Thanks and keep posting,
Patrick
Thanks Patrick!
Yes I use ScreenToGif, it is a fantastic tool. It is free, but I would highly recommend to donate something to it :)
https://www.screentogif.com/
Thomas
Thank you Thomas! That is great! i also had a look into it and of course – a donation will be done anyway :)
Thanks for this post! Great info!
Few things I already know about CloudShell, but “code”, “git”, “dig” and other tools somehow slipped by.
Thank you for the article, great stuff.
[…] Mastering Azure with Cloud Shell via Thomas Maurer […]
Great article, thank you. Is it possible to persist scripts that other team members can access?
Hi Rob
The CloudShell is a personal experience so it is per user. However, there are two options you could do that.
I highly recommend that you create a git repository and store your scripts for your team there. With that, you will also get versioning and your team will also be able to simply update the scripts.
Of course, you can also create an Azure File Share and mount it into all of the cloudshells of your team, in addition to the default cloud drive. However, I would highly recommend you to have a look at the option using a git repository. This can also be a private one hosted on GitHub or Azure DevOps.
Hi Thomas,
I know this post is old but I just stumbled on it now. I find it extremely useful and I glad I found it. Could I suggest if you can put a table of content with links to the corresponding section? It is probably a lot to ask but it makes it easier to navigate and limit scrolling…
Thank you,
L
Hi Lauren
That is a good idea. I will see what I can do :)
HI, I have seen some test exam questions for AZ-900. One of them says you cannot create an Azure VM, using Bash in Cloud Shell. Is this correct ?
I have no idea about the exam question. But you can definitely create VMs from Azure Cloud Shell (using Azure CLI or Azure PowerShell)
Great Info!!!!!, thanks you.
You’re welcome :)
Q. You need to create a new Azure virtual machine from an Android laptop.
Solution: You use Bash in Azure Cloud Shell.
Does this meet the goal?
A. Yes
B. No
Answer : B
HOW is this Correct ????????
As i understand we can create
Hi Vishal, where did you find this question and answer? :)
Hi I found that question and answer in the book “Microsoft AZ-900 Exam Preparation” by Georgio Deccache.
I understand that since Azure Cloud Shell is web base and can be access by a web browser, the answer should be yes, right?
In my opinion, it should be clearly yes. Because first you can run Cloud Shell in the browser correct and there is even an Azure app that you can run on your mobile phone, where Azure Cloud Shell is integrated.
Very well explained, thank you.
Q: How does the cloud shell connect to my azure infra? My guess is using public IP, but if I have to say SSH to a VM that doesn’t have public IP, will it work from cloud shell?
Also does the portal.azure and shell.azure have the same public IP?
If you are speaking about the Remote Management, then you are right you can access the VMs currently only if they have a public IP address assigned.
Hi ,
Can you use Any module available with Microsoft?
Can you run AZureAD module?
Only modules that are working with PowerShell Core 6 or PowerShell 7. (.NET Core). There is an Azure AD Preview version already installed in Azure Cloud Shell.
Hi
great post!
i have one question related to starting azure cloud shell from vs code for CSP admin user.
when i go from the CSP portal>>>Azure Management portal for a tenant, i can start Cloud Shell directly in the correct context
but when i start Cloud Shell locally i can’t get the same user context
i have tried to use:
az login –tenant azuretennant –username [email protected]
after login i get the list of subscription, and the subscription i wan’t to work with is listed.
but i can’t work with resources like i do via the web session.
i have also tried to use: az account set –subscription
but the issue remains.
any help on how to get the same context from locally started cloud shell would be appreciated
Hi Thomas, thanks for the great article, i am trying to run a script from within Cloud Shell to clean my diagnostics logs table, i have uploaded it to my $home dir but when running it, i get this message: “WARNING: Windows Azure PowerShell module not found! Please install from http://www.windowsazure.com/en-us/downloads/#cmd-line-tools“. Do you know what’s happening?
since it is referencing windowsazure.com, how old is that PowerShell script? Maybe it still uses an older version?