With the release of Windows Server 2016 Technical Preview 4 Microsoft allows you to use Windows Server Containers and Hyper-V Containers on Nano Server. In this blog post I will cover how you can setup a Nano Server on Hyper-V and let it use as a Container Host for your Windows Server and Hyper-V Containers inside this Nano Server VM. I already described how you can create a Nano Server VHDX file and how you can manage your Nano Server using PowerShell or PowerShell Direct so you can use this quick guide to set this up.
Create Nano Server Container Host VM
Create a new Nano Server Container Host VHDX file using the following features:
- GuestDrivers (VM Drivers for Hyper-V)
- Containers
- Compute (Hyper-V role, if you want to run Hyper-V Containers)
- ReverseForwarders

# Change Working Directory
cd C:\NanoServer

# Import Module
Import-Module .\NanoServerImageGenerator.psm1

# Create Nano Server Image
New-NanoServerImage -MediaPath D:\ -BasePath .\Base -TargetPath '.\NanoImage\NanoConHost.vhd' -EnableRemoteManagementPort -GuestDrivers  -ComputerName NanoConHost -Containers -Compute -MaxSize 60GB -ReverseForwarders
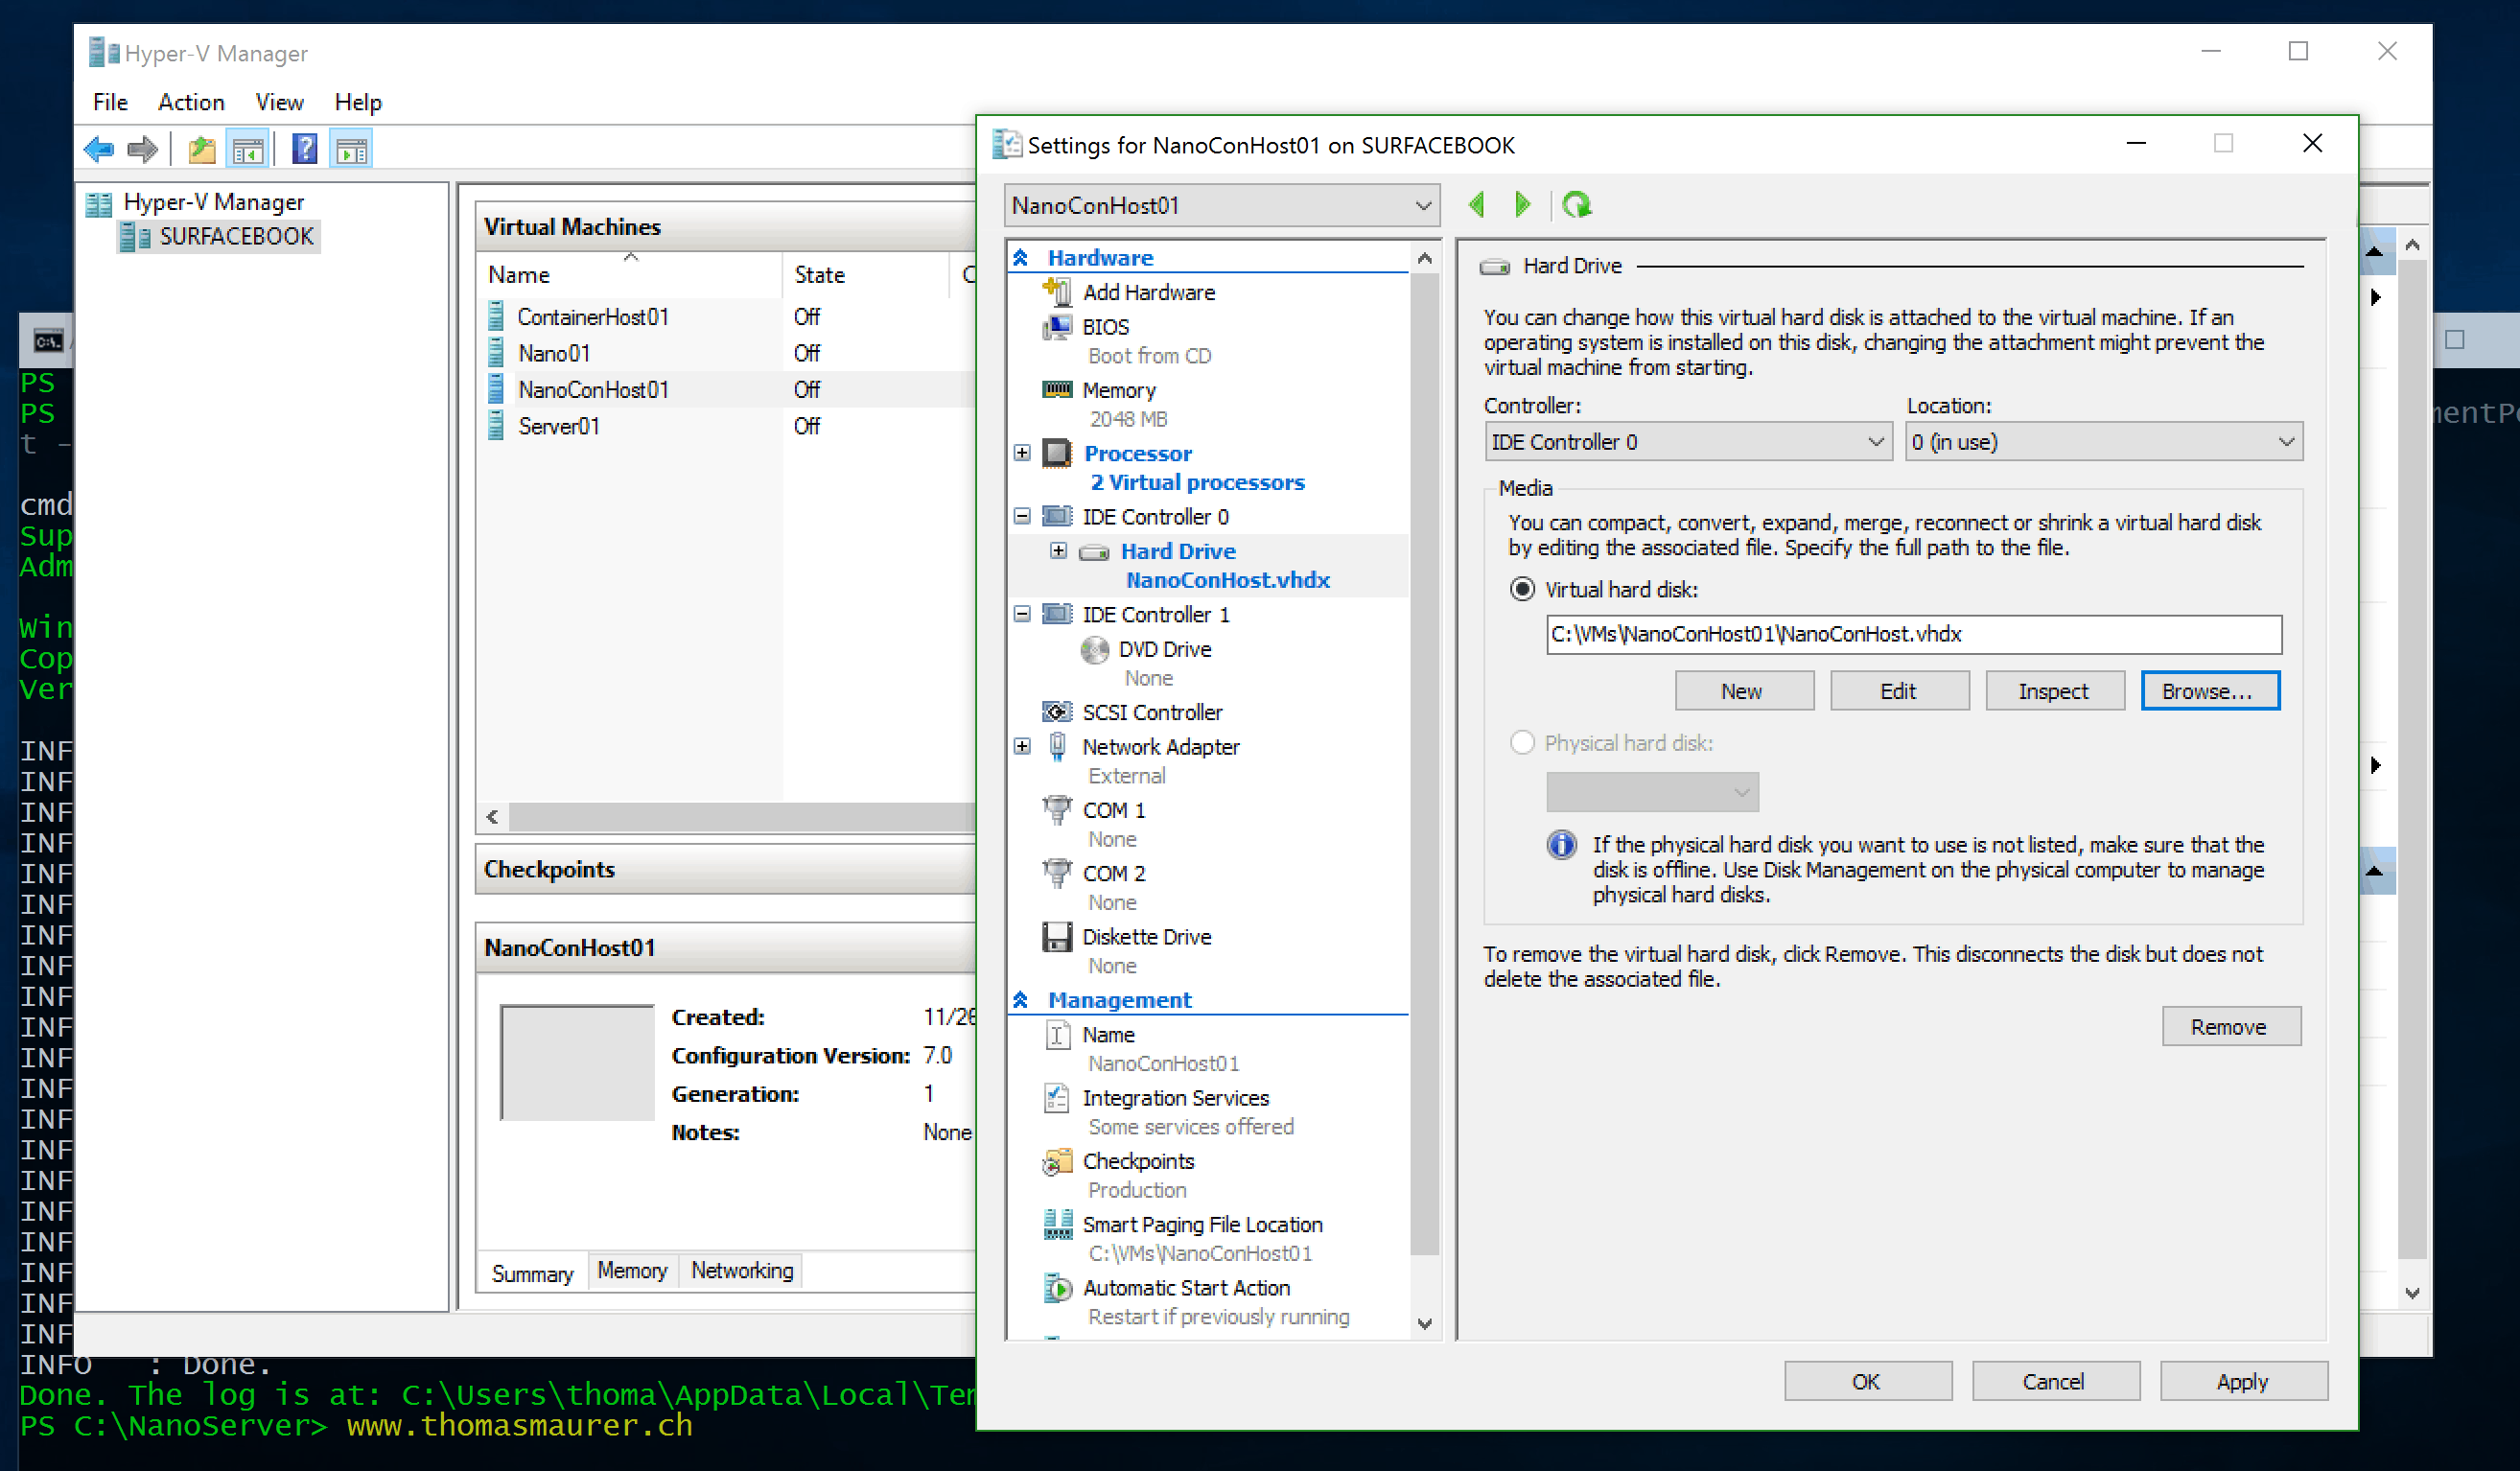
This will create a new VHDX and you can create a new Virtual Machine. The Virtual Machine you create has to have at least 2 vCPUs.
If you want to use Hyper-V Containers inside this Virtual Machine, you have to setup the Virtual Machine to use Nested Virtualization. For this you can use this PowerShell command:
Set-VMProcessor -VMName "NanoConHost01" -ExposeVirtualizationExtensions $true
Configure Nano Server Container Host
Startup your Nano Server Virtual Machine and use PowerShell remoting to connect to it:
Enter-PSSession -ComputerName 192.168.1.34 -Credential (Get-Credential)

You have to configure networking for your container host, you can create a External Switch or a new NAT Switch. If you use a new NAT Switch you can use the following commands:
# Create Virtual Switch for your Containers
New-VMSwitch -Name "Virtual Switch" -SwitchType NAT -NATSubnetAddress 172.16.0.0/12

# Set NAT Configuration
New-NetNat -Name ContainerNat -InternalIPInterfaceAddressPrefix "172.16.0.0/12"
Now you can download the Nano Server Container Image to your Container Host, so you can create new Containers based on this Image.
# Download and Install Nano Server Image
Install-PackageProvider ContainerProvider -Force

Find-ContainerImage

Install-ContainerImage -Name NanoServer -Version 10.0.10586.0 # Get Container Image should list the Nano Server Image

Get-ContainerImage
Now you can start using Containers inside your Nano Server Container Host.First thing you may notice is how fast and light weight everything is. For example, on my Surface Book it takes 7-8 seconds for the first initial boot of my Nano Server VM and new containers are created and started in less than a second. I really think that the concept of Nano Server and Container will bring a lot of benefits which will make both solutions a great success. When you deploy new servers today it takes several minutes until they are ready, with Nano Server it only takes seconds. If you copy for example a Windows Server Full Installation VHD you copy around 12GB, with Nano Server you copy around 400-500MB.
Tags: Container Host, Containers, Hyper-V, Hyper-V Containers, Microsoft, Nano Server, PowerShell, Virtualization, Windows Containers, Windows Server, Windows Server 2016, Windows Server Containers Last modified: June 26, 2019