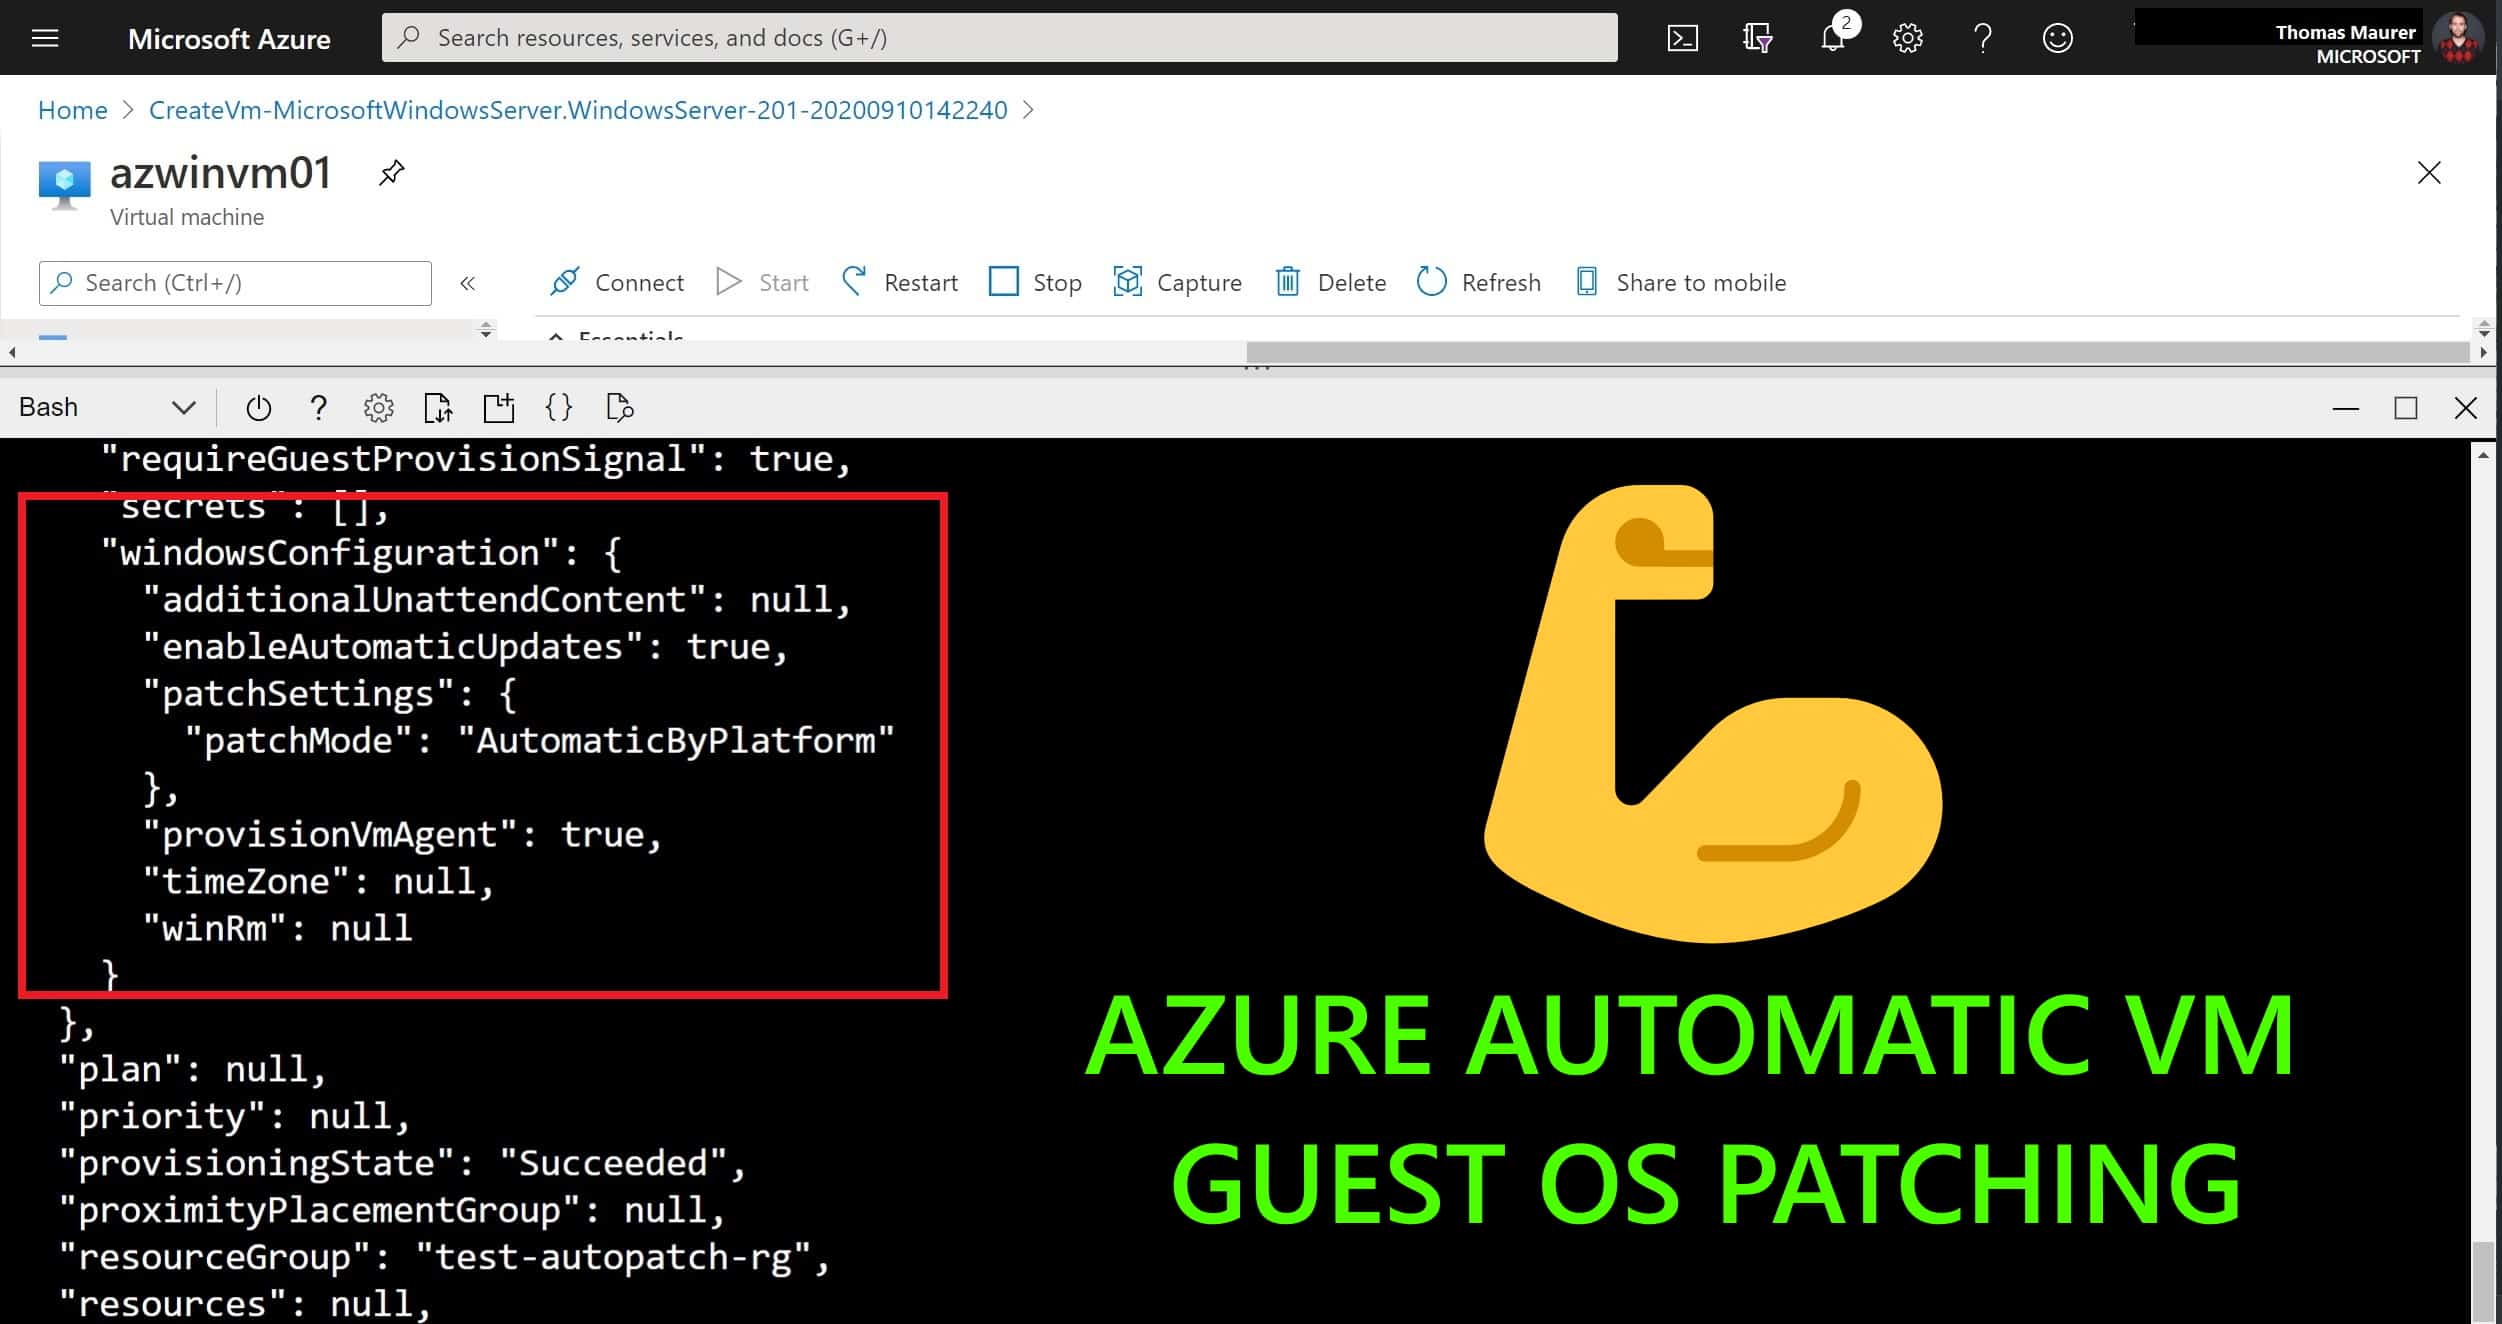
How to configure Azure Automatic VM guest OS patching
If you want to keep your Azure virtual machines (VMs) up-to-date, then there is a service called...
Learn Windows Server Hybrid and Azure IaaS VMs
A couple of weeks back I promoted a post about how you can learn about Windows Server on Azure and a post on ITOpsTalk for New Microsoft...
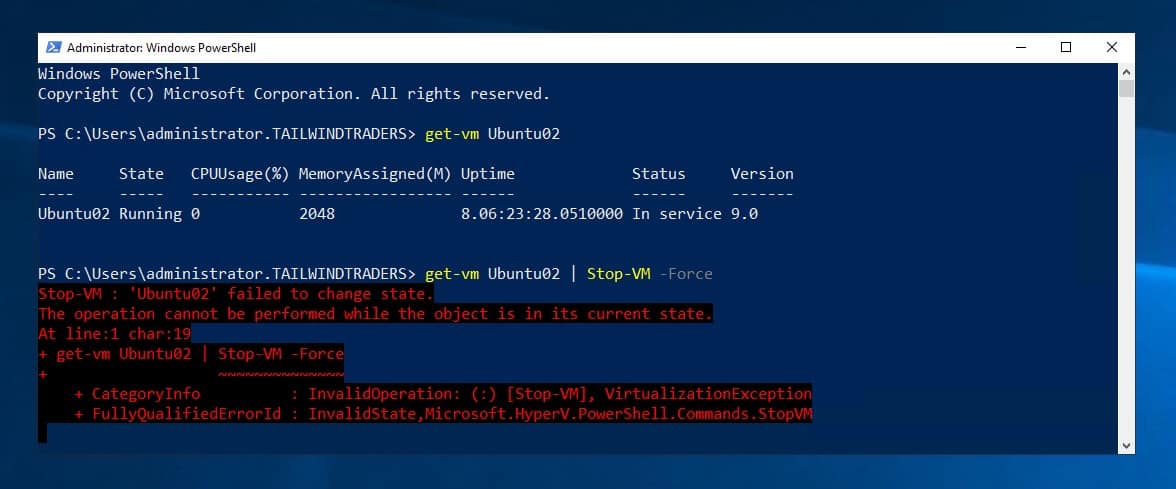
Force Hyper-V Virtual Machine VM to turn off
In this blog post, we are going to have a look at how you can force a Hyper-V virtual machine (VM) to turn off using the HCSDiag tool. A...
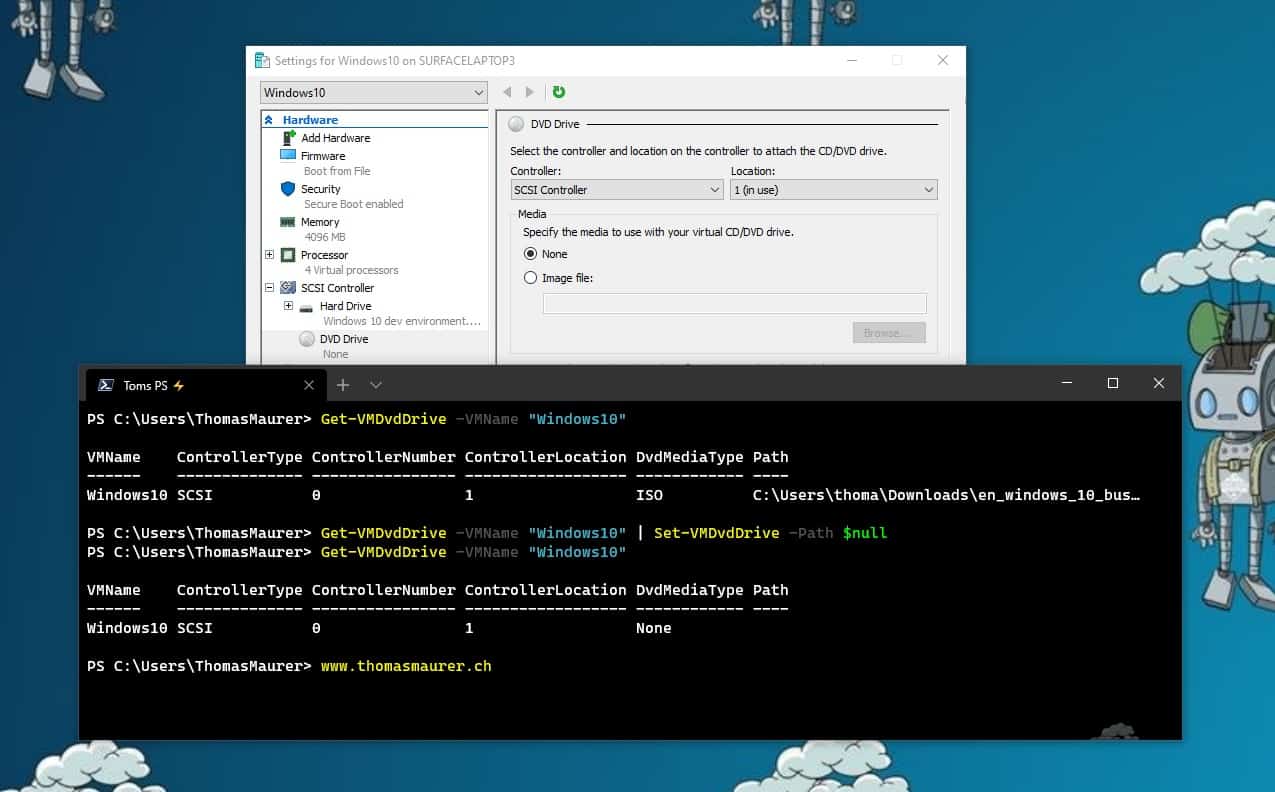
Eject ISO from Hyper-V VM using PowerShell
This is one of these quick and dirty blog posts mostly as a note for myself. Hyper-V offers the...
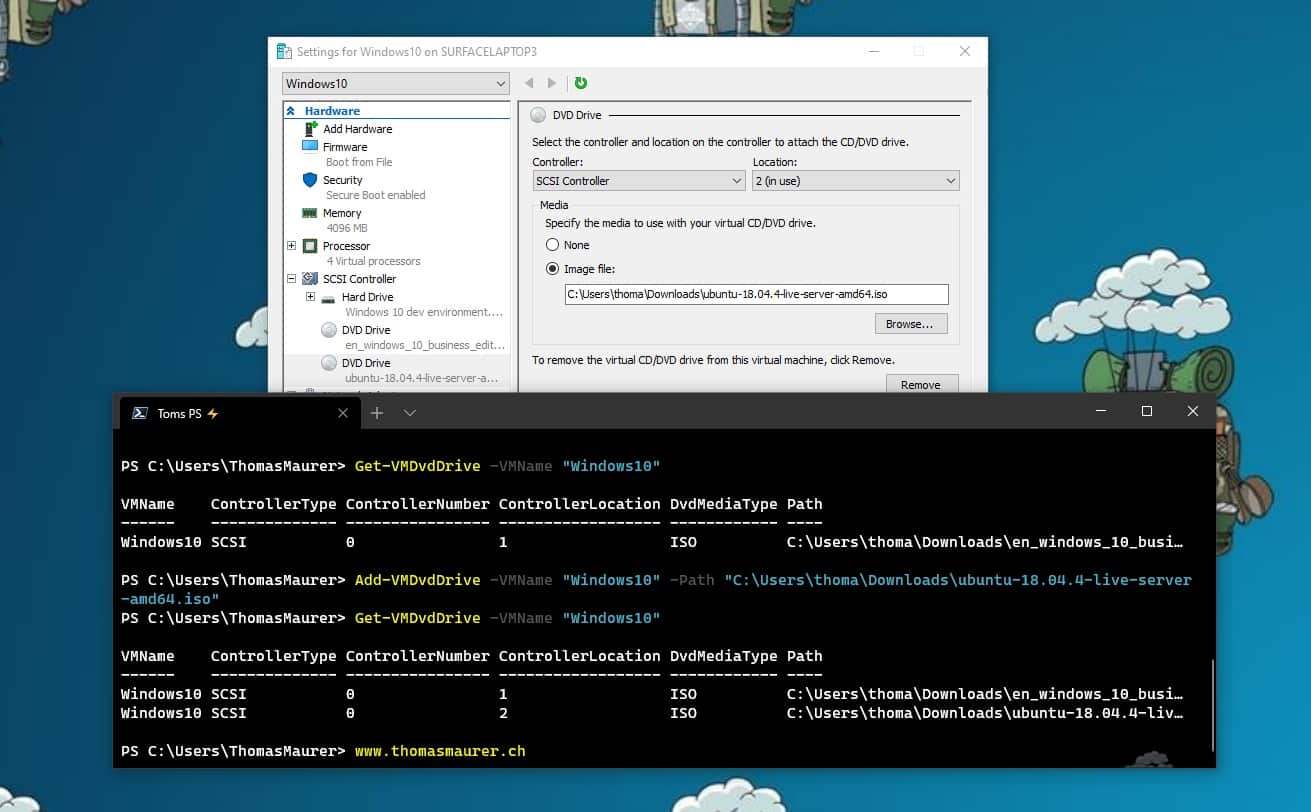
Add ISO DVD Drive to a Hyper-V VM using PowerShell
Hyper-V offers the capability to add an ISO image to a virtual CD/DVD drive and you can use Hyper-V Manager to do that, or you can also use...
Learn about Windows Server on Microsoft Azure
As many of you know, Microsoft Azure is the best cloud to run Windows Server workloads. Last week the team published two new Microsoft...
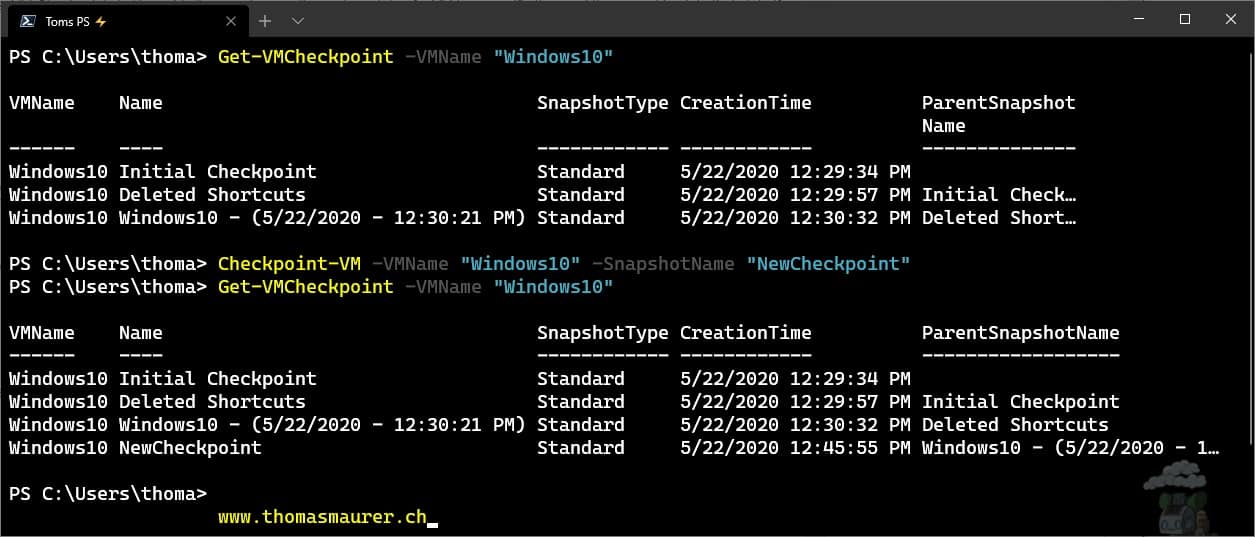
How to Manage Hyper-V VM Checkpoints with PowerShell
In this blog post we are going to have a look at how you can create, manage, apply, and remove VM...
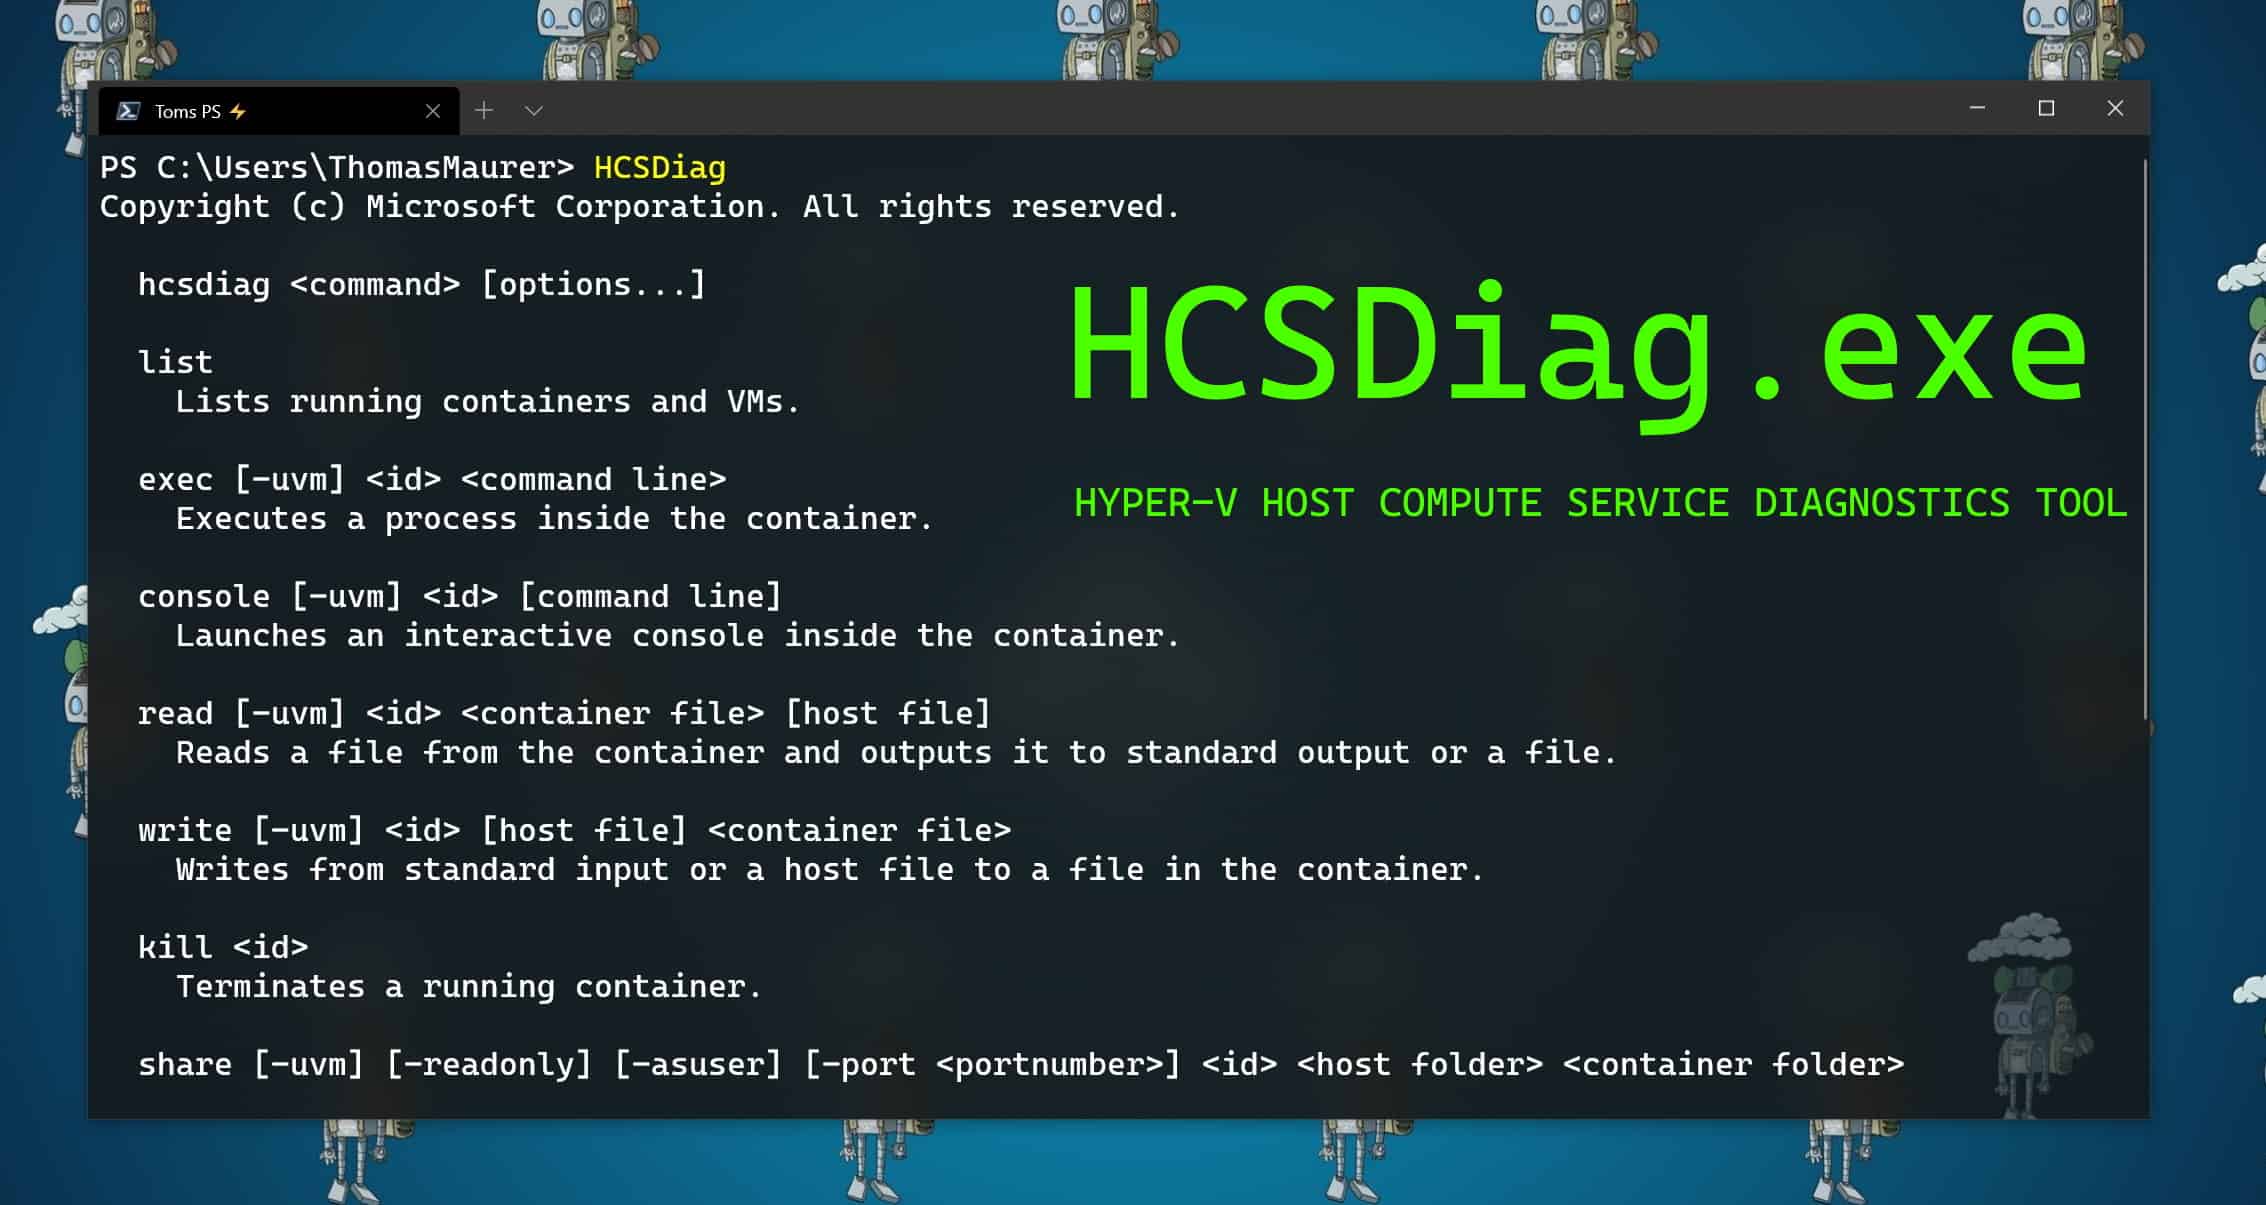
HCSDiag.exe – Hyper-V Host Compute Service Diagnostics Tool
As you know, Hyper-V is not just a server virtualization software anymore. Today, you can find Hyper-V technology across different...
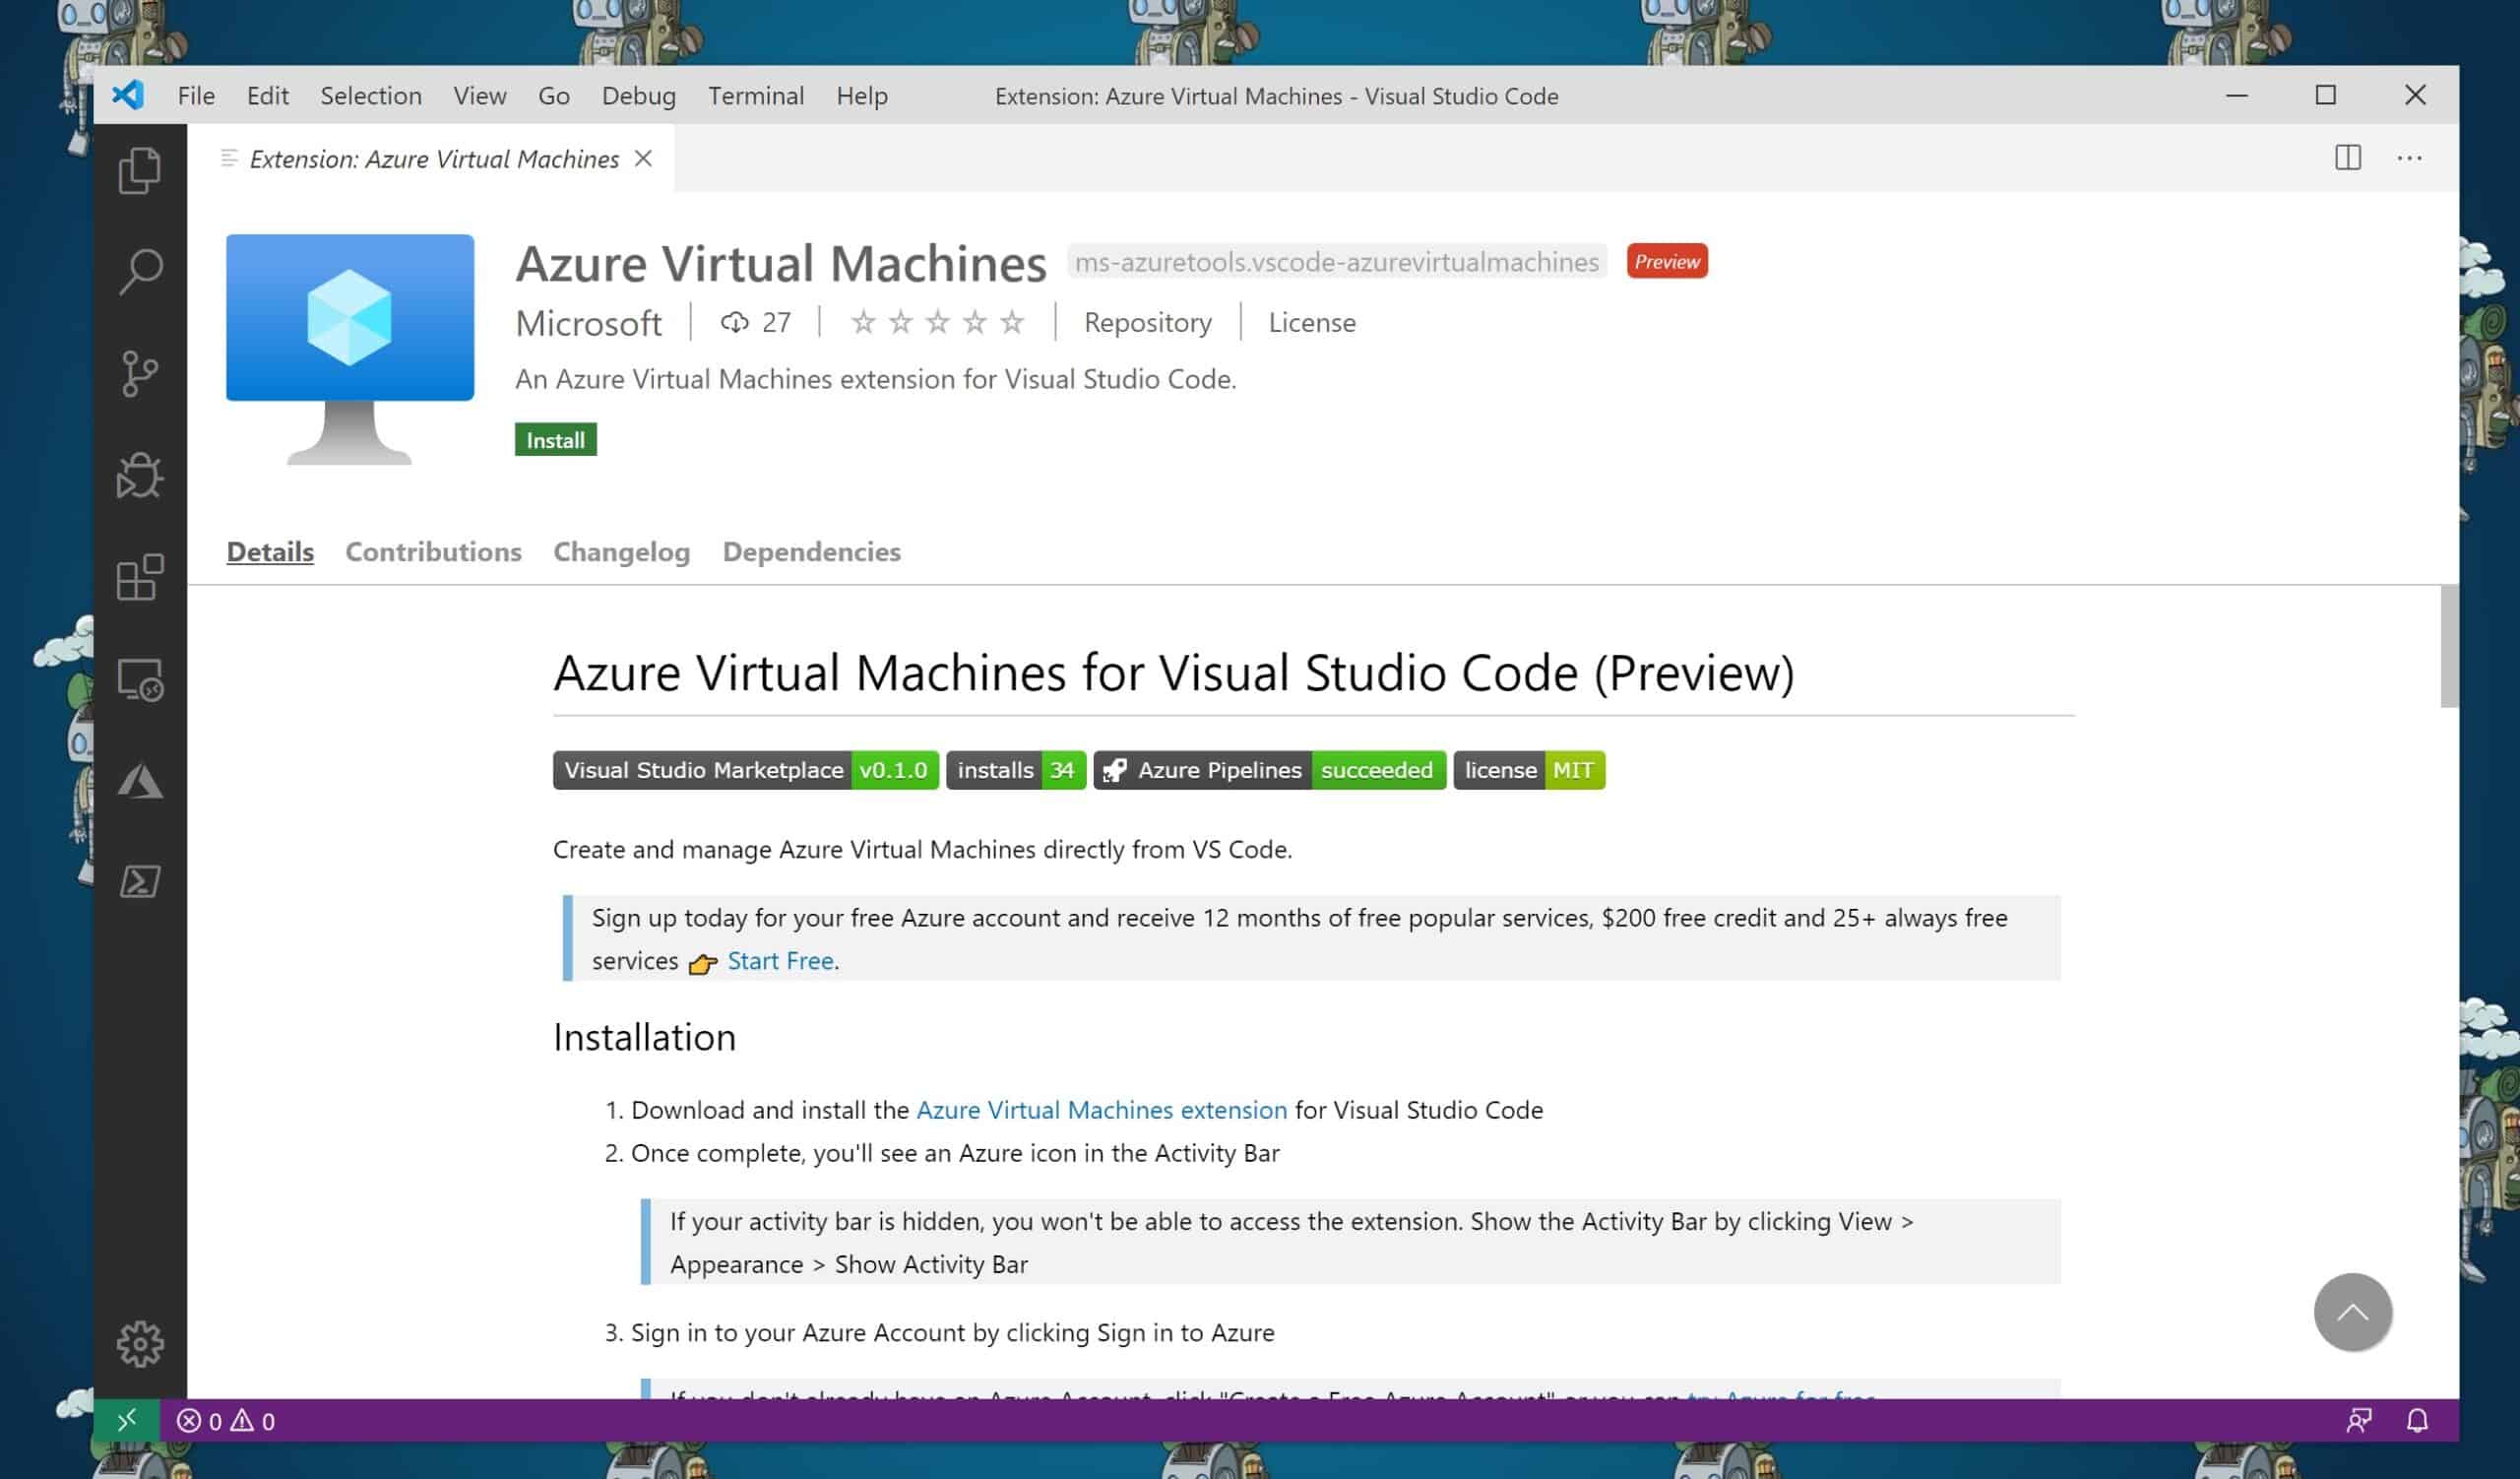
Create and Manage Azure VMs from VS Code
With the new Azure Virtual Machines (VMs) extension for Visual Studio Code (VS Code), you can now create and manage Azure VMs directly from...
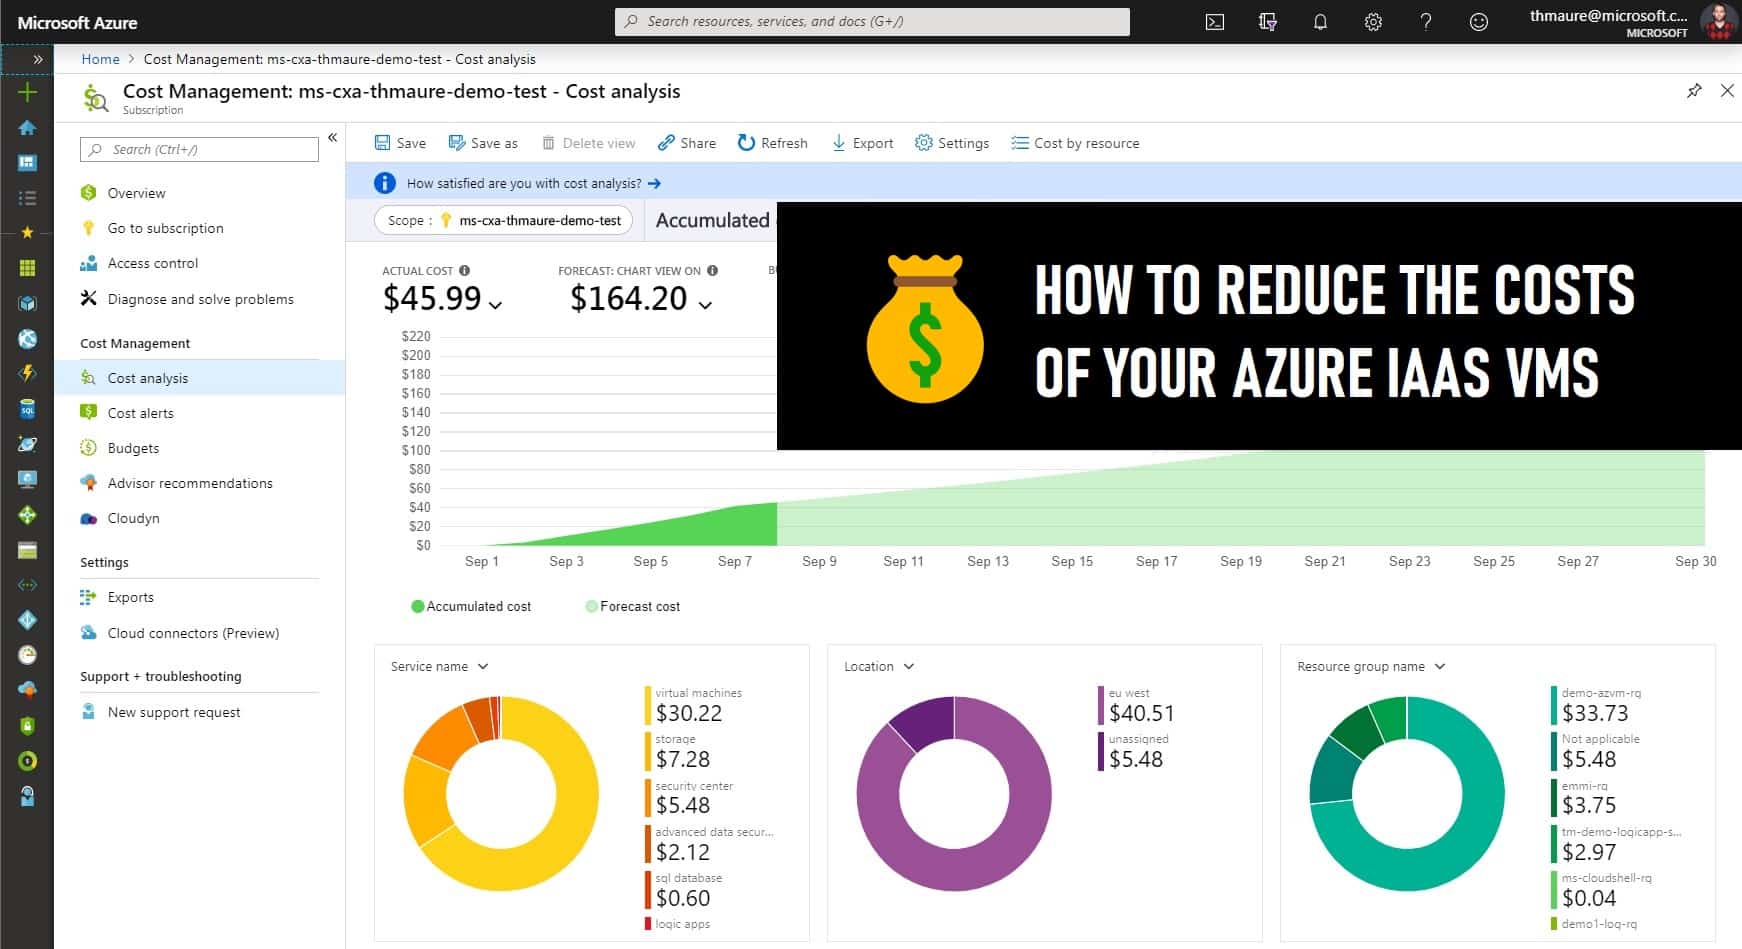
How to Reduce the Costs of your Azure IaaS VMs
Azure Infrastructure-as-a-service (IaaS) offers significant benefits over traditional...


