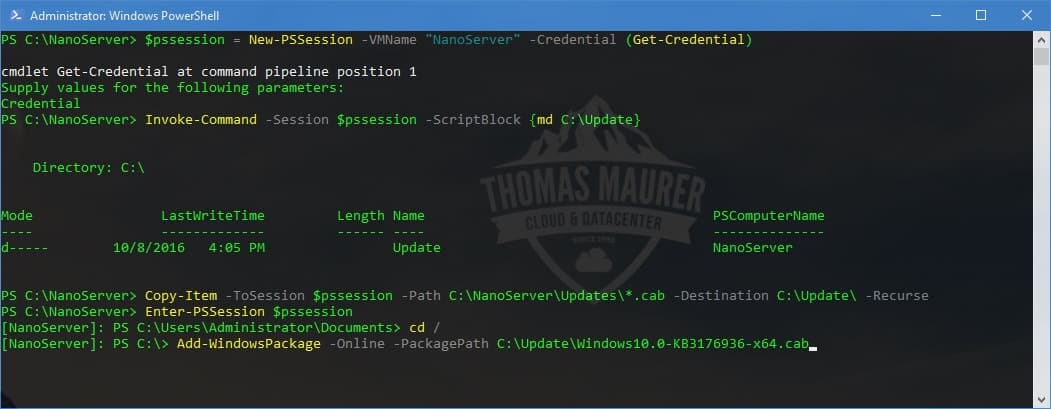
How to install Updates on Nano Server
Microsoft just released Windows Server 2016, which comes with a new deployment option called Nano...
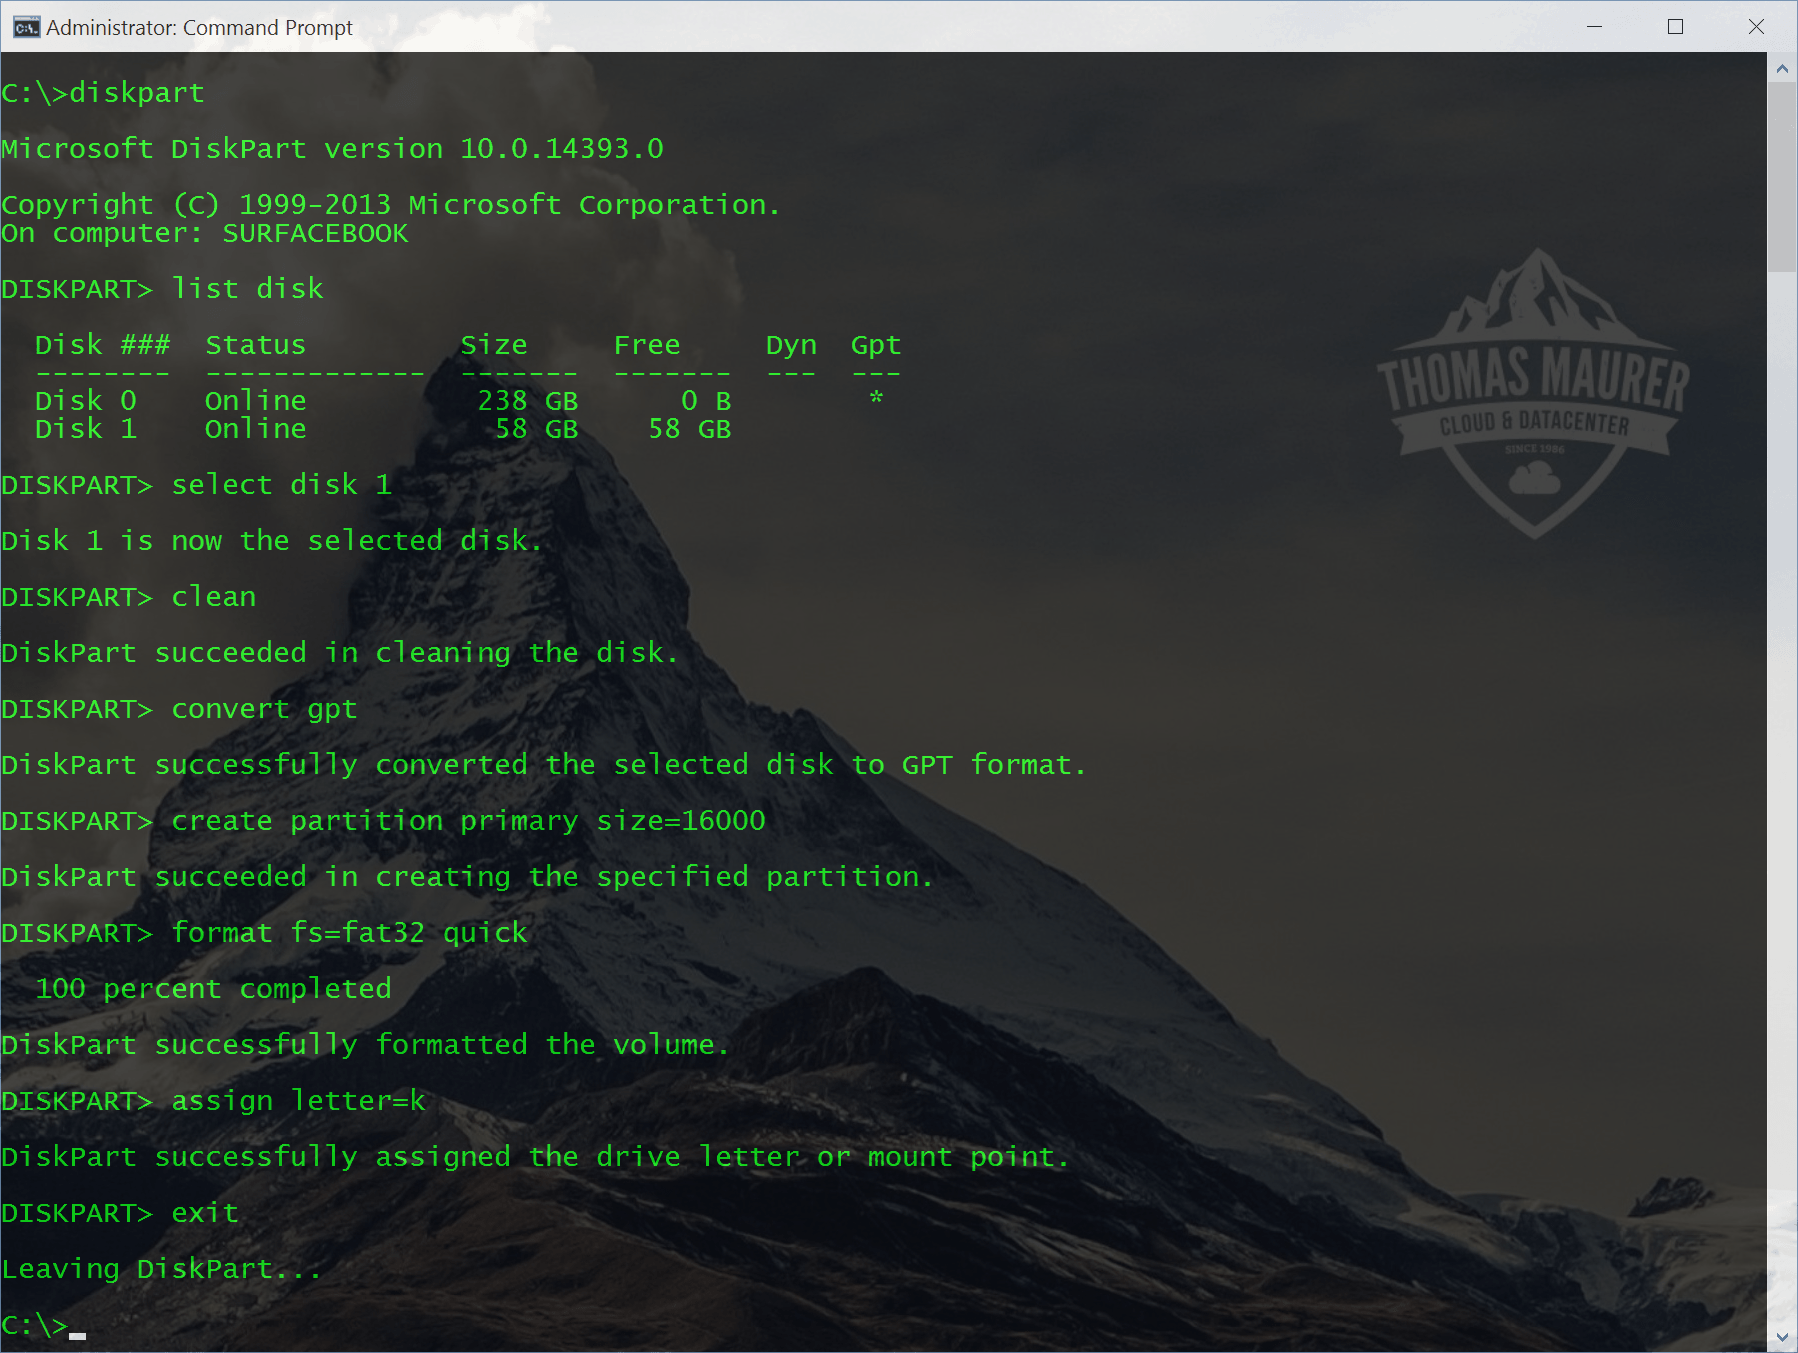
Create a USB Stick for Windows Server 2016 Installation
If you have download the latest version of Windows Server 2016 you can create a USB stick to install it on a physical server. This blog...
Add drivers to Windows 8 ISO Image
I already did a post how you can add drivers to your Windows 7 image with command line tools like dism and imagex. With Windows 8 you...
Add drivers to Windows Server 2012 ISO Image
I already did a post how you can add drivers to a Windows Server 2008 R2 installation image with...
Cisco UCS Hyper-V Cluster – Create Hyper-V Image for Blade Servers – Part 2
We use Microsoft Hyper-V Server 2008 R2 as Operating System for our Cisco Blade Notes. The Cisco UCS does need some special drivers which...
Add Drivers to Windows Installation ISO
If you have a Windows 7 or even a Windows Server 2008 R2 Server ISO file and you need to add drivers to this ISO file, this little how-to...
HowTo: Install Roles and Features Windows Server 2008 R2 Core (Shell)
This Guide should help you to install Roles and Features on Windows Server 2008 R2 per shell or on...


