Configure CSV Cache in Windows Server 2012 R2
In Windows Server 2012 Microsoft introduced CSV Cache for Windows Server 2012 Hyper-V and Scale-Out...
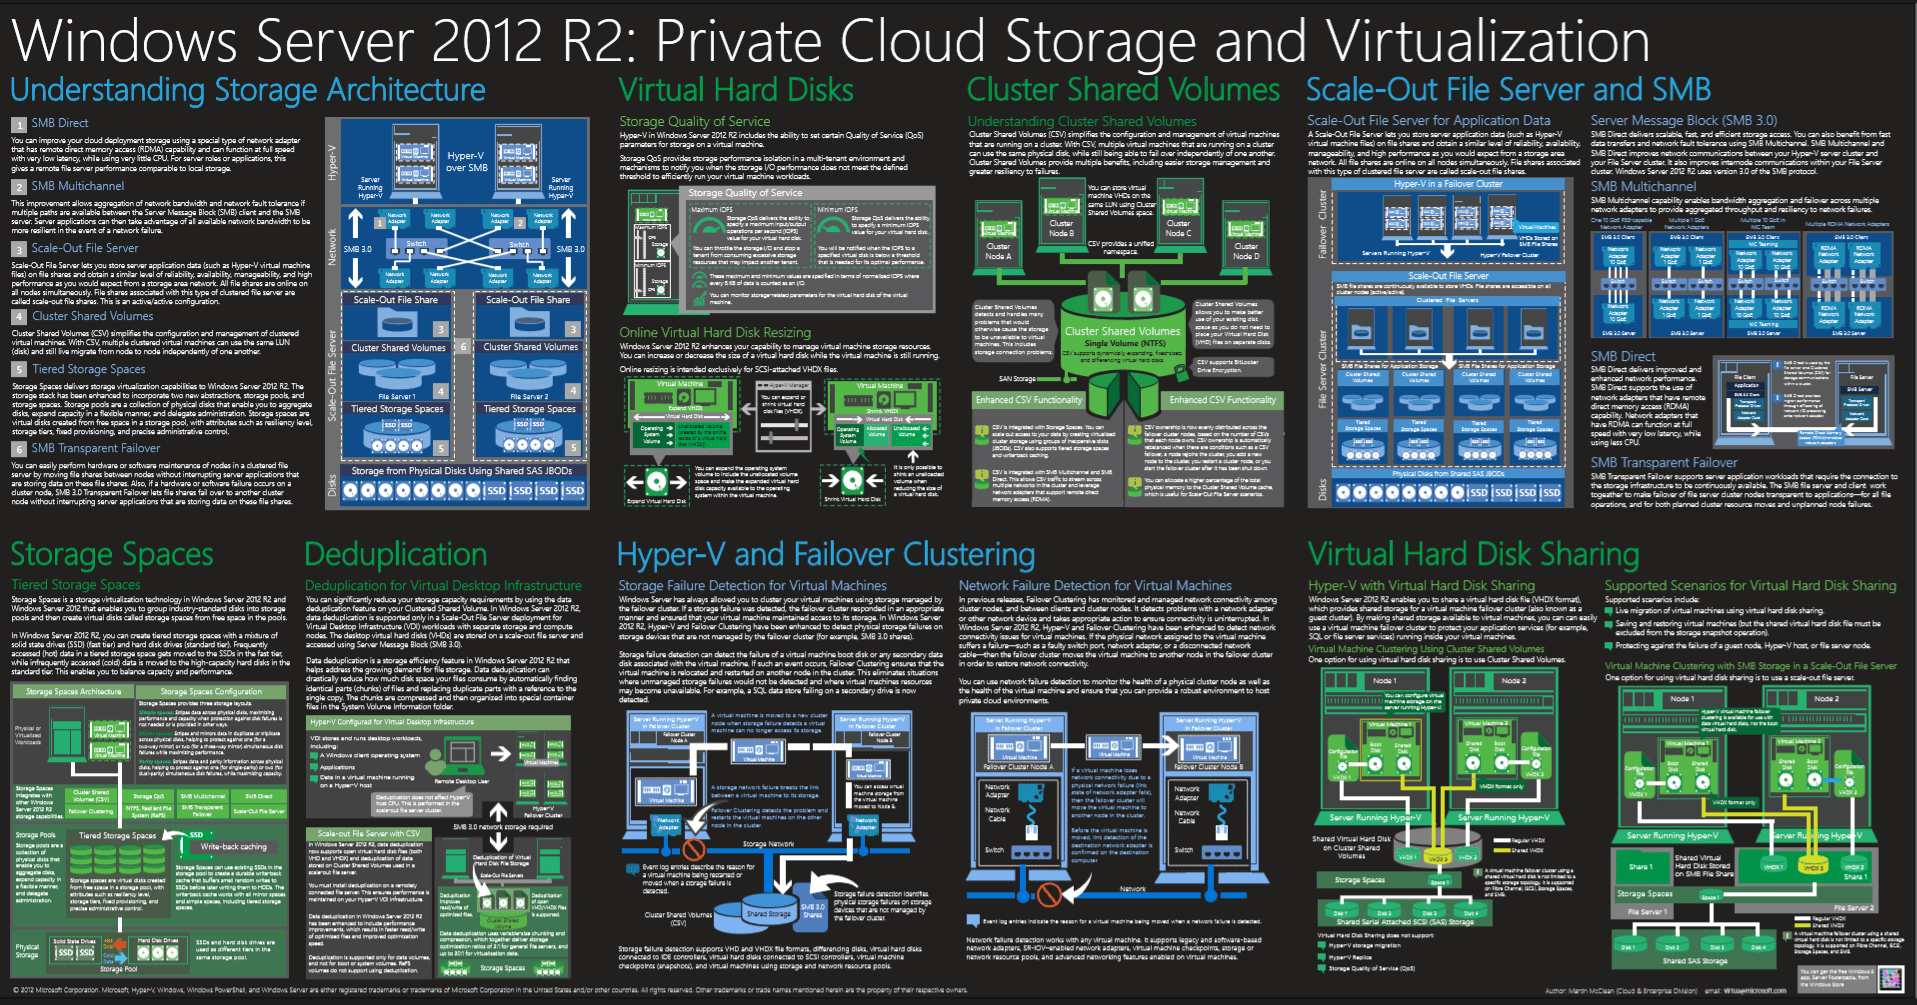
Windows Server 2012 R2 Private Cloud Virtualization and Storage Poster and Mini-Posters
Yesterday Microsoft released the Windows Server 2012 R2 Private Cloud Virtualization and Storage Poster and Mini-Posters. This includes...

Hyper-V over SMB: Scale-Out File Server and Storage Spaces
On some community pages my blog post started some discussions why you should use SMB 3.0 and why you should use Windows Server as a storage...
Altaro launching Hyper-V Backup 3.5 Beta with Windows Server 2012 support
Today Altaro is launching the public beta of Altaro Hyper-V Backup 3.5 with a contest where...
Windows Server 2012 Hyper-V Converged Fabric
In Windows Server 2008 R2 we had some really simple configurations and best practices for Hyper-V and network configurations. The problem...
Windows Server 2012: CSV Cache Benchmark
Some days ago I wrote a blog post about how you can enable CSV Cache on the new Windows Server 8 beta. Now a lot of people asked me about...
Windows Server 2012: Enable CSV Cache
In Windows Server 8 beta (Windows Server 2012 beta), Microsoft released a lot of new features for...
Automated Active Directory Deployment with PowerShell
For a small presentation at KTSI I created a PowerShell script will automatically will deploys Active Directory Servers, adds other member...


