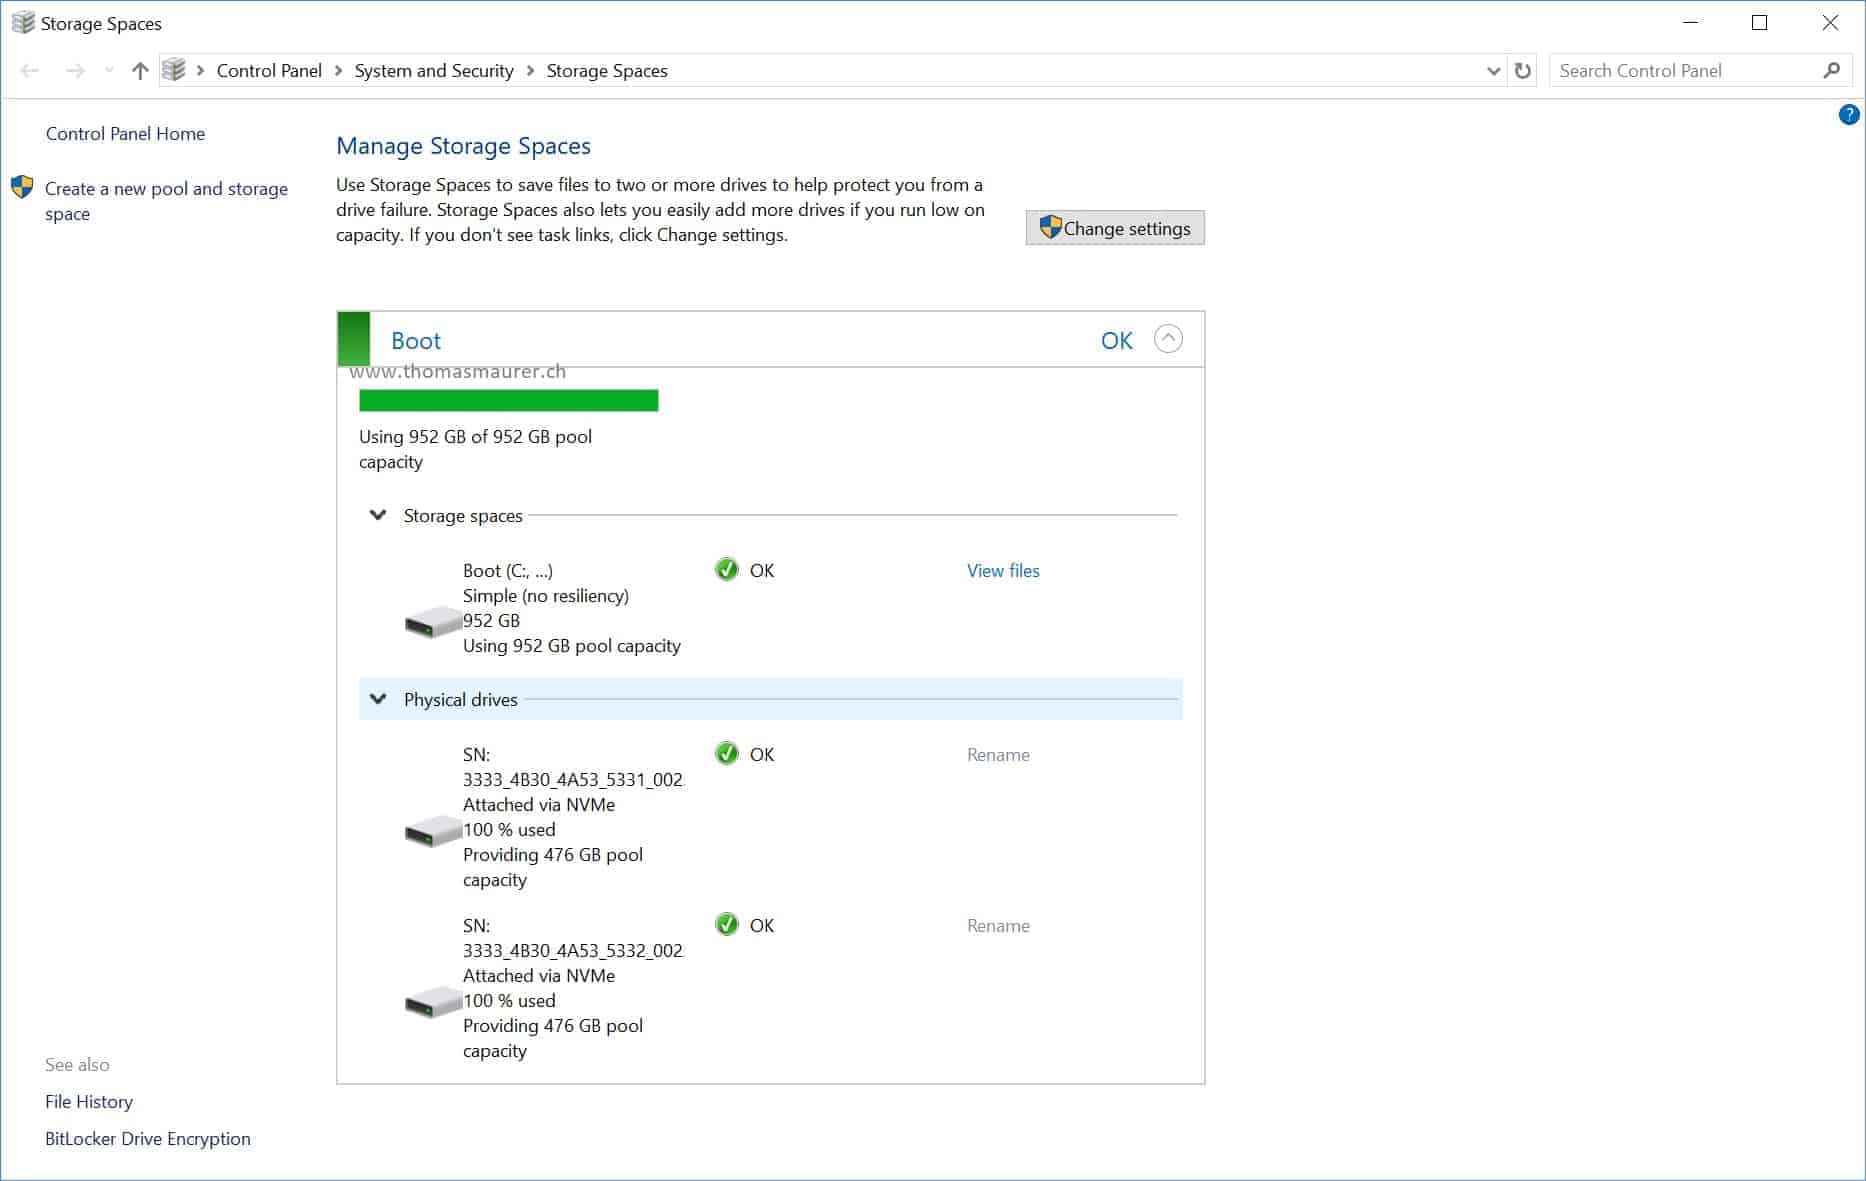
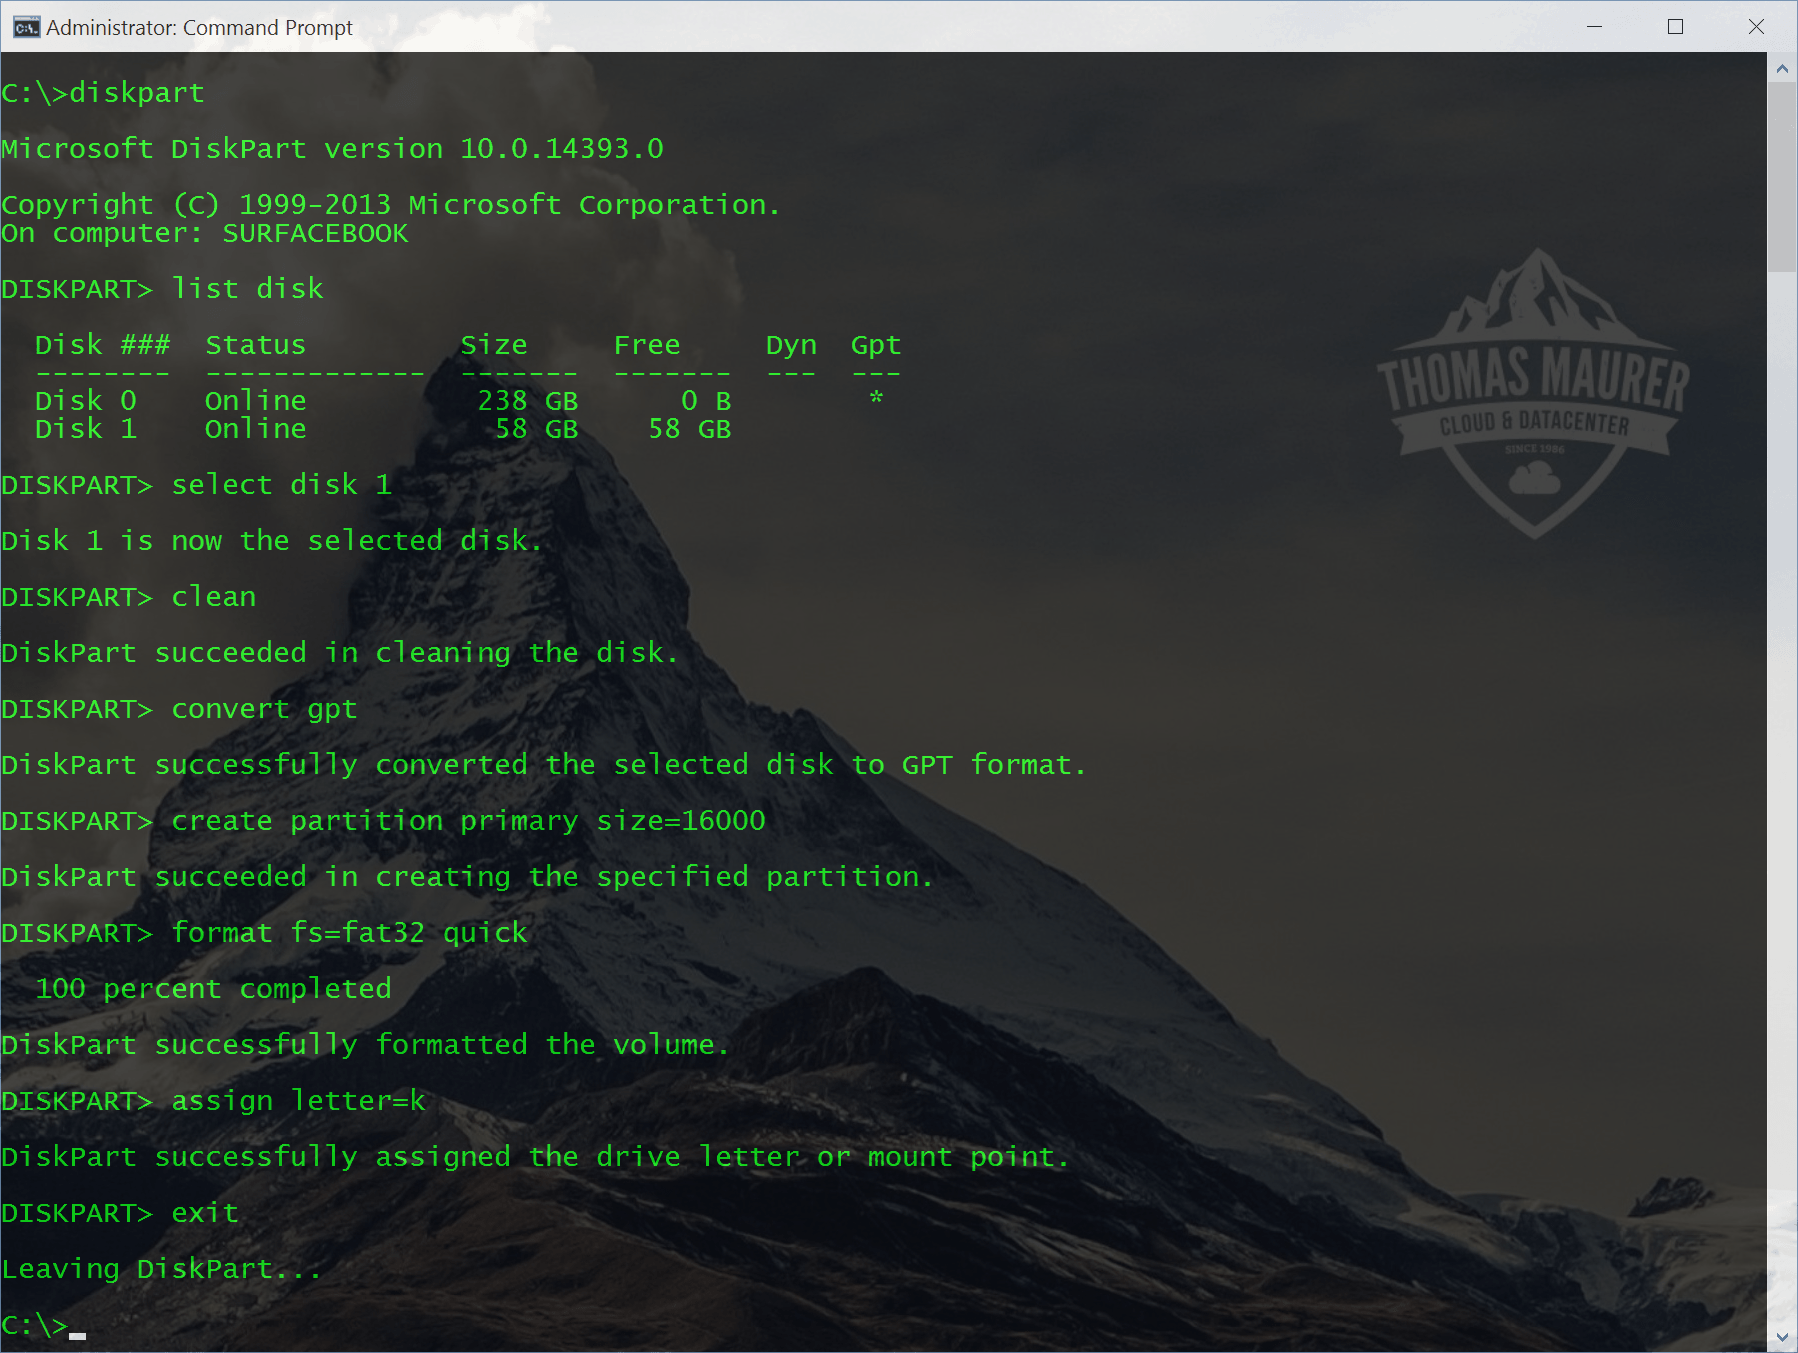
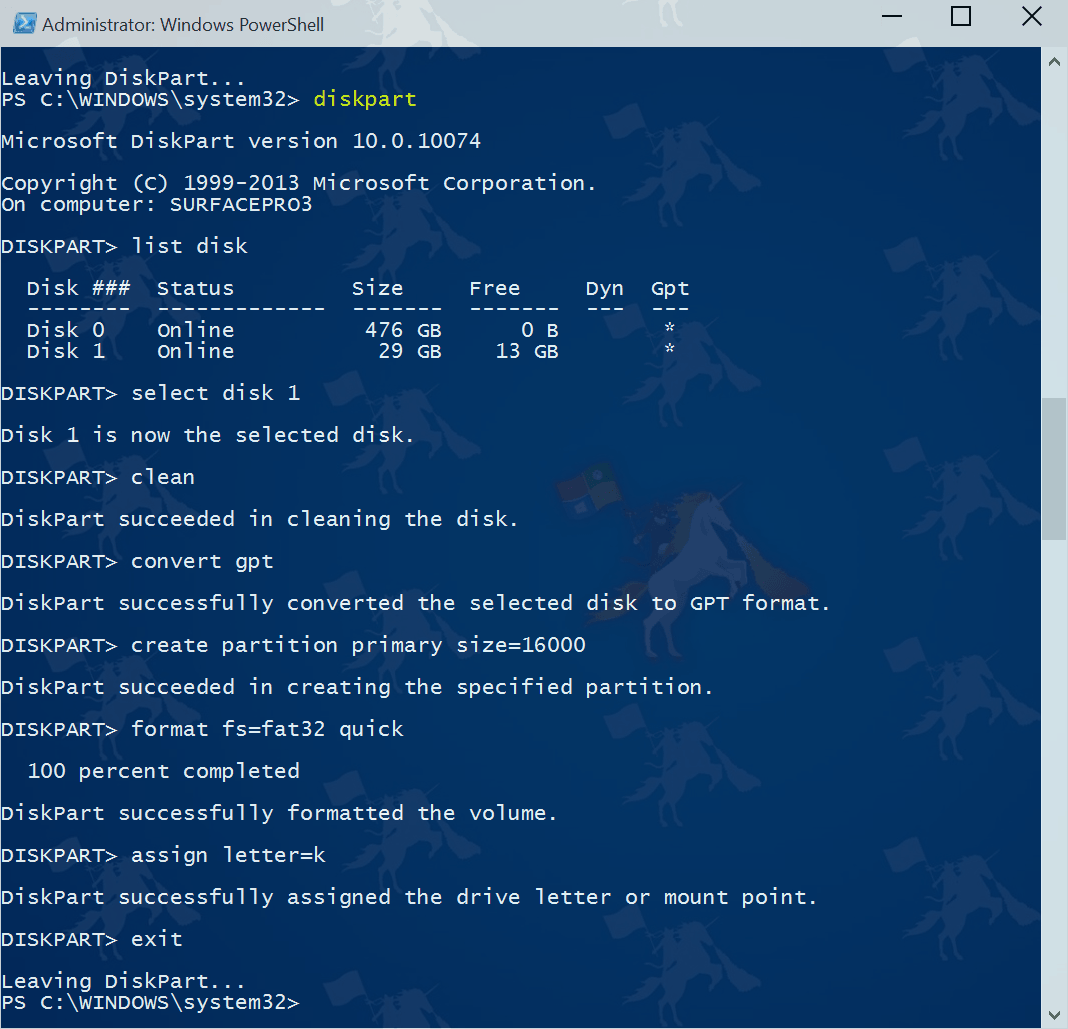
Native Boot To VHD (Boot2VHD) – Everything You Need To Know…

VHD Boot

Some time ago I made a post about how you can boot from a VHD. Now some days ago I found a very cool series of blog post from Dan Stolts (Microsoft Sr. IT Pro Evangelist) about booting from VHD. He has also created some video tutorials which are great if you are just getting started with VHD boot.


Boot from VHD

If you need to run multiple instances of Windows on your computer, you have different options. First you could use software like Microsoft Virtual PC or VMware Workstation to run a virtual instance. But if you need more performance, or you have to run for example Microsoft Hyper-V you need a native installed Operating System. Until Microsoft added the feature “boot from VHD”, you had to create different partitions for each installation. Since Microsoft allowed you to use VHD to boot you won a lot of flexibility.

This guide should show you how you can install a new operation system in a VHD, which you can boot from.

  1. First boot from a Windows Setup DVD or USB Stick
  2. On the screen where you could click “Install now” you have also a “Repair your computer” option in the bottom left corner. Click on this option or use the short cut “Shift + F10” to boot in to the command line mode.
  3. Enter diskpart
    Capture1
  4. Create a new VHD file
    create vdisk file=”filepathandfilename” type=”expandable” maximum=maxsiize
    Capture2
  5. Now you have to attach this VHD
    select vidsk file=”filepathandfilename”
    attach vdisk
    Capture3
  6. Now you can switch back to the “Install now” screenby pressing “ALT+TAB” and now do the setup on the new create vdisk.
  7. If you start Windows the next time you will see the new and the old Windows in the boot menu.

If you want to add a already existing VHD to the boot menu you can use bdcedit to edit the boot menu.

bcdedit /copy {originalguid} /d "New Windows 7 Installation"
bcdedit /set {newguid} device vhd=[D:]\Image.vhd
bcdedit /set {newguid} osdevice vhd=[D:]\Image.vhd
bcdedit /set {newguid} detecthal on

You can get more information here.

How to create a Windows 7 & Windows Server 2008 R2 Install USB Stick

Its very simple to create a Windows 7 or Windows Server 2008 R2 bootable USB Stick. Microsoft provides a tool called Windows 7 USB/DVD Tool. This tool also works for Windows Server 2008 R2.

  1. Download Windows 7 USB/DVD Tool and install it
  2. Start the programm and choose the .iso Image (Windows 7 or Windows Server 2008 R2)
    Windows 7 USB/DVD Tool
  3. Choose which media you want to create (USB)
    Windows 7 USB/DVD Tool
  4. Choose USB device
    Windows 7 USB/DVD Tool
  5. Begin Copying and after some minutes your USB Stick is ready to use

How to create an HP Firmware Maintenance CD and SmartStart USB Stick

HP has some Maintenance CD’s for the ProLiant Server Serie, but a lot of Servers used in a datacenter don’t have a CD-ROM, so how can you use the HP Support CD’s USB Stick? Its pretty easy if you know how to do it.

What do I need for this:

  • Windows XP Client
  • HP Firmware Maintenance ISO Image or HP SmartStart ISO Image
  • HP USB Key Utility (link)
  • USB Sticks (1GB or more)
  • CD-ROM Drive or Virtual CD-ROM

There are a lot of benefits by using USB-Sticks:

  • faster boot
  • no more space for CD ROMs needed
  • you can update it

And the best thing, you can easy upgrade Firmware Files on the USB Stick by adding them to:

USBSTICK:\compaq\swpackages\