Windows Server 2016 comes standard with built-in Anti-Malware called Windows Defender like Windows 10 Client. And per default, Windows Defender is active and has also turned on Real-Time Protection by default. In Windows Server 2016 Desktop Experience you can disable and configure Windows Defender using the UI or PowerShell, in the Windows Server 2016 Core version or on Nano Server you only have PowerShell available. Here are some quick command how you can configure or disable Windows Defender on Windows Server using PowerShell.
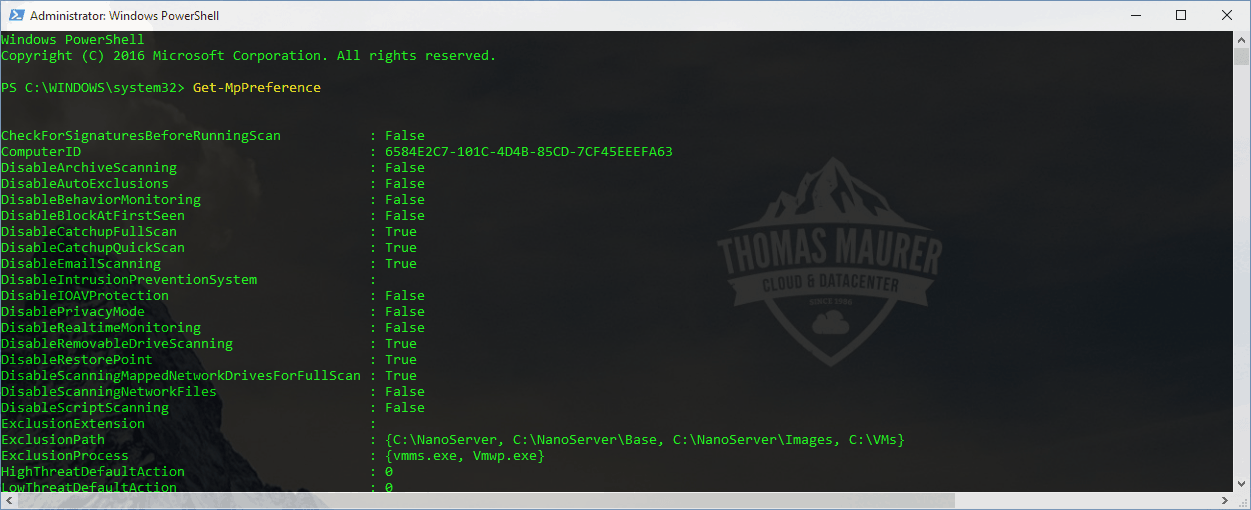
Check the Defender configuration and settings:
Get-MpPreferenceTurn off Windows Defender Real-Time Protection using PowerShell
Set-MpPreference -DisableRealtimeMonitoring $true
Turn on Windows Defender Real-Time Protection using PowerShell
Set-MpPreference -DisableRealtimeMonitoring $false
Add a File path exclusion:
Set-MpPreference -ExclusionPath "C:\temp", "C:\VMs", "C:\NanoServer"
Add process exclusion
Set-MpPreference -ExclusionProcess "vmms.exe", "Vmwp.exe"
I hope this helps you to easily configure Windows Defender on Windows Server 2016. Btw. This also works on Defender on Windows 10.
Tags: Antimalware, Antivirus, Defender, Microsoft, Nano Server, PowerShell, Security, Windows, Windows 10, Windows Defender, Windows Defender Windows Server, Windows Server, Windows Server 2016, Windows Server Core Last modified: January 12, 2019


“Set-MpPreference -DisableRealtimeMonitoring $true” does run but the Windows defender service still runs. Is there a way to stop the service?
Remove-WindowsFeature Windows-Defender, Windows-Defender-GUI
To remove windows defender open command prompt with administrator and copy following
Dism /online /Disable-Feature /FeatureName:Windows-Defender /Remove /NoRestart /quiet
restart server .
thanks
Satish – that works great!
IS it possible to reinstall it using DISM?
I might want to add it back later!
IF needed, to reinstall it, mount the CD and add the feature back from Server Manager.
If the source location is different, just edit the source location when asked.
Example: wim:f:\sources\install.wim:4
This probably could be used with DISM also, but didn’t try it.
Thanks Satish, your tip worked like a charm!
thanks, it works. the stupid defender could not be disabled using the GUI. the on/off switches that I turned off were always back enabled when closing and opening defender settings.
Now I know Server 2016 Essentials is a dumbed down version of server, but I have a client that has 4 users and they need no more than Sever Essentials but why, in their wisdom, have Microsoft put Defender of all things into it? Anyway, thank you Satish, worked like a charm and no more errors in the Dashboard awaiting re-starts. :)
If you remove the Windows Defender feature, you cannot view the WindowsUpdate.log file (using Get-WindowsUpdateLog cmdlet), there is some dependence on the Defender feature being installed to be able to the Windows Update log on Server 2016.
Thanks…. .
Powershell (Uninstall-WindowsFeature -Name Windows-Defender-Features)
If you are running another AV….
In Powershell running as admin type the below…
Uninstall-WindowsFeature -Name Windows-Defender