In Windows Server 2012 added a lot of improvements to Hyper-V and Active Directory. One of Microsoft strategic goals is to virtualize every workload. With the improved scale of Hyper-V Virtual Machine it is now possible to run even high SQL workload on Hyper-V Virtual Machines. In Windows Server 2008 R2 virtualization of Active Directory had still some challenges which Microsoft addressed in Windows Server 2012. (Windows Server 2008 R2: Running Domain Controllers in Hyper-V)
- Physical DC is required for Windows Server 2008 R2 Clusters
- No Snapshots of virtual Domain Controllers
- No cloning of virtual Domain Controllers
- No online V2V migration via Snapshots
- No restoring of virtual Domain Controller VMs
Most of this was caused by the problem of USN (update sequence numbers).
In Windows Server 2012 Microsoft included a new feature for Active Directory Domain Controllers called VM-GenerationID. At the moment you can use this feature with Windows Server 2012 Hyper-V as a hypervisor, but Microsoft also offers other hypervisor vendors to integrate this feature.
TechNet: Safe virtualization of domain controllers
“With Windows Server 2012, AD DS employs safeguards on virtual domain controllers hosted on VM-GenerationID aware hypervisors and ensures that the accidental application of snapshots or other such hypervisor-enabled mechanisms that could ‘rollback’ a virtual machine’s state will not disrupt your AD DS environment (by preventing replication problems such as a USN bubble or lingering objects). However, restoring a domain controller by applying a virtual machine snapshot is not recommended as an alternative mechanism to backing up a domain controller. It is recommended that you continue to use Windows Server Backup or other VSS-writer based backup solutions.”
Another problem was solved by Active Directory-less Cluster Bootstrapping. This basically removes the Active Directory dependencies during a cluster boot. This means you can boot up your cluster even if there is now other Active Directory server available during the boot process.
With the integration of the VM-GenerationID, Microsoft also created a new possibility which allows you to clone virtual Active Directory Domain Controllers.
How to clone a virtual Domain Controller
Preparation
- A Windows Server 2012 Hyper-V server is needed. In the future maybe other hypervisors will also support VM-GenerationID.
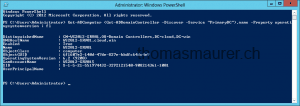
- A deployed Windows Server 2012 domain controller (virtualized or physical) that hosts the PDC emulator role. To check which server hosts the PDC role you could use the following PowerShell command.
Get-ADComputer (Get-ADDomainController –Discover –Service “PrimaryDC”).name –Property operatingsystemversion | fl
- A source virtual Domain Controller with Windows Server 2012 hosted on a Windows Server 2012 Hyper-V server. This will be the VM which will be cloned from. This cannot be the Domain Controller with the PDC role. In my example case this is VirtualDC1.
Step 1
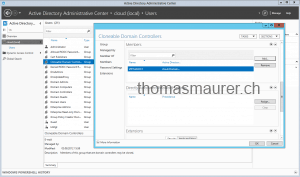
Grant the source virtualized domain controller the permission to be cloned. Add the source domain controller to the Cloneable Domain Controllers group. You can do this over Active Directory Users and Computers, the Active Directory Administrative Center or Windows PowerShell. In my case I added the computer object VirtualDC1 to the Cloneable Domain Controllers group.
With Windows PowerShell this would be done like this.
Add-ADGroupMember –Identity “CN=Cloneable Domain Controllers,CN=Users,DC=cloud,DC=win” –Member “CN=VirtualDC1,OU=Domain Controllers,DC=cloud,DC=win”
Step 2
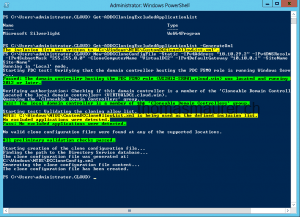
In the TechNet manual step to would now be to run Get-ADDCCloningExcludedApplicationList, this will check for applications which are not evaluated for cloning. If your source domain controller is a new clean setup with any special applications you can skip this step. If you have installed any application which is listed when you run Get-ADDCCloningExcludedApplicationList you have to create a Custom DC Clone Allow List. You can do this with the following PowerShell command.
Get-ADDCCloningExcludedApplicationList -GenerateXml
Step 3
Run New-ADDCCloneConfigFile on the source domain controller (VirtualDC1), which allows you the configuration of your new domain controller clone (in my case VirtualDC2), such as Name and IP Address.
New-ADDCCloneConfigFile –Static -IPv4Address “10.10.29.2” -IPv4DNSResolver “10.10.20.1” -IPv4SubnetMask “255.255.0.0” -CloneComputerName “VirtualDC2” -IPv4DefaultGateway “10.10.0.1” -SiteName “Default-First-Site-Name”
Note: The new domain controller has to be on the same site.
There are a lot of options you can configure your virtual server. For more information check out the TechNet page.
Step 4
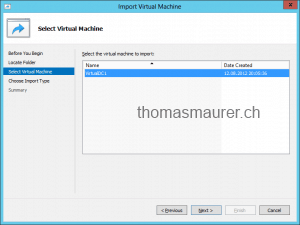
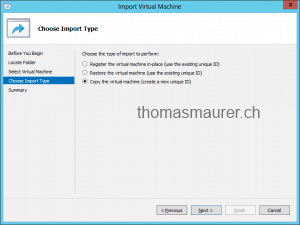
In step for you have to export the source virtual machine (VirtualDC1) and import it as a new virtual machine (VirtualDC2). You can do this via Hyper-V Manager GUI or via the cool way with Windows PowerShell. Check out my blog post about doing import and export of virtual machines via Windows PowerShell.
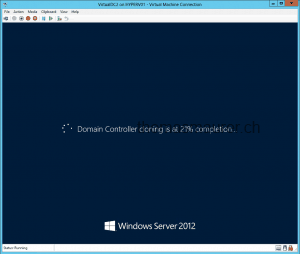
After the import of your virtual machine is done you should rename it. In my example this will be VirtualDC2. After the import is finished you can boot up the virtual machines and you will have a new domain controller in your infrastructure.
By the way Peter Noorderijk wrote a blog post called The future of a virtual domain controller on the Hyper-V.nu blog.
Tags: Active Directory, Clone, clone a Virtual Domain Controller, Cloning, DC, Domain, Domain Controller, Hyper-V, Microsoft, Virtual Machine, Windows Server, Windows Server 2012 Last modified: January 7, 2019



hi
i need help ,i have windows2008 server ,i export Hyper-v Machine inculd snopshot, i exported another server 2008 Hyper-v working but snopshot is not working …..what i do ???